

Greetings!
After more than 2 years since my last game of Mortem et Gloriam, I have finally managed to play one! Let's hope it heralds the come back to regular battles.
Rob was my first opponent in 2023. For this battle I asked him to bring his veteran Mid-Republican Romans. Rob has just recently won a tournament with it, so I knew I am in trouble! But I also knew that he is going to help me to get back to speed after a break. And it is great to have a historical opponent too.
We played Maximus at 10,000 points per side. This is the snapshot of the army Rob brought:

Six TuGs of veteran (superior) Hastati & Principes, each boosted by a base of Triarii, formed a formidable infantry battle line. Very maneuverable and well equipped to go against any TuG I fielded.
They were supported by two Tugs of Legion Cavalry, great at filling the gaps in the battle line and threatening flank attack wherever there was an opening.
It all was boosted by the Numidian allies, with their flexible TuGs of Nobles and three SuGs of very dangerous, Skilled Light Horse.
Rob had an obvious advantage in the shooting department and could easily decimate any TuG in my force , if only allowed to focus the fire of his units.
Phalanx vs Legion matches are always interesting and, in my opinion, quite luck dependent, if you are talking about one-on-one fights. The veteran (superior) Legions have the advantage in the charge phase, things go equal in the melee phase. However, with more bases per TuG, the Phalanx may still prevail in the protracted combat. But then, I had four TuGs of the Phalanx vs six TuGs of the Legion. Even if I could match one TuG of the Phalanx against one of the Legion, I would still need to occupy two remaining TuGs.
For that, technically, I could use Agema, Companions and Cataphracts. However, since they are four bases each only, then it may turn out against me in the longer run. And even if I did, then I had no option but to let Numidian Light Horse run around my army and pick their targets at will.
This all meant that I had to look for the usual opportunity when facing the foe that outnumbers my army, in engaging part of the enemy host first. Try to overwhelm it and delay the reinforcements while doing so. Since I haven't played for so long and felt very rusty, I thought I need a really simple plan, so I would not confuse myself during the game! Hence, that was rough idea I wanted to implement, with a lot of factor to affect it along the way.
I also noticed that after some updates, I got a bit more points to spend on the army. I thus decided to get back to Talented Army Commander and see what I can learn this time. Here are the details of the army I fielded:

Pre-battle
I managed to get a Strategic Intercept. After a few rounds of back and forth we ended up fighting on the battle field with a secure, coastal flank and in a normal terrain. That suited me very well as there was a chance of having a few pieces of the terrain to restrain the Numidians a bit. And try and force the fight on a narrower frontage, so that Romans would not be able to use the full width of the battle field to their advantage.
Having only 3 scouting cards versus Rob's 5, I knew I would be outscouted. I tried to limit the margin and ended up with being outscouted by 30% only.
Deployment
 |
| Rob and his Mid-Republican Romans ready for battle! |
 |
| Early Seleucids vs Mid-Republican Romans. |
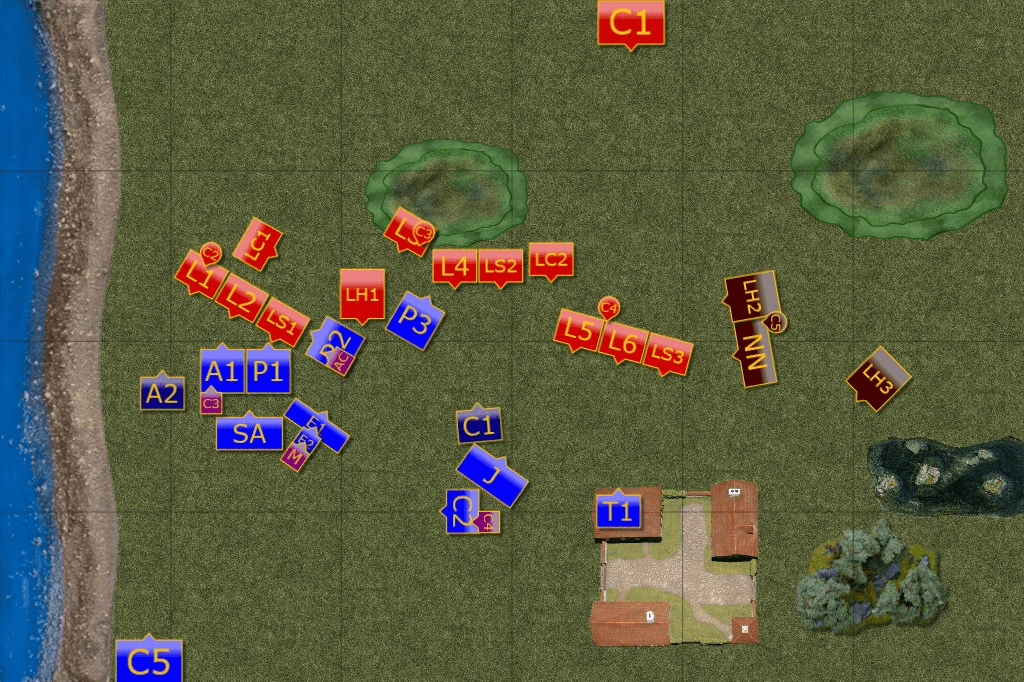
Rob deployed his army along the width of the battle field with the Roman infantry facing the Phalanx, while Numidians covered the flank. They left only one Light Horse SuG in front of the Elephants, but that already was a problem.
I tried to use the narrower frontage thanks to the terrain set up. I would not be able to count on it to have my right flank protected. I left Thracians in the town as otherwise they would have been badly exposed. They seemed like a liability as they are at big disadvantage in the open and there was no terrain they could use well while advancing.
After the deployment I didn't have any precise plan and wanted to make it simple. Hence, I wanted to advance the Phalanx as fast as possible. If cards allows, even with a shift to the left flank. In this way, perhaps, I could engage some of the Roman Legions without exposing my opposite flank too much. And delay the rest of Rob's army long enough to obtain some successes on the left. I would also be looking for some gaps in the formation where I could sneak my small cavalry TuGs through and help the Phalanx on the right.
This was not a great plan as it relied too much on luck in the war of attrition and may well back fire. In addition, if the Numidians and and remaining Roman Legions would turn the flank quick, then I would be in big trouble indeed.
However, I didn't come up with anything better so let's see if that worked!
 |
| Deployment of the Armies |
Seleucids - Turn 1
 |
| Turn 1 - Sequence of Actions |
 |
| Argyraspides lead the way on the left flank. |
The Seleucid Phalanx moved at a double towards their enemies. Roman Legions advanced as well, although those on the centre right moved at the normal pace.
Surprisingly, the Numidians were not in a hurry to outflank more compact formation of their foes either. In such circumstances, Companions and Cataphracts remained in their positions, closely observing the maneuvers of their enemies.
 |
| Phalanx and Legions are getting closer to each other. |
 |
| More conservative advance in the center and on the right flank. |
Romans - Turn 2
 |
| Turn 2 - Sequence of Actions |
 |
| Phalanx is attempting to surround the Legions on the left flank. |
Using a bit of hesitation of the Legions in the center and on the right flank, as well as a small gap that appeared in the Roman formation, the phalangites started surrounding their enemies on the left flank.
Once again, the Numidians didn't advance as quickly as expected by either of the commanders. In such circumstances, Companions and Cataphracts shifted towards the center to avoid being in the charge range of the Legions.
 |
| The clash on the left flank is inevitable. |
 |
| Romans and Numidians on the right flank are not yet in a striking distance. |
Seleucids - Turn 3
 |
| Turn 3 - Sequence of Actions |
 |
| First charges of the battle. |
Two TuGs of Phalangites, joined by Agema, charged two TuGs of Roman Legions on the left flank. Third TuG of Phalangites was counter-charged by the Roman Cavalry, to stop a very dangerous flank attack. The grinding match has started and it appeared that the Seleucids are doing a bit better than the Romans.
In the meantime, the remaining Phalanx was charged by one of the Legions, leaving only Elephants, Companions and Cataphracts in reserves. While all three tried to fill the gaps in the battle line, there was a wide opening on their left flank. Once again, though, the Numidians were not that eager to exploit it.
 |
| Meanwhile on the right flank ... |
Romans - Turn 4
 |
| Turn 4 - Sequence of Actions. |
 |
| Roman Legions try to desperately hold against Seleucid Phalanx. |
Seleucid Companions decided to charge the Roman Legion already locked in combat with the Phalanx. The charge itself did not break the Romans but inflicted significant damage. The following melee, however, was too much for the Romans, who broke and fled. Pursuing Seleucids hit the new enemy, with Companions in a difficult situation, when both, Roman Cavalry and Numidian Nobles, were threatening their flank.
The most decisive blow was dealt on the left flank, however. In a bitter melee between Roman Legions and Seleucid Phalanx, the pikemen were more successful. Not only their deeper formation put a lot of pressure on their enemies, but they were inflicting more casualties than Romans. As a result, one of the Legions broke. This, in turn, caused panic in nearby TuGs that were already at the brink of being broken. The chain reaction followed and in quick sequence, another Legion and Roman Cavalry broke and fled the battle. More Roman soldiers lost the heart to fight. Some of the nearby Light Horse, as well as the Legion defending the hill, were subject to significant desertions.
The remaining Legion on the hill suddenly was quite lonely and surrounded by Seleucid units. What is more, the Roman army was very close to being broken too. Even though Seleucids suffered some casualties as well, the majority of the combat ready units Roman had at their disposal, were not in position to tip the balance in their favor that soon.
 |
| Roman flank collapsed. |
 |
| Can Romans turn the tide? |
Seleucids - Turn 5
 |
| Turn 5 - Sequence of Actions. |
 |
| Antiochus the Great lads the Phalanx to battle. |
Feeling the breath of the Roman Cavalry at their backs, Companions use the momentum of the pursuit to charge the Legion in the flank, before being hit by the enemy. At the same time, Elephants chase away Light Horse and hit the same Legion from the front. That was a dangerous decision, as one of the beast fell in the hail of javelins thrown by the skilled Numidians.
The second SuG of the Numidian Light Horse was not that lucky and was caught and run down by the Cataphracts.
In the quick but furious fight, the Romans were damaged significantly but managed to hold the line. While Companions were scattered by the Roman Cavalry.
The Phalanx too continued their advance and approached the hill to surround the single Roman Legion. However, their assistance was not required in the end, as the Phalangites from the TuG already engaged in a fight with the Romans, managed to inflict sufficient amount of damage to break this unit as well.
With that, the Roman army broke and their commanders gave the order to sound the retreat to the remaining units.
 |
| Seleucids claim the victory! |
 |
| Lucky Thracians survived the battle too! |
Summary
 |
| Turn-by-turn animation summary. |
After-battle
Many thanks to Rob for fantastic game! It is always pleasure to play against him. His patience was limitless when he helped me to recall the necessary rules. In a way, I felt like it was my first MeG battle. Fortunately, I think I was fast enough as we managed to complete the game in more-or-less 3 hours. Which is, what I believe, around the typical amount of time allocated for a game at the local tournaments (always good reference, in my opinion).
Rob remained calm and stoic throughout the whole battle, despite the fact that the luck was definitely not on his side. Both, in terms of "cards" (you may have noticed we used tokens this time) and dice. It was probably the most visible in the case of his allied Numidian contingent that took way too long to move around the flank. And then, in the clash between the Legion and the Phalanx, my white/green dice proved to be better than his green. This resulted in the collapse of the left flank fast and didn't give time for the reinforcements to arrive.
I really liked the way Rob used his Roman Cavalry and I intend to apply this tactics to my own army. His excellent move on the left flank and timely counter-charge was superb, as it gave him a good chance to hold that flank. If only the dice obliged!
I am, of course, very happy with the result as I didn't expect to pull out a win in this battle. However, taking into account the fact I made quite a few mistakes in the course of battle and that I got lucky enough with the dice, I am convinced I need a more robust plan in the future.
In general, I think it was still a good idea to advance with the Phalanx aggressively but there were a few things that I was not happy with and that I need to improve in the future.
First, the use of skirmishers. My initial plan was to position them behind the Phalax, to allow the slower phalangites to have a shorter distance towards the enemy. However, I was supposed to move the skirmishers forward at a double to prevent any shooters to interfere. I didn't get the right "cards" to do so (I had to spend the tokens on moving the Phalanx). Fortunately, Rob didn't have many lined up there.
Second, I left the Elephants completely unprotected and they were almost shot down before reached any action. Even then, they were already at a breaking point. And it was with a single SuG of the enemy Light Horse!
When I saw a single TuG of the Roman Cavalry on my left flank, I thought I could have a chance to use Agema to break through and outflank there. However, I didn't maneuver them fast enough to create an opportunity to do so. Rob did great with his Legions to keep my Phalanx in their front, while at the same time preventing Agema to move around them. Fortunately for me, the elite Seleucid cavalry contributed to the fight against the Legions, although they got broken in the process.
I don't think I did well with Cataphracts either. They didn't quite slow down the enemy flanking units, and I had to avoid the fights so that they were not surrounded.
Thracians, once again, felt like a liability. I keep them in the army to use some difficult terrain and be able to protect the flanks of the Phalanx at the same time. However, it is usually very hard to have such terrain in the right place of the battle field. I thus think that I will need to make some changes to the army list and replace Thacians, most likely with Line Cavalry.
Speaking of some changes to the army list. After discussion with Rob and considering that I intend to use Skirmishers as a screen more than for shooting, I will be replacing 2 x 9 with 3 x 6 to better fulfill that role. With one SuG attached to Elephants.
Rob also advises boosting one of the cavalry TuGs to 6 bases strong. This change, however, would require more significant changes to find points. I will definitely have a look at the options but I haven't had any particular ideas on how to do it yet.
I am sure I will be revisiting this particular battle many times in search for a better plan that does not reply on luck that much. I am sure the changes I have already discussed would help in that too.
I hope you enjoyed this battle report and I encourage you to share your comments on any aspect of the game. Be it respective army lists, deployment and battle plans and really, anything that you would like to provide feedback on.
Thank you in advance and hopefully, see you next time soon!
How do you do the maps and animation of the turns? They are fantastic.
ReplyDeleteHi there!
DeleteThank you! I am glad you like them!
I use free software called BattleChronicler (link: http://www.keyfocus.net/battlechroniclercom/) to make the maps. I need to make each individual map for each move though, and then combine them in gif file to create animation. A bit time consuming but I found it shows the ebb and flow of the turn well.
I hope that helps!
Looks wonderful, though I get a bit confused as to which unit is which
DeleteGreat report!
ReplyDeleteThat table is A sight to behold.
As someone who is not familiar with MeG, but is familiar with ancients wargaming:
Your plan worked nicely. While the dice could have been less kind, it's also not like your sucess was unearned.
If the legionaries on the left rolled better, they were still a turn away from being flanked.
The Numidians could have helped more, but that's a risk one takes when including an allied commander.
What is strange to me is that I don't see a difference between the argyraspides and the phalangites?
I would expect the argyraspides to be superior.
Hi Erasmus!
DeleteThank you for your comment, it is always great to hear from you!
I think what I wanted to emphasize is that when both sides have the same chances of inflicting damage upon the enemy, the outcome is, obviously, much harder to predict. This time the Phalanx prevailed but I cannot really count on that every time they clash with the Romans.
Hence, while I am very happy with the fact I managed to win against such a good player as Rob, I need to come up with a more robust plan next time.
Indeed, it was good I had some units working to outflank Legions already in melee with the Phalanx. I think that will need to happen in general against such stubborn enemy.
Regarding the Argyraspides, they can be downgraded to "Average". I did it some time ago when that change was introduced and I needed points elsewhere. Otherwise, superior Phalanx would be of a great use against Romans for sure!
Cheers!
Quite a dramatic turn, that one. Nice to see more reports!
ReplyDeleteThanks a lot! I am glad you liked the narrative. It is always great to know when it can capture the turn of events during the battle. I hope to get back to reports on a more regular basis too!
DeleteIt sounds like you had an exciting battle with challenging opponents.
ReplyDelete