Stormwind Cavalry Regiment (S), Cavalry, Chalice of Wrath - 230
Palace Guard Regiment (PG1), Infantry - 160
Palace Guard Regiment (PG2), Infantry - 160
Forest Shamblers* Regiment (FS1), Large Infantry - 120
Forest Shamblers* Regiment (FS2), Large Infantry - 120
Drakon Riders* Regiment (DR1), Large Cavalry, Staying Stone - 170
Drakon Riders* Regiment (DR2), Large Cavalry - 165
Silverbreeze Cavalry* (SB1), Cavalry - 130
Silverbreeze Cavalry* (SB2), Cavalry - 130
Lord on Drakon (DL1), Hero (Large Cavalry), Mead of Madness - 180
Lord on Drakon (DL2), Hero (Large Cavalry) - 170
Elven Archmage (A), Hero (Infantry), Inspiring Talisman, Lightning Bolt (5) - 115
My army has 12 elements, 11 of which are scoring, with 21 total unit strength. It looked like a I had a slight advantage in the number of scoring units (11 vs 8), more mobile but shorter range shooting and in general, faster units.
Regardless of the scenario, I would try to avoid being shot at by the artillery, so I needed a way to neutralize it soon. I also wanted to eliminate the light cavalry as these units could interfere with my movement phase and intercept Stormwind. So these were on my priority list for shooting.
I thought one-on-one fights against Spearmen should generally go my way so if possible, I wanted to block these units in such combats. The biggest threat were Ogres as they are as fast as my infantry and can hold off cavalry charge too. If coordinating with Paladin and the Knights, these could have been devastating. So I needed to spread their efforts and let them operate alone.
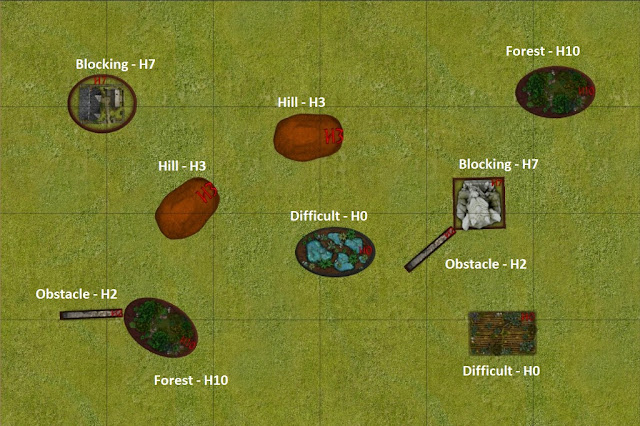
Terrain
 |
| Terrain Details |
Deployment and Scenario
 |
| Elves vs Brothermark |
In this round we played Control as a scenario. I expected the majority of the Brothermark to be deployed in the centre and that's where Ogres were deployed. I could not afford to go against these head on, so I tried to spread my army to be able to put more pressure on the flanks first. But at the same time keep Ogres occupied. Especially with heavy cavalry threatening to charge them first.
At the same time I needed to use the terrain to hide the units from the artillery, especially for the first turn or two. Initial plan, especially after the deployment, was to win on the left and threaten units advancing in the centre with multiple charges. If I could combine the attack of Drakons and Stormwind against Ogres in particular, that would have been ideal.
I wanted to use units on the right to slow down the knights, eliminate the fast cavalry with shooting and get the artillery. If in addition to that I would be able to grind down Spearmen, and do not sustain too many casualties, I should have a number of fast units left to control different areas of the battle field. Even if the Ogres would control the top centre zone, perhaps I would be able to control 3-4 other zones to swing the balance into my favour.
Michael won the roll off and chose the first turn.
Brothermark - Turn 1
 |
| Shy advance by the Brothermark. |
The army of the Brothermark, somewhat surprisingly, did not move at full speed towards their enemies. Instead, the cavalry on both flanks remained stationary and in some cases, even moved back, while the Ogres and Spearmen marched slowly forward.
The artillery opened fire and that unnerved the Silverbreeze cavalry on the right flank.
Outcasts - Turn 1
 |
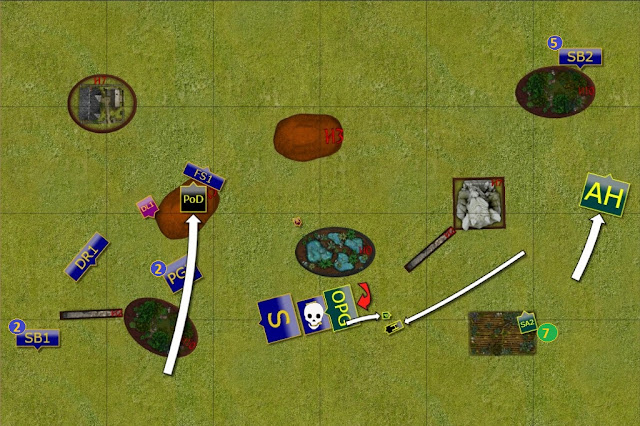
| Elven manoeuvres. |
Elves moved in a more dynamic fashion, with the bulk of the army still using cover to shield their advance from the potentially deadly artillery. Meanwhile, Drakons on the right flank took some risks and landed in the open to have a clear line of sight to attack.
Brothermark - Turn 2
 |
| Brothermark army is looking for an opening. |
The Brothermark army was not advancing still, it seemed more like they were looking for an opening in the enemy lines. At the same time being reluctant to commit against more numerous foes.
The artillery once again scores some hits but this time Elven units remained steady.
Outcasts - Turn 2
 |
| Drakon Riders attack. |
While the units on the left and right formed a new battle line, the Drakons on the right attacked the artillery. The crew was quickly defeated and Drakons reformed to face a new threat.
Brothermark - Turn 3
 |
| Brothermark counter attacks. |
The Brothermark army waited for Elves to commit some units and counter attacked. Spearmen and the Hunter intercepted the Drakons and kept them busy.
On the opposite flank, Villain Skirmishers attacked the Silverbreeze cavalry and wavered the surprised Elves.
Outcasts - Turn 3
 |
| Exchange of attacks. |
Elves slowed down the advance across the centre and kept fighting on the flanks. On the left, Silverbreeze withdrew to make some room for the Drakons to charge and defeat the Skirmishers. On the right, second unit of Silverbreeze shot at the Villains but this units held its ground.
Last but not least, the Drakon Lord attacked second artillery crew but failed to break it and was in a really bad spot now.
Brothermark - Turn 4
 |
| Elves lose Drakons on the right flank. |
The gamble to take down enemy artillery did not pay off. Although the fire stopped for a bit and one of the war engines was destroyed, Elves lost both, Drakon Riders and the Drakon Lord. It looked like the fight on the right flank was won by the Brothermark.
Outcasts - Turn 4
 |
| The attack in the centre. |
After some time spent on manoeuvring, Elves accepted the challenge and attacked the Ogres in the centre. Forest Shamblers blocked on of the units, while Stormwind and Palace Guard charged together against the second. Unfortunately, they only wavered it.
In the meantime, one of the Spearmen units was defeated by Elven Palace Guard and Forest Shamblers, while the second unit was the target of some Lightning Bolts. Finally, the second unit of mounted Skirmishers was also routed by shooting from Silverbreeze.
Brothermark - Turn 5
 |
| Brothermark regroups. |
The Brothermark army lost three units and an artillery but the main and most dangerous units remained in a fight. The Ogres routed the Shamblers in the centre and reformed, waiting for the Paladin to join the fight.
Outcasts - Turn 5
 |
| Elves advance into enemy territory. |
Stormwind and Palace Guard finish off the damaged Ogres and reform to face the Paladin (Stormwind) and remaining horde of Ogres (Palace Guard).
The units on the left flank started advancing deeper into enemy territory.
Brothermark - Turn 6
 |
| Brothermark does not give up. |
The Ogres charge the Elven Palace Guard and defeat the enemy swiftly. At the same time, Paladin and the Knights attempt to control some of the battle field, despite numerical superiority of the Elven forces.
Outcasts - Turn 6
 |
| Elves move to control even more territory. |
With no target to attack, Elves focus on manoeuvres and controlling as much territory as possible. But in doing so, they made some serious mistakes!
Brothermark - Turn 7
 |
| Unnecessary Casualties. |
The first mistake was made by the Palace Guard who exposed their flank to the enemy attack. The Ogres would not miss such an opportunity and yet another regiment was lost. Second, Silverbreeze cavalry left the cover of the nearby forest and was hit by the artillery fire. This time the damage was too big and the fast cavalry was routed.
Outcasts - Turn 7
 |
| Elves managed to secure the victory. |
Fortunately for Elves, they kept enough units to control more territory than their enemy. In the final act of the battle, the Elven Archmage cast another Lightning Bolt at the enemy artillery and this time the war engine was destroyed.
Summary
 |
| Turn-by-turn animation summary |
After-battle
Many thanks to Michael for a great game! Not only he stepped up to make sure no participant missed the game in this round but also played with unfamiliar army. I really appreciate that!
If that was not enough, Michael was a great sport during this game. He showed that in particular in turn 3-4 where, for some reason, I kept considering the centre piece of the terrain as a forest. And I assumed my units are not visible to the Ogre Palace Guard. I recklessly moved Forest Shamblers into charge range of both enemy units. When Michael realized that, he simply told me to correct my mistake, even though that would have positioned his units in a much more advantageous place. Thanks a lot for that Michael!
I was a bit concerned by the amount of mistakes I made in this game. Not positioning Palace Guard (PG2) out of charge range by the end of the game almost cost me the ability to control the zone. Losing Silverbreeze to the artillery shot was also unnecessary. While it is not always possible to avoid mistakes, it is still annoying to make them. This time it did not result in defeat but it could easily have been the case.
Is there anything in particular you found useful to at least limit the chance to make mistakes in your games? I hoped that after some games I should have been a bit better at avoiding them, yet they still occur. I know there may be a lot of factors contributing but at the same time I am sure there is something that can be done.
The reason I am asking is because I obviously enjoy games more if I don't do something stupid. At the same time, I would like to give the best game to my opponent and perhaps in making mistakes (especially silly ones) it may make the battle less entertaining?
Thank you for your comments in advance!

No comments:
Post a Comment