
Greetings!
First of all apologies for the long absence. Time flies and it seems one should be more disciplined about almost-daily habits such as blog updates! :)
Below I present the report from the first game of ANUWTF tournament in 2013.
I was very glad to find out that the local club at the university organizes the tournament. It was not in a very convenient location but it also was at 2500 points which meant I could field 2 regiments of my light cavalry! I could not miss such opportunity! :)
Here is my list:
Outcasts - Army List
Archmage, Staff of Solidity, Lore of Metal
Battle Standard Bearer, Heavy Armor, Shield, Great Weapon, Reaver Bow, Dragon Helm
2 x 10 Archers, Musician
2 x 15 Lothern Sea Guard, Full Command
10 White Lions, Musician, Banner of Eternal Flame
10 White Lions, Musician, Gleaming Pennant
10 Swordmasters, Bladelord, Amulet of Light
10 Swordmasters, Musician, Bladelord, Talisman of Loec
2 x 5 Dragon Princes
2 x 5 Ellyrian Reavers, Spears
2 x Great Eagle
1 x Repeater Bolt Thrower
There were 22 players listed and there was quite strong group of gamers coming from other cities too! Thanks guys, really appreciated!
This tournament was planned for 2 days and 6 games in total. We played scenarios from the rulebook (some modified). There was no comp in that event but points for sports and painting were added to the overall standings. If you are interested in details, here is the link to the players pack. Just be warned that it also contains information on the results so it is up to you if you want to know it now or would you prefer to wait until the summary.
ANUWTF - player's pack
Battle 1 - High Elves - Battleline
High Elves seem to be a very popular army here in Oz. One of the most numerous representation at CanCon, 5 armies at QNK Joust and 4 at ANUWTF. It was a great chance then I will meet one again and that is what happened in round 1. I had a pleasure to play against Mark and his Guards HE. His army list (as always without all the item :oops: ).
High Elves - Army List
Prince, Vambrances of Defence, Foe Bane, Armor of Caledor (?)
Archmage, Level 4, Talisman of Saphery, Robes (I think) - Lore of Shadow
BSB
Mage, Level 2, Dispel Scroll, Seerstuff - High Magic
30 Lothern Sea Guard, Full Command, Banner of Eternal Flame
16 Archers
30 Phoenix Guard, Full Command, Razor Banner
5 Shadow Warriors
2 x Eagle Claw
2 x Great Eagle
Quite compact army list with serious investment in characters. Not many support units which is always good for my army. A significant amount of shooting could be a problem but fortunately for me Sea Guard had flaming attacks so I guess we both knew where Dragon Princes would be going. A lot depended on the formation Mark wanted to adopt for this game and if he wanted to play defensively or not. Since there was a lot of terrain that also was an important factor.
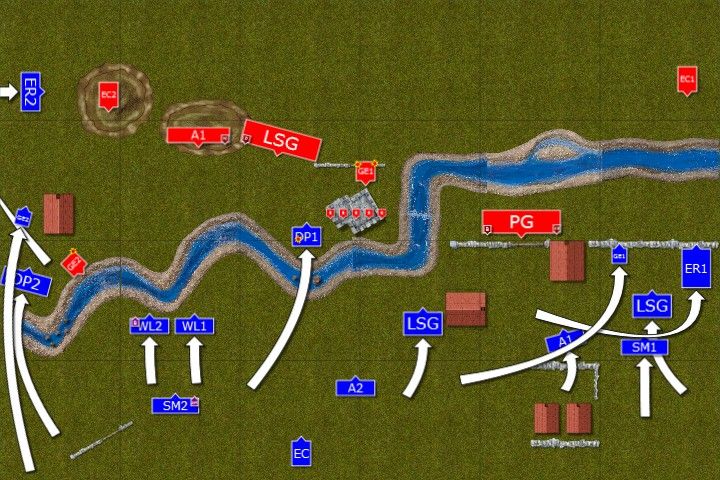
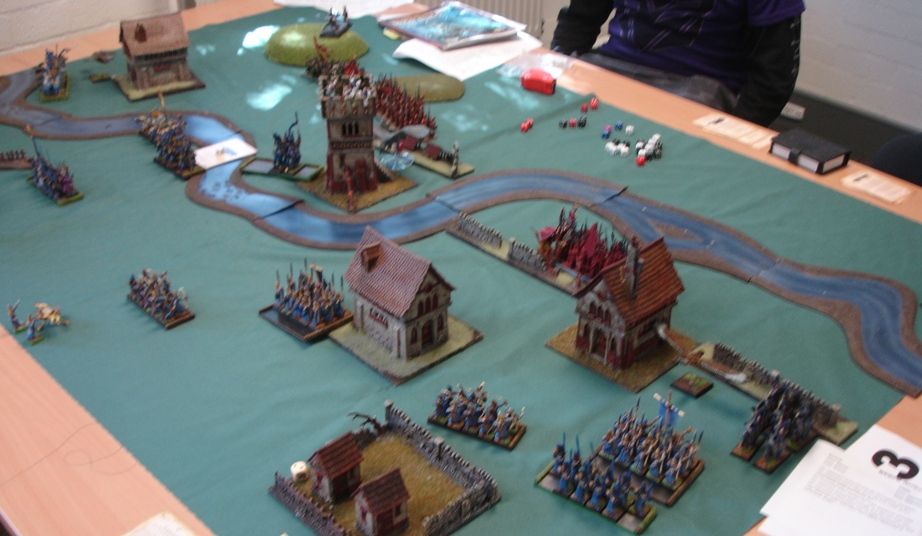
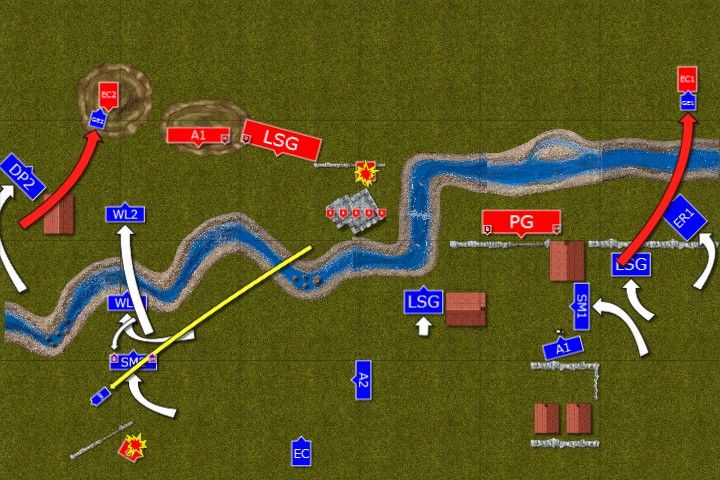
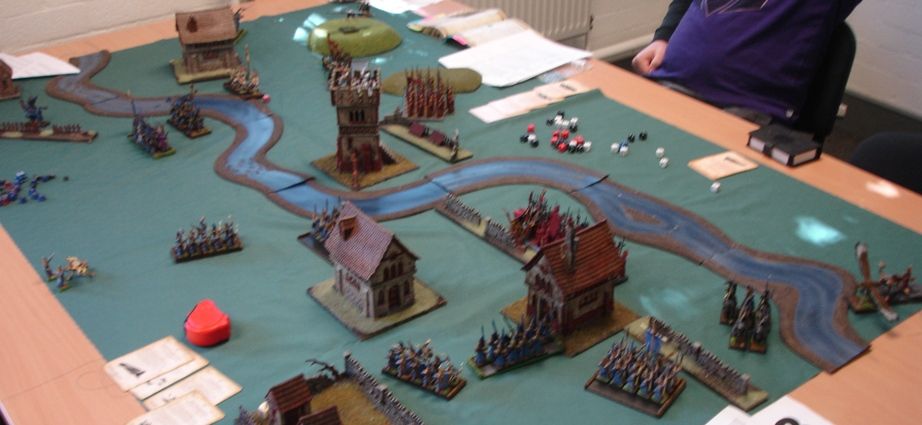
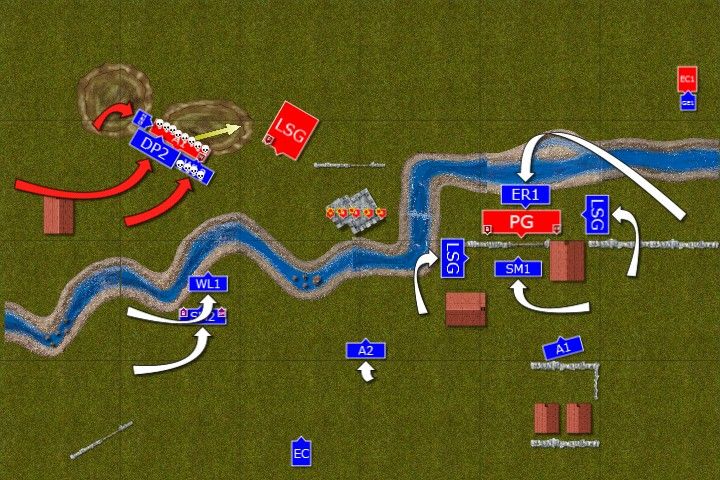
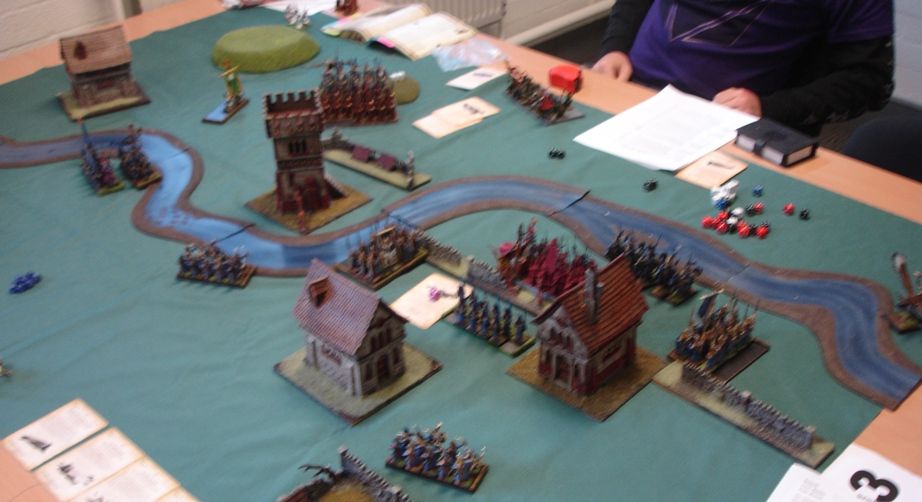
Deployment
 |
| Civil War or Pillow Fight? |
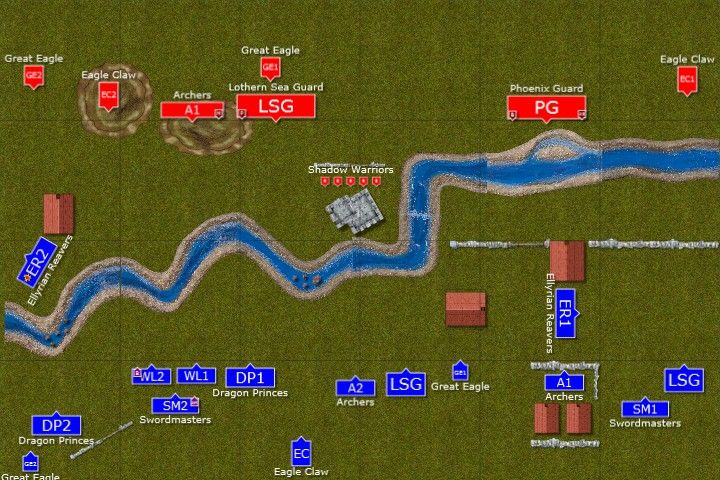 |
| Deployment of armies after vanguard moves |
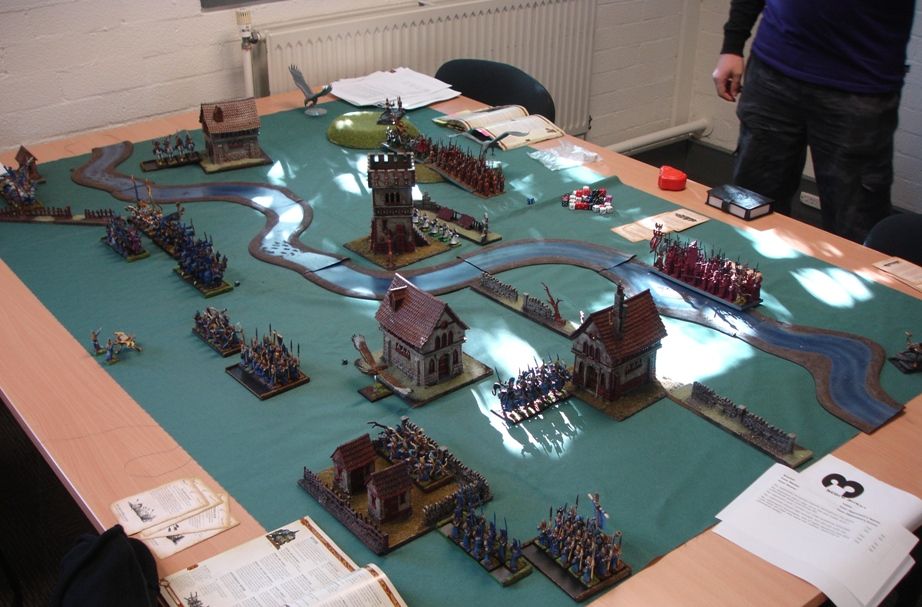
As you can see the terrain was rich and interesting. The river happened to be the river of light and poor reavers making vanguard move got banished. Fortunately not seriously and lost only one of their numbers. If I remember correctly all houses were just obstacles while the tower could be occupied as normal. We had hard walls everywhere, providing much needed hard cover.
I wanted to use Dragon Princes to engage sea guard, even in a frontal attack. Lions were to provide shelter for swordmasters and could also dish some damage away. The problem was that the river would slow them down if they didn't use the passages. But it was not that bad.
Seeing isolated Pheonix Guard I wanted to use my small units to surround them. My previous experience showed that if attacked from both flanks simultaneously, PG is quite vulnerable.
However, I wanted to focus on repeaters and eagles in the first place. I had enough regiments to be able to contain war machines at least for a while. Then my own shooting was a good answer for eagles.
Mark's Prince was with Sea Guard, Level 2 with Archers, while BSB and Archmage joined Phoenix Guard.
Archie the Archmage was with Swordmasters and Bob the BSB led White Lions.
Mark won the roll off for the first turn. Our wizards had following spells:
Red Archmage - Miasma, Steed, Withering, Mindrazor
Mage - Shield, Curse of Arrow Attraction
Archie - Plague of Rust, Enchanted Blades, Glittering Robe, Final Transmutation
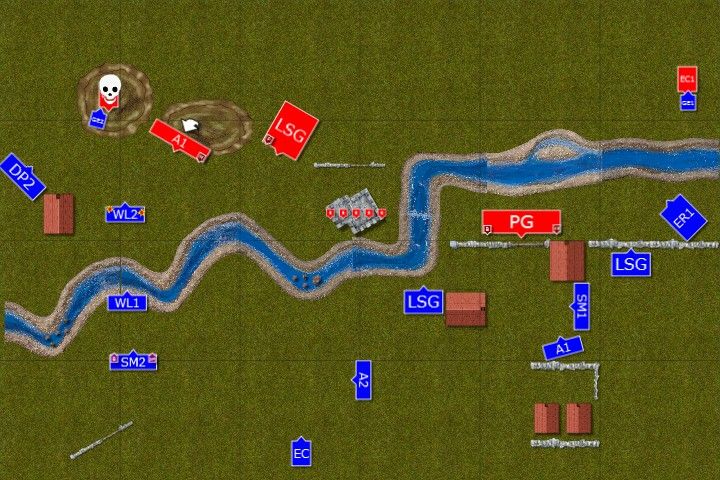
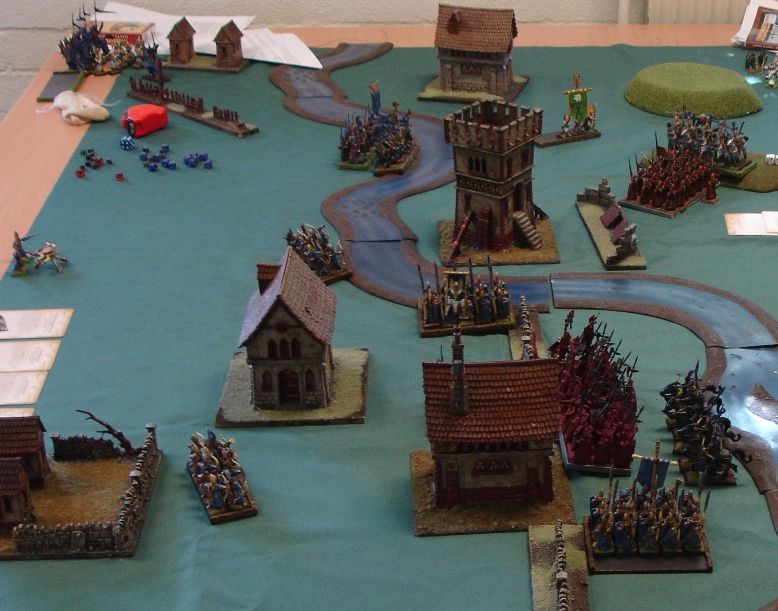
High Elves - Turn 1
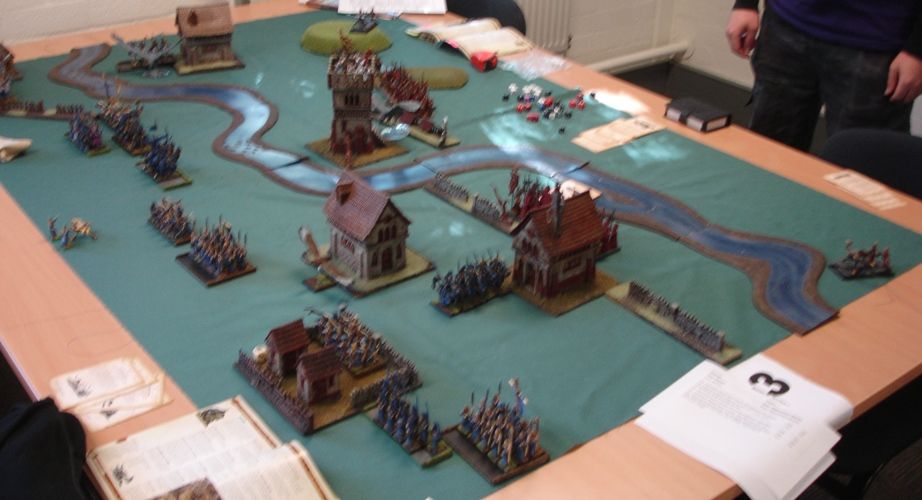 |
| Red Elves advance |
 |
| And occupy defensive positions |
Phoenix guard crossed the river and the magical water blessed them further with Pha's Protection. Shadow Warriors jumped into the tower. Other regiments slightly re-adjusted their positions and fired at their enemies. However, the fire proof armor of the heavy cavalry deflected a huge amount of arrows. Nevertheless, 3 knights fell down.
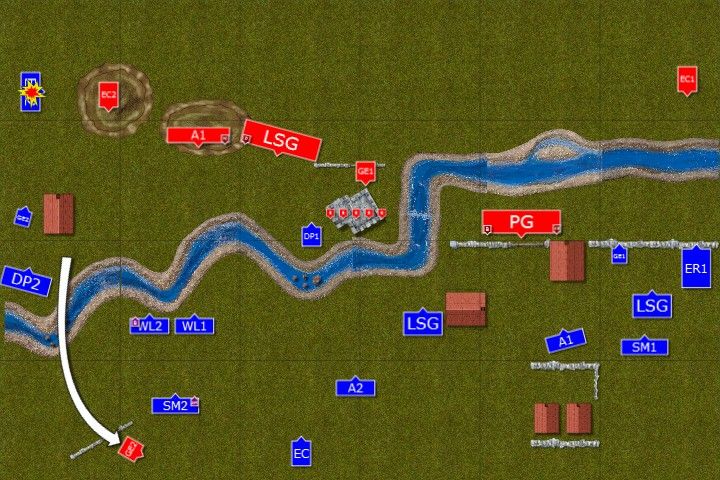
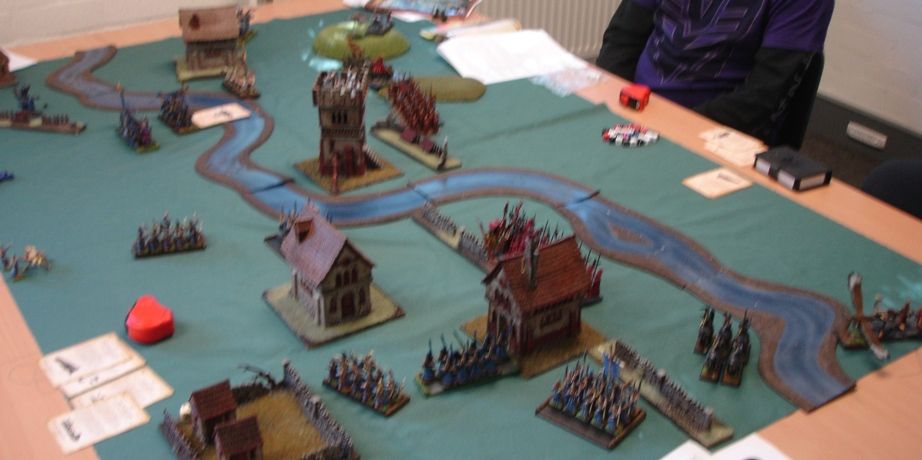
Outcasts - Turn 1
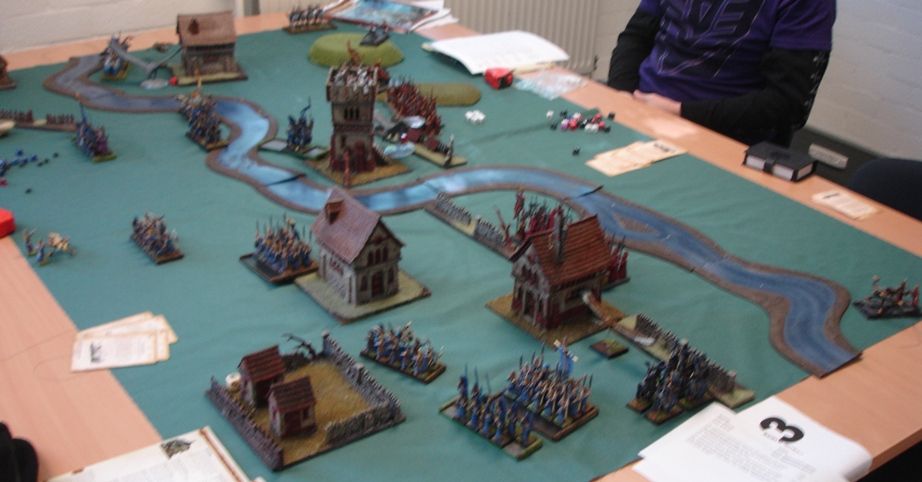 |
| Outcasts move faster |
 |
| The dance has began |
Units on flanks sped forward to threaten eagle claws before they start inflicting more damage. Where possible they used terrain and obstacles to get extra cover. Heavy cavalry crossed the river while shooters aimed at great eagles. Both noble birds were seriously wounded.
High Elves - Turn 2
 |
| Red Elves do not abandon their positions |
 |
| Some more shooting at incoming enemy |
Red Elves, content with their defensive perimeter, do not move at all. Their shooting is targeted at light troops of the enemy army. This time one unit of light cavalry on the far West perishes in the volley of bolts.
Outcasts - Turn 2
 |
| Blue eagles attack! |
 |
| Red eagles down! |
Outcasts attack! Flanking charges are made by eagles and occupy the crews of enemy eagle claws. Two Knights charge enemy archers, seeing that there is a chance to hunt down enemy mage but one of them dies in the hail of arrows and the horse of the last one shies away.
While other units maneuver the shooters aim at red eagles again and this time both birds are down.
High Elves - Turn 3
 |
| Red elves remain stationary |
 |
| Static defense vs. dynamic attack |
One of the eagles finally prevails and prepares to assist Knights and Lions in the attack. Lions are a target of enemy shooters but fortunately not many of them fall down. Sea guard reforms into a deep formation, anticipating an attack soon and red elves brace for impact.
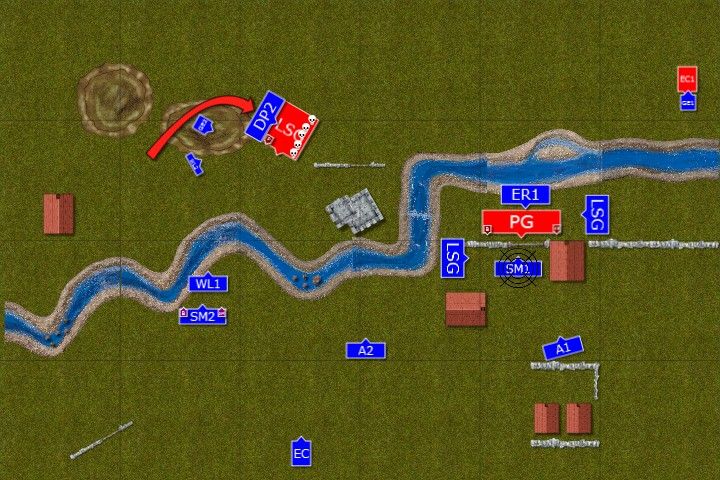
Outcasts - Turn 3
 |
| Phoenix Guard surrounded |
 |
| Western flank is secured |
Dragon Princes, Great Eagle and What Lions all charge the archers who unleash the arrows at Charcians. It does not save the archers and their thin red line is broken, despite protection of the shield of Saphery. Dragon princes chase down those who fled and their momentum carries them right into the flank of the nearby sea guard.
In the center, Shadow Warrior are all shot down despite the cover the tower provided. On the East phoenix guard is surrounded from each side and prepared for last stand.
High Elves - Turn 4
 |
| Phoenix Guard ready for last stand |
 |
| Red arrow indicates overrun move |
Overrunning Dragon princes hit the sea guard but red elves hold and reform under the stern eye of their general. Phoenix Guard stayed motionless, ready to meet their fate. The Archmage tried to discourage Swordmasters from attacking by casting spells at them. Would that be enough to save him and his unit?
Outcasts - Turn 4
Outcasts - Turn 4
 |
| The end of the Phoenix Guard |
Dragon princes were locked in combat with sea guard and again, the infantry held despite more casualties being inflicted.
The main combat, however, took place on the other flank. Sea guard units attacked simultaneously from both flanks using the opening the enemy left. Reavers and Swordmasters didn't join the fight as it was planned to distract the enemy so that the flank attack could have been smoothly performed.
Phoenix Guard fought well but both units pressed hard from each flank and eventually the formation broke, despite their bsb encouragements. All survivors were caught and two standards were claimed as trophies.
Seeing that Archie the Archmage gave the signal to disengage to give his adversary a chance for dignified withdraw.
Summary
 |
| Turn by turn animation |
After-battle thoughts
The game ended after turn 4 simply because we run out of time. But I was very happy with that last turn charge which gave me a decisive victory. I am also glad that I managed to demonstrate that in right circumstances even 2 underestimated sea guard units can deal a killing blow to a more powerful enemy unit. All it took was to kill a few of them and break steadfast. Something no other unit in my army could not do due to lack of that extra rank.
Also note, that I didn't charge with Swordmasters as I had to fight through the obstacle and probably gave more attacks for the enemy. Similar reason was to stop the charge with reavers. They were in a perfect position to charge next turn, however.
Having said that I must admit that there were a few factors that helped me to achieve that victory.
Mark's army is one of the forces I like to fight against. It is due to the fact that he does not have many support units to interfere with my movement. And his shooting is a little limited by the fact a huge part of it is flaming. Also his characters are combat orientated so they do not harm my units while I maneuver. On top of that shadow magic is not exactly the most dangerous of lores simply because lowering abilities of one unit does not affect the army much.
Such an army can be difficult to defeat, however, if it denies the opportunity to charge big units from 2+ directions at the same time. Mark spread his army and that helped me too. He also remained static. Small mistake with PG prevented him from moving/charging (due to the building blocking the passage) and that in the end cost him that regiment.
Had he deployed on one flank and kind of castled, the game would be different. I am not sure if he would inflicted enough casualties with shooting but that was a better position to prevent my gains. In particular with a river running across the board where I was banished 3 times! Fortunately for me the number of hits was always low.
I hope Mark enjoyed the game despite the loss of that big unit at the end. It was a pleasure to play against him and he took the heavy blow with a true stoicism as a Phoenix Guard! Thanks Mark!
And thanks for reading too!
Firstly, great report after the long absence! As soon as the Guard got set up apart from the rest of the army, I had a feeling you would claim them. After that, it was just a matter of getting to his ranged units/war machines without losing too much to be rendered ineffective but with reavers and Eagles, you have that aspect of the game covered!
ReplyDeleteQuestion, how did the overrun with the dragon princes into the sea guard work? The angle looked a bit odd, but that could just be the diagram's issue.
Also, you made the right decision to just charge with the LSG into PG in the flanks to pin him there. Charging in with the other two units (especially with the swordmasters into the front would have just given your opponent more combat res).
That brings me to my next question: how necessary are ranked units to the MSU playstyle? The LSG seemed to be the stars of the game, and as you mentioned in your summary, I'm not sure you can break the PGs steadfast without those extra ranks. Although, without the time restraint, you had more turns to grind that unit down, so by turn 6, they probably would have been goners anyway.
All of my ranked units are 12 strong, so two ranks at most, but often just one by the time they make it into combat. Is that enough, or would a few "ranked" units be a necessary addition. I'm not sure any models in the DE would match the ranked utility of the LSG for a reasonable cost. What are your thoughts?
Hi Dan,
DeleteI am sorry for a little delay but I was away and could not reply earlier.
When you determine the direction of flee/pursuit movement you need to draw the line through the center of both units. As dragon princes were on the left hand side of the archer unit and the survivors had the center to the right it was very convenient for me as it allowed me to hit sea guard in the flank. It is very important rule (and I believe it was even explained in FAQ) as you can change that direction by appropriate removing casualties. It is not always possible but if you have two units of equal strength it might be good idea to consider which one to attack as otherwise it may lead to a disaster too.
Well, I have learned that these ranked units help. It does not have to be something overwhelming, you don't need to bring 30 spears for example and keep them in 6 ranks. However, it is not necessarily bad idea to have some regiments with 2 ranks to start with. This game I used LSG for that purpose. I had similar successes with 15 Archers. They might be soft targets but if they hit the flank they can disrupt the enemy and sometimes break steadfast.
I also know players who are willing to invest into a bigger unit (and tougher too) for that purpose. It is often some kind of character bunker as well. The downside is that you may need to replace two units with one and it will definitely attract more attention. But that is a good thing as it makes you think how to find your own balance.
It does not mean ranked unit is a necessity. You just have to be careful how to engage combats. Both options have advantages and disadvantages so I guess it is all about choosing your own medicine :)
Thanks a lot for kind words, I am happy you enjoyed that report and I was glad I pulled out that charge eventually as it is not always a possibility to exploit.
Cheers!