
Game 5 - Chaos Dwarves - Battle for the Pass
In my fifth game of CanCon I had a pleasure to meet Perry who has just switched from 40k to fantasy battles. You could tell he loves big guns by the choice of his army. There were only 2 armies representing Chaos Dwarves but they were very different from each other.
I had absolutely no prior experience in playing against that army. I have seen a few reports and I knew it is a tough one to win against. However, Perry didn't have any of the big toys Chaos Dwarves army usually sports. That didn't mean it was an easy army to win against as he had a proper war machines park. And his artillery alone could do a lot of damage to my small and fragile units simply because they are all template weapons. Add to that Lore of Hashut and you see why it is scary opponent.
As if it was not enough I had to fight them in the battle for the pass scenario. That added extra distance between the armies which suits Chaos Dwarves and limited my own deployment due to lack of space. I basically had to deploy in two lines.
Here are more details of Perry's army (apologies for lack of all information on equipment):
Chaos Dwarves - Army List
Sorcerer-Prophet, level 4, Talisman of Preservation - Lore of Hashut
BSB
Daemonsmith-Sorcerer, level 1, Dispel Scroll - Lore of Fire
24 Infernal Guard, Full Command, Banner of Eternal Flame
25 Blunderbusses, Full Command
5 Hobgoblin Wolf Riders
5 Hobgoblin Wolf Riders
3 Bull Centaurs
Deathshrieker Rocket Launcher
Deathshrieker Rocket Launcher
Deathshrieker Rocket Launcher
Dreadquake Mortar
Very small army. Always a bad sign. 4 large templates weapons per turn. And then some deadly spells too. Not to mention narrow pass and longer distance to reach the enemy. And then warm greetings from blunderbusses who can easily annihilate any of my units (oh, and have no penalties for shooting at all). It made me feel as if I were to make a reenactment of Omaha Beach but in the fantasy world.
I decided that my chance would be to run towards the enemy as fast as possible and not even stop for shooting. Perry tried to explain all the rules as best as he could but I found that there is simply too much to remember so I decided to go for it anyway. I knew that while template weapons are deadly at a distance they cannot shoot you at close range. Also, the blunderbusses while deadly had 15" effective range so hopefully I could get enough units in range to charge them and have enough of them left to enact some vengeance.
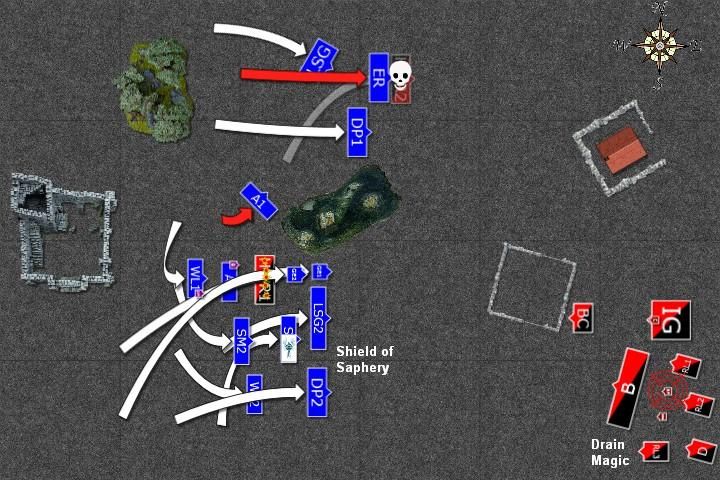
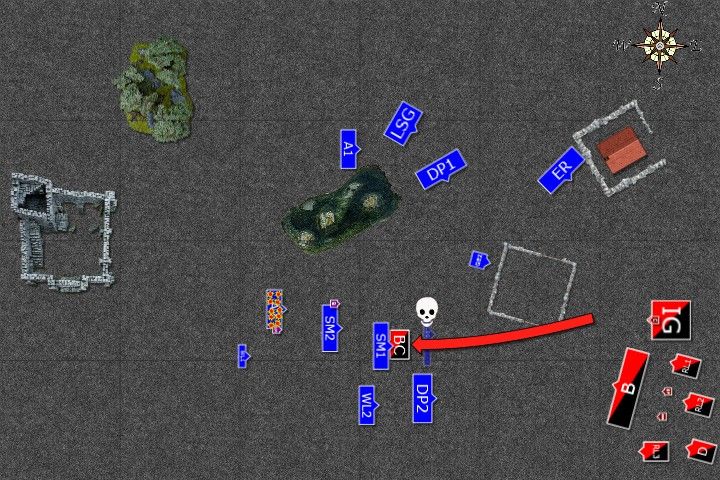
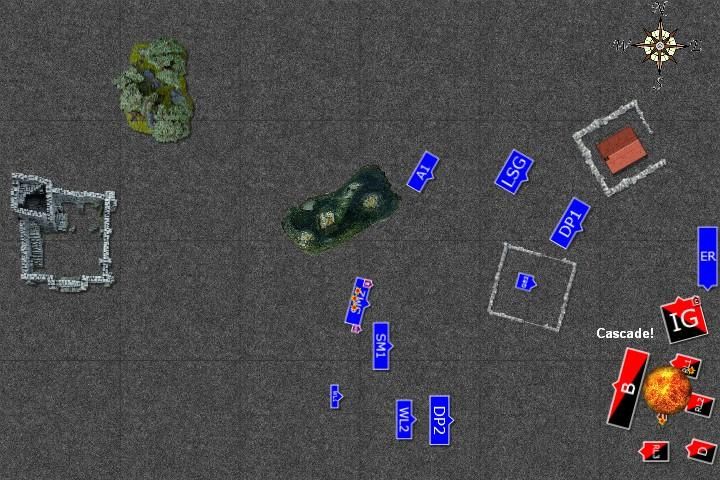
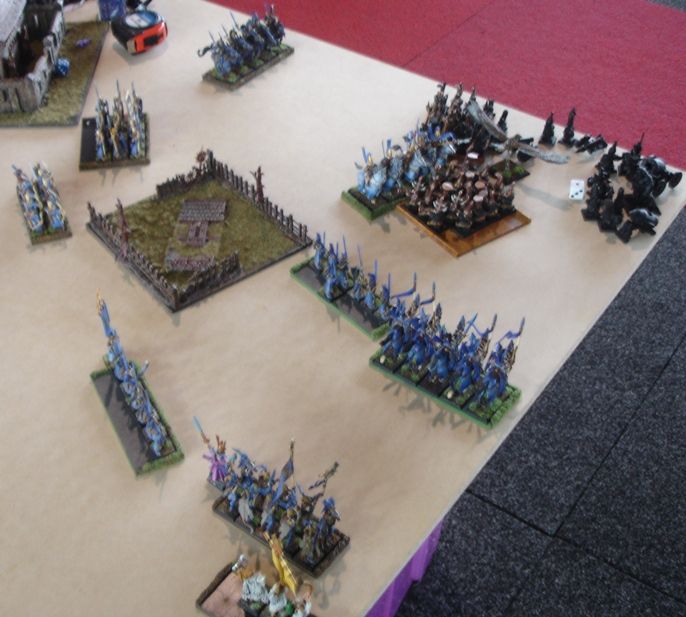
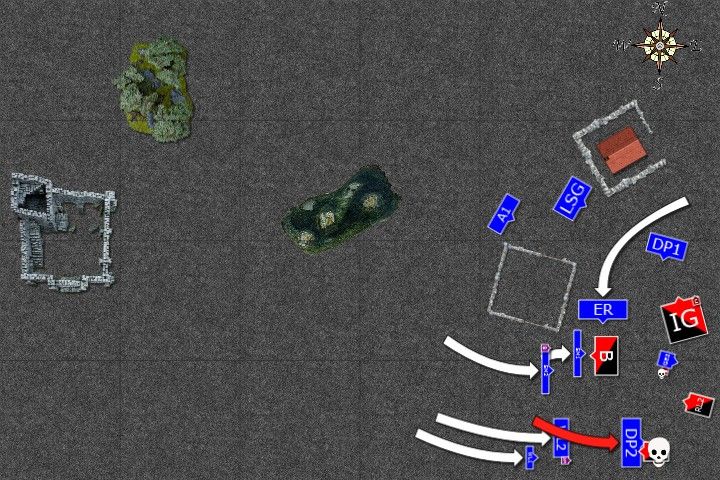
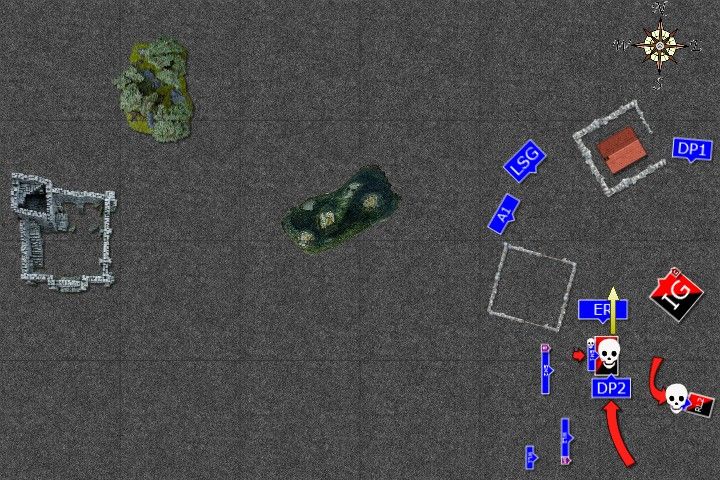
Deployment
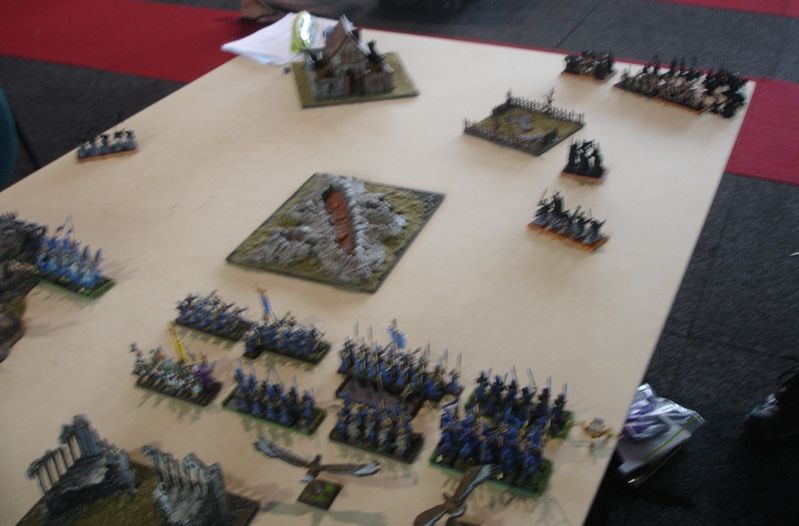 |
| Deployment - Elven point of view |
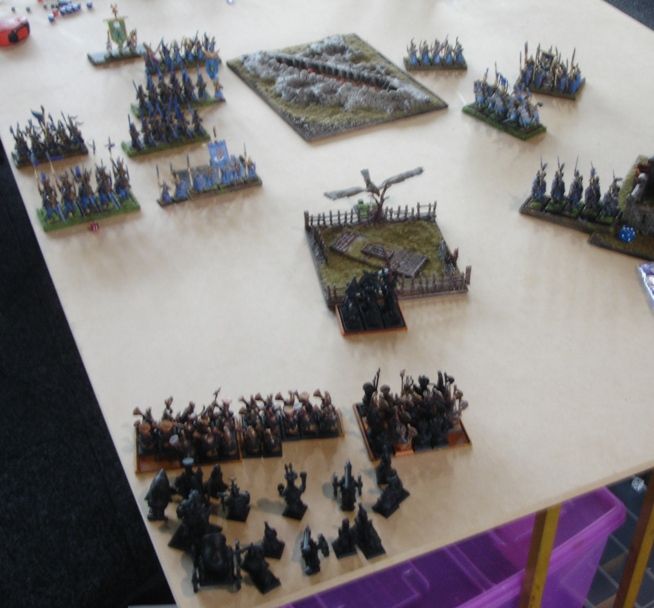
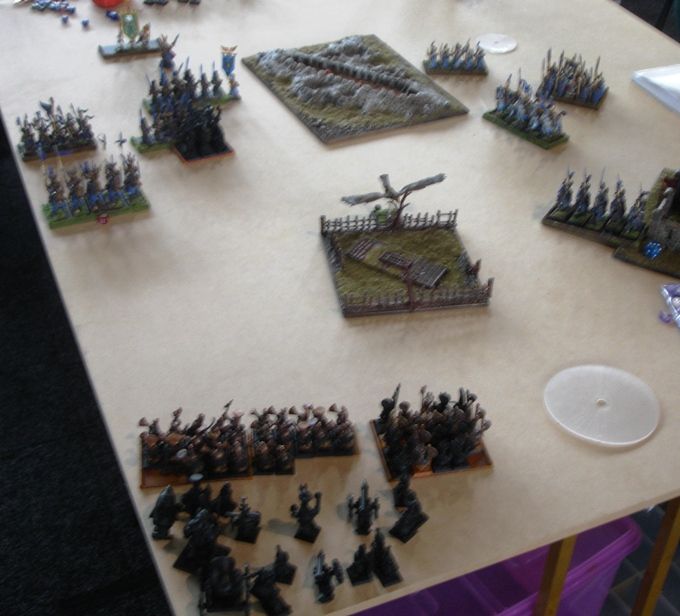
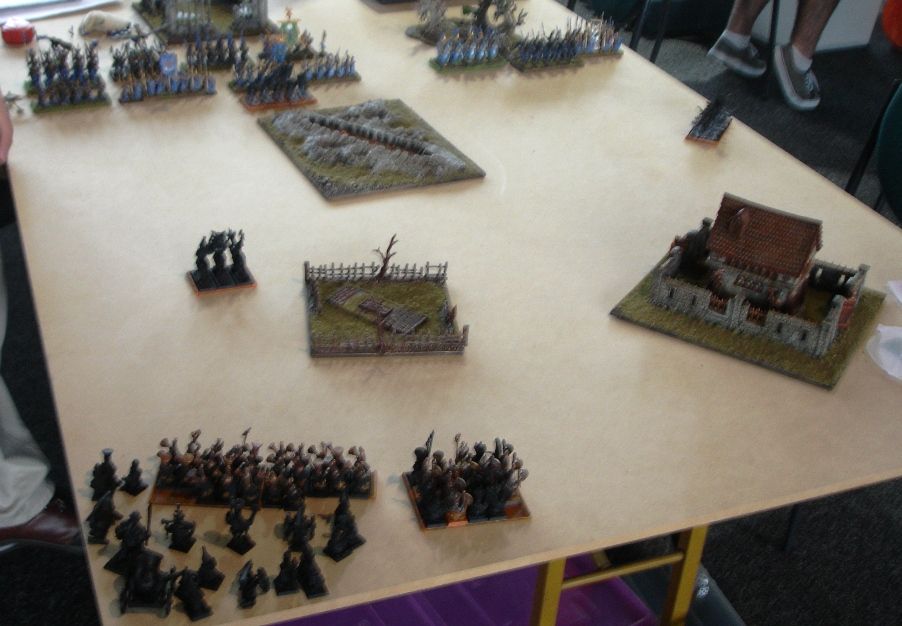 |
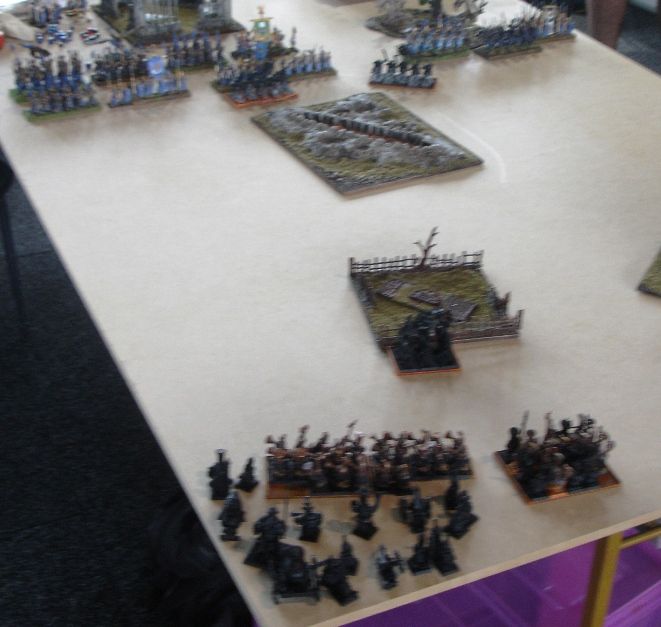
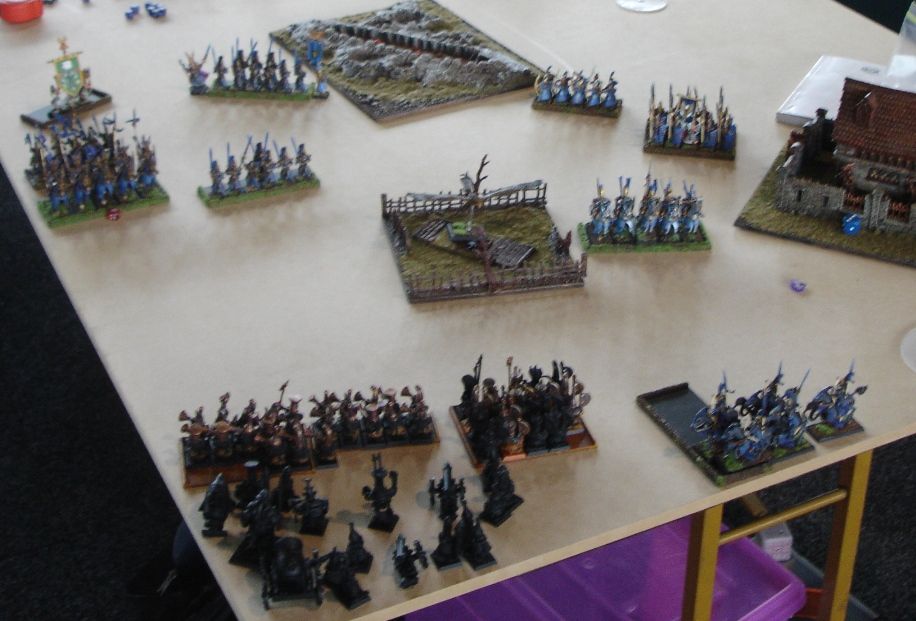
| Deployment - Chaos Dwarves point of view (taken at the beginning of turn 1) |
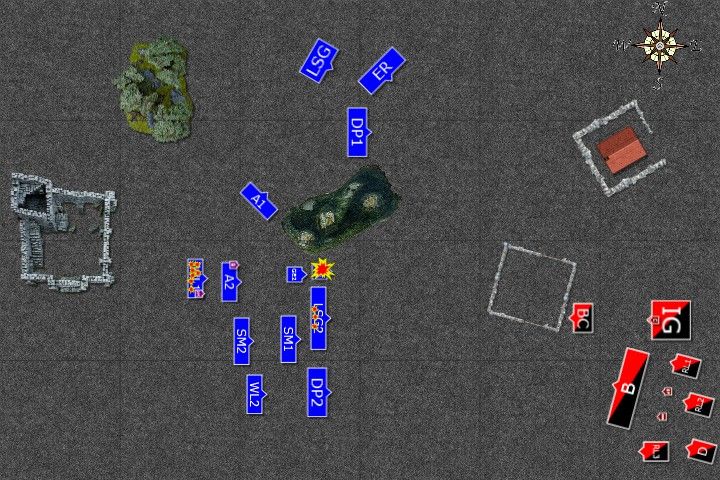
 |
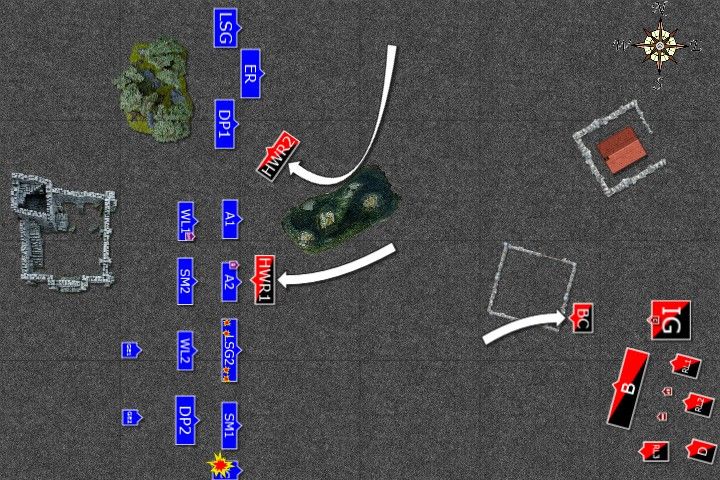
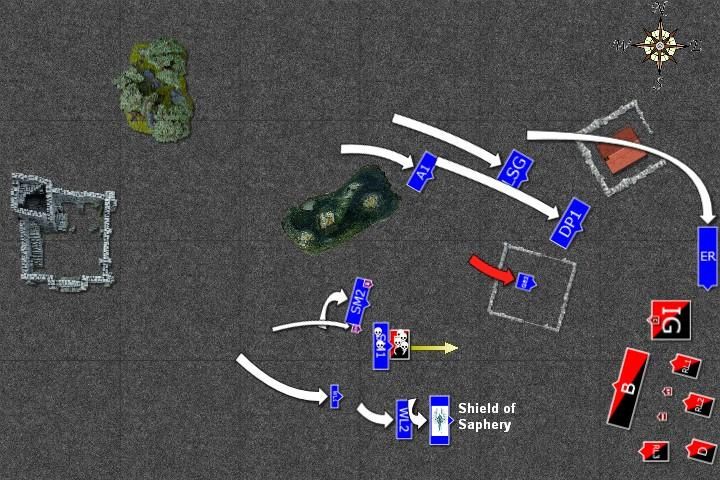
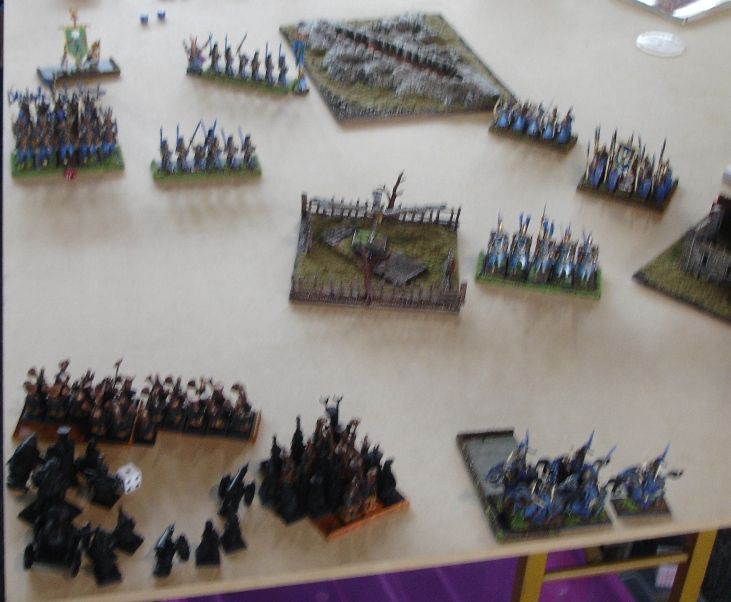
| Deployment of the armies after vanguard moves |
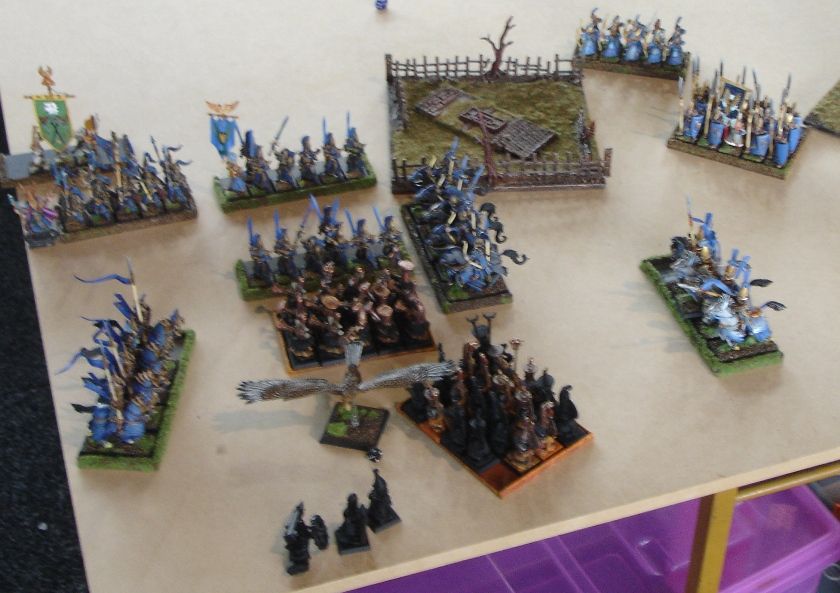
Elven warriors spread across the pass while Chaos Dwarves castled in one corner, sending expendable wolf riders to slow the enemy down. Difficult terrain in the middle of the pass also could perform that role.
Respective wizards had following spells this game:
Sorcerer-Prophet - Curse of Hashut, Ash Storm, Hell Hammer, Flames of Azgorh
Daemonsmith-Sorcerer - Fireball
Archmage - Drain Magic, Shield of Saphery, Curse of Arrow Attraction, Fury of Khaine, Vaul's Unmaking
Chaos Dwarves won the roll off and theirs was the first turn.
Chaos Dwarves - Turn 1
 |
| Wolf Riders are harassing the enemy |
 |
| Artillery opens fire |
With armies quite far away not much can be done yet and Chaos Dwarves open fire at the seaguard. Some of the missiles hit but some scatter away and one of them hits eagle claw, destroying it entirely.
Wolf riders try to block the elves while Bull Centaurs pull back.
Outcasts - Turn 1
 |
| High Elves destroy enemy light troops |
 |
| ... and move forward the main enemy formation |
Archers surprise Wolf Riders and instead of shooting at them, they charge. Hobgoblins retreat but they are caught by swift Ellyrian Reavers.
In the middle of the elven formation BSB and his Archers shoot down wolf riders instead. All units move forward and Archmage tries to protect his troops with a Shield and by draining magical powers from the battle field.
Chaos Dwarves - Turn 2
 |
| Chaos Dwarves maintain their formation |
 |
| The artillery barrage continues |
Chaos Dwarves feel no need to abandon their entrenched positions and instead they continue artillery bombardment. As a result one eagle is dead, second is wounded and more sea guard die too. Also white lions bodyguards for the Archmage suffered a lot of damage with only 3 surviving the barrage.
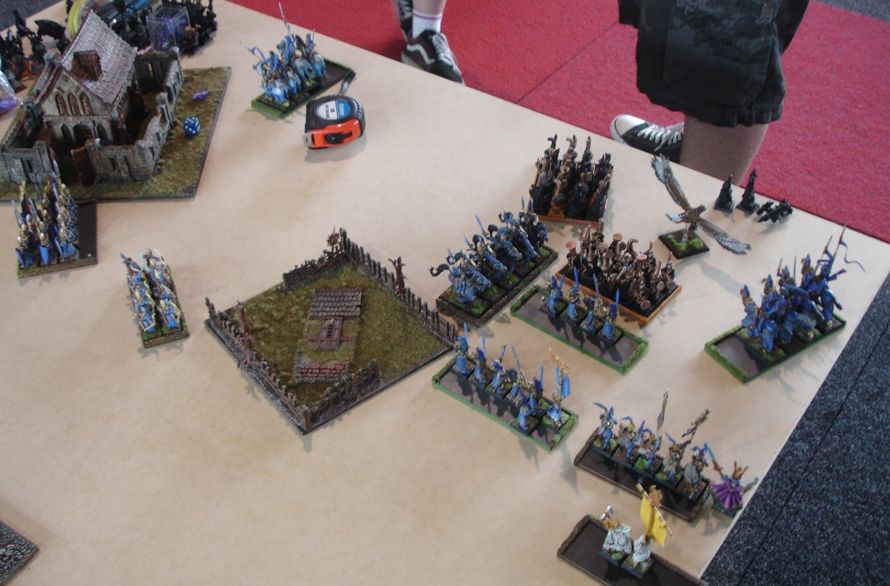
Outcasts - Turn 2
 |
| High Elves press forward |
 |
| There is no time for shooting |
All units move forward as one, despite heavy casualties. Archmage and BSB change the units, each staying in another regiment. Shield of Saphery this time is granted to Dragon Princes spearheading the attack.
Chaos Dwarves - Turn 3
 |
| Bull Centaurs destroy sea guard |
 |
| Artillery continues the fire |
With enemy in range Bull Centaurs charge. Depleted sea guard hold but with no deep ranks to make their stance solid they lose and break. Bull Centaurs pursue into Swordmasters right behind.
Dwarven artillery does not stop firing and this time another unit with the Archmage among their ranks is targeted. Unfortunate Archers die to an elf but Archmage somehow survives.
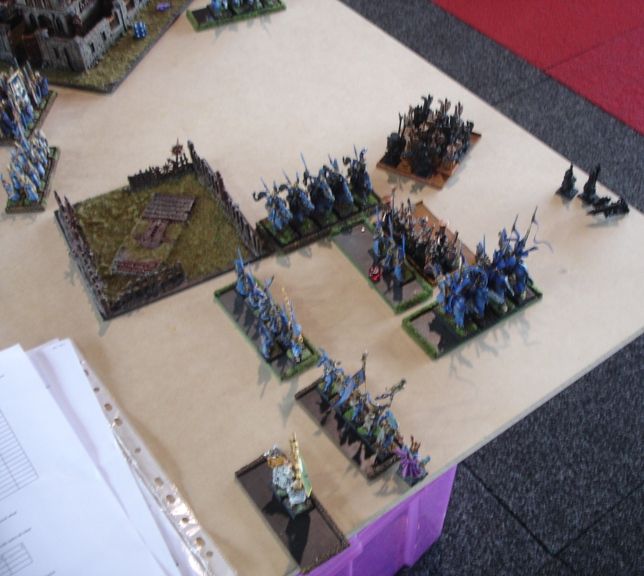
Outcasts - Turn 3
 |
| Despite casualties High Elves close in |
 |
| High Elves begin surrounding of the enemy positions |
Bull Centaurs are no match for Swordmasters and lone survivor breaks and is caught in hot pursuit. Nearby Dragon Princes move forward but do not enter the danger zone marked by the maximum range of blunderbusses.
Reavers move swiftly to the flank of enemy formation threatening their war machines. Single eagle attempts to attack them too but is forced to land in the middle of the graveyard.
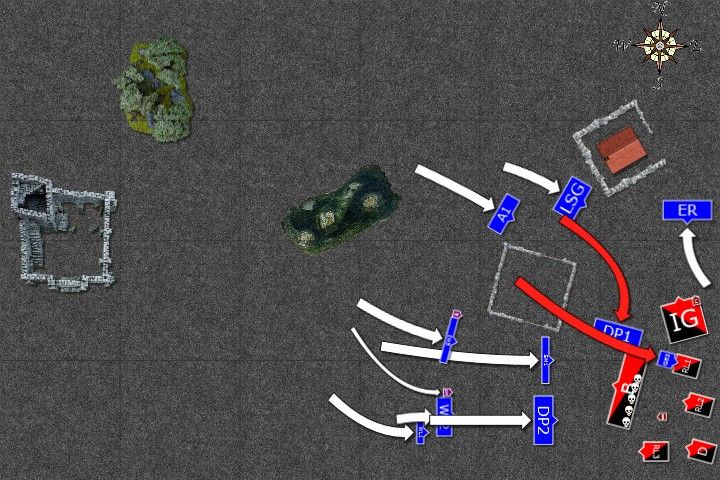
Chaos Dwarves - Turn 4
 |
| BSB orders his warriors to block the passage to the artillery |
 |
| Then disaster struck! |
Seeing light cavalry ready to sneak past them, BSB orders his warriors to reform and block the passage. But then a huge detonation strikes and the army general is lost due to dimensional cascade. What is more, his apprentice is hurt and one of the crewmen of nearby rocket launcher dies too.
Other artillerymen are shaken and miss their targets. Would that be the opening High Elves were waiting for?
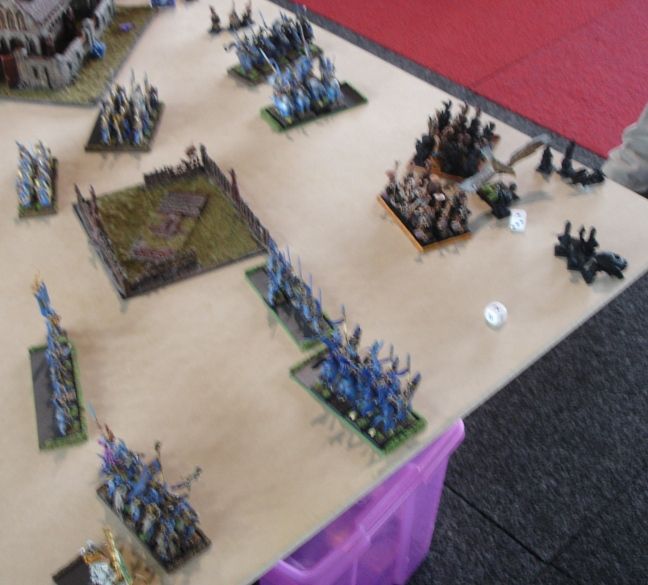
Outcasts - Turn 4
 |
| Dragon Princes charge! |
 |
| Chaos Dwarves are surrounded |
Seeing the opening Dragon princes charge exposed flank of the blunderbusses and tie them in combat. Great Eagle also swoops down and fights one of the crews. All regiments advance too, closing the distance while the enemy shooters are occupied.
Chaos Dwarves - Turn 5
Chaos Dwarves - Turn 5
 |
| Chaos Dwarves push back the first wave of the attackers |
 |
| But the formation is broken |
Blunderbusses manage to win combat by the slightest of margins and elven knights are forced to pull back and regroup. Great eagle, however, even attacked by the Daemonsmith, kills two remaining crewmen and keeps fighting.
Chaos Dwarves try to shoot again but the mortar, without supervision of the Daemonsmith, explodes while remaining two rocket launchers miss their targets.
Outcasts - Turn 5
 |
| High Elves tighten their grip |
 |
| Yet another artillery piece is destroyed |
High Elves keep pressing forward. Depleted blunderbusses are surrounded from all sides now and Dragon princes attack and destroy one of the war machines. Brave great eagle deals the last wound to the Daemonsmith too.
Chaos Dwarves - Turn 6
 |
| Chaos Dwarves try to counter attack |
 |
| High Elves do not accept the challenge |
Chaos Dwarves try to counter attack but elven units perform tactical withdraw. Blunderbusses target Swordmasters but their weapons loaded in haste were not as powerful as usual. Last artillery piece opened fire and half of the regiment of White Lions protecting the Archmage died. However, High Elves didn't falter.
Outcasts - Turn 6
 |
| Blunderbusses are about to break |
 |
| High Elves successfully assault Dwarven castle |
Dragon Princes and four Swordmasters charge blunderbusses and break them. Elven knights pursue and slay all of the survivors. Brave great eagle attacks last war machine but bloodied and tired it is not strong enough to defeat another one. Unfortunately, that last try costs it its life.
Chaos Dwarves are forced to retreat, however, with only a single regiment and a single war machine surviving the battle.
After-battle thoughts
I didn't expect I could win that game so it was even more satisfying when I did. My desperate plan somehow worked although I am fully aware that the fact the enemy general cascaded helped me enormously. Following misfire of the Mortar also was bad luck for Perry.
In general my troops behaved this game and only unlucky break test for Dragon Princes who lost due to lack of musician and fled as they were just out of range from BSB. But I do not complain at all as things worked perfectly in the end. At least in terms of winning the game and the fact I got a 16-4 win is not a small reward!
Apart from bad luck one thing helped me enormously during that game. I mean the moment when warriors reformed to block reavers but by doing so exposed the flank of blunderbusses. That one less shooting phase for them saved some of my units for sure. And also opened the path to artillery for dragon princes.
I am sure there are things I could have done better but for once I am very happy with the results and the way it worked out anyway.
Last but not least, thanks to Perry for a very nice and friendly game. :)
Thanks for reading!
No comments:
Post a Comment