
Game 4 - Lizardmen - Battle Line
In my game 4 I met Adam, whom I played against a year ago at ConCon 2012 and at Hammer of Dave. Each time I managed to win after bloody fight so we started to establish some kind of series of battles between our armies. Adam was kin to prove he can beat me eventually and it was even more interesting as we had almost unchanged armies in comparison to our previous encounters.
Lizardmen - Army List
Slann Mage-Priest, BSB, The Focused Ruminations, The Becalming Cogitations, Plaque of Tepok - Lore of Life
Scar Veteran, Cold One, Light Armor, Shield, Dragon Helm, Dawnstone
Skink Priest on the Engine of the Gods, Dispel Scroll - Lore of Heavens
Skink Priest on the Engine of the Gods, Dispel Scroll - Lore of Heavens
24 Saurus with Spears, Full Command
24 Saurus with Hand Weapons, Full Command
10 Skins with Javelins
10 Skink Skirmishers with Blow Pipes
7 Chameleon Skinks
7 Chameleon Skinks
20 Temple Guard, Full Command
3 Terradon Riders
2 Salamander hunting packs
I know I don't remember the list correctly as Adam added one more chameleon skinks group but I cannot recall where he made room for them. In general my plan against this army has not changed. I had to stay away from the Slann to cast spells, I had to deploy wide to deny chameleons nice spots to hide. I wanted to eliminate skirmishers, support units and salamaders first and isolate big units so that I could charge them from many sides and win combats in 1-2 turns while blocking other regiments from joining the fight. As always, easier said than done :)
We played standard battle line scenario and during the deployment I could already see that Adam remembered the lessons from our previous games.
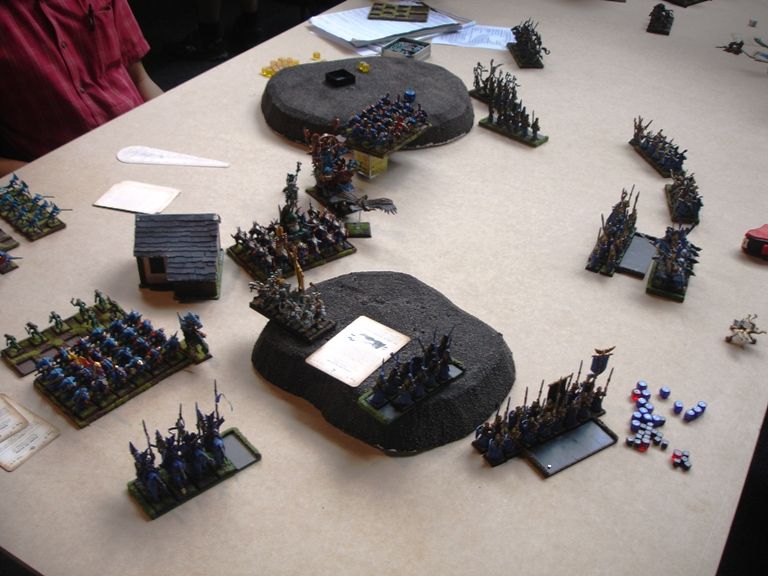
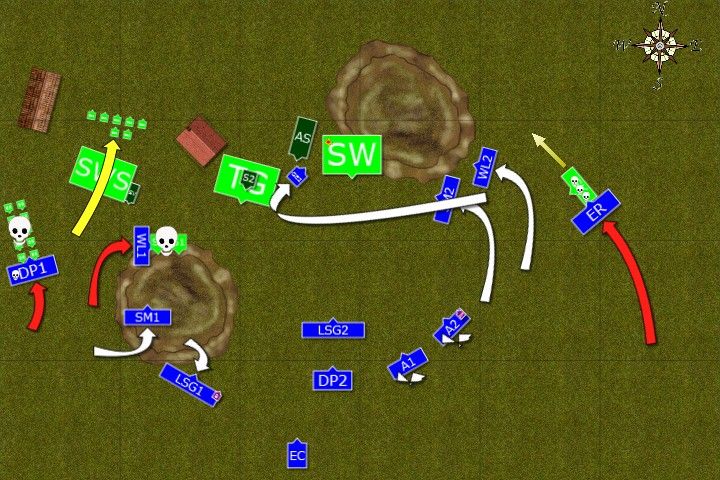
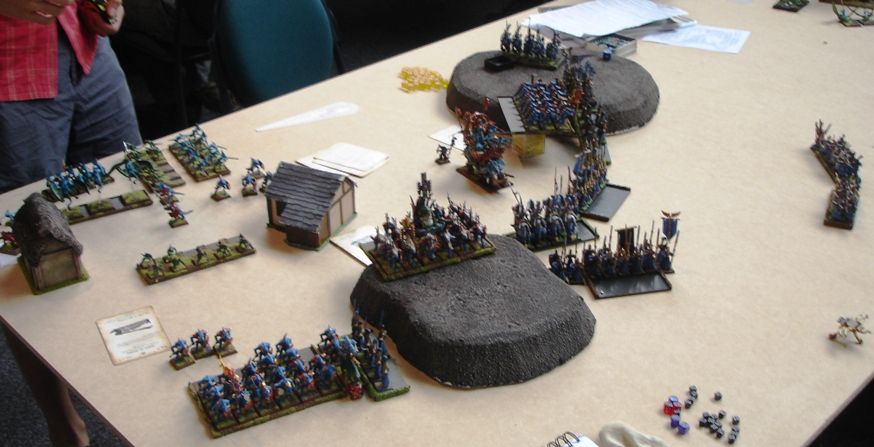
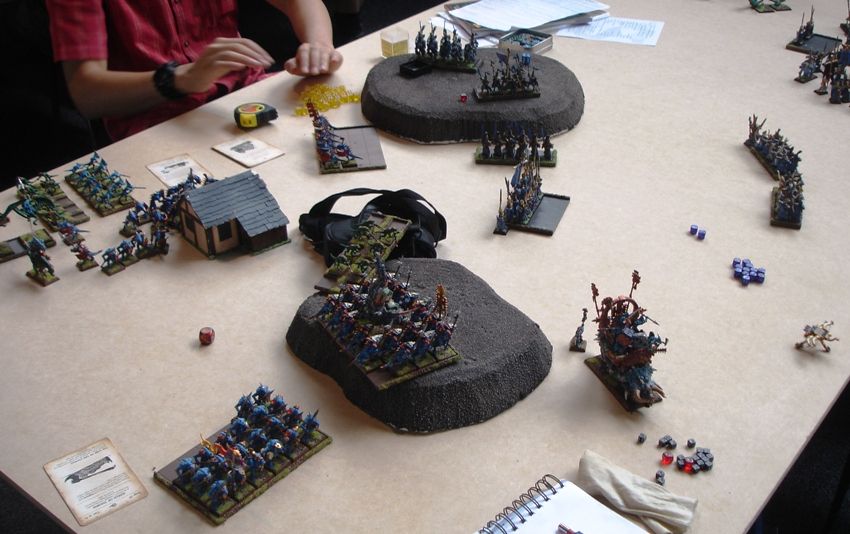
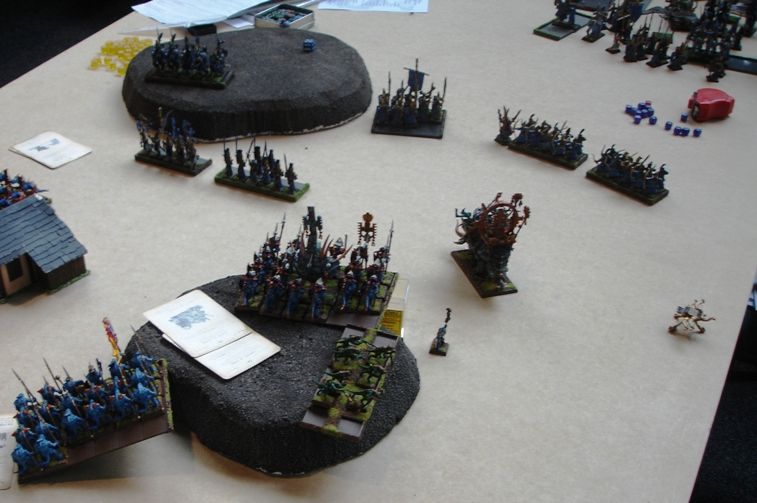
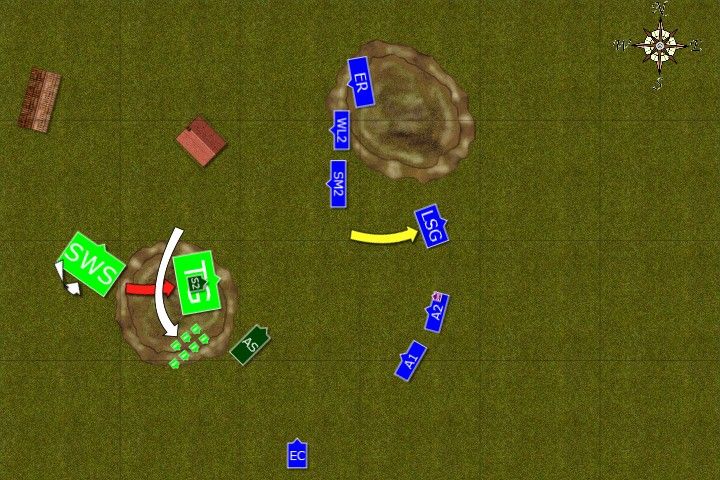
Deployment
 |
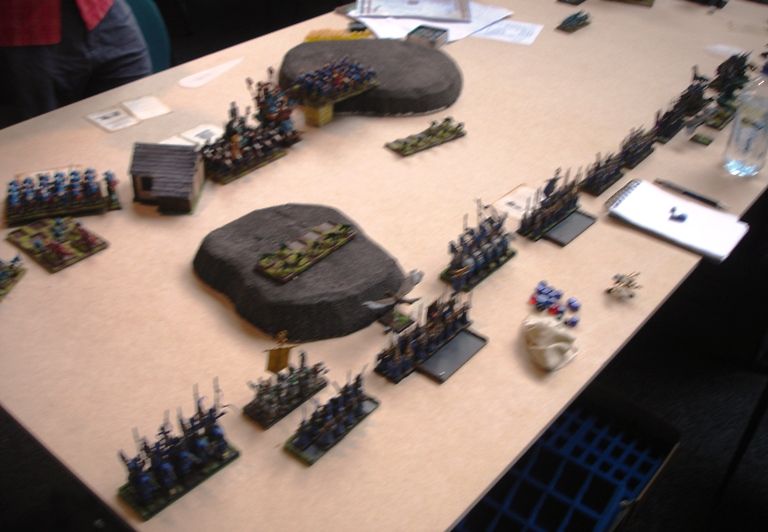
| Armies arrayed for battle |
 |
| Deployment after vanguard move |
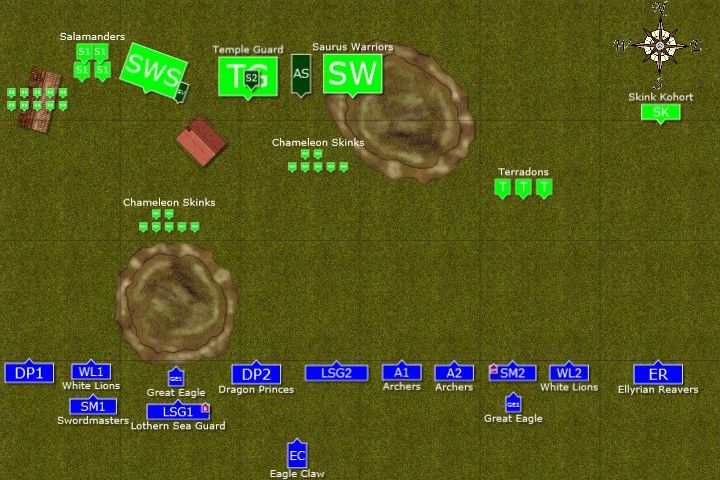
Lizardmen deployed with the refused flank formation, their unbreakable phalanx leaning towards Western flank and light troops forming vanguard.
High Elves deployed wide with strong flanks and shooters in the center. Western wing was reinforced by heavy cavalry mainly due to the presence of Salamanders.
The wizards had following spells:
Slann - Awakening, Flesh to Stone, Throne, Shield, Regrowth
Priest - Iceshard Blizzard
Archmage - Drain Magic, Curse of Arrow Attraction, Courage of Aenarion, Fury of Khaine, Flames of the Phoenix
We rolled off and Adam won the fist turn.
Lizardmen - Turn 1
 |
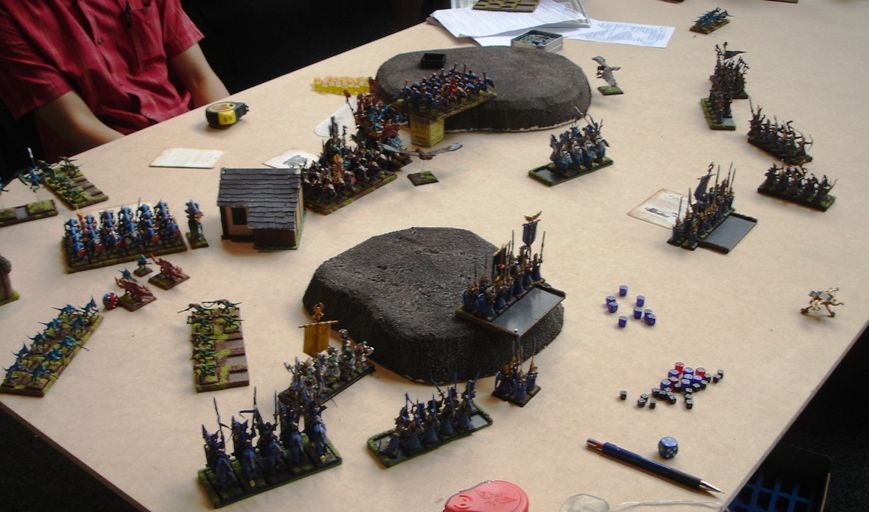
| Lizardmen move forward |
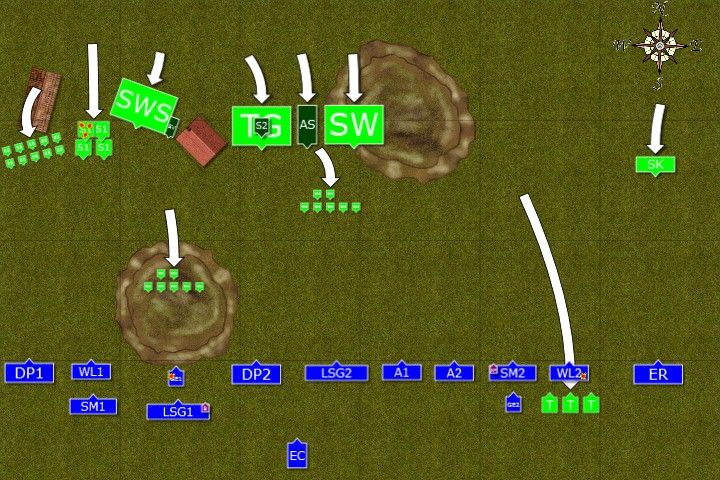 |
| Skirmishers attack |
Lizardmen army moved forward maintaining tight formation. Terradons flew over Lions and shot at them while one Chameleon group sneaked on top of the hill and peppered an eagle with their poisonous barbs. Fortunately, the eagle survived. Finally, skinks prodded salamanders to spit their venom at elves but beasts were hungry and decided to eat a few unfortunate handlers rather than obey the orders.
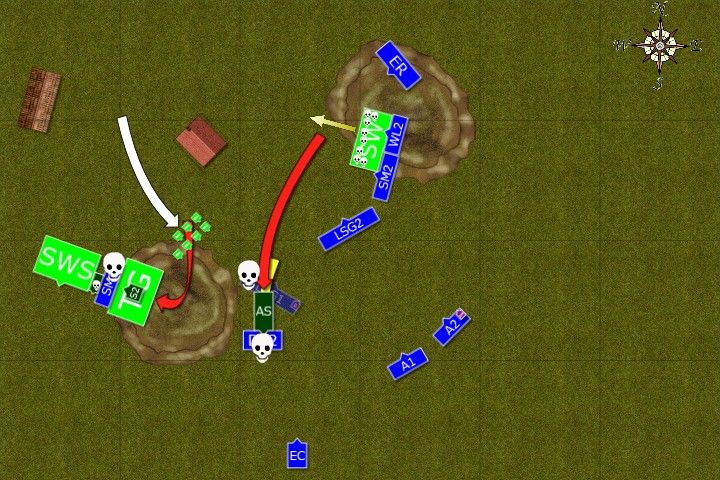
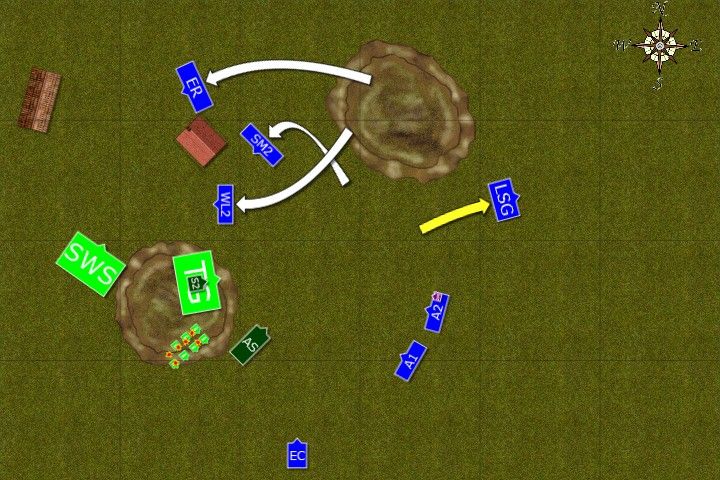
Outcasts - Turn 1
 |
| High Elves move more aggressively |
 |
| Heavy cavalry charges straight away! |
Seeing chameleons on the hill Dragon Princes charged but little skinks fled. Elven Knights swiftly changed the direction of the attack and raced towards another group of chameleons who were ordered to hold. They all died skewered by the lances of elven warriors.
In the meantime second squadron of heavy cavalry aimed at Salamanders but they overestimated the distance and when fleeing enemy appeared on their way, elves decided to stop the charge.
BSB led sea guard on the hill and elves aimed at salamanders, inflicting more wounds but not being able to kill any of the dangerous lizards. In the center Archers turned about and with the aid of Archmage killed all terradons which tried to harass elven units.
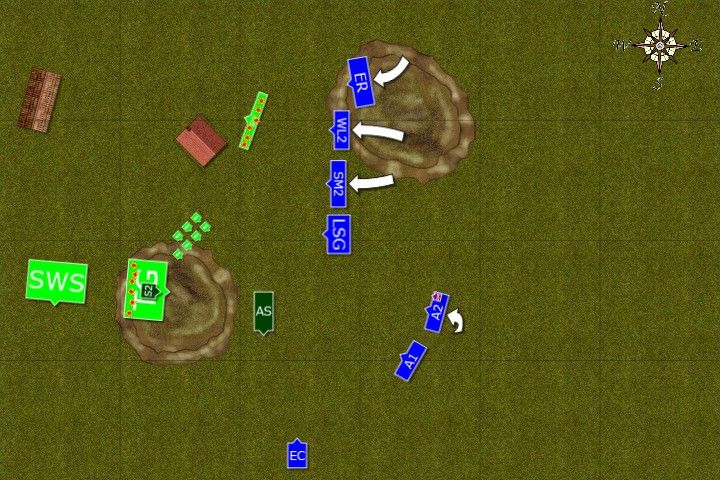
Lizardmen - Turn 2
 |
| It's getting crowded on the West |
 |
| Slann shows the power of his magic |
Lizardmen continued their advance. One of the Saurus regiments charged Dragon Princes who withdrew. Stegadon destroyed intervening eagle.
On the West chameleons rallied and created a living shield for the Saurus behind them, who in addition were toughened by Slann and his magic.
Salamanders moved on the hill but vicious beasts were in no mood to fight and again ate some skins.
Outcasts - Turn 2
 |
| Elves attack again ... |
 |
| ... but in doing so put themselves in grave danger. |
Dragon Princes on the West first charge chameleons and when they flee behind the Saurus, elven knights charge nearby skink skirmishers and destroy them.
White Lions attack Salamanders, killing them too and moving out of sight of the Saurus but in front of the temple guard. Chracians are assisted by Swordmasters but would it be enough?
On the East another task force of Lions and Swordmasters approaches the flank of Saurus warriors while Reavers destroy another unit of skinks.
Lizardmen - Turn 3
 |
| Lizardmen are winning on the West |
 |
| Slann makes his regiment almost untouchable |
Saurus led by scar veteran charge Dragon princes who hold to buy some time for other regiments but are broken and flee. Lions also receive the charge of the enemy. Temple Guard attack without mercy and Chracians so find out their axes are useless against tough as stone saurus. Brave elves are utterly destroyed.
Only great eagle miraculously survives the attack of the stegadon and keeps fighting.
Outcasts - Turn 3
 |
| High Elves counter attack through the center |
 |
| West is lost |
Swordmasters attack Saurus to assassinate scar veteran but he proves too tough to kill just yet and the fight continues.
Sea guard and BSB march away from the danger and out of sight of the the angry Temple Guard, while other regiments surround stegadon and second saurus units. These warriors are also charged by lions and swordmasters frontally and suffer a lot of casualties but hold for now.
Lizardmen - Turn 4
 |
| Stegadon breaks through |
 |
| High Elves lose their Battle Standard! |
Temple Guard charges Swordmasters already fighting Saurus warriors. Elves know they are doomed but before that they managed to kill scar veteran.
Enraged Stegadon charges Dragon princes who again have to withdraw and the beast hits the sea guard behind. The attack is so powerful that only a handful of elves remain, not enough to present coherent formation and stop the dinosaur in its tracks. Elves break and lose their battle standard, while stegadon stampedes them to death and even catches retreating dragon princes!
Another saurus warrior regiment suffers more casualties and this time they cannot hold and flee. Elves do not pursue but reform to face new threat.
Outcasts - Turn 4
 |
| Battle lines are redressed |
 |
| Shooting and magic finishes off fleeing saurus |
High Elves take a short break from combat and redress their ranks. Using their shooting and with magical support they also managed to destroy survivors of the saurus unit. Some casualties are also inflicted upon temple guard.
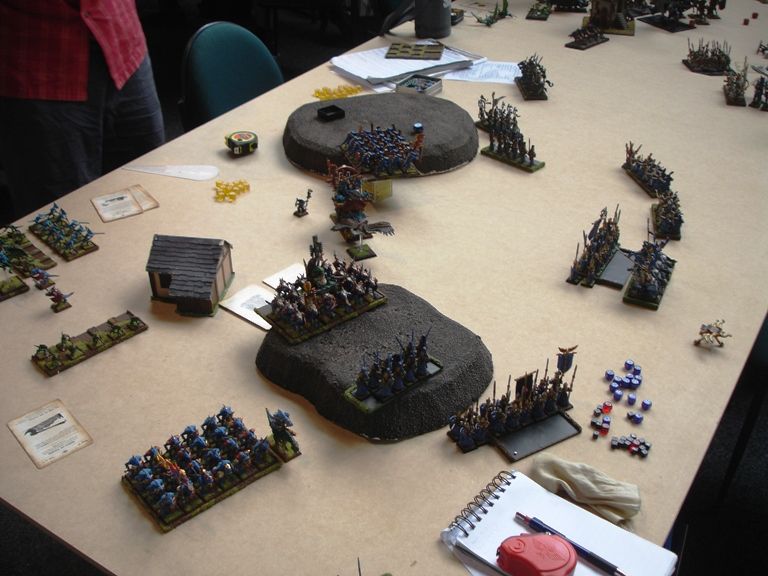
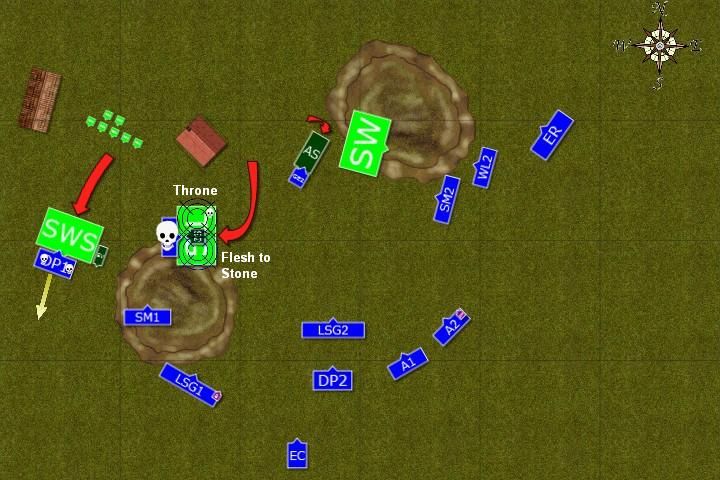
Lizardmen - Turn 5
 |
| Lizardmen turn towards the center |
 |
| Chameleons unsuccessfully try to hunt down the bolt thrower |
Lizardmen turn towards the center to attack elves once more. Slann resurrects his fallen bodyguards while Chameleons sneak around to attack eagle claw but are not successful.
Outcasts - Turn 5
 |
| Elven elites move around Temple Guard |
 |
| While shooters almost finish chameleons |
Elves do not have enough regiments to threaten Temple Guard so decided to move around it and prepare the attack at Saurus warriors.
Archers and eagle claw all aim at chameleons and manage to kill all but one. Brave chameleon refuses to flee.
Outcasts - Turn 6
Archers and eagle claw all aim at chameleons and manage to kill all but one. Brave chameleon refuses to flee.
Outcasts - Turn 6
 |
| Yet again magic of the Slann makes Saurus unstoppable |
Saurus warriors charge Lions and again Slann uses his powers to toughen his army. White Lions fight bravely but are unable to do enough harm and are destroyed. Nearby Swordmasters are forced to retreat.
Outcasts - Turn 6
 |
| Elven regiments withdraw from the battle in good order |
Seeing that the battle is lost Archmage decides to pull back and Elves withdraw in good order. Both armies were bloodied but Lizardmen maintained the core of their army in their unbreakable phalanx formation.
After-battle thoughts
This time Adam got me and his 12-8 victory was fully deserved. Well done, Adam! He definitely remembered our discussion after the game during Hammer of Dave tournament. He deployed with refused flank so I could not envelope his forces from both sides. He also used magic to its full potential by throwing 5 dice for throne, which I often could not dispel and then either had free reign in terms of casting other spells or I simply failed to dispel them. That turned his Saurus into unkillable monsters and no wonder I could not harm them.
Adam also used my own mistakes to gain advantage. Here is what I think belongs to that category
1. Deployment - First I positioned too many units on the West and choked myself there, giving Adam the opportunity to destroy them. Second, I should have deployed more in a checkboard formation so I could have shot at skirmishers earlier or even attack them with archers thus sacrificing units that in this particular situation were expendable.
2. Movement - Even with the deployment I had I was too impatient with Western flank. I should have kept Lions and Swordmasters away (also to prevent being targeted by salamanders) and threaten Lizardmen by simply being there. Lions and Swordmasters are capable of winning against Saurus warriors even in frontal assault. Dragon Princes could still perform their salamander hunt duty. I also charged with them turn 1 in a wrong order. I declared the charge of the unit on the West against Salamanders first. Since they held I could not charge fleeing chameleons and since I failed longer charge against Salamanders I gained nothing there.
I could have restrained from charging skirmishers following turn, allowing Lions to attack Salamanders freely, without a risk of being attacked from the rear and by doing so I would block saurus warriors from joining the fight.
3. Stegadon - that was simply stupid. First, I should have kept Dragon Princes out of harm range. Or simply hold with them. Unfortunately Stegadons stampede destroyed enough sea guard that I lost steadfast and in the process both units and bsb were killed. A huge point swing that gave Adam his victory. That last turn charge against lions with Saurus could have also been prevented. I should have played safe as I had no good attacking lines to bring both, Lions and Swordmasters to the fight together and even with reavers at the flank I might have not been able to break the warriors.
In that context 8-12 loss seems to be very good result and I was happy indeed I didn't lose more points.
Cheers!
No comments:
Post a Comment