

Greetings!
In the last round of the first day of Clash of Kings Australia 2020 I had a great pleasure to play against Matthew who commanded an army of Orcs and friendly Trolls!
It was the second time I played against Matthew, as we did so a few months ago during a local event. It was, thus, a great opportunity for a re-match, although under 3rd edition of Kings of War this time. I was very curious what would be the composition of Matthew's army. I noticed some very interesting changes and as usual, great looking models on the other side of the table!
It was the second time I played against Matthew, as we did so a few months ago during a local event. It was, thus, a great opportunity for a re-match, although under 3rd edition of Kings of War this time. I was very curious what would be the composition of Matthew's army. I noticed some very interesting changes and as usual, great looking models on the other side of the table!
Gore Chariot Legion was obviously the first unit I noticed, as it was really intimidating! But all elements of Matthew's army looked really great! Here are the details of the army he brought to the tournament:
Gore Chariot Legion (GC), Chariot, Sir Jesse's Boots of Striding - 290
Ax Horde (AH), Heavy Infantry - 215
Troll Horde (T1), Large Infantry - 190
Troll Horde (T2), Large Infantry - 190
Longax Regiment (L1), Heavy Infantry - 155
Longax Regiment (L2), Heavy Infantry - 155
Skulks Troop* (SO1), Heavy Infantry - 85
Skulk Outriders* (SO2) - Cavalry - 105
Orclings* (O), Swarms - 60
War Drum (W), Monster - 80
Godpeaker (GS), Hero (Heavy Infantry), Heal (2), Shroud of the Saint - 115
Krusher (K), Hero (Cavalry) - 75
Flagger (F), Hero (Infantry) - Lute of Insatiable Darkness - 75
Gakamak (G), Hero (Cavalry) - 230
Matthew's army had the same number of elements as mine, with one less scoring unit and overall units strength 24. There were many units in that army that I could not defeat in one-on-one fights so I had to come up with the plan how to engineer combined charges to overwhelm more powerful foes. It was a challenge because the advantage of speed and manoeuvrability was not that big.
The Legion could outpace any infantry unit I had and simply smash it to pieces. While at the same time it was tough enough to take any frontal charge and destroy the enemy with the counter-charge. Trolls were as fast as my infantry and they too were good at receiving charges. Not to mention that if they are not defeated on the charge, then their regenerative abilities would quickly recover damage done.
Infantry Ax horde and Longax regiments were a bit slower but they too had good staying power, further augmented by the War Drum. Two mounted heroes, especially Gakamak, were good interceptors and made it more difficult to execute charges against slower infantry. I also noticed that the Godspeaker was equipped to heal and that would definitely help to minimise damage against heavily armoured units.
I would still seek the chance in outmanoeuvring Orcs and engineering the combined charges as usual. To an extend, I could avoid infantry for some time but I would need to have good positions to attack Trolls and especially Chariot Legion. What I wanted to use to my advantage against the Legion in particular, is the fact that due to large foot print, it is possible to attack it with many units at the same time. And it is difficult to cover the flanks to prevent attacks from such directions.
Here is my army list for reference.
Outcasts (Elves) - Army List
Stormwind Cavalry Regiment (S), Cavalry - 215
Palace Guard Regiment (PG1), Infantry - 160
Palace Guard Regiment (PG2), Infantry - 160
Kindred Archers Regiment (A), Infantry - 120
Drakon Rider Regiment* (DR1), Large Cavalry - 165
Drakon Rider Regiment* (DR2), Large Cavalry - 165
Forest Shamblers Regiment* (FS1), Large Infantry - 120
Forest Shamblers Regiment* (FS2), Large Infantry - 120
Silverbreeze Cavalry Troop* (SB1), Cavalry - 130
Silverbreeze Cavalry Troop* (SB1), Cavalry - 130
Silverbreeze Cavalry Troop* (SB1), Cavalry - 130
Silverbreeze Cavalry Troop* (SB1), Cavalry - 130
Lord on Drakon (DL1), Hero (Large Cavalry) - 170
Lord on Drakon (DL2), Hero (Large Cavalry) - 170
Elven Archmage (M), Hero (Infantry), Inspiring Talisman, Lighting Bolt (5) - 115
Army Standard Bearer (AS), Hero (Infantry) - 60
Terrain
 |
| Terrain Details |
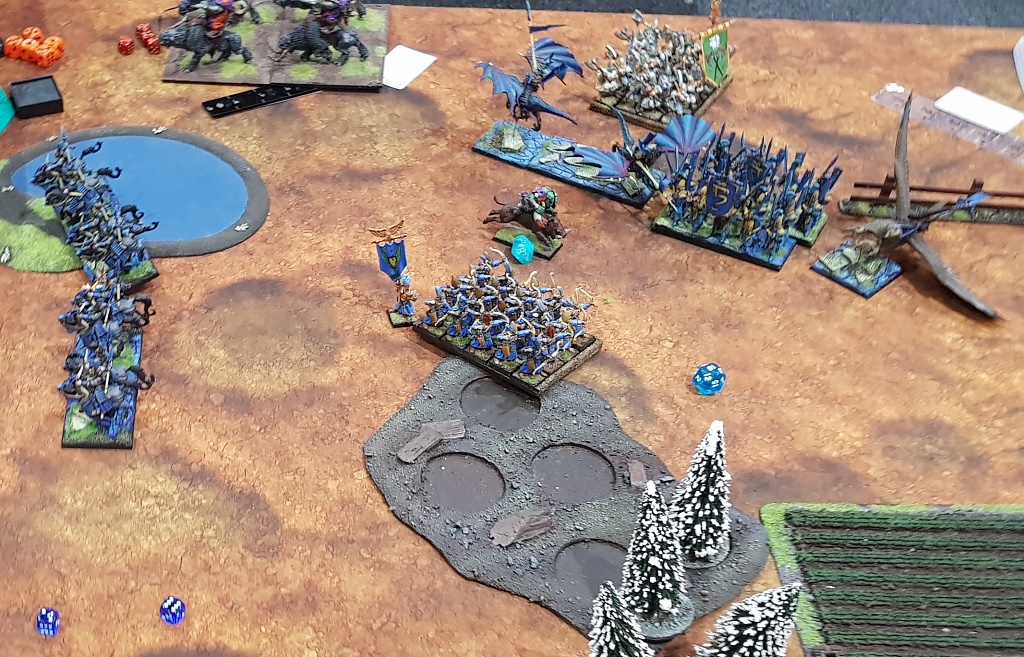
Deployment and Scenario
 |
| Elves vs Orcs |
 |
| Deployment of the Armies |
In this round we played Invade as scenario, another classic one and relatively straightforward to remember. A very good option for the last game of the day!
In this scenario, if possible, I want to engage the enemy in melee on his own territory. In this way I am blocking the foe from fulfilling the scenario objectives while potentially obtaining my own goal. If my units survive of course!
Matthew deployed his units that would significantly limit the efficiency of my shooting. I don't have much in terms of ranged attacks but it can still hurt if the targets are in the open. So his units were either in cover or not visible at all.
I thought I would be able to use more space on my right and this is where I placed my Stormwind cavalry. Legion seemed to be a bit isolated there so hopefully I would be able to attack it with a few units of my own.
I deployed some forces on the left to make advance of the Orcs a bit less easy but I intended to delay and slow enemies there. Only if my shooting is efficient I may consider some charges against the Orcs there. Otherwise, the units were too tough for me to attempt frontal assaults.
 |
| Deployment after Scout moves. |
Outcasts - Turn 1
 |
| Elves make the first move. |
 |
| First shots! |
Elven forces advanced more or less at the same speed to try and keep the plan secret. Silverbreeze and Archers aimed at the biggest infantry unit in the enemy army but the damage done was not yet substantial.
Orcs - Turn 1
 |
| Orcs send their outriders first. |
 |
| Green Horde on the roll. |
Orcs marched forward as well. After all, the objective was to invade, something Orcs would do anyway! Main forces advanced on Elven left flank, while the centre and units on the right adjusted the positions to keep an eye on Elven manoeuvres.
Outcasts - Turn 2
 |
| Elven bait. |
 |
| Early attacks on seemingly unworthy targets. |
Elves begun executing the next stage of the plan, which was to slow down on the left and speed up on the right. In addition, Forest Shamblers and Drakon Riders attacked what looked like unworthy targets. But by doing so they forced Orcs to counter attack these particular regiments. Otherwise, they would add to the next wave of Elven charges.
Orcs - Turn 2
 |
| Orcs responded! |
 |
| Powerful counter attacks. |
Orcs kept advancing on the left but still a bit slow, as the close proximity of the Elven fast regiments was not something to ignore.
But they unleashed their power on the centre and right were they attack arrogant Elven units who dared to challenge them. Both Forest Shamblers and Drakon Riders perished!
Outcasts - Turn 3
 |
| Elves can fight too! |
 |
| Orcs were outmanoeuvred! |
As the Orcs took the bait, Elves could now attack in force. First. Palace Guard regiments and Drakon Lord combined their efforts to attack slightly damaged Horde of Orc infantry and managed to rout it! The attack was even more powerful thanks to one of the regiments attacking down the hill.
Then Stormwind cavalry, spotting the opportunity to charge the enemy while avoiding Orc Chariots, and supported by unusually brave Archers, attacked and defeated horde of Trolls!
That was a very important success for Elven army, that was already sending second regiment of Drakon Riders to support the centre in case of prolonged attack.
Orcs - Turn 3
 |
| Orcs keep fighting! |
 |
| A gap in Orcs' battle line. |
Despite powerful Elven attack, the battle was far from over and Orcs were actually very happy that Elves are proving to be a worthy opponent!
They kept advancing on the left while Chariots moved to face the enemy again. Stormwind cavalry was distracted by single Krusher but he made enough mess to disorder the formation.
Outcasts - Turn 4
 |
| Elves slow down the enemy on the left. |
 |
| And prepare to finally fight against the Chariots! |
Silverbreeze cavalry together with Archmage keep shooting at Longax but the damage is being quickly healed by the nearby Godspeaker.
However, the main threat was still present on the right flank. Drakon Lord attacked the Chariots all alone to buy a bit time for the rest of the units to prepare the attack.
Orcs - Turn 4
 |
| Power of the Orc chariots! |
 |
| Mistakes were made! |
Unfortunately, Elves made some mistakes and paid dearly for the overlook. Despite the best efforts of the Drakon Lord, the Chariots ignored him and raced right into Stormwind cavalry. Even at lower speed, the Chariots were deadly and Elven Knights were not able to hold against such a powerful enemy.
Outcasts - Turn 5
 |
| Chariots are finally defeated! |
 |
| Elves make sure even the Chariots Legion does not survive the attack. |
Although losing Stormwind cavalry is always a significant damage to the army, Elves mounted yet another combined attack, this time aimed at the most powerful Orcs' unit. This time even the Chariots were not able to hold the ground and were finally routed!
The shooters tried to destroy small units of Orclings for a change but their shots were not effective this time.
Orcs - Turn 5
 |
| Yet the Krusher fight on! |
 |
| Place swap. |
At this stage it looked like Elves and Orcs swapped the places and remaining units of both armies found themselves in the enemy territory.
For time being Elves seemed to have a few more units there but savage Krusher routed Drakon Riders all by himself and suddenly Elven advantage did not look like advantage at all!
Outcasts - Turn 6
 |
| Elves can't get rid of the Krusher! |
 |
| Archers missed! |
Elves attempted to secure their positions and kept shooting at the enemy. However, instead of focusing on the notorious Krusher, only Archers aimed at him. It was not enough to get rid of this Orc hero and he was about to make some trouble again!
Orcs - Turn 6
 |
| Lucky Elves! |
 |
| Gakamak finally charged the enemy! |
(Edit: I think I didn't take photos for turn 7 and it seems to me that there should have been one. However, I definitely did not do much while Matthew had the opportunity to swing the balance of the battle with the last charge!)
The last word belonged to Orcs and while Elves kept avoiding the group of regiments on the left, mounted heroes were fast enough to catch up. It was thus up to Gakamak and Krusher to destroy at least one Silverbreeze unit to change the outcome of the battle!
Unfortunately for Orcs, Silverbreeze miraculously stood the ground and Elves claimed the victory by the narrowest of margins!
Summary
 |
| Turn-by-turn animation summary |
After-battle
Many thanks to Matthew for a great game! What a battle to finish day one of Clash of Kings Australia! Despite some setbacks in the first half, Matthew kept his eyes on the objective and punished me for my mistakes. This game should have ended in a draw thanks to heroic actions of certain Krusher!
I got really lucky that the troop of Silverbreese was not routed as that allowed me to win the game by just a single point of Unit Strength and the game ended with the result 14:7 in my favour. We had very similar level of attrition, which had no impact on the overall score.
I was really happy with how the game evolved and that I was able to inflict sufficient damage while fighting on the enemy territory. I risked with Forest Shamblers and Drakon Riders but it paid off. Routing two powerful horde units is never easy but this time it worked. I must add that while Archers did not inflict much damage in that combined charge, I think it made the difference and allowed me to rout Trolls on the charge.
The mistakes were made, however and they almost cost me a game! First, I should have reformed Forest Shamblers a bit better so that Ax Horde would need to attack them frontally. Would that be enough for them to have a chance to survive and contribute to the counter charge I don't know. But definitely better to be attacked frontally than from the flank.
What is more important, however, and perhaps the biggest mistake on my part, was the way I attempted to block the Chariots with Drakon Lord. I did not move Archers and Stormwind to make room for him to get to the very centre of the enemy unit. If I did, that would have blocked the Chariots and Stormwind would have survived. Very important because they would contribute 3 US to the scenario!
The next mistake was to keep Silverbreeze too close to the enemy. I should have ignored the shooting and simply race far into enemy territory, where they would have been safer. And shoot at that indestructible Krusher too! :)
I am very curious about your impressions on both armies, flow of the battle and the battle report itself. If there is any aspect of the above you would like to discuss, please leave a comment!
I hope you enjoyed the battle report and thanks for reading!
very good game. It seems like the slight misposition on his chariots was also a blow for his battle plan. Good play leapfrogging them for the other unit to effectively remove them for a turn.
ReplyDelete