Greetings!
In the first game of the day two and battle 5 of the tournament I played against Stephen and his Abyssal Dwarfs. I have never played against Stephen before, although I believe we participated in the same events in the past. It was thus great opportunity for me to play against him for the very first time!
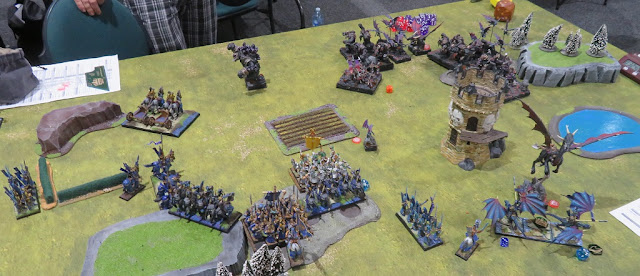
Stephen brought an army that had almost ever model from Mantic and it looked great! My pictures do not show properly how good the models look. Perhaps the dark color scheme was also more difficult to present nicely. But it was fantastic to be able to play against a very nice and characterful looking army! He had the following units in his force:
Abyssal Dwarfs - Army List
6 Lesser Obsydian Golems, Horde, Brew of Haste
- 10 Gargoyles, Troop
- 10 Gargoyles, Troop
- Greater Obsydian Golem, Monster
- Ba'su'su the Vile
6 Lesser Obsydian Golems, Horde
- Supreme Iron-caster on Great Winged Halfbreed, Hero, Surge (10), Banner of Griffin
10 Abyssal Halfbreeds, Regiment, Brew of Courage
- Overmaster on Great Abyssal Dragon, Hero, Blade of Slashing
20 Crossbowmen, Regiment
20 Crossbowmen, Regiment
To me this army has three components. Slow but tough battle line of Golems supported by the Supreme-Ironcaster. Fast assault force in the form of Abyssal Halfbreeds, Overmaster and always notorious Ba'su'su. And support of Gargoyles and allied Crossbwomen.
I expected Golems and Superme Iron-caster as well as Halfbreeds and Overmaster to operate together. Ba'su'su is more of a wild card and can be used in many missions, either individual or as an additional support.
I already learned how tough Golems can be and I needed overwhelming force to have that opportunity to rout them. In order to do that I had to take care of the fast elements first. It was not easy because neither Overmaster nor Ba'su'su are easy targets to ground, let alone to rout. At the same time I had to get rid of the crossbowmen and gargoyles as they can interfere with my movement.
However, the fact that the main battle line is slow creates a dilemma. Should the fast element move forward alone or should they slow down and wait for the shambling golems but give up the speed and maneuverability advantage?
I wanted to use that as an opportunity to divide the army and try and deal with separate elements one at a time. My plan was to eliminate Crossbowmen and Gargoyles first (provided I had a chance to do so) and then try and tempt the faster elements to move forward without support of the slower golems. If I succeeded in achieving these two goals I should have enough time to attempt an attack on golems with realistic chance of routing them too. Of course that is an ideal situation where I still have units left to do so! After all, hunting dragons always comes with a high price!
Terrain
 |
| Terrain Details |
Scenario and Deployment
 |
| Deployment - Left flank view. |
 |
| Deployment - right flank view. |
 |
| Deployment and tokens placement. |
We played Eliminate scenario and this was an additional challenge for sure. In this scenario all my tokens went to Drakon Riders, which are the fastest and hard hitting elements of the army. That created a dilemma where on one hand I wanted to use them aggressively and move to the fights, preferably by getting around the flank while at the same time I had to protect them due to scenario conditions.
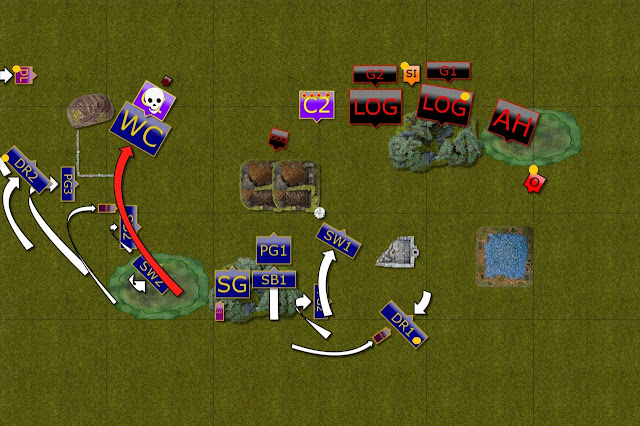
I also realized that Golems would be perfect to get to the middle of the table and claim or at least contest the middle token. Thus I modified the plan as follows. I decided to deploy on the left flank because it allowed me to use some initial cover but I would have relatively open space to attack any units there. My regiments were also close enough to the center token to be able to contest it.
At the same time I left a small contingent on my right to create a bait. I decided I cannot position too many units there as it would discourage Stephen from approaching against it with his Halfbreeds and Dragon. What is more, I also needed mutual support on my left flank to be able to either bait and tie down Ba'su'su or discourage it from attacking any of my units.
This deployment would also allow me to bring my shooters against Crossbowmen and create local superiority with ranged attacks to hopefully get rid of them fast and have room to maneuver.
It happened that I got the first turn this game.
Outcasts - Turn 1
 |
| Outflanking maneuvers. |
 |
| Setting up the trap - stage 1 |
Elves moved towards the enemy as planned. On the left flank Drakon Lord and Riders tempted Ba'su'su to charge either of them while the shooters aimed at their evil kin and already inflicted some damage.
Abyssal Dwarfs - Turn 1
 |
| Abyssal Dwarfs mirror the maneuvers on their flank. |
 |
| Shambling forward. |
The army of Abyssal Dwarfs mirrored the Elven maneuver but at a bit slower pace. With smaller volume of the arrows they also could not inflict similar damage upon their foes either.
Outcasts - Turn 2
 |
| Attack on the left flank. |
 |
| Tempting the dragon! |
 |
| Setting up the trap - stage 2 |
One of the units of the crossbowmen were badly damaged so the War Chariots regiment was sent to finish them off. Thanks to that the Drakons could also maneuver with a bit more freedom as vile Ba'su'su could not see them at the moment.
That allowed the shooters to aim at the second unit of the Twilight Kin. At the same time, the Drakons on the right flank stayed in the charge range of the Overmaster while nearby Palace Guard moved in to support. Would he take the bait?
Abyssal Dwarfs - Turn 2
 |
| Overmaster vs Drakon Riders! |
 |
| Ba'su'su flies to the rescue. |
 |
| Re-arranging the battle line. |
The Overmaster took the bait, attacked the Drakons but did not inflict that much damage. However, they still got wavered. In the meantime, Ba'su'su was flying towards this area to support the Overmastr while Greater Obsidian Golem was sent to slow down the Elven units on the left flank.
Outcasts - Turn 3
 |
| Counter attacks! |
 |
| Dragon is pinned down - for now. |
Elves used the opportunity to maneuver on the left flank without immediate threat to the units there and re-arraged the battle line too.
In the center, the shooters routed second regiment of Crossbowmen while Storm Wind cavalry attacked Ba'su'su to occupy it for a while. Last but not least, Palace Guard flank charged the Overmaster and wounded his monstrous mount enough to stop it from flying - for now.
Abyssal Dwarfs - Turn 3
 |
| Ba'su'su to the rescue! |
 |
| Ba'su'su claims the trophy! |
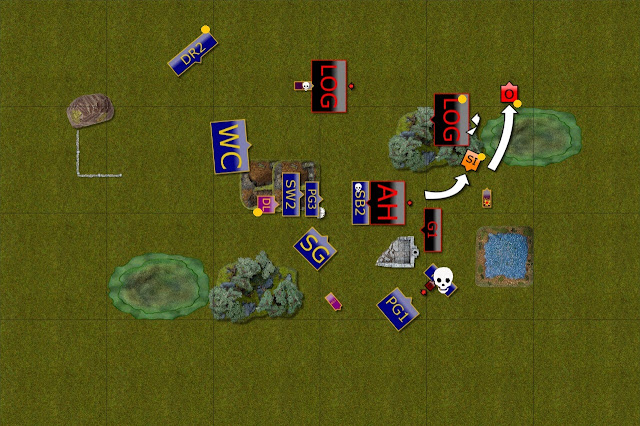
Unfortunately for the Elves, they didn't not cover all the bases and notorious Ba'su'su, although grounded, sprinted towards the Drakon Riders and routed them! That allowed the Overmaster to focus on Palace Guard who held their ground but got wavered. It looked like the hunters got trapped themselves!
Outcasts - Turn 4
 |
| Blocking maneuvers. |
 |
| The show must go on! |
The plan did not work out and the gamble backfired but the battle was far from over. Elves responded by blocking the right flank and few counter attacks in order to clear out the area to prepare for the last stage of the battle.
Abyssal Dwarfs - Turn 4
 |
| Overmaster flies to safety. |
 |
| Ba'su'su claims another unit. |
Although it was tempting to attack more Elven units, the Overmaster turned around and flew back to the safety of his own army. Ba'su'su covered that withdrew by attacking another Elven unit, this time routing troop of Silver Breeze cavalry.
Outcasts - Turn 5
 |
| One more shot. |
 |
| Elves keep fighting. |
Palace Guard troop chased the Dragon anyway while the regiment kept Ba'su'su busy. In the opposite corner of the battle field the Drakons managed to crumble Greater Obsidian Golem and the units in the center tried to block the middle token.
Abyssal Dwarfs - Turn 5
 |
| Ba'su'su picks another target. |
 |
| Protecting the Overmaster. |
Only Ba'su'su was active this time as he charged Palace Guard troop, wavering it. The rest of the army was busy hiding the Overmasters so that he is not being shot at again!
Outcasts - Turn 6
 |
| Blocking the access to the middle token. |
 |
| Elven attacks |
Elves tried some desperate measures to turn the tide but the brave Army Standard could not inflict that one point of damage to attempt to rout the Overmaster. The rest of the units kept blocking the enemy from getting to the center of the battle field.
Abyssal Dwarfs - Turn 6
 |
| Abyssal Dwarf slowly eliminate Elven units |
Abyssal Dwarfs send their badly wounded Overmaster to the safety and keep pressing against Elven units. Some of them got eliminated but there were still a few blocking the path.
Outcasts - Turn 7
 |
| Last attacks. |
 |
| Elves keep blocking the enemy units. |
Elves attacked more out of necessity as they simply had to keep their battle line intact in order to prevent the enemy from picking them apart. The charges did not do much damage but occupied the foe.
Abyssal Dwarfs - Turn 7
 |
| Last charges. |
The battle was won by Abyssal Dwarfs but they attempted one more attack to rout a few Elven units. It didn't change the overall outcome much, however, and both armies disengaged.
Summary
 |
| Turn-by-turn animation summary |
After-battle thoughts
Many thanks to Stephen for a fantastic game and congratulations on the well deserved victory! I think after this game the army should be named "Ba'su'su and friends" :)
I also apologize as I think I may not have gotten the details correct in the 7th turn. I did not take the picture of the final stage and I can't recall which units I really lost in the end.
However, that does not change the fact that Stephen won as he claimed one of the tokens in the melee while the middle one was contested. And even if I did better at protecting it, i.e. moving some units forward so that Gargoyles would not have been in 3" distance from it, 2 points for the token won in melee was still enough to claim victory.
I guess this game really went in Stephen favor when I made a mistake in my turn 3 and didn't block Ba'su'su from attacking wavered Drakon Riders. I took risk with them but if I kept them alive then the chances to hunt down that dragon were real. What I noticed a second too late was that I didn't move either my Silver Breeze to block the passage towards the Drakon Riders. It was a good idea to attack him to prevent him from flying by I didn't prevent it from charging though.
It is not a guarantee that Overmaster would have not killed my Army Standard and then advanced into Drakon Riders. But this maneuver would have been more risky for Stephen too.
Unfortunately, I repeated that mistake later when I didn't block Ba'su'su from charging my Palace Guard troop that was chasing the Dragon. Perhaps they would have been blocked by Gargoyles anyway but again, I made it an easy choice for Stepehen to send Ba'su'su against another target and freeing Gargoyles to charge the center of my formation instead.
Yet another game where it was close but in the end the consequences of my mistake led to the defeat. Well done to Stephen for spotting them and exploiting them to his advantage! It was a great game and I am looking forward to the opportunity for a rematch!
Thanks for reading!


Hey Swordmaster
ReplyDeleteI really enjoyed this game, thanks
On the blocking of Basusu, I realised on reading the report that it was basically difficult to block Basusu with the silver breeze...assuming I spotted the following in game. As the Drakons are height 3, Basusu could see over the silverbreeze. It may have been possible to pivot Basusu (as he is individual) to a position where I could still see the Drakons and do one 90 degree pivot and still connect on the charge.
I think there would have been a play that could block the charge, but it may have been different to what we discussed after the game.
I was very pleased with how I played the scenario as I think I lost the game if I committed into the heart of your army and played to win the center objective. My game plan from the start hinged on either the Dragon or Basusu killing one of your scoring units and then keeping my units safe.
Steve
Hi Steve!
DeleteThanks a lot for your comment and finding time to post it! I really appreciate it as it is always great to have some feedback from the opponents :)
I agree that even when grounded, individuals are still super mobile. Perhaps it would have been very difficult to block the passage for Ba'su'su anyway. The lesson for me, however, is that I didn't make an attempt to do so and I didn't see that opening until it was too late.
There are many paths to victory! I had to try and anticipate your battle plan, that is part of the game! It is clear that your idea worked perfectly and you won the game. My gamble back fired and even if in other circumstances I may have pulled out the trick it also makes me think about alternatives so that I can surprise you next time :)
Well done and congratulations once again on a well executed plan and fully deserved victory!
Cheers!
It’s always good to have the opponent able to comment and hear their side of the match!
ReplyDeleteBa’su’su was nerfed a bit, but I’m not sure it was enough. If I were still playing my Twilight kin, I would still take Basusu to every tournament (maybe not in every casual/friendly game as he can be quite frustrating to play against haha). But a well played game on both sides, and a great report to read!
Rules question: Steve mentioned how difficult it is to block basusu, especially from a height 3 unit which is very true. Correct me if I’m wrong but individuals get 1) a free pivot in any direction when declaring an action 2) the standard one pivot when charging and 3) a nimble pivot since individual grants nimble in this case, not fly which makes a difference when disordering comes into play? I’m unsure on point three and am away from my rulebook at the moment.
Looking forward to the next report!
Hi Dan!
DeleteYou are correct. As Ba'su'su keeps his Individual special rule, regardless if he can fly or not, he can pivot before the move for free and then have two pivots due to individuals being nimble.
In order to stop Ba'su'su from charging the drakons I would need to make sure that there is no physical gap for it to break through in between the units and the terrain.
Perhaps blocking by Silver Breeze and Army Standard would be the only option here. But as I have mentioned in reply to Steve it is more about the fact I missed that opening completely that worries me. I should have seen it coming and at least attempt to neglect that.
In fact, what I could have done the turn earlier is deny Ba'su'su the target to charge, i.e. Storm Wind cavalry. That, after all, brought him close to the action in the first place.
But that is also the conclusion made with the full benefit of a hindsight of course :D