
Greetings!
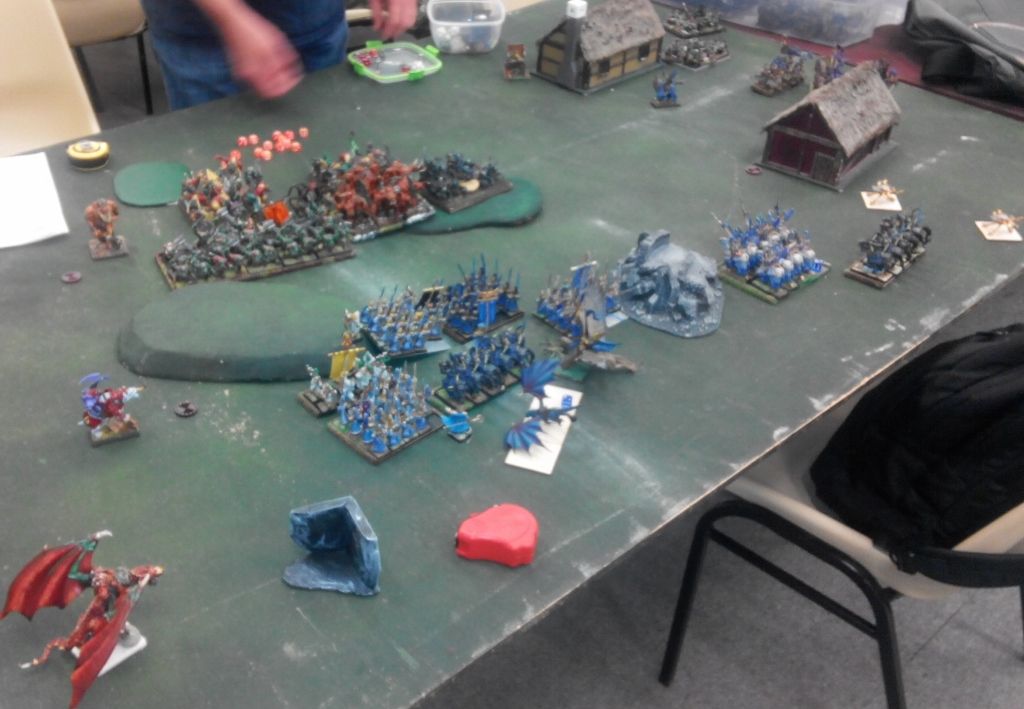
In game 3 I had a great pleasure to play against Tony, who this time brought his Orcs with some allied contingent of Goblins. I met Tony on a few occasions but I have never had a chance to play against him. He often plays with Ogres too but this time it was about Green Tide!
Orcs - Army List
40 Ax, Horde - 205
- War Drum, Monster - 80
- Krudger on Slasher with Wings, Hero, Medallion of Life (Regeneration 5+) - 315
20 Morax, Regiment, Blessing of the Gods (Elite) - 225
- Giant, Monster - 190
- Gakamak, Mounted, Hero - 240
20 Morax, Regiment - 200
10 Gore Riders, Regiment, Maccwar’s Potion of the Caterpillar (Pathfinder) - 205
10 Gore Riders, Regiment, Brew of Haste (+1 Speed) - 185
Goblins Allies
20 Rabble, Regiment - 75
- Big Rock Throwers, War Engine - 80
20 Rabble, Regiment - 75
- Big Rock Throwers, War Engine - 80
6 Trolls, Horde - 190
- Big Rock Throwers, War Engine - 80
- Big Rock Throwers, War Engine - 80
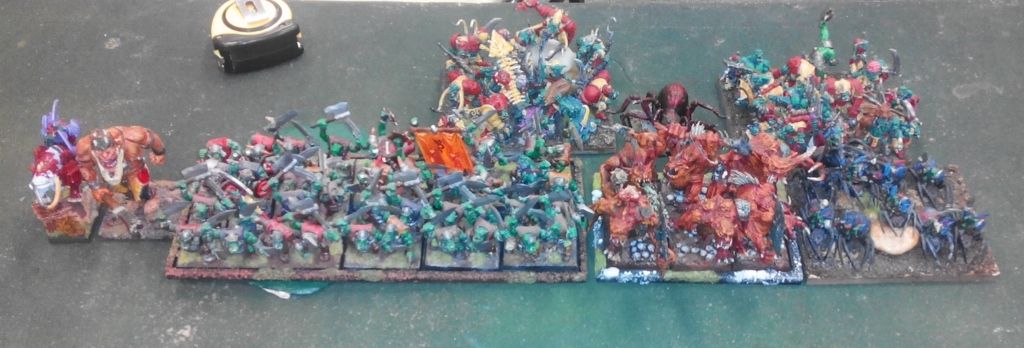
A nice mixture of tough as nails Orcs, even tougher Trolls and Monsters and Goblin helpers. I would call it a classical Orcs & Goblins army in any fantasy setting. It did look intimidating too which is definitely a good thing for Orcs & Goblins player. :)
As usual, let's have a closer look at each element that found its way to Tony's army.
40 Ax - Probably the main Anvil of the army, the center. With Defense 5+ and high nerve (backd up by the War Drum) these guys could hold against many dedicated attacks. With army wide Crushing Strength (1) they can then hit back properly too. What not to like? That unit is not even that expensive.
Fortunately for me I played against Ax hordes already so I know that as mighty as they are they can be routed too. First, with even wider frontage than regular infantry of other armies, they may be potentially attacked by more units. While it is still not a guarantee that this unit will be gone after initial attack, it may not be able to recover after repeated punch. And all the counter attacks would need to go against a single enemy too.
I thought then that my more flexible infantry line could comfortably take on that unit, as long as the flanks were protected.
20 Morax - half the size of the Horde of Ax, almost the same point cost. No surprise here as they have the same amount of attacks but hit on 3+. They are assault troops, the only concern for the Orcs player is how to make them hit the right combat.
They are more maneuverable than the horde, obviously, not as good armored either which means that I should expect them to go around the flanks of the front line. Or maybe even form the second wave. The cannot afford to hold against an attack of the heavy cavalry for example. Or be exposed to shooting. Either of these opportunities would be great to exploit though.
10 Gore Riders - two regiments of Gore Riders added some much needed speed to the army. On top of that one unit had Brew of Haste to make them as fast as my own knights and the other had Pathfinder ability. Probably the most popular upgrade for cavalry units in the game!
I still had a bit of advantage with my own fliers against them and if I could remove the faster unit early then the other one would have problems with outpacing my Storm Wind cavalry too. I guess that is why I brought some bolt throwers!
War Drum - I really like the idea behind this unit. It looks (sounds? :)) so obvious! And it is truly amazing for making the infantry line a bit tougher. Great addition because it adds so much to the army, both in the story line dimension and in game usefulness.
If I could find a way to jump over the enemy lines and single it out then it would be great as it is not that well protected and it does not have high nerve either.
Giant - There is quite a large population of giants in the world of Mantica, it seems, as they are very popular in many armies. And I am not surprised. They are reasonably fast, hit hard but also can hold the line all by themselves if there is a need. In my first game even the hardest hitting Storm Wind cavalry could not rout one on the charge. Fortunately for me this time there was only one of them!
Krudger on Slasher - very fast, hard hitting flier. Very hard to contain, good armor, regeneration due to artifact, it will be very difficult to first catch him and second to rout him. While he can pick and choose the fights as he likes.
Bolt throwers could potentially harm him or at last scare him a bit. But even with possibility to do some damage he will be able to heal himself. I think this hero is the toughest nut to crack in this army.
Gakamak - very interesting hero, definitely a fighter as he can hit hard with Melee 2+ and 7 attacks. As an individual he can also maneuver with easy. He seems to be a perfect leader for Gore Riders and I expected him to join either one or both units.
20 Rabble - Goblin allies are not great fighters at all. However, left unattended they can hold objectives, can slow advance of the enemy and few more attacks on the flank can also help. But their main role is to bring some Rock Throwers :)
6 Trolls - As popular as Giants if not more. They add to the army as they are faster than infantry, are tougher and hit harder. Basically, very versatile unit that can be used in many different ways depending on the need. I learned that the best way to deal with them is to attack them in force so that they cannot start healing back the damage done to them. But in order to do that I would need to find a way to isolate them first.
Rock Throwers - long range artillery, a very good choice I must admit. Without it the enemy might choose to sit tight and try to avoid slower infantry. But rock throwers may ensure that the opponent does not do that and may want to seek some combats, which is what Orcs want.
I expected them to hit something during the course of battle and that is why I needed to get to them fast. Fortunately, I had a few fast elements to do the job.
In general, I faced the army that hits hard in melee and would want to get there as soon as possible. My chance lied in the fact that all elements in that army have varied speed so there was a chance to separate them. And I had to do it one way or another because my units are too fragile to go into one-on-one combats.
Terrain
 |
| Terrain with Pillage markers. |
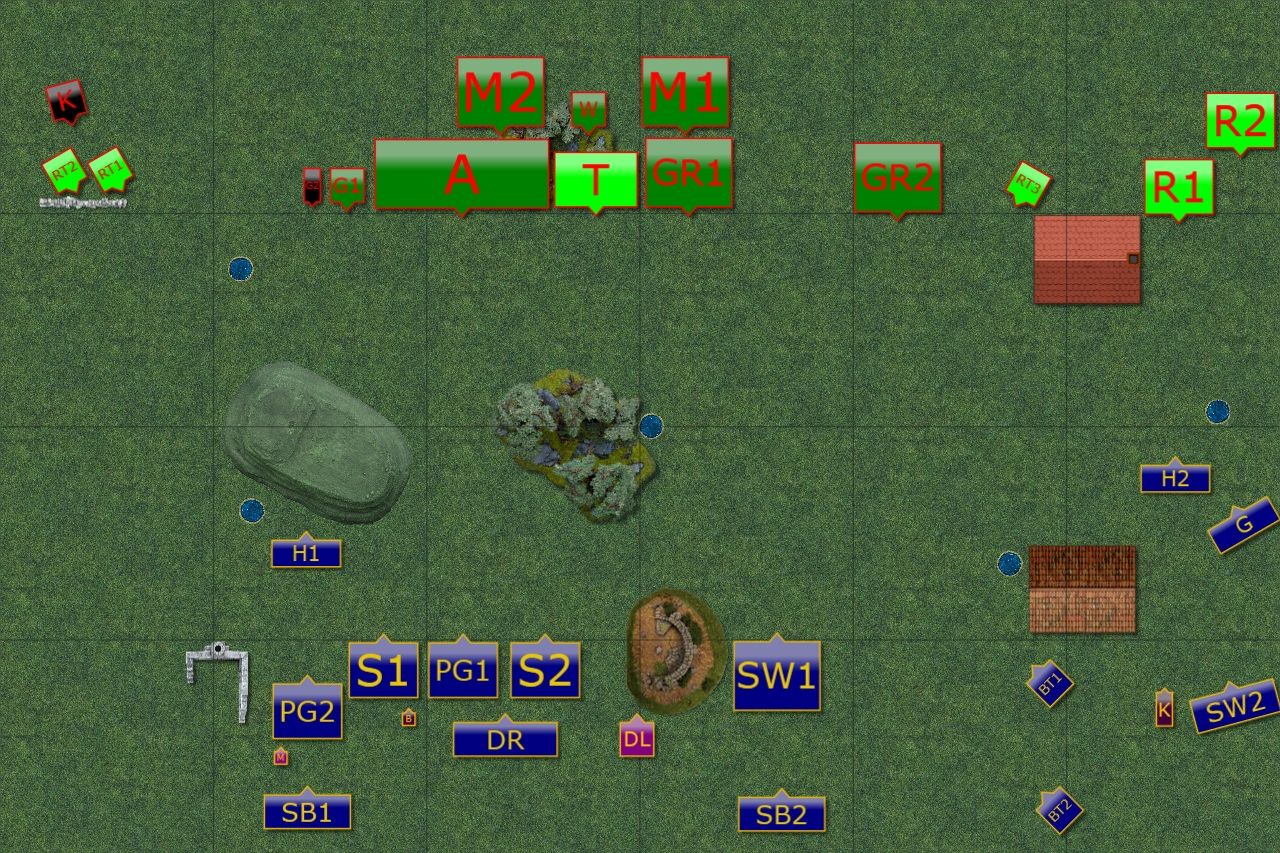
The scenario for this game was Kill and Pillage and we got 5 markers as shown in the map. It was the first time I played this scenario so I was not really sure how to place the markers properly. As they were more or less evenly separated over the battle field I had to wait until the deployment to make a final decision as to how to go after the objectives.
The terrain was interesting, it didn't have any elevated positions in the deployment zones and the hill and the forest in the middle (height 2 and 4 respectively) provided enough cover. In fact, these two terrain features blocked line of sight to all infantry so it created an interesting situation where units had to go into the forest or on the hill to see enemy army. But in doing so they could expose themselves to the attacks.
At the same time there were areas of open space that could have been used either by shooters or cavalry. I must say I really liked this particular terrain set up as it provided a lot of interesting opportunities and affected both armies.
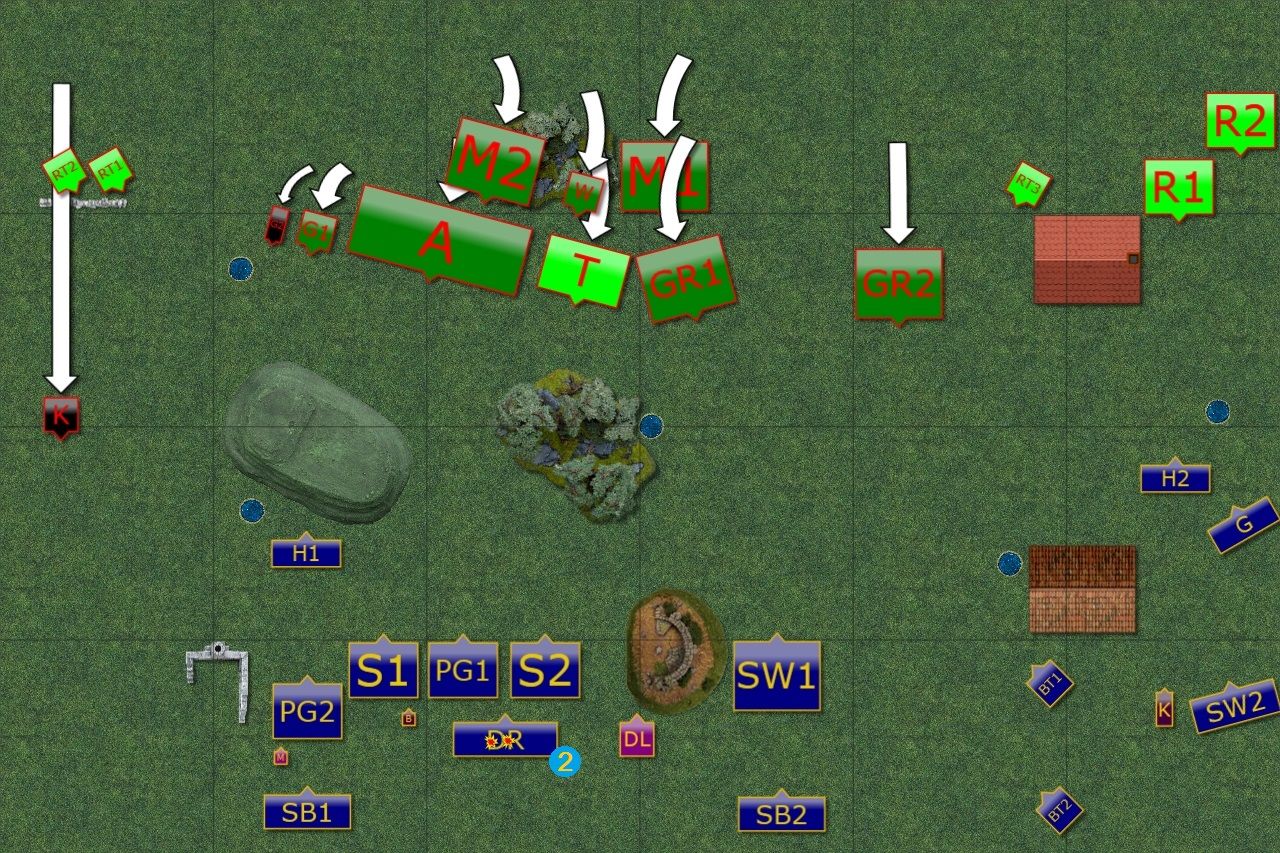
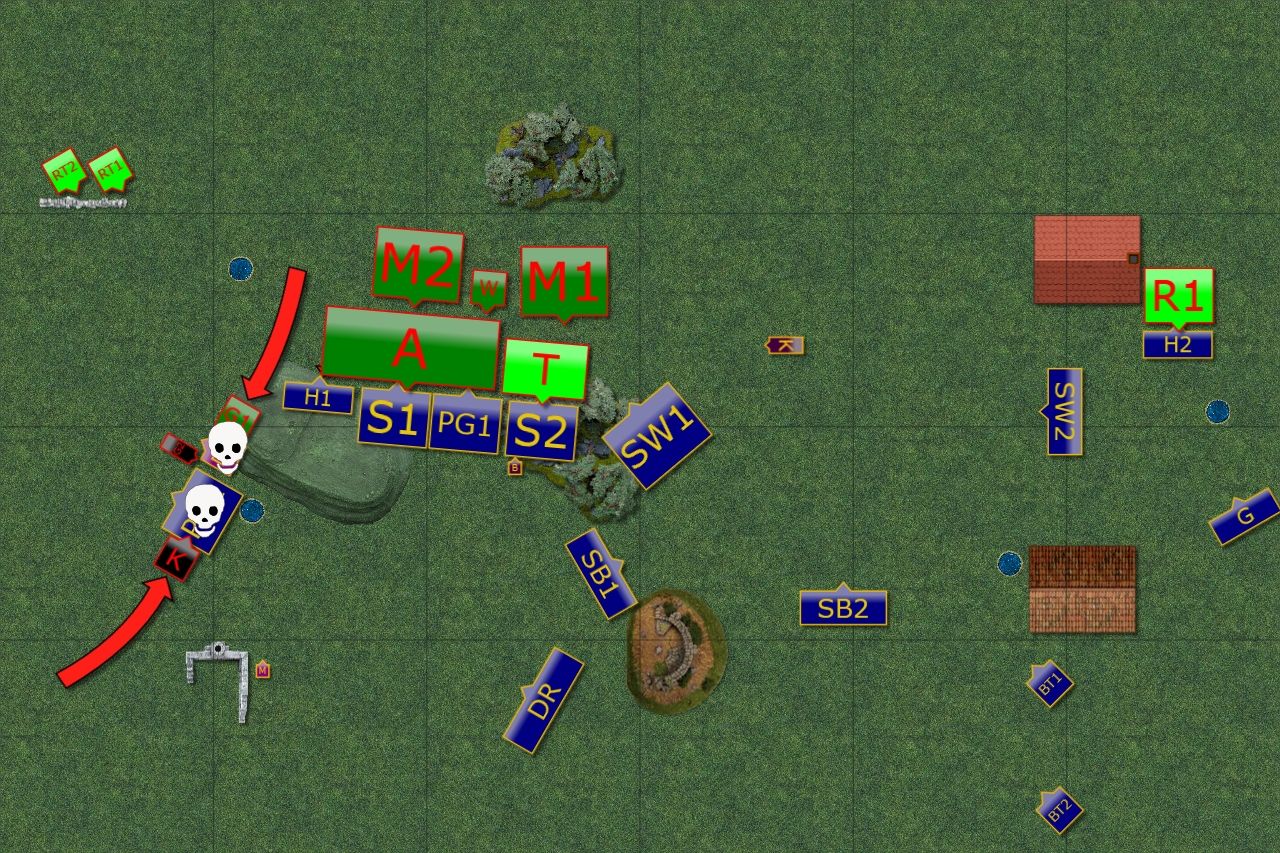
Deployment
 |
| Deployment before vanguard. |
 |
| Deployment order |
 |
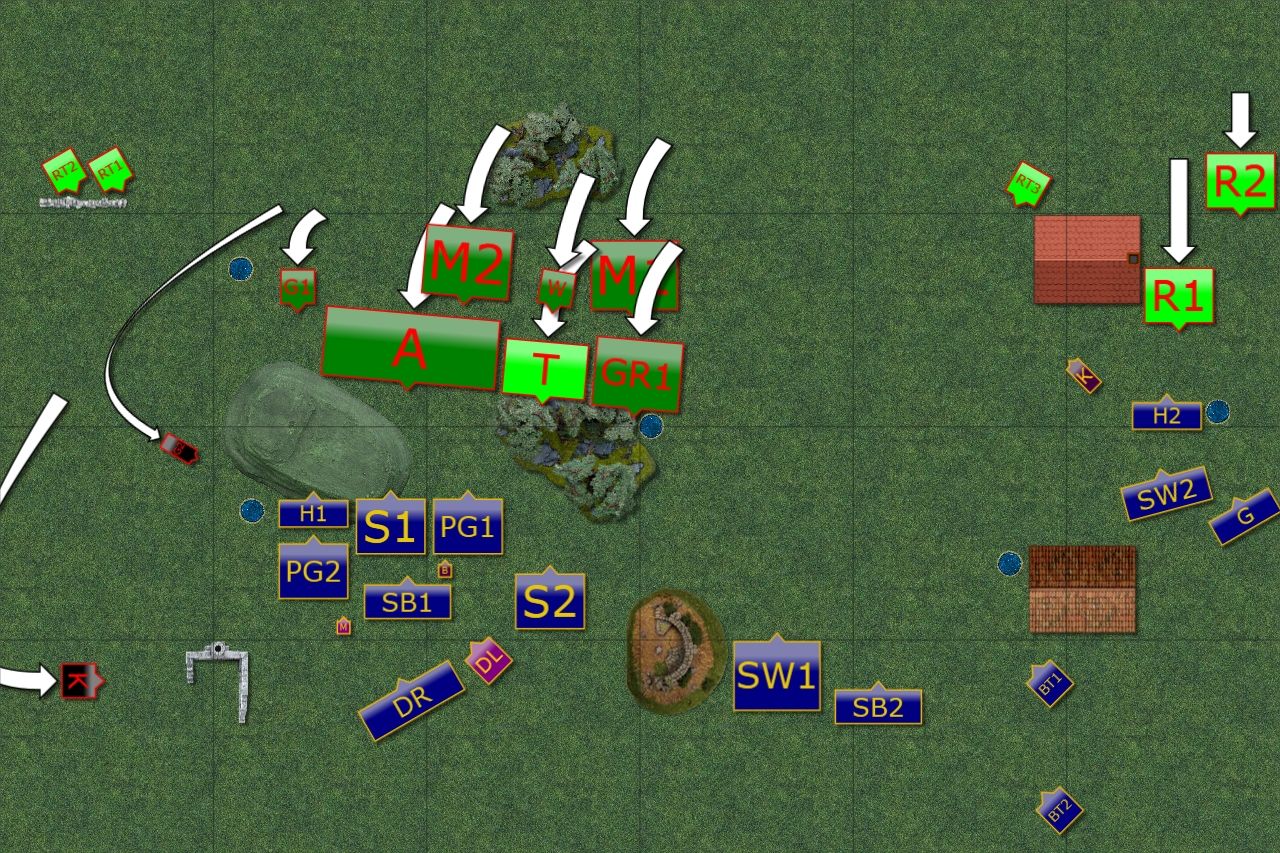
| Final deployment after vanguard. |
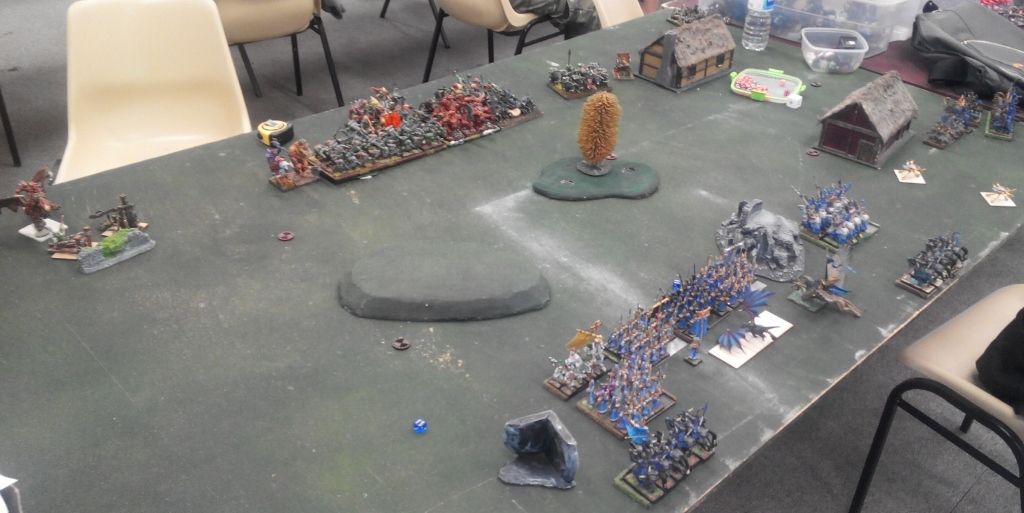
As expected, Orcs formed a very strong and tight formation guarded on both flanks. However, it still left space on my right flank and I wanted to use the Hunters and the Gladestalkers to deal with the Goblins. Then the shooters could control the objective.
The open space on the right flank was perfect for the Bolt Throwers and Storm Wind cavalry made sure to offer some threat to discourage some units to come too close.
Infantry formed on the left and I was ready to go head on against Ax horde. The fact that Morax formed second line was actually good because they could not engage my units directly. Of course that could have changed during the game. And I had to do something with Trolls and Giant on both flanks to be able to stay in good shape for some proper clash of the infantry formations in the middle.
I kept fast cavalry probably a bit too far to be used turn 1 but I didn't have good line of sight on that part anyway. I wanted them to form a reserve and to keep them alive until the last turns where their shooting could potentially rout damaged enemies. Their speed was also important for securing the objectives.
Last but not least I decided to position the fliers in the middle. That would help them to project threat over bigger area of the battle field, leave them more options to pursue and avoid being targeted by all 3 rock throwers in one go.
Tony won the roll off for first turn and his army started rolling towards my lines!
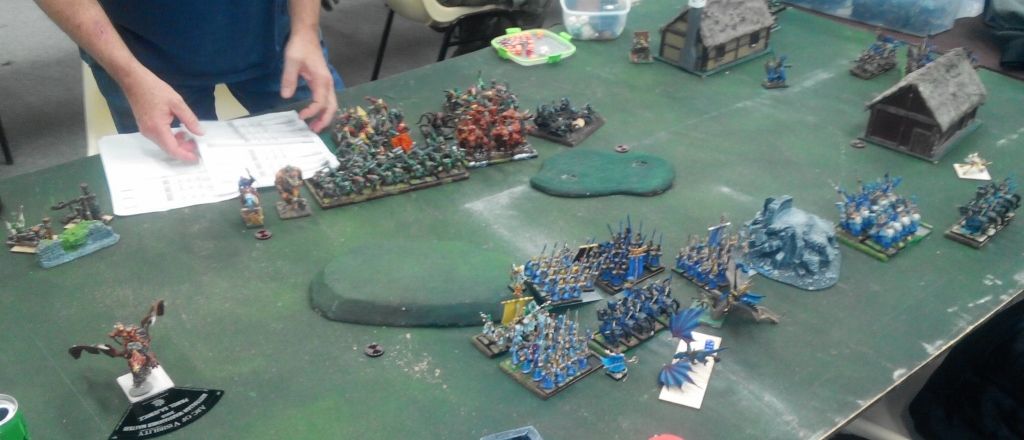
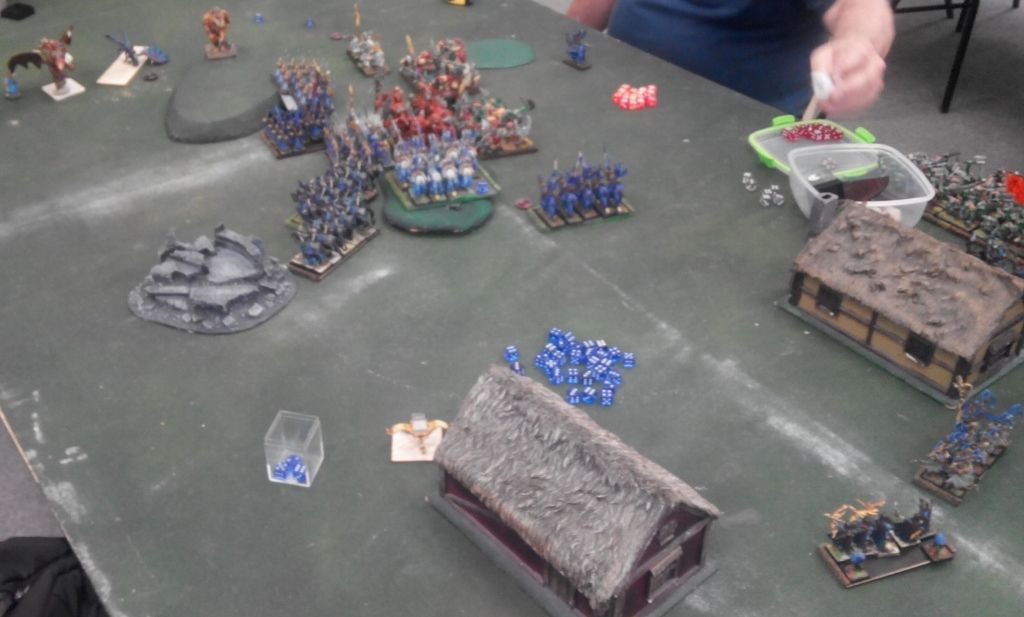
Orcs - Turn 1
 |
| Orcs on the march. |
 |
| Slow advance |
Orcs moved slowly, with the main battle line turning to meet Elven infantry. Gore riders were ready to engage the cavalry while Kruder use the opportunity and rode along the flank to occupy a better position.
Finally, rock throwers shot their deadly load and Drakon Riders suffered a bit from the early artillery barrage.
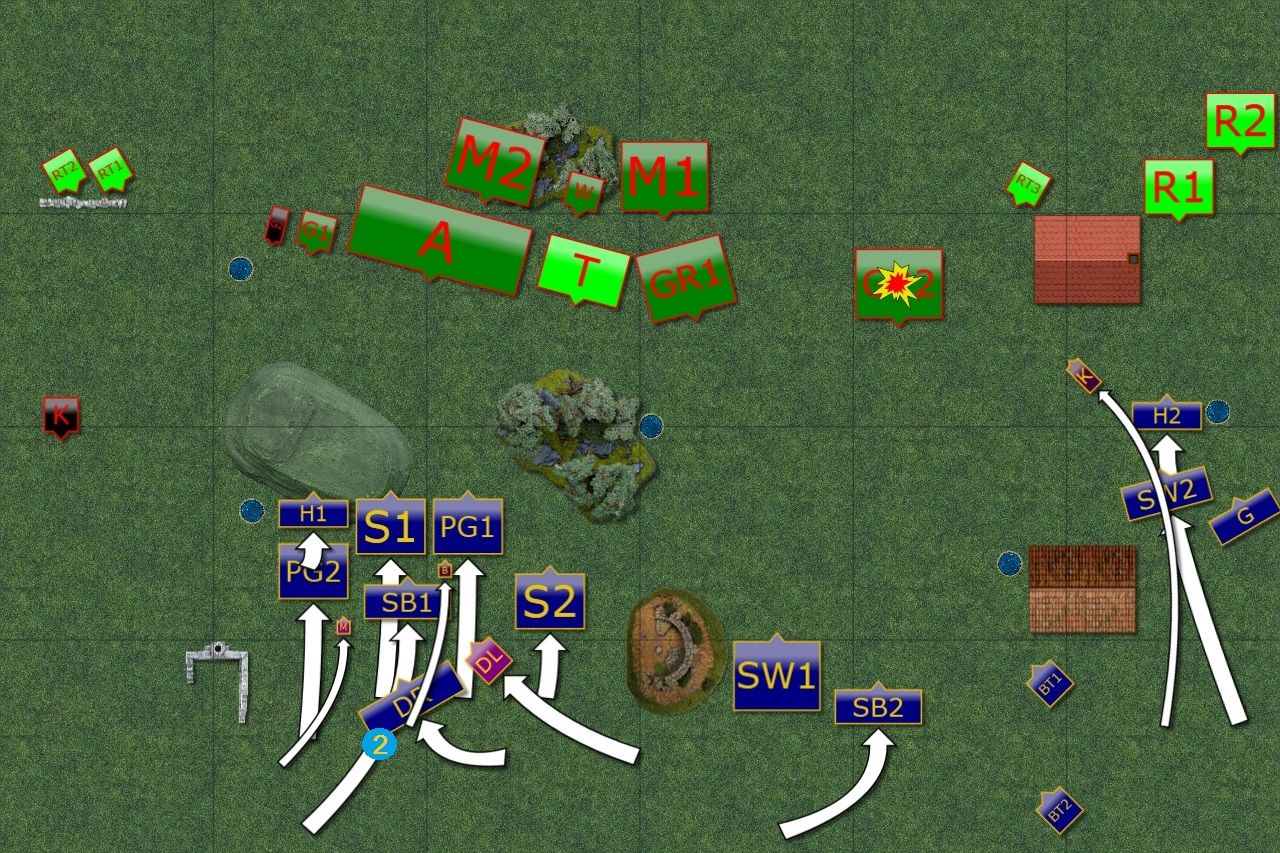
Outcasts - Turn 1
 |
| Elves do not shy from the enemy. |
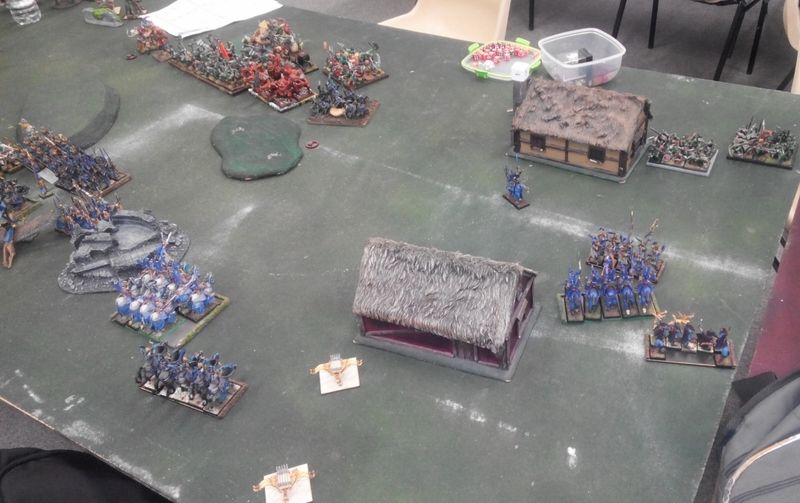 |
| Situation on the right flank |
 |
| Elven shooting proves to be deadly for the units left in the open. |
The Elves moved forward boldly but being careful not to get too close to the Orcs infantry just yet. Drakons stayed as a rearguard but moved a bit to potentially intercept the Krudger. Meanwhile, Bolt Throwers and Silver Breeze cavalry squadron took the opportunity to shoot at exposed Gore Riders. The result exceeded expectations as the damage done was so significant that Orcs were simply destroyed on the spot!
On the right flank the Gladestalkers shot at cowardly Goblins and the Hunters moved closer to be able to attack them soon.
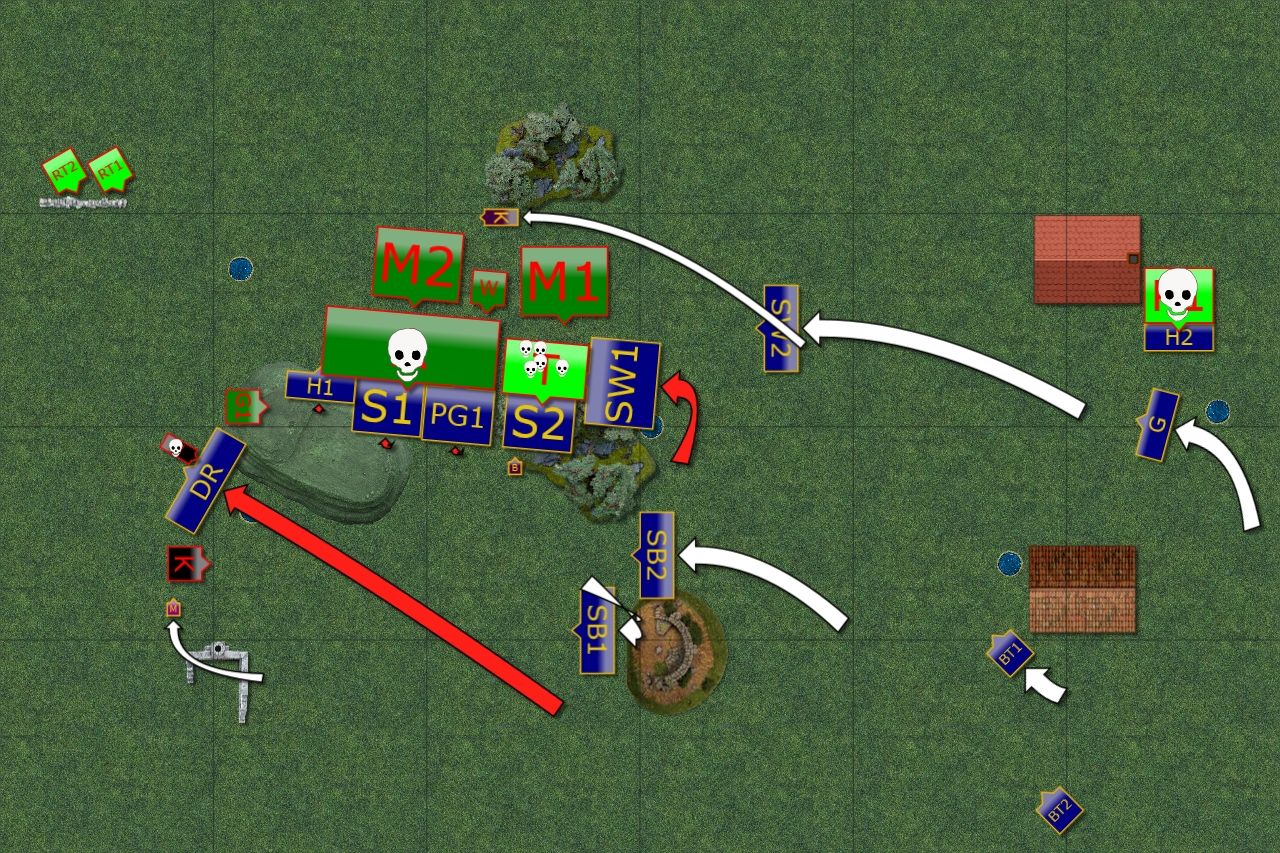
Orcs - Turn 2
 |
| Orcs get closer and also outflank Elven formation. |
 |
| Closing in. |
Orcs moved forward as if nothing happened. The solid front line gave Elven two options, to charge or to be charged. In addition, the presence of two powerful leaders on the left flank made Elven warriors uneasy.
This time Rock Throwers missed completely and it was now up to the Elves to make some very important decisions.
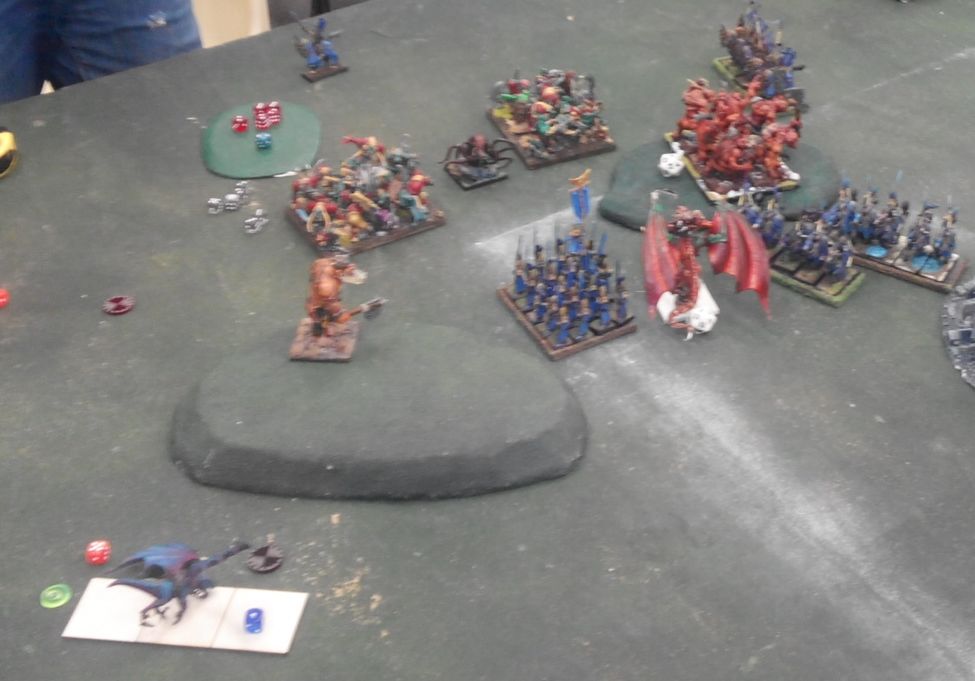
Outcasts - Turn 2
 |
| The clash of battle lines. |
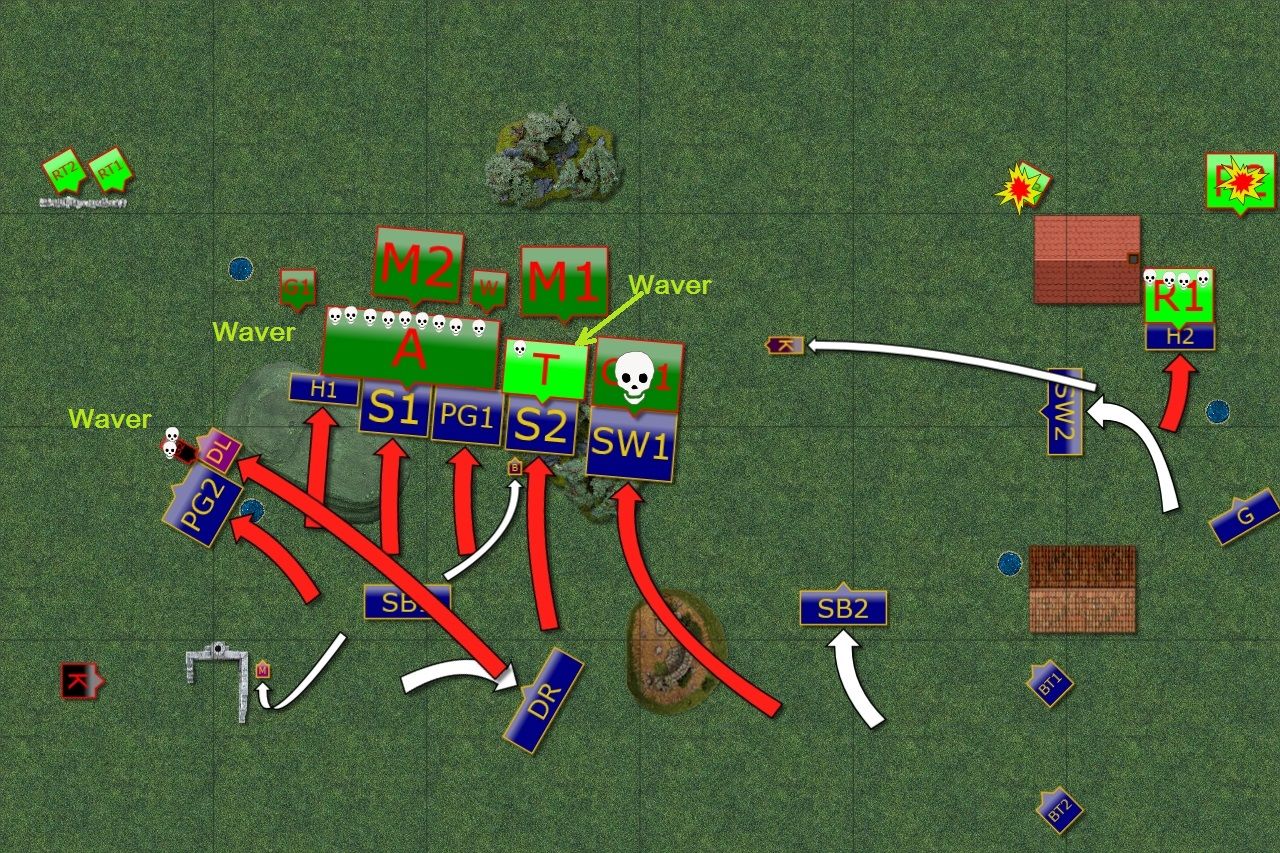 |
| Elves - first to fight! |
Elves took the opportunity and attacked first. The shooters managed to get rid of one of the Rock Throwers and a mob of Goblin rabble on the right flank. Storm Wind cavalry exploited a mistake of the Gore Riders who thought they might be safe in the Forest. Magical potion granted even greater level of agility to Elven knights and they routed their enemies.
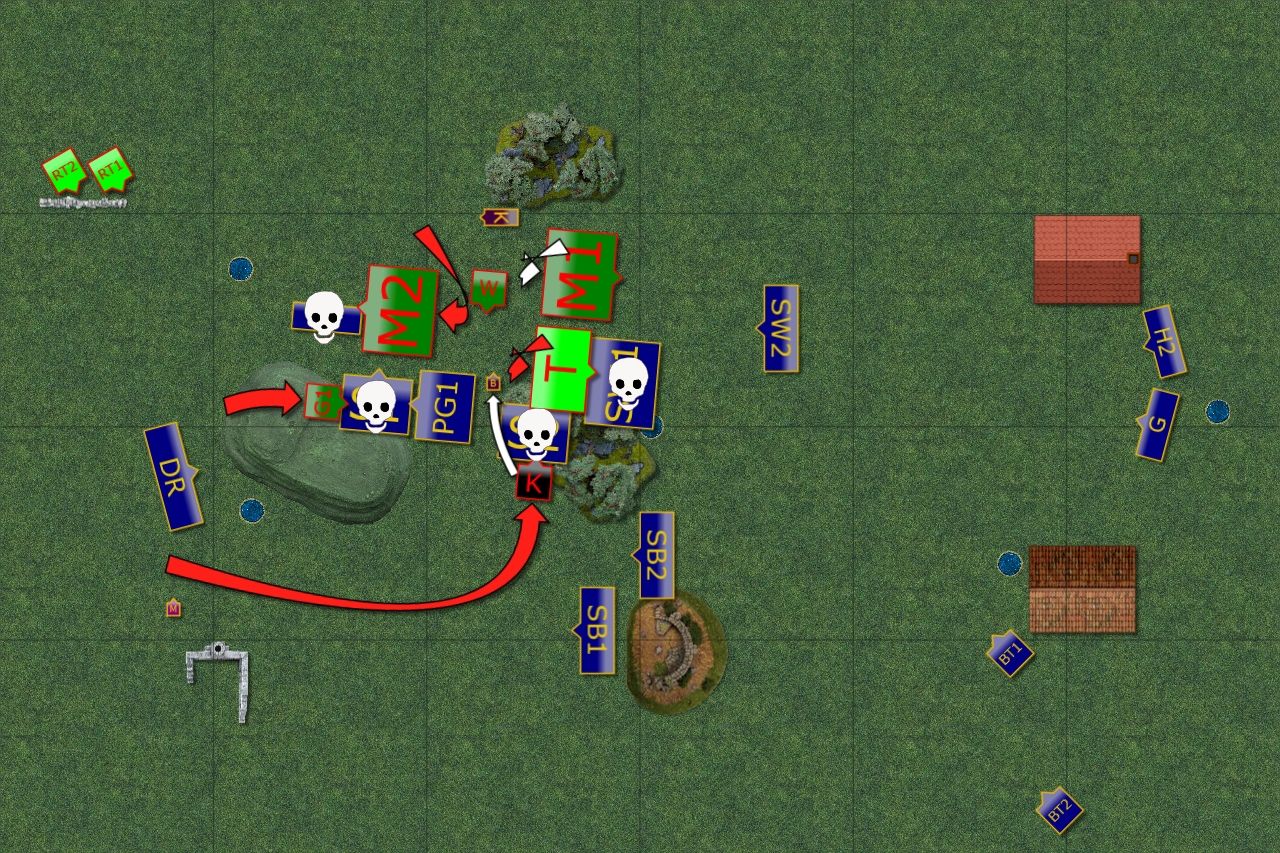
On the right flank Palace Guard and Drakon Lord attacked enemy leader but could not inflict enough damage to rout him. That was a risky move and both units were about to suffer the consequences, even if Gakamak had to spend some time regaining composure.
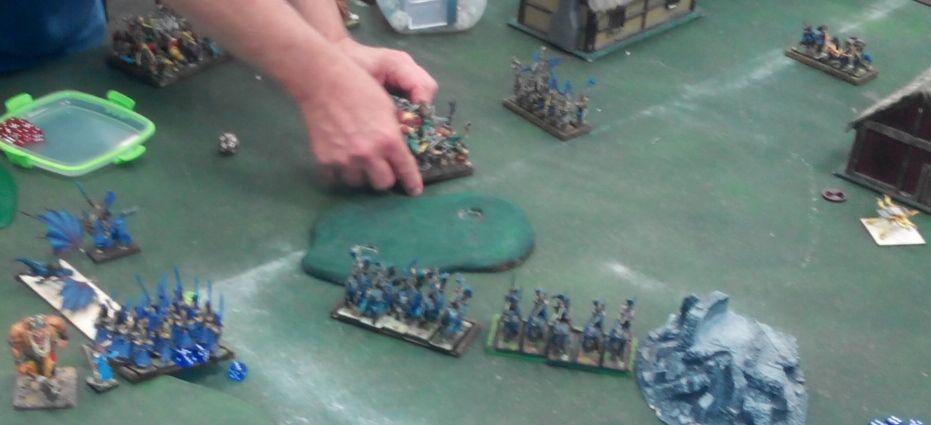
Three infantry units smashed into the Ax Horde as one and made such an impression on Orcs that they forgot to counter attack. (Edit: I managed to roll well for both damage and nerve roll to waver them). And then something unexpected happened:
Tobby the Troll watched with the amusement as a regiment of Elves armed with tooth picks charged into the forest. Agile warriors managed to jump over the fallen trees and other obstacles with easy but that affected their accuracy. One of them, however, tripped over his battle skirt and fall in a spectacular way.
Tobby the Troll has never seen the acrobatic performance before so this particular move both impressed him and made him laugh. He laughed so hard that he threw his enormous stone axe in the air to show his appreciation. Unfortunately, he also failed to catch it and the heavy object landed on the head of the biggest Troll in the group, simply known as Da Boss.
While Trolls are particular known for their thick skulls and it didn't make a single crack on the eyebrow of Da Boss, he had to maintain the discipline and made his way toward unfortunate Tobby. That naturally resulted in even bigger confusion among the group and all Trolls started "debating", completely forgetting about the outside world.
(Edit: Long story short, I inflicted a single point of damage and proceeded to roll double 6's to waver the unit :))
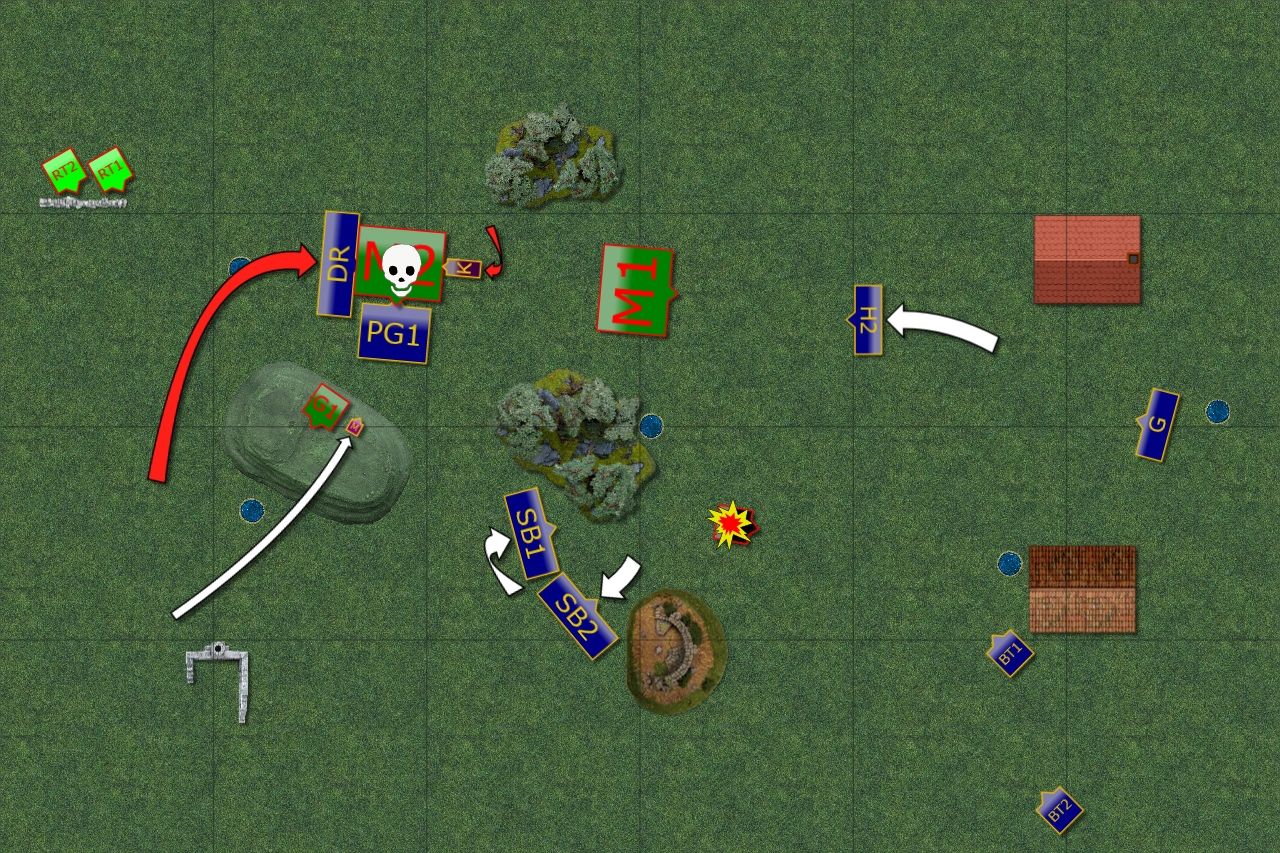
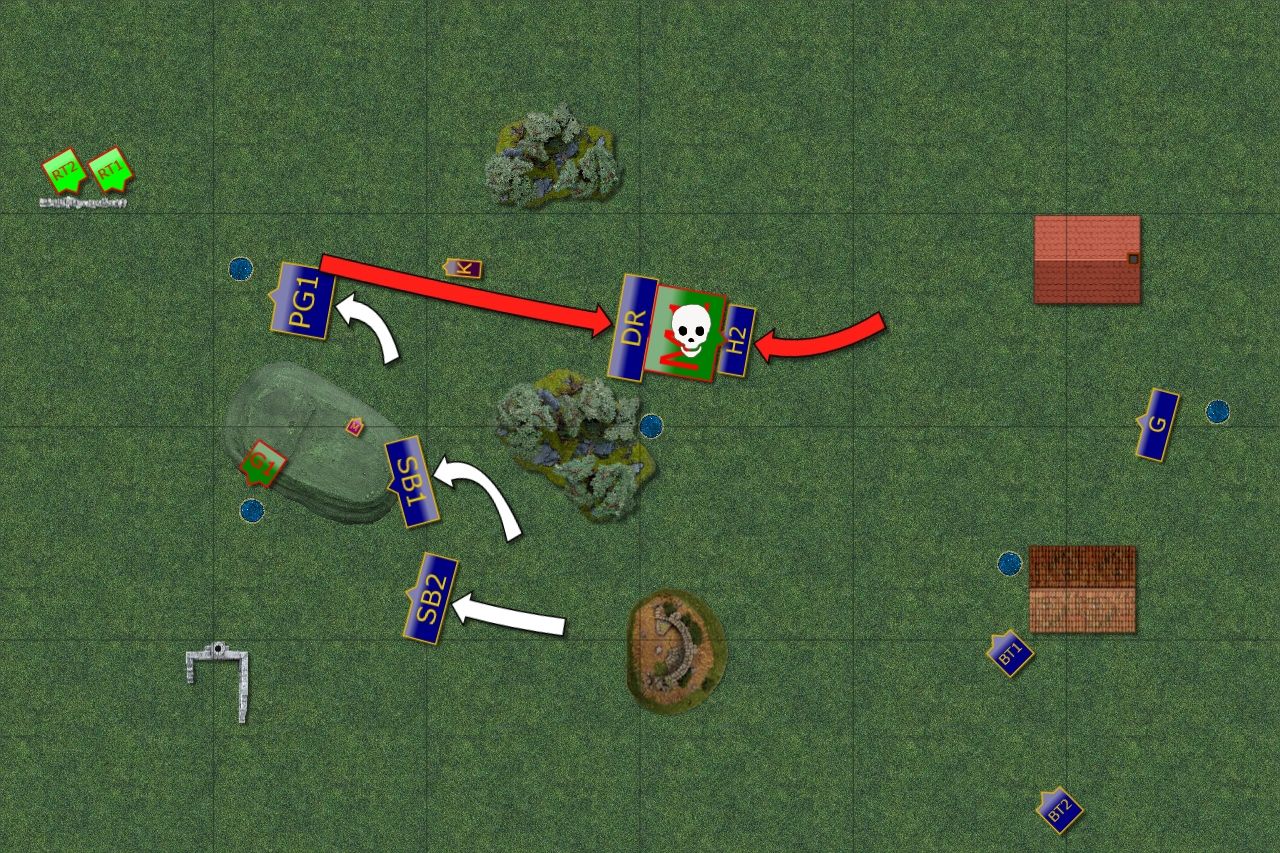
Orcs - Turn 3
 |
| Counter attack on the flank. |
 |
| The center is blocked. |
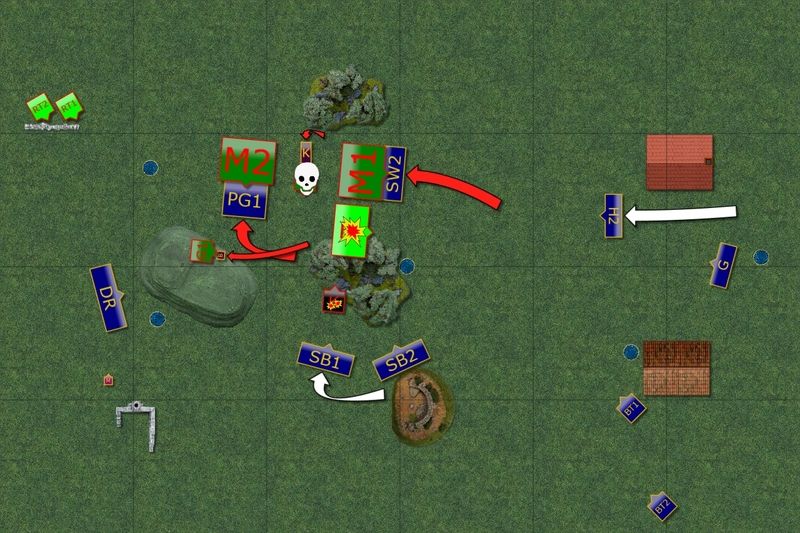
With Ax Horde and Trolls blocking the way, Morax behind them could do little. It was then up to the Krudger and the Giant to punish Elves for their sneaky attacks. Both Palace Guard and Drakon Lord were charged from the exposed flanks and were utterly destroyed. But would that be enough to stall Elven attack?
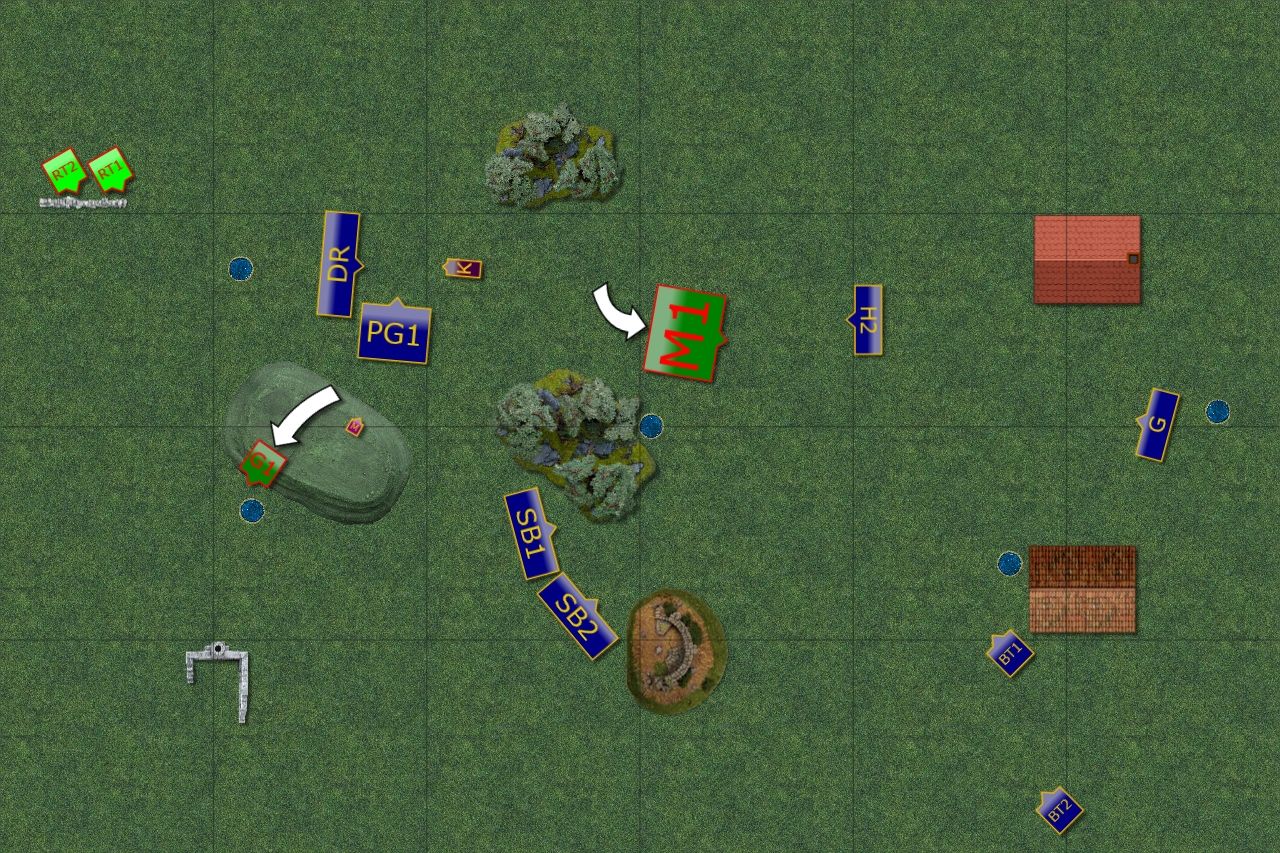
Outcasts - Turn 3
 |
| The horde is gone but the trolls are still there! |
 |
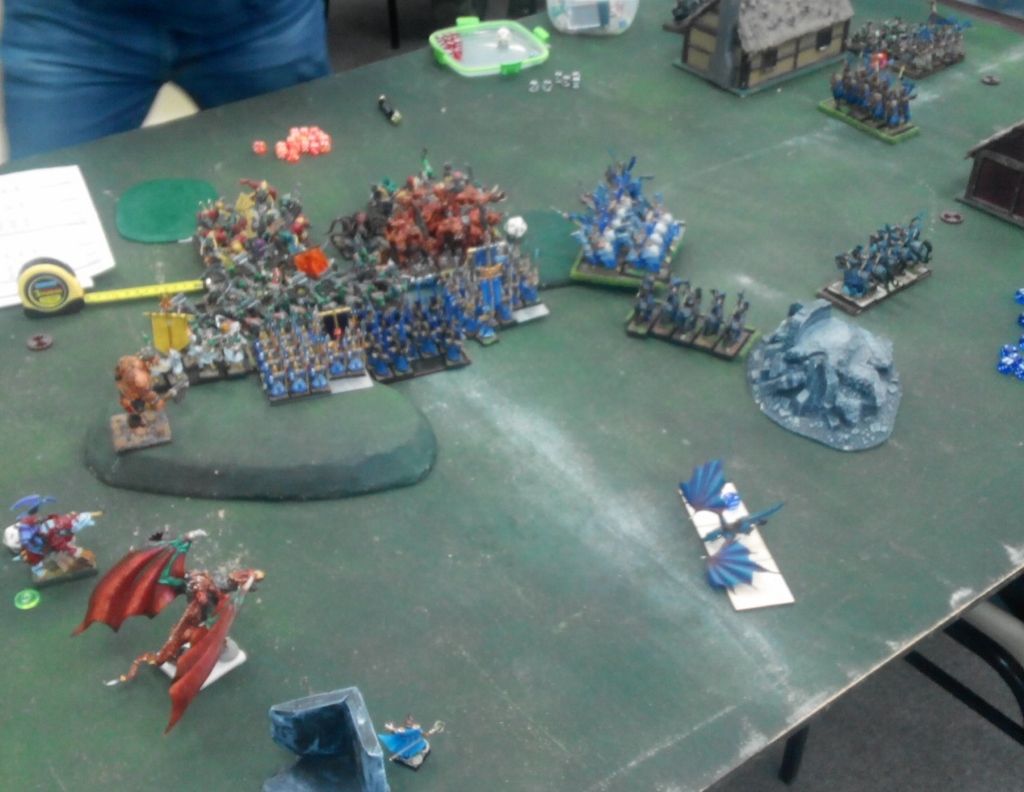
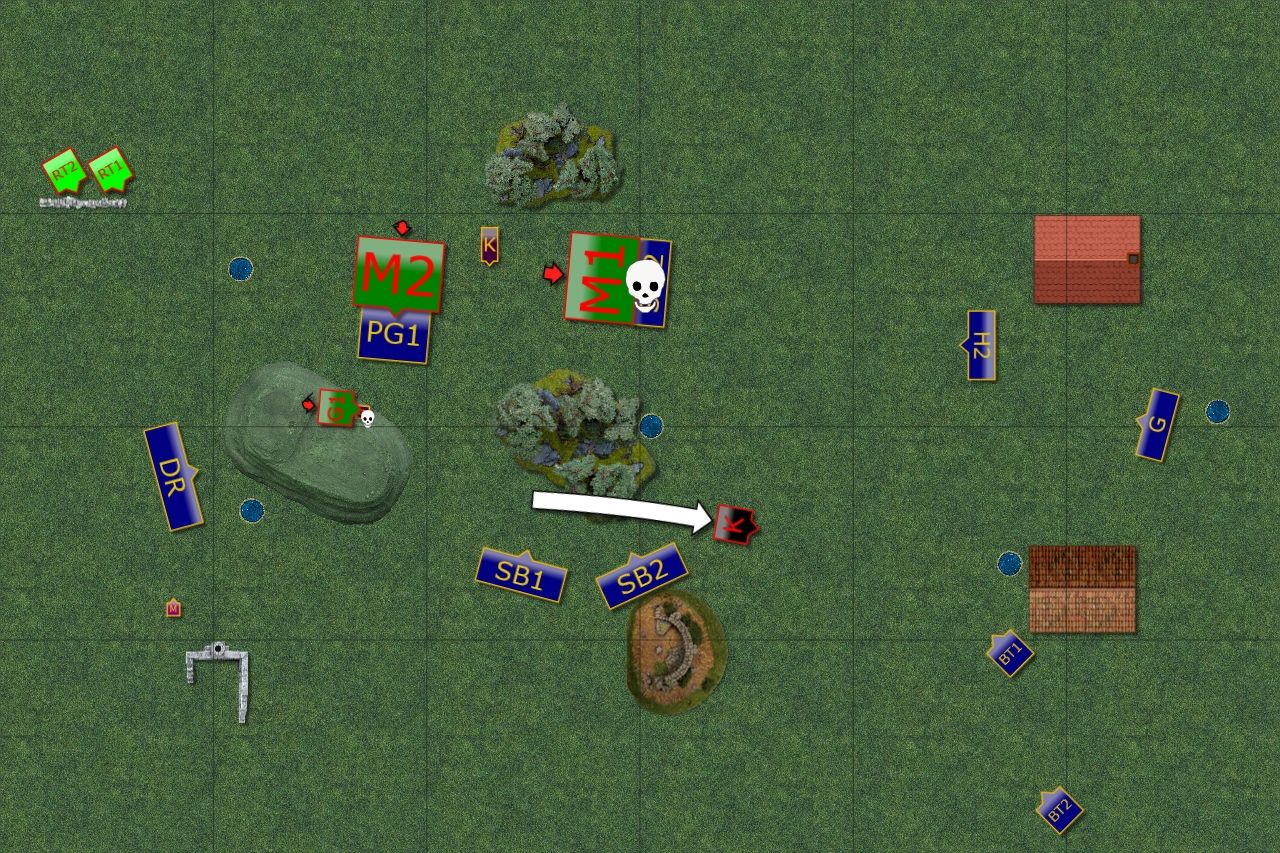
| Elves keep pressing forward. |
Drakon Riders decided to finish what their companions started and attacked Gakamak. This time this bloodthirsty Orc was not tough enough to hold his ground. Nearby Elven infantry punched against the Horde again and this time, even with the aid of a nearby War Drum, they were destroyed.
Storm Wind heavy cavalry had a perfect position for a devastating flank charge even Trolls would not hold against. But despite horrendous damage and against all odds they held the line! (Edit: Yes, this time I got double 1's for a nerve test :))
That created quite a dangerous situation for the Elven troops as despite undisputed successes they were about to receive a powerful counter attack.
Orcs - Turn 4
 |
| That hurt. |
 |
| Four Elven units dead - Ouch! |
The opening Orcs were waiting for finally came and they smashed in with all the ferocity they are
known for. All Elven units that were the targets perished, even Storm Wind cavalry!
What was worse, the Drakon riders got hit by Rock Throwers and ... got wavered! That was a very heavy blow. Would Elves be able to recover from that? Or was it a turning point of the battle?
Outcasts - Turn 4
 |
| The outcome of the battle hangs in the balance. |
 |
| Elven shooters come to help! |
Elves didn't want to give up. Drakon Riders gulped their Dwarvn Ale but this particular branch was not to their taste at all. Because of that Palace Guard was forced to attack Morax all alone. Another unit of Morax was charged by Storm Wind cavalry. But even with the aid of the Elven King who destroyd War Drum, both Orcs regiments held their ground.
Fortunately, Elven shooters managed to finish off the stubborn Trolls and even put a few more wounds on the Slasher!
Orcs - Turn 5
 |
| Last charge of Morax |
Both armies suffered a lot of damage by now but the battle was not decided yet. Both Morax regiments counter charged their foes but only Storm Wind troop perished. Krudger then moved his flying beast towards Elven bolt throwers.
Outcasts - Turn 5
 |
| Morax keep fighting. |
 |
| Elves gain the upper hand. |
Drakon Riders redeemed themselves and finished off Morax that were pinned down by Palace Guard. The fast cavalry, Gladestalkers and Bolt throwers aimed at the already wounded Krugr and this time they managed to take him down. It seemed that the Elves were gaining upper hand.
Orcs - Turn 6
 |
| Morax and Giant try to secure the objectives. |
With Elven units out of range, remaining Orcs tried to secure objectives and brace for incoming attacks. Rock throwers failed again to hit anything, it seemed that Goblins didn't even try to do so, enjoying fireworks they produced instead.
Outcasts - Turn 6
 |
| Elves control the field. |
 |
| End of Morax. |
With no support, Morax could not avoid the Elves and combined attack of the Drakon Riders and the Hunters destroyed the last regiment of Orcs. After a very bloody battle Elves emerged victorious.
Summary
 |
| Turn-by-turn animation summary. |
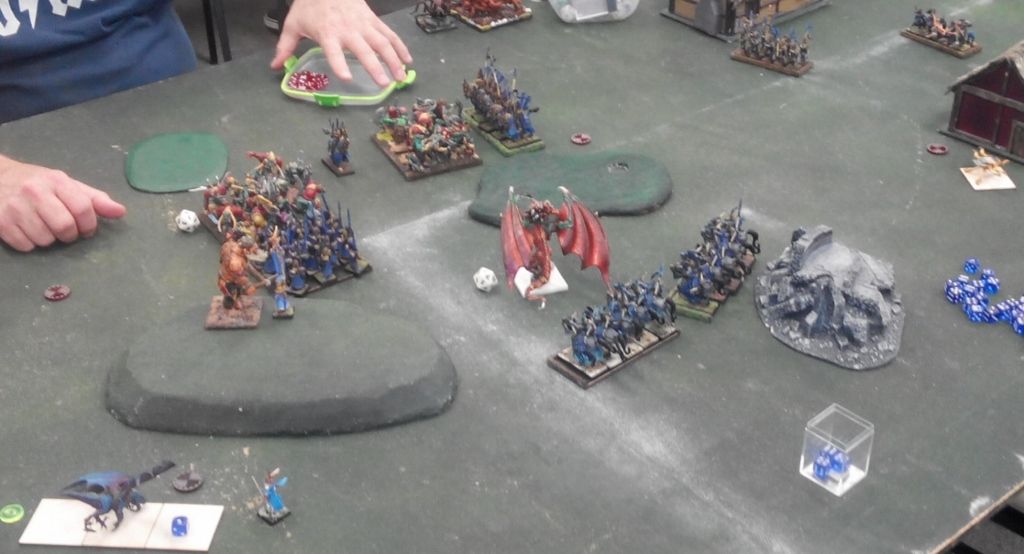
After-battle thoughts
I would like to thank Tony for a fantastic game! And we played full 6 turns too! It was mainly thanks to the fact that Tony was really fast with his turns but I hope I started improving on the way as well.
What a blood battle! Some of the unexpected turns of events took place too. I am very happy to prevail but I must say that turn 4 was brutal in particular.
In general I was happy with the way I played in this game. I think it was a good plan to deploy infantry as a direct counter to Ax Horde. I was of course lucky with so many Waver results. It completely blocked entire battle line for Orcs and second Wave could do nothing either. The contingent on the right flank did well too, as they got rid of the Goblins, secured the objectives and still contributed to the overall success in the last turns of the game.
I am still not sure about the deployment of the fliers though. Initially I was wondering if I could deploy them on the left flank to directly counter Krudger and to threaten the rock throwers too. Deploying behind my own lines didn't hid them anyway. I simply left that flank open and I did suffer because of that. Even if I took the Krudger down eventually.
I took the risk to attack Gakamak with Palace Guard and Drakon Lord. Had I succeed I could have moved to the safety or at least reform to face both threats from the front. Maybe I should have intercepted him only with the infantry?
It was absolutely hilarious to inflict a single wound on Trolls to waver then and subsequently do a lot of damage only to roll double 1's! The counter charge was incredible and I must say that alone thought me a harsh lesson.
I really like how different elements of the army can play together and I definitely was happy to have some shooting this game. From the moment of the opening fire to destroy one of the Gore Riders regiments to the end phase of the game where ranged attacks where needed to inflict that extra wound and force a nerve check on badly damaged enemy.
Thanks for reading! I hope you enjoyed the report!
Nice report, sounded like a really fun battle!
ReplyDeleteThanks! It was my favorite game of the event and I voted for Tony as the best sport!
ReplyDeleteWow SM, what an incredible battle!
ReplyDeleteI loved how it wasn't at all one sided right to the last few turns and there were points where the advantages switched sides a few times. Great reading!
I must say I was most taken aback by the fact you met the Orc battle line in the middle with your own battle line. I'm certainly not saying it was the wrong play it's literally the first time I've ever seen you do that in a war game which certainly was unexpected.
That being said it certainly paid off eventually. I would also like to say it's fantastic seeing two great looking armies on the table squaring off, fantastic work as usual!
Hi Jimmy!
DeleteThe great thing about battle reports is that you can feel the thrill of battle again but with a cooler head. It allows to see things with better perspective and boy but I was so happy that the events went my way eventually! As you say, the game could have gone either way and that is awesome too. Make for a much better read I am sure :)
Yes, I took the brutal and straightforward approach. I must say I find it quite an important element of KoW because by attacking the enemy you have a chance to pin it down for a turn. With movement at a double you cannot pivot so sometimes there might be an opening for your foe to go past your blocking unit. In addition you can do a few points of damage. That is why I took on trolls with the spears.
The frontal assault at the Orc Ax horde is even better example and what you refer to I think. I would always look for the opportunity to outflank the enemy but in this case it helped to block entire line too.
What is more, I learned that hordes cannot be taken in a single attack, at least not by the units I have. But what I need to achieve here is not only doing some damage but also pinning the horde in place. If it works well I can have my frontal attacking units still in place for a second round but also a flanking unit ready. In particular when horde decides to counter the regiment on the left or right but not in the center. Or when I use the time to maneuver to the flank with the fourth unit.
Think about it as double-jab or jab-cross to the face to get your opponent at the proper distance and to make him focus on your frontal attack and then proceed with a powerful hook that he cannot see or defend himself against. :)
You may see such frontal assaults by my infantry more often. :)
Last but not least, thanks a lot for reading the reports and coming back with great feedback!
Cheers!