
Game 2 - Adam - Beastmen - Dawn Attack
Adam is a very active tournament player, a fellow Master player and the guy responsible for that unique 8-dragon slayers Dwarven army that was on everybody lips before Masters tournament. Somehow, despite taking part in many other tournaments at the same time and often being very close to each other on the ladder, we have never played a single game. This time fate finally pitched us against each other.
Adam is also known for having multitude of armies and for taking different forces to different events. This time he chose Beastie Boyz:
Beastmen - Army List
Doombull, Heavy Armour, Shield, Sword of Swift Slaying, Ramhorn Helm, Dawnstone, Gnarled Hide
Great Bray-Shaman, Level 4, Dispel Scroll - Lore of the Beasts
Gorebull, Great Weapon, Talisman of Preservation
Gorebull, Great Weapon, Glittering Scales
Wargor BSB, Heavy Armour, The Beast Banner
47 Gor Herd, Extra Hand Weapon, FC
5 Ungor Raiders, Musician
5 Ungor Raiders, Musician - Ambush
Tuskgor Chariot
Tuskgor Chariot
5 Harpies
6 Minotaurs, Standard, Musician
3 Razorgor Herd
Quite character heavy army list if you ask me. Let's look at the details!
Doombull - the most dangerous model on the field. He can take care of any of my unit all by himself. With 1+ armour save and re-rolls to that he is very resilient. Single bolt or any of my nobles could harm him, however, especially if he chose to hunt alone. If he was to stay in the unit of Minotaurs there is a better chance for me to contain him though.
Gorebulls - As dangerous in combat as the Doombull but fortunately less protected. They also don't have ASF, in fact, they are ASL with GW so that there is always a chance to sneak a wound or two on them. Since they are pretty expensive at around 200VP each, it may be good idea to direct some attacks at them. Again, a lot would depends how they are deployed. Since they are more vulnerable I thought they would start the game in the unit of the Minotaurs anyway but I should be always careful not to give them a chance to charge some units alone.
Great Bray-Shaman - very respectable spell caster with Beast Lore that suits Beastmen very well. He is not protected at all so if given the chance I should try to assassinate him. His spells can affect his characters in a great way, even more reason to keep them together. Wildform on Gors is awesome too as T5 is their best defence (apart from sheer numbers).
BSB - quite typical choice for beastmen army. His banner affecting gors is fantastic. THey have S4, 2A each and with primal fury they re-roll their to hit rolls. Simply great! However, another naked but valuable characters so I would be looking for a chance to get him down as soon as possible.
Gors - horde of them. Despite no armour there are so many of them that it would be tough to trim them down to the manageable size. With potential Wildform I was looking at a unit that has a very large amount of S5 attacks (as long as Beast Banner is there). However, horde formation also means I can fit more units into their frontage and that they lose rank bonus faster. There is no mistake, however, there would be blood.
Ungors - total opposite to the big hitting regiments, they are there to be annoying and be sacrificed. One unit with Ambush is going to hunt down my Eagle claw. However, it is not known which table edge they are going to enter and fortunately, they cannot charge then. Need to take care of them as they potentially can mess up my movement phase.
Harpies - a very useful unit indeed. They might not be the most disciplined unit around but they fly and skirmish offers some protection from shooting. Again, another annoying unit I need to take care of and with potential to do some damage to some of my less fighty units, such as reavers if attacked to the flank.
Chariots - Always annoying due to impact hits. Pair of them can ensure that small units can be annihilated on the charge. Can be dealt with by heavy cavalry due to longer charge distance but used well can be painful. Also, they accompany other fighting units perfectly.
Minotaurs - second fighting unit. They can deal damage on their own pretty well but with potentially 3 characters in them, Mino-Bus is terrifying opponent to hold. Even their frenzy is not that easy to exploit as they overrun/pursue only d6". On top of that, after each won combat they get additional attacks. Very powerful indeed. I still need to divert them and try to separate them as I cannot fight Minotaurs at full strength and I need time to soften them up with magic and shooting.
Razorgors - quite interesting unit with very good hitting potential, especially on the charge (as they get +1S). despite no armour they are T5 and relatively fast so that I needed to employ my cavalry to hunt them down before they add their powerful attacks to these of gors, minotaurs and chariots.
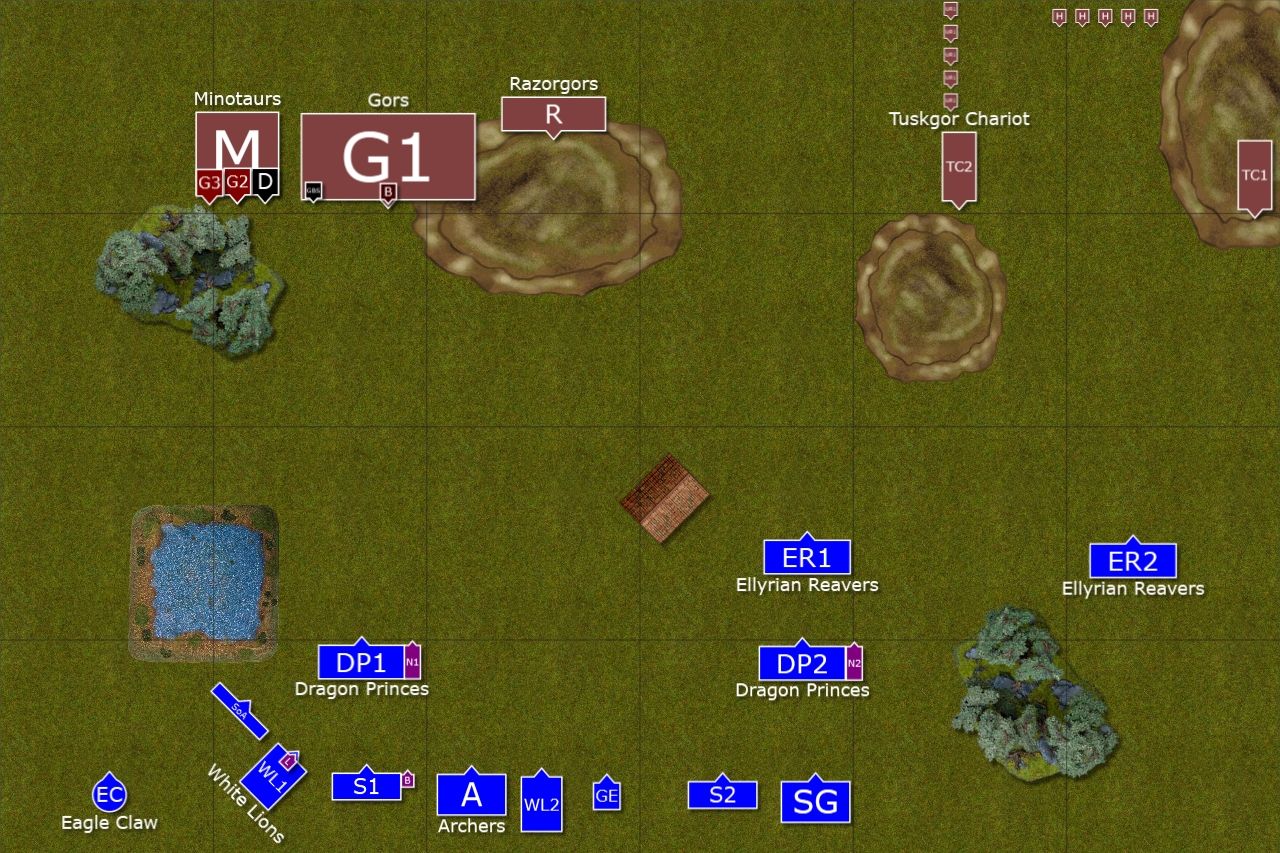
We played modified Dawn Attack scenario. We deployed as per rulebook but there were additional conditions to regular victory points. If you moved your most valuable unit from the deployment zone you got 200VP. If you hunted down the most expensive enemy unit/character then you get 200VP extra. Finally, if you moved the units with at least 2 ranks to the enemy zone you got 200VP more.
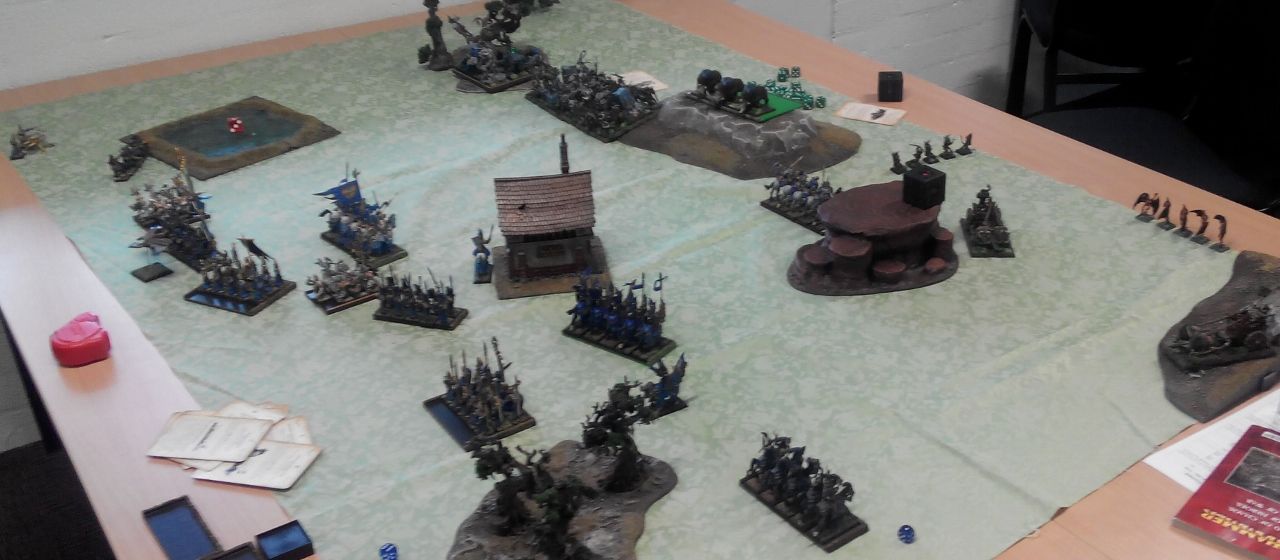
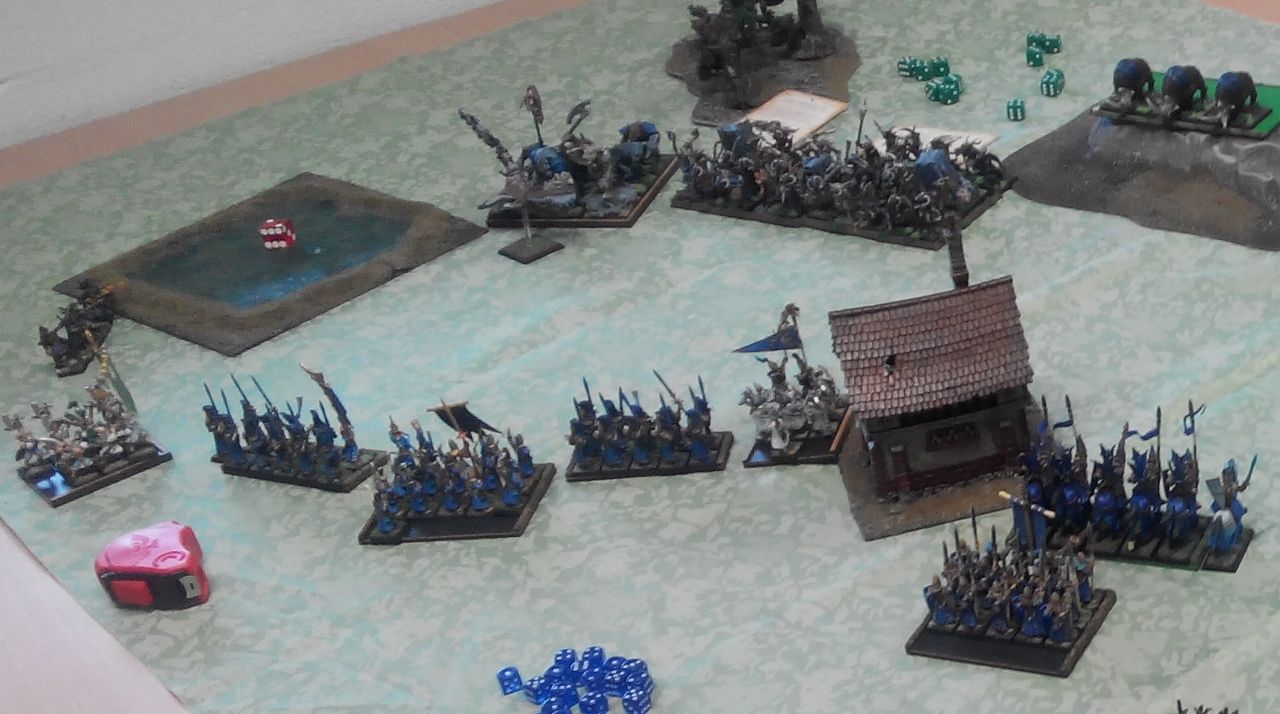
Deployment
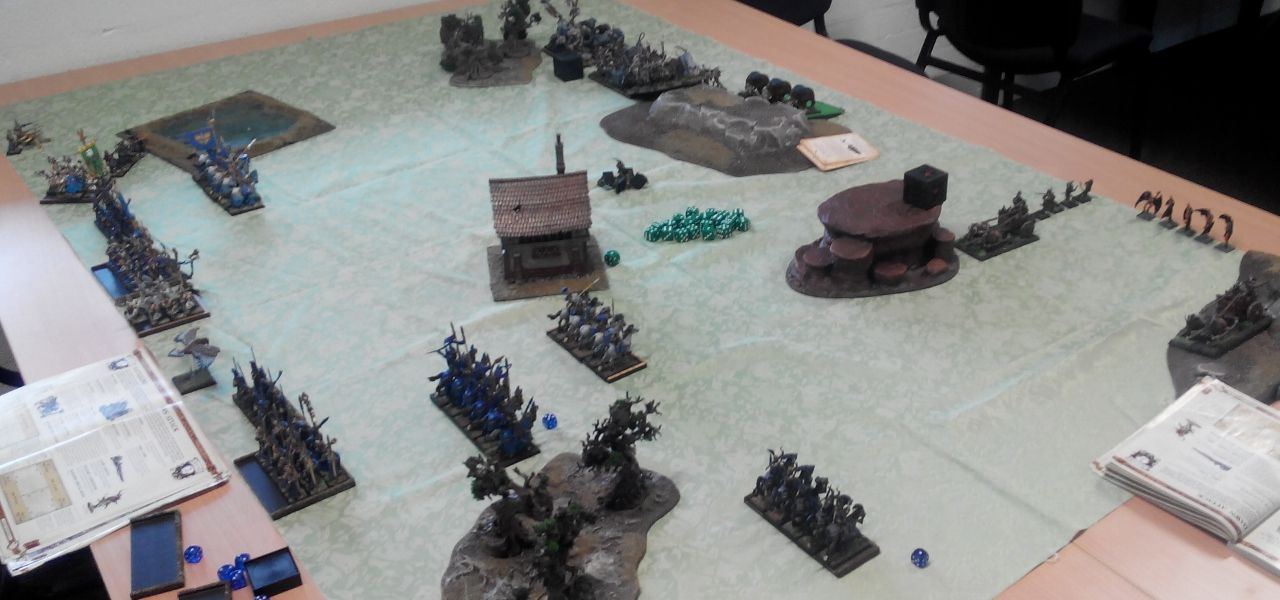 |
| Armies emerging from the morning mist |
 |
| Deployment after vanguard moves |
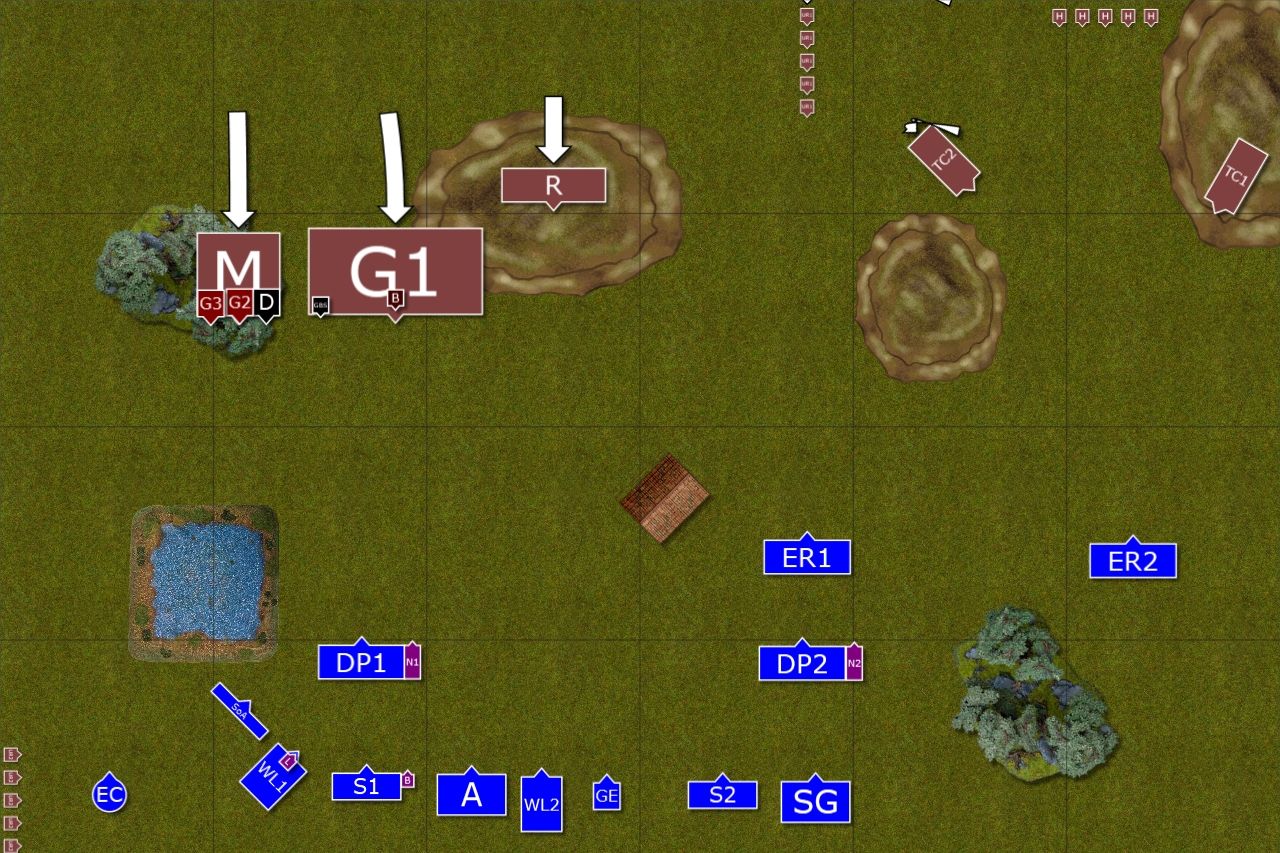
Dawn Attack is tricky because you don't quite know where units are going to show up. What is more, I won the roll off and had to deploy my army first. I decided that I am going to deploy at the back anyway so that I have more time to act against Adam's Beastmen. I decided to deploy as evenly as possible but some rolls meant my units were leaning towards left flank.
Larry was with Lions on the left flank, Bob joined nearby Swordmasters. The noble with Potion of Strength was in the centre while Star Lance hero guarded right flank.
As expected, Minotaur heroes were with Minotaurs and Bray-Shaman with BSB joined Gors. Support troops of the Beastmen all were lost in the morning mist and emerged on the opposite flank of the deployment zone.
Bastmen Great Shaman had the following spells:
Wyssan's Wildform, Pann's Impenetrable Pelt, The Curse of Anraheir, The Savage Beasts of Horrors
Adam showed some great skills at rolling dice and promptly obtained a "6" to steal the first turn! Deploying at the back line definitely paid off! :)
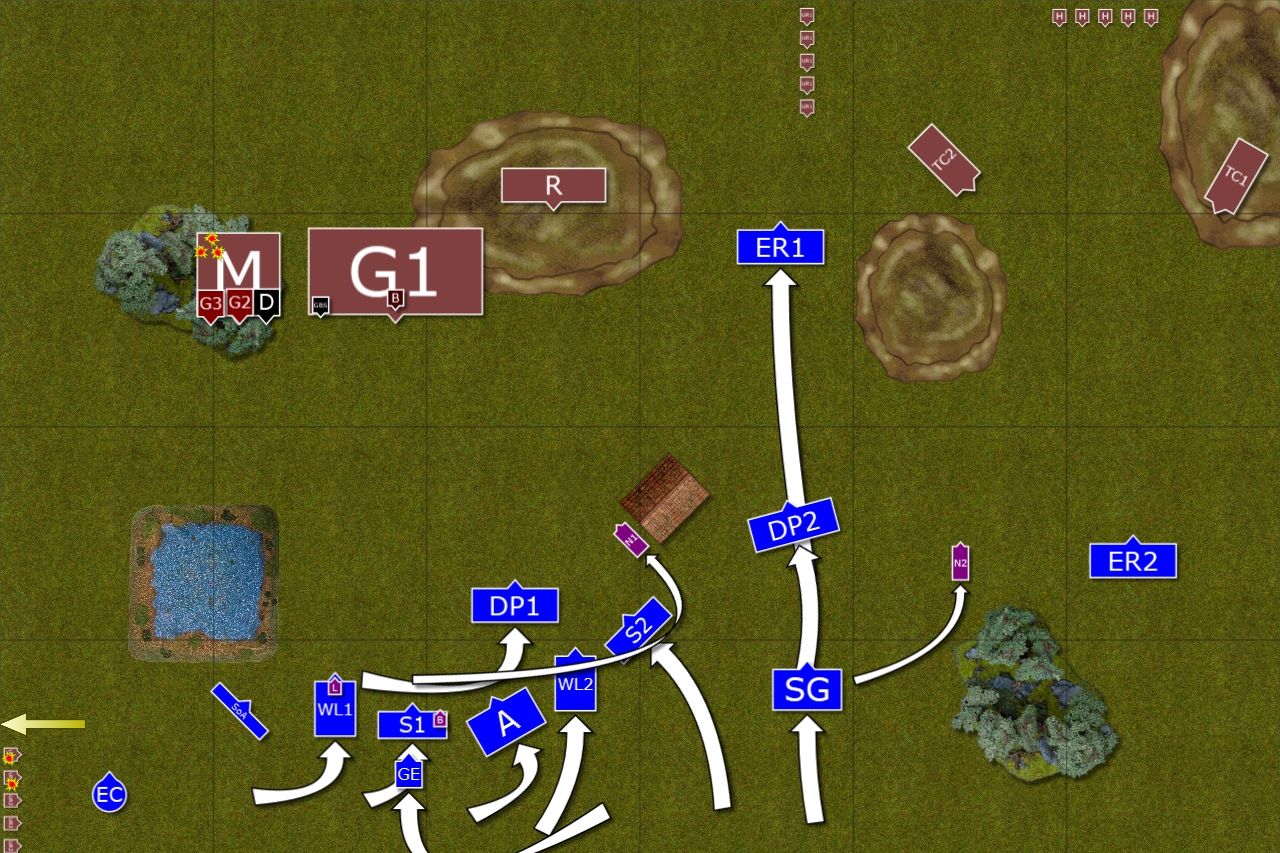
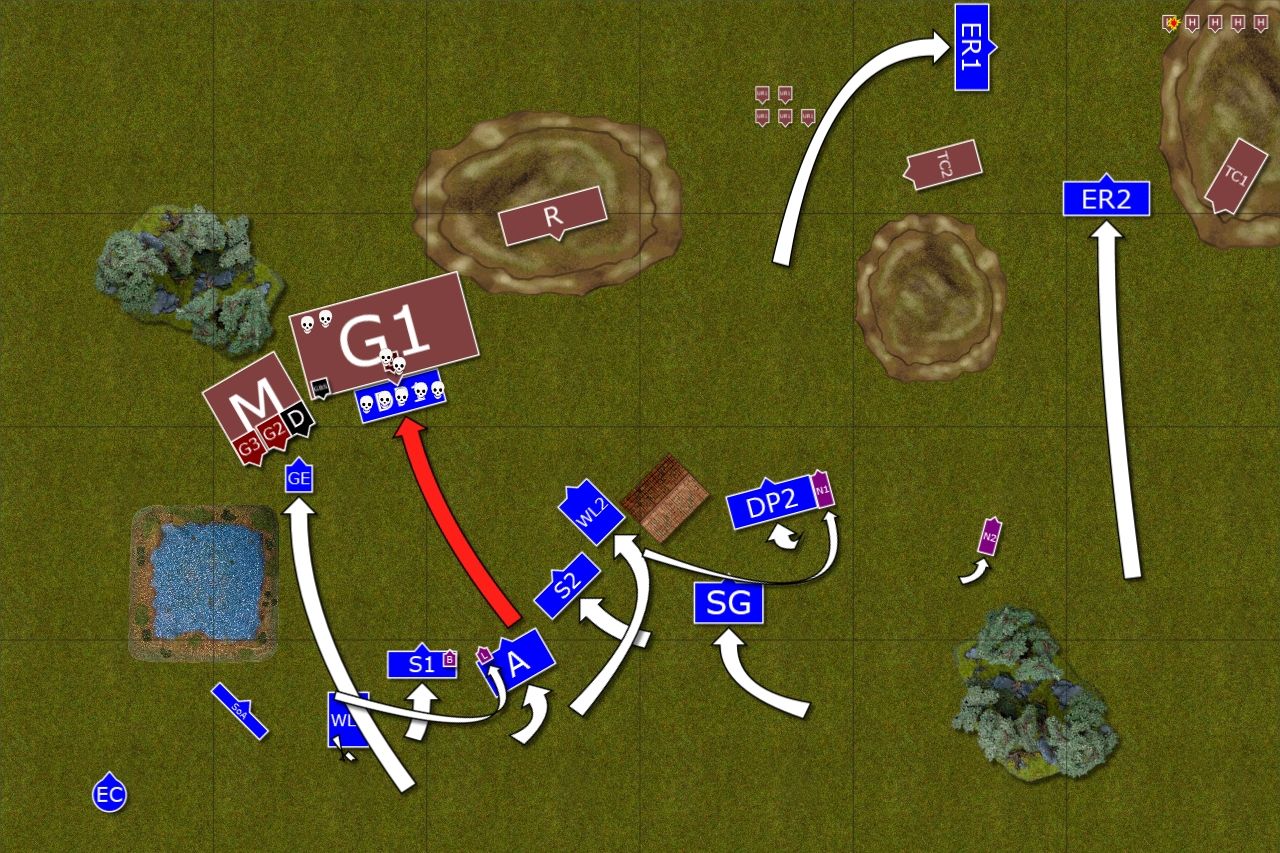
Beastmen - Turn 1
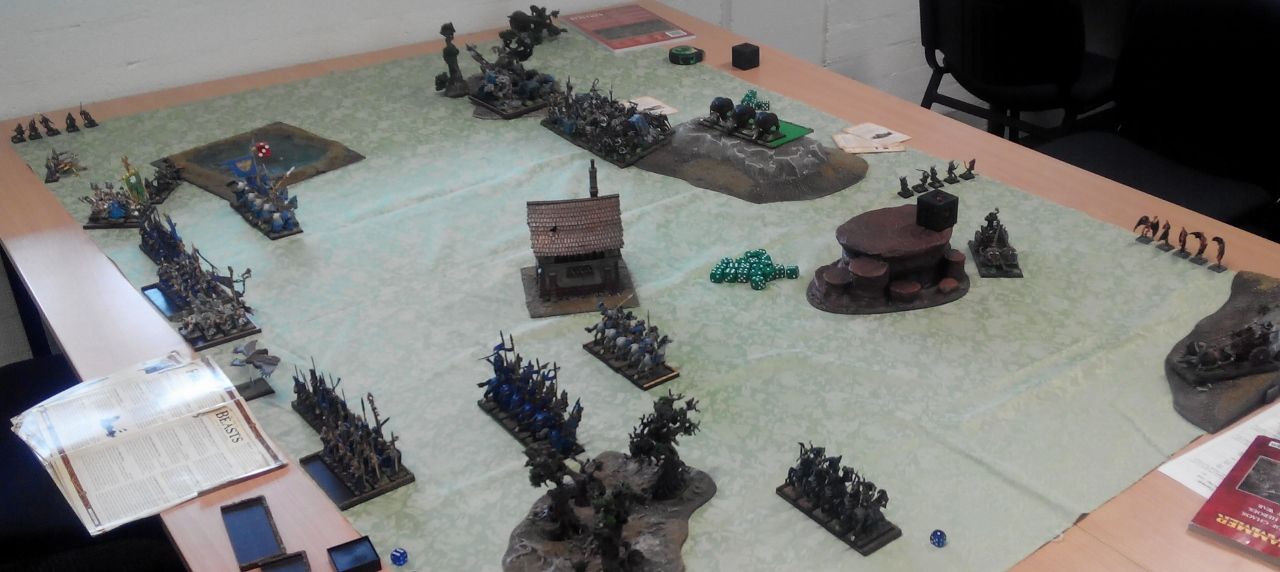 |
| Beastmen in steady advance |
 |
| Main horde surges forward |
Minotaurs and Gors move forward keeping cohesive battle line. Nearby Razorgors keep a little more distance to protect the flank better. Support units do not move much in order to threaten the elven flank or stay safe. They also follow the order to disperse so that demise of any one of them does not panic another.
Small unit of Ungor Riders shows up nearby the Eagle Claw but their poorly aimed arrows do not harm the crew.
Outcasts - Turn 1
 |
| High Elves do not remain static |
 |
| First blood for Elves! |
High Elves use the opportunity to redress the ranks and move towards the enemy. On the right flank ellyrian reavers try to shoot at ungors and chase them away but small beastmen managed to avoid casualties. Their brethren near the Eagle Claw were not that lucky and they indeed were not brave enough to stay and fight.
Magic and shooting was focused on Minotaurs and at least one of the brutes were dead after the missiles reached them.
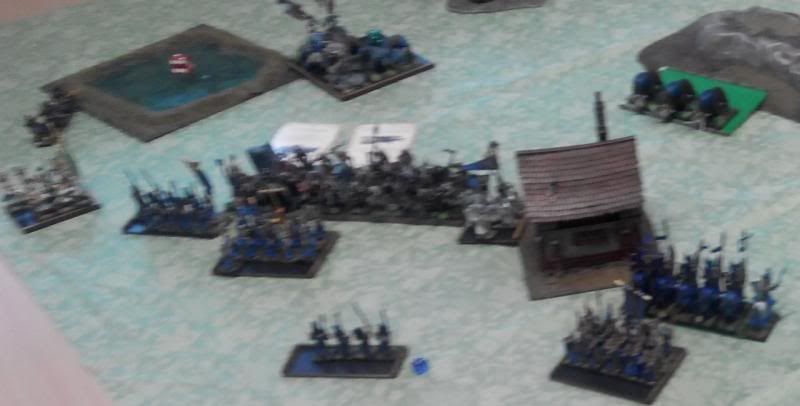
Beastmen - Turn 2
 |
| Beastmen are getting closer |
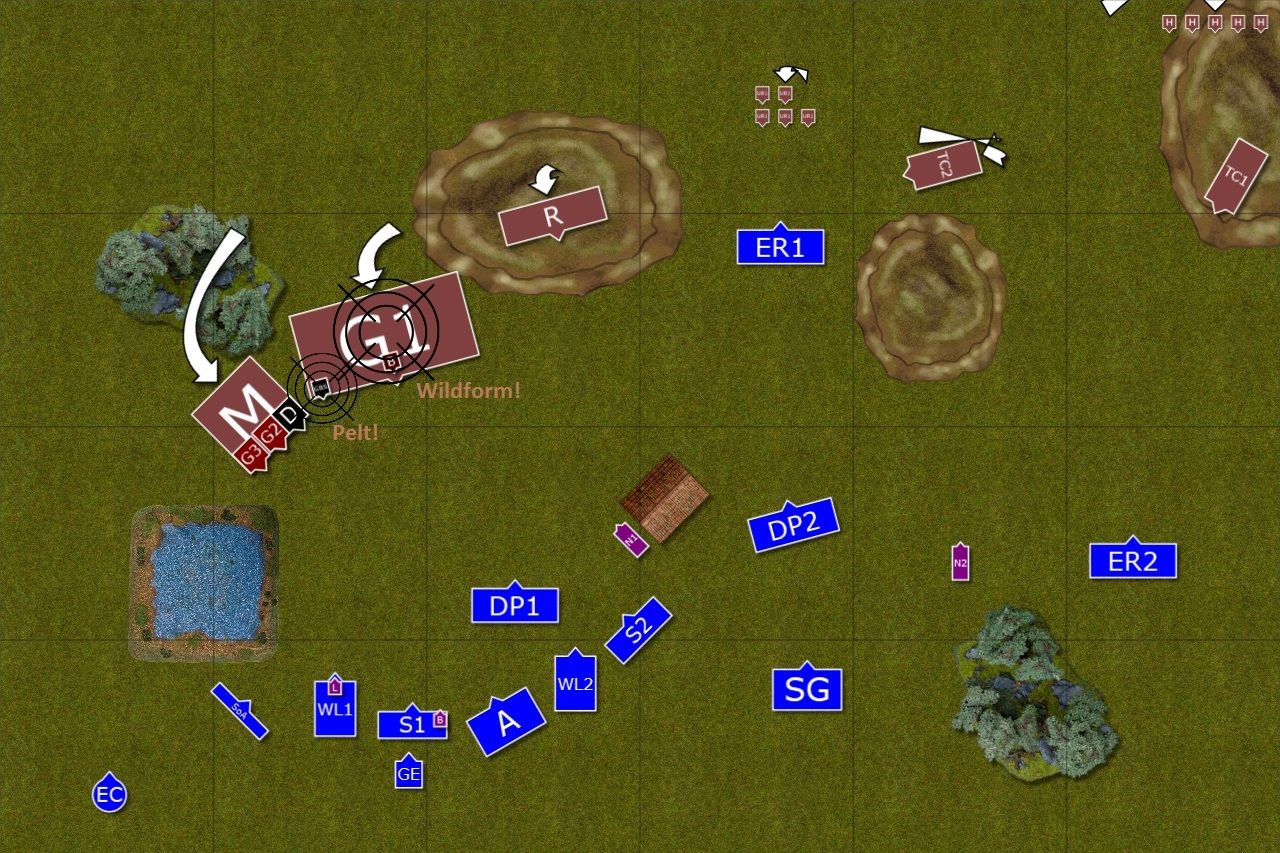 |
| Great Bray Shaman prepares himself and his horde for the incoming combat! |
Minotaurs and Gors wheeled towards the centre of the Elven battle line. It was clear that the close combat is inevitable. Great Bray Shaman didn't wait any longer. He first was allowed to cast a protective spell on himself and then managed to get Wildform through, to make his Gor horde a very formidable foe indeed.
On the other flank a manoeuvre and counter manoeuvre between support troops continued.
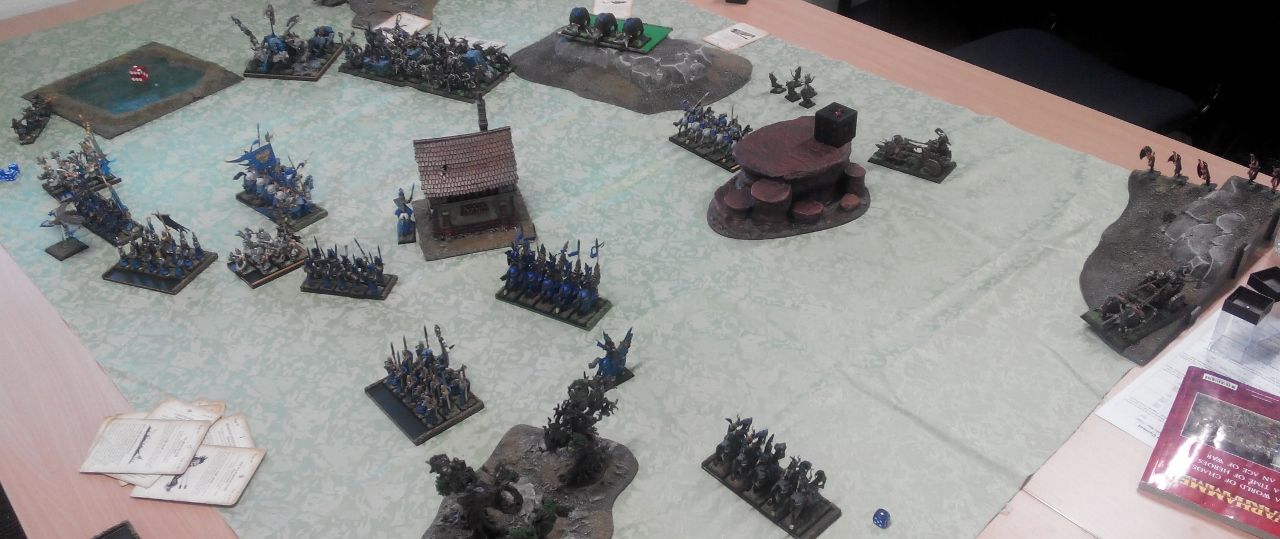
Outcasts - Turn 2
 |
| Closer look at both battle lines. |
 |
| Noble sacrifice by Dragon Princes |
Seeing an enemy standard bearer at the head of the formation Dragon Princes moved as one. It was their right to charge gloriously into the thick of the enemy. They knew it was a suicidal charge but they had one mission to accomplish. They all aimed at the enemy army standard. The beast was incredibly tough but Dragon Princes were experts with lances and foul creation of chaos was pierced by the Caledorians. They tried to use the impetus to impale a few more beastmen but the sheer number of the enemy was enough to swallow the whole squadron alive.
The rest of the army formed a line in grim determination to make the noble sacrifice of the knights count. Light troops continued their dance but still could not pin down beastmen skirmishers.
Beastmen - Turn 3
 |
| Left flank after combat and ... |
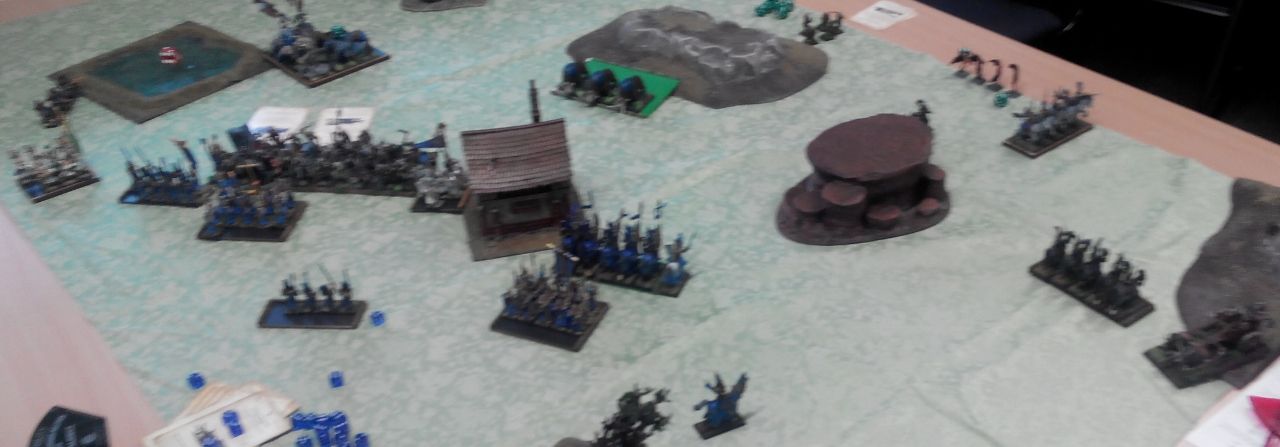 |
| ... bigger picture |
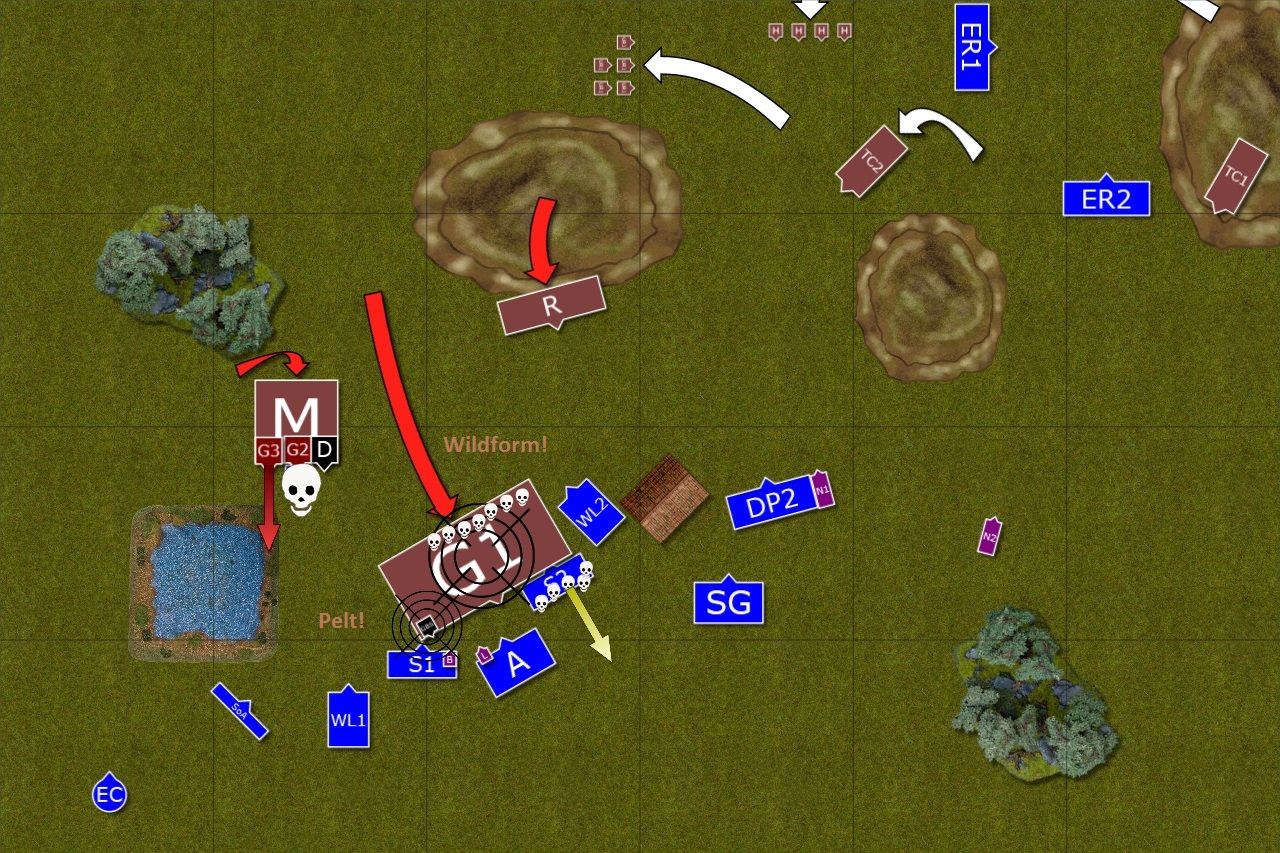 |
| Beastmen counter attack! |
Beastmen great shaman, outraged at this display of bravado and the demise of his personal standard, ordered his horde to charge. They made contact with small unit of Swordmasters who fought bravely and fell many beastmen but also suffered casualties and had to withdraw. They managed to avoid pursuers who, having not much space to manoeuvre, hit another elven unit without a chance to reform. (Edit: It was peculiar situation as Gors hit one model in the other Swordmaster unit and there was no way for beastmen to wheel to maximise any better, so here they were, touching almost corner to corner :))
Razorgors were not fast enough somehow to join the fight and dangerously exposed themselves to the counter charge by elven knights. Minotaurs hunted down annoying eagle and devoured the carcass immediately.
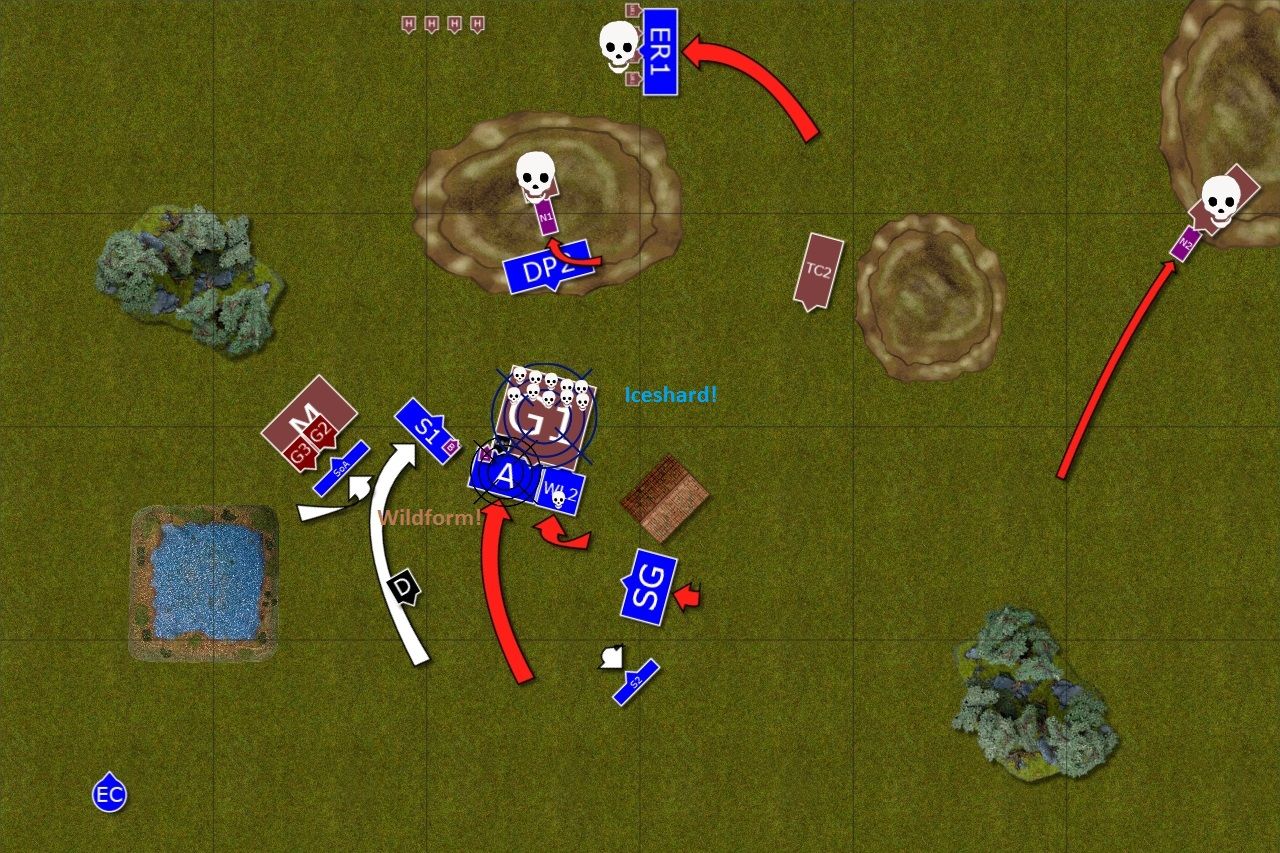
Outcasts - Turn 3
 |
| The result of Lions counter attack! |
 |
| Double pincer charge! |
White Lions, using the opportunity, counter charged horde of gors from both flanks while Bladelord challenged Great Shaman to a single combat. Lions hit hard, as was expected from expert huntsmen, and suffered minimal casualties in return. Gors, no unruly due to lack of standard bearer and great shaman being occupied in the challenge, decided to retreat. Fortunately for them, they outpaced pursuing elves. (Edit: Another hilarious situation! With 3 attempts to catch fleeing enemy I failed all of them! What is more, for 2 units I rolled double 1's)
Fortunately, nearby Sisters could distract minotaurs while razorgors were charged by dragon princes led by one of the heroes. Two razorgors died but the third managed to escape pursuing knights. Just.
On the right flank, a lone hero misjudged the distance to isolated chariot but nearby reavers blocked beastmen from counter charging the noble knight.
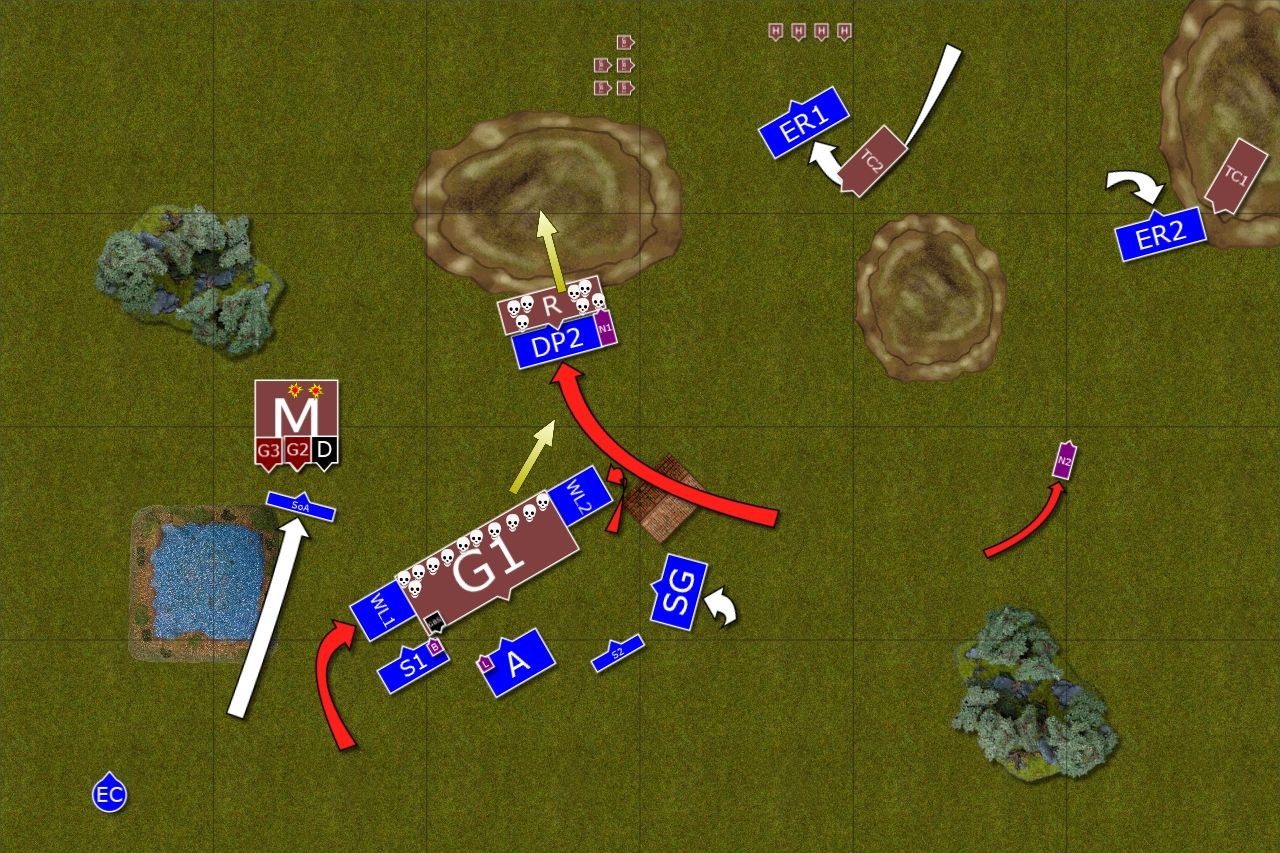
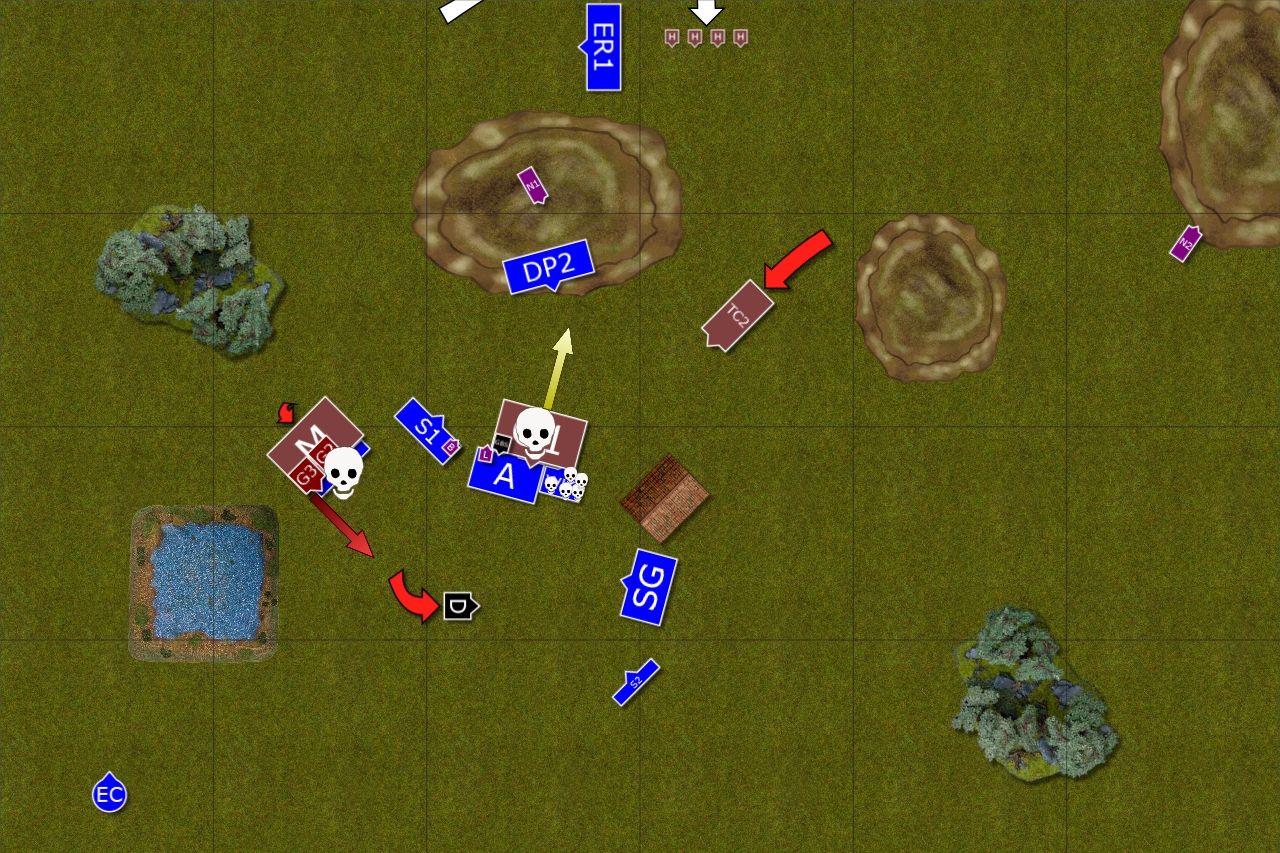
Beastmen - Turn 4
 |
| Beastmen Gors rally! |
 |
| Doombull charges alone! |
Gors and single Razorgor manage to rally to face the Elves one more time. Gors, despite losing almost half of their numbers, were still in great strength. Great Shaman one more time made them even more wild and mutated than usual, increasing their strength and toughness.
Nearby charioteers considered charging the exposed flank of the elven cavalry but they spotted the elven hero picking up some magic bottle and gulping its contents. After that his form seemed to grow and glow with magical light and they decided they don't want to face him just yet.
In the meantime Doombull, bored with hunting some lesser prey, charged White Lions alone and killed them all to an Elf! Fortunately for nearby Swordmasters, he was distracted by the fresh flesh and blood and didn't use his momentum to hit them too!
On the opposite flank, Reavers drew the chariot into their ranks and sacrificed their lives so that the noble knight could avenge them and destroy the enemy!
Outcasts - Turn 4
 |
| Gors still hold! |
 |
| Elves in another counter punch! |
Archers and Lions charged together against the rallied Gors to pin them down. Behind the enemy formation, lone hero charges out from among the Dragon Princes and finishes last Razorgor while his unit reforms and prepares to charge Gors next. Unfortunately, nearby Sea Guard was a little late to join the party (Edit: Needing 4+ I had to roll 1 and 2 :))
As the vicious combat started Larry the Loremaster challenged enemy great shaman. That distracted the servant of chaos and as a result elven archers became stronger and tougher while beastmen were suddenly fighting against the cold even they could not ignore. Archers and Lions inflicted huge amount of casualties and defeated the enemy but Gors were filled with some insane, savage courage and held against all odds! (Edit: Adam simply rolled double 1 when he needed it the most!)
Another knightly noble made the successful charge against another chariot this time and destroyed it, avenging brave reavers. Second unit of the fast cavalry finally hunted down some enemy skirmishers.
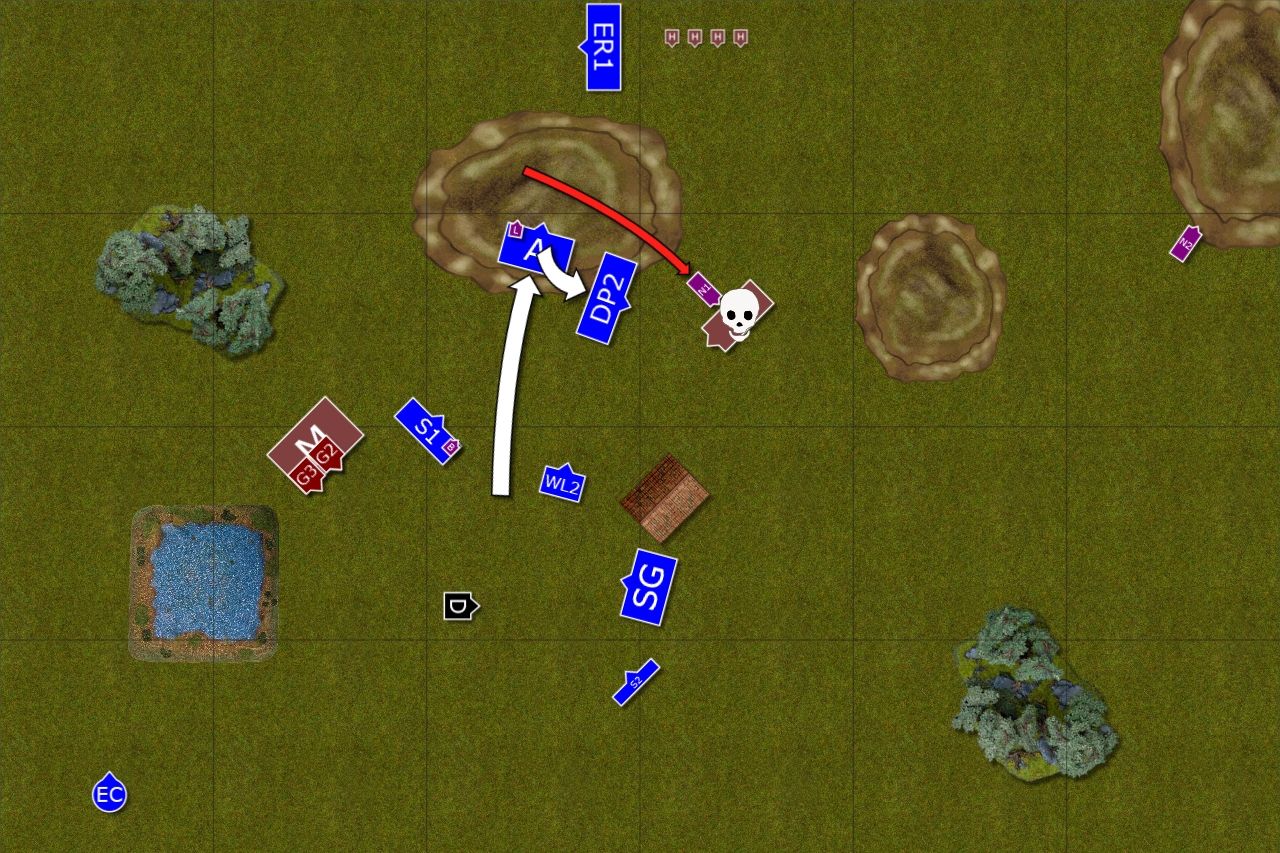
Beastmen - Turn 5
 |
| Tuskgor chariot failed to help |
The last attempt to turned the tide by beastmen failed. Their chariot was too late to join the fight and this time defeated Gors were successfully chased down by Archers! Even doom bull failed to reach elven units in the last charge.
Outcasts - Turn 5
 |
| Archers tried to reach enemy deployment zone but were a little bit too late |
 |
| Elven noble hunts down last chariot |
With the time for the game reaching its end I only did a few moves to speed it up and finish the game. I charged the chariot with the noble and caught it when it fled. I also tried to reach Adam's deployment with the Archers for extra VP points due to scenario but I was still too far away. I didn't cast any magic as there was no time for it.
With that last move the game was finished!
Summary
 |
| Turn-by-turn summary animation |
After-battle thoughts
It was extremely enjoyable game and I would like to thank Adam for the opportunity to play against him. I am very happy we finally had a chance to play against each other and it was a very tense contest but in very positive meaning. We both tried hard to outsmart the opponent and all was decided in a vicious combat rather than by some tricky magic or shooting. Although one has to add that magic did play a very significant role.
I think Adam had bad luck with his support units as he needed them to prepare his advance better. Because he didn't have any screen I could charge his gors with my knights and use the opportunity to assassinate his bsb. That was crucial for the combat as you saw when Beastmen failed their Ld8 steadfast break test. With a bsb alive they would have been there for sure, not to mention the fact that gors would have had S5! It is truly a formidable unit in terms of how much damage it can deal and having them in horde formation meant they could soak up casualties and keep fighting.
That is the reason why I was so impressed by the Archers! I was thinking if I should charge with them or should I simply move more units to positions but it was a good move to attack. It was not guaranteed that I could even win that combat but I guess fortune favour the bold and I could aid my units with timely Iceshard as well as Wildform. Before I tried to chip away a few wounds from minotaurs with small magic missiles but after losing 2 of them Adam could allocate hits and I kept failing my to wound rolls against tougher gorebulls.
There were moments where I took the risk, as with holding against Gors with Swordmasters but I think it was calculated risk. I didn't see them stopping by contacting Swordmasters again. I thought I would be able to receive the charge with archers and add Swordmaster + Lions from the flank and Sea Guard from the front. I didn't expect them breaking while being steadfast either but then Ld8 is not that great without bsb. To balance it out, Adam got the insane courage result exactly when he needed! Not to mention stealing the initiative!
I was very happy with the performance of the mounted nobles as they aided cavalry but also operated as single units themselves, which was very helpful.
I still wonder what would have happened if Adam used his Minotaur heroes separately, say from turn 2. I could try to kill one but probably not two and Doom bull would have been free to go earlier. AS he demonstrated he was capable of killing entire unit in a single round of combat!
In the end I was very happy to gain upper hand after great game and against fantastic opponent! I hope we are still going to have a chance for a rematch!
Thanks for reading!
No comments:
Post a Comment