
Game 7 - Battle for the Pass - James - Beastmen
After tough day 2 I was ready to turn the tide and fight for some better results during the last day of the tournament. Game 1 of the day and 7th in general was played with Battle for the Pass scenario rules and I had a pleasure to play against James and his Beastie Boyz! :)
I have a great respect for people who use Beastmen not because it is considered a weak army ( I think it is not) but because they have guts to bring the force that looks great even if it is not that popular. I never underestimate them and the player that plays that army as it often happens that he is actually a very good gamer who knows how to use his army.
These are the details of the army I was fighting against:
Beastmen - Army List
Beastlord, Shield, Brass Cleaver, Armour of Destiny, Dragonbane Gem, Uncanny Senses - 243
Great Brayshaman, Level 4, Shard of the Herdstone, Staff of Darkoth - 335 - Lore of Beasts
Wargor, Battle Standard, Heavy Armour, Shield, Gnarled Hide, The Beast Banner - 206
Slugtongue - 190
Brayshaman, Obsidian Trinket - 110 - Lore of Beasts
Brayshaman, Scroll of Shielding - 90 - Lore of Shadow
28 Gors, Full Command, Additional Hand Weapons - 249
15 Gors, Full Command, Additional Hand Weapons - 145
9 Ungor Raiders, Champion, Musician - 63
Tuskgor Chariot - 80
Tuskgor Chariot - 80
5 Warhounds - 30
27 Bestigors, Full Command, Razor Standard - 399
5 Harpies, Scouts - 70
Chaos Spawn - 55
Chaos Spawn - 55
Swedish Comp: 15.6
It looked like a typical Beastmen force to me, based around infantry and magic with nice selection of the support. Let's have a look at the choices James made in more details:After tough day 2 I was ready to turn the tide and fight for some better results during the last day of the tournament. Game 1 of the day and 7th in general was played with Battle for the Pass scenario rules and I had a pleasure to play against James and his Beastie Boyz! :)
I have a great respect for people who use Beastmen not because it is considered a weak army ( I think it is not) but because they have guts to bring the force that looks great even if it is not that popular. I never underestimate them and the player that plays that army as it often happens that he is actually a very good gamer who knows how to use his army.
These are the details of the army I was fighting against:
Beastmen - Army List
Beastlord, Shield, Brass Cleaver, Armour of Destiny, Dragonbane Gem, Uncanny Senses - 243
Great Brayshaman, Level 4, Shard of the Herdstone, Staff of Darkoth - 335 - Lore of Beasts
Wargor, Battle Standard, Heavy Armour, Shield, Gnarled Hide, The Beast Banner - 206
Slugtongue - 190
Brayshaman, Obsidian Trinket - 110 - Lore of Beasts
Brayshaman, Scroll of Shielding - 90 - Lore of Shadow
28 Gors, Full Command, Additional Hand Weapons - 249
15 Gors, Full Command, Additional Hand Weapons - 145
9 Ungor Raiders, Champion, Musician - 63
Tuskgor Chariot - 80
Tuskgor Chariot - 80
5 Warhounds - 30
27 Bestigors, Full Command, Razor Standard - 399
5 Harpies, Scouts - 70
Chaos Spawn - 55
Chaos Spawn - 55
Swedish Comp: 15.6
Beastlord - this character is not that popular as he competes with Doombulls or level 4 Shaman for the place in the army. However, with T5 and 4+ ward he is already tough enough to survive a few attacks. Brass cleaver adds more attacks per each enemy in contact so I can assume he will have 7A with S5 with primal fury on top of that. He alone will chop through my units easily. The good thing is he is infantry model and will stay with his unit unlike flying doombull for example, so he can be contained.
Great Brayshaman - main spell caster of the army and he chose Beast Lore. It means my opponents is not going to stay away from combats as the lack of armor for beastmen can be mitigated with higher toughness. Their attacks will also count more with a least S4, in particular against fragile Elves. Lore of the beasts has some nice magic missiles too and in addition to that he also have the Staff that adds 5d6 S1 attacks which can be nasty against war machines for example.
BSB - Typical configuration with 2+ armor save and Beast Banner! He will make any gor unit very dangerous already while boosting their strength further with beast magic will make them really hard hitting regiment! While not easy to kill I will have to do my best to eliminate him because his banner makes any combat much more dangerous. Noble with Star Lance will have him as a target for sure!
Slugtongue - he adds to already great selection of spells of the army. Magic phase domination belongs to Beastmen this game and I actually hoped that the winds will be strong as with all the channels and extra dice I will need as many as possible to dispel anything. But his main danger comes from the special rule that allows him to roll for every unit in the enemy army and apply damage on 4+ with even more on 6+. With MSU force it can be even more devastating but at least my opponent had to roll first :)
Shamen - Great shaman helpers their main role is to generate power dice and stay close to the herdstone. However, with Shadow and Beast Lores they can provide some more options for the player. Beat Lore in particular sounds great because there will be redundancy with Wildform casting or even stacking the effects of it on a single unit. It can result in S6 Gors (with beast banner) or S9 Bestigors!
Gors - two units, one will be a living shield while the horde is there to provide some punch or reform deep and keep the ranks. In both cases they are dangerous to my units. They are fragile and can't take much damage but with T4 to start with and spells to help them get tougher, they can still survive some attacks anyway. And thanks to large number they can soak up damage and hit back way harder to make up for the initial losses. Depending on formation I will need to adapt different approach. Horde can be charged from the front with a few units and will suffer more casualties. Deep formation will have to be engaged from the flanks. Which may be more difficult in the Battle for the Pass scenario.
Ungor Raiders - they will be small bodyguard for the level 1s and that is their main role. Stay out of sight, their skirmish formation allowing them to move faster to avoid potential danger.
Chariots - T5 chariots with 4+ save are always a problem. There are only two but these are not the only threats my army has to face. I will have to be careful not to get charged by them but fortunately my infantry can take on one of them even if charged (well, it is risky since I can lose steadfast in such an attack but that potentially allows for counter charges!). Also, if I can use any of my nobles and cavalry they should be able to deal with them too.
Warhounds - can be annoying so I will use reavers to shot them down if possible while taking positions to harass the enemy.
Bestigors - Elite of the enemy army. With base S6 and primal fury plus Razor Standard these are really hard hitting beasts. And again, have the numbers to soak up the damage and hit back. Their combat prowess can be further boosted by the presence of the characters and the spells. Can only be engaged from the flanks and even then I would need to make sure I have overwhelming forces that can tie the characters and inflict enough damage on the attack.
Harpies - interesting choice with scouting unit, they are one of the priorities for the support units to eliminate as they will either interfere with my movement phase or will attack war machines.
Spawns - more support, this time in the form of mindless creatures with random movement. They are T5 but have nor armor and inflicting 3w on them should not be a problem. However, as with all the support in this army, there are many targets that needs to be eliminated fast.
I think the fact we were playing Battle for the Pass suited my opponent better as he could cover entire width of the table and would not fear the frontal attack. He can advance or stay put and use his magic to inflict damage on my small units at the distance regardless of the option chosen. That creates an interesting challenge where I would need to keep the distance to have time to eliminate support units such as small gors, chariots, spawns and harpies, while I would prefer to attack as soon as possible as that limits the damage I can suffer from magic.
At the same time, after dealing with support (fast enough hopefully) I would prefer to use my own shooting and magic to thin down the enemy so that they are vulnerable to charges even from the front.
I decided that I will do the following. Try to attack in close combat anything but Bestigors. I have speed to do so with cavalry and nobles while infantry will be the second wave. In the meantime, I will deal with the support by any ways that will look viable and use my own support to slow down and divert Bestigors.
It will create a lot of dangerous situations since in the narrow Pass I will not be able to separate units will and I will have to check the possible paths of charges, pursuits and flees much more carefully than usually.
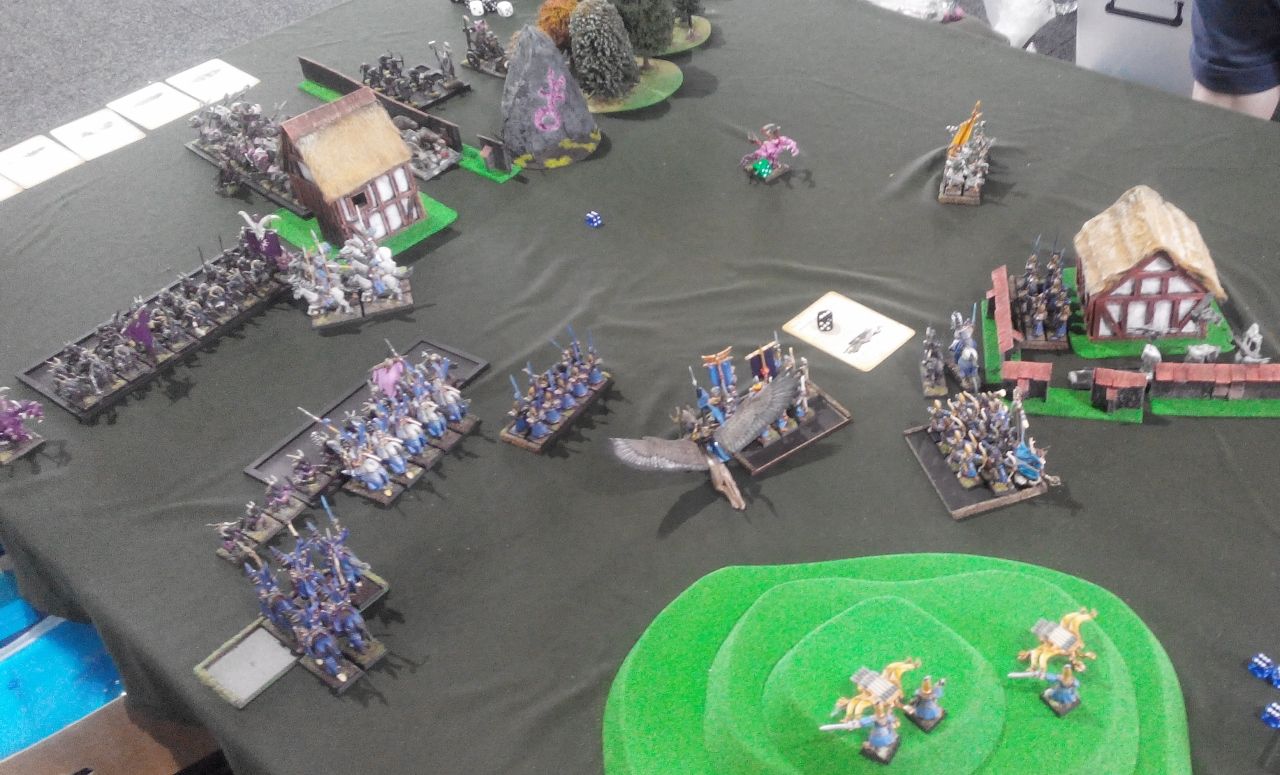
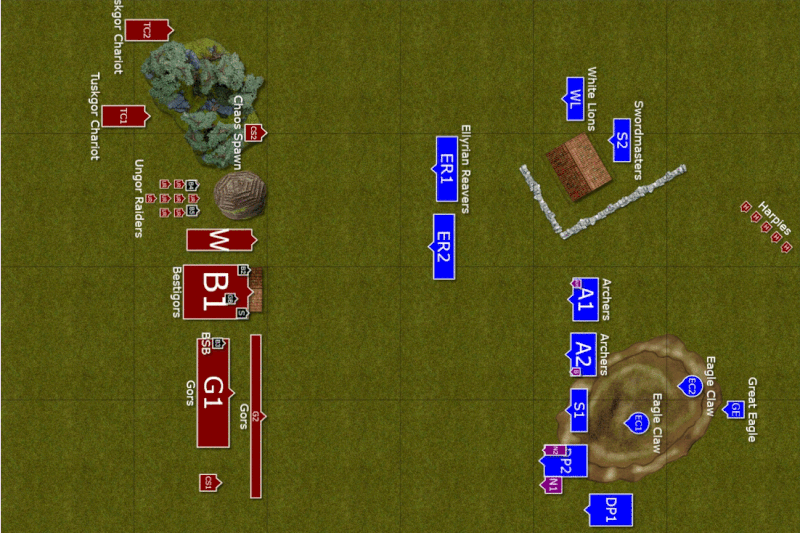
Terrain
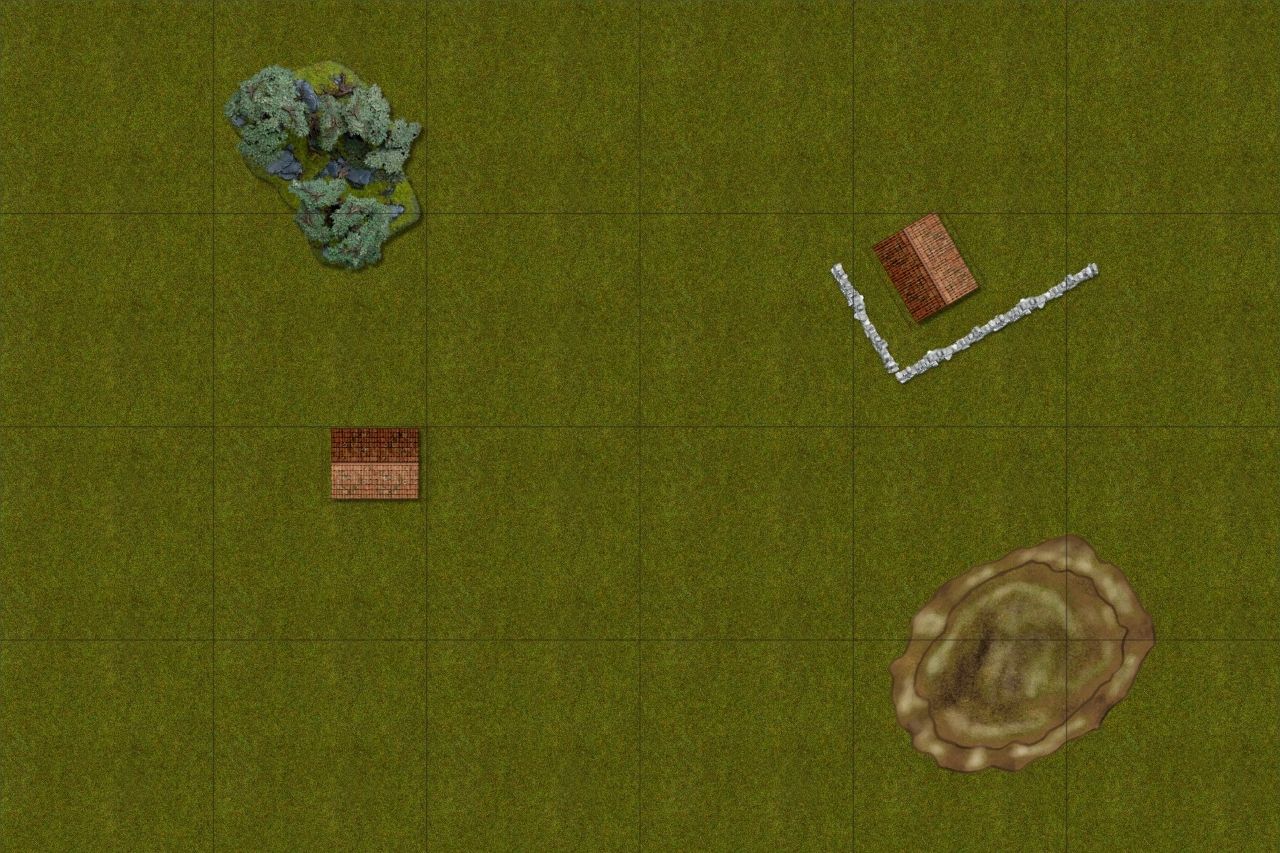 |
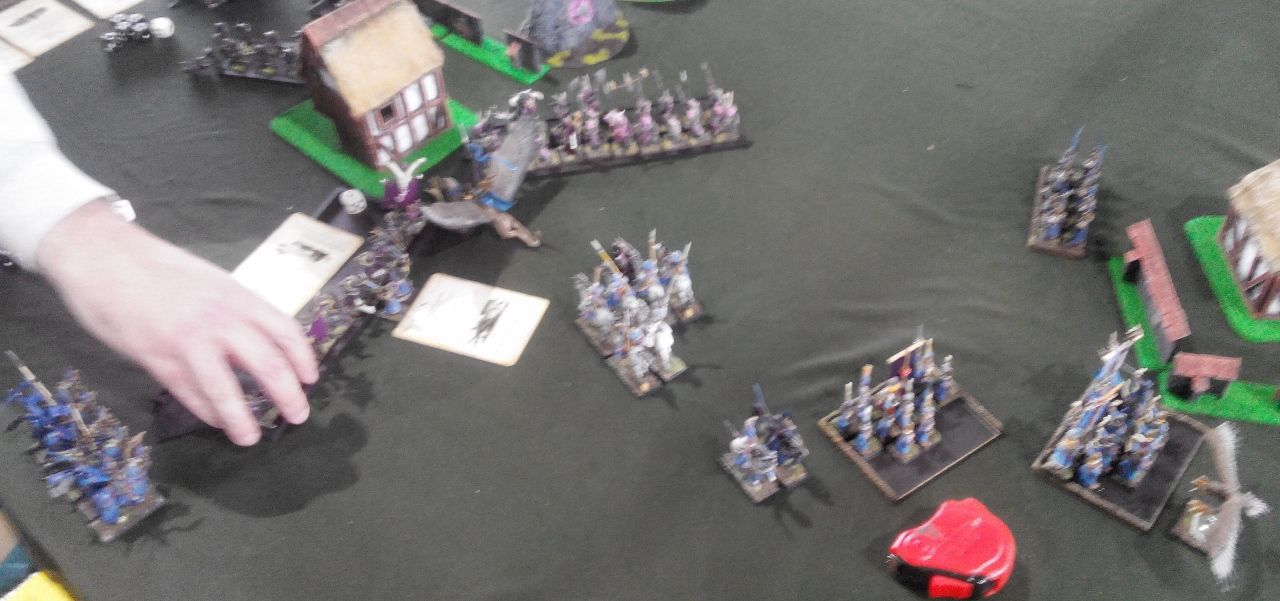
| Battle field before the deployment |
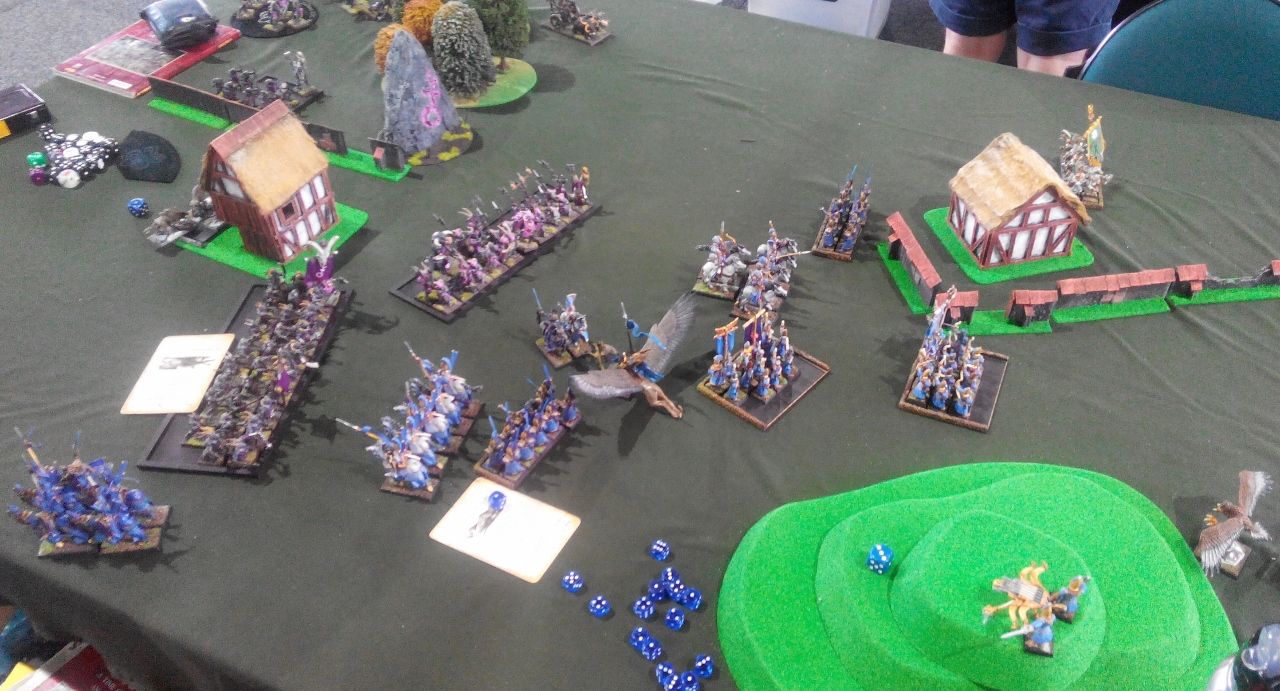
The battle field looked empty in the middle but please, take into account the fact that deployment zones contained all the terrain here and created additional problems in already narrow space. I though I would still prefer the right deployment simply because I could deploy shooters on the hill and keep the line of sight open.
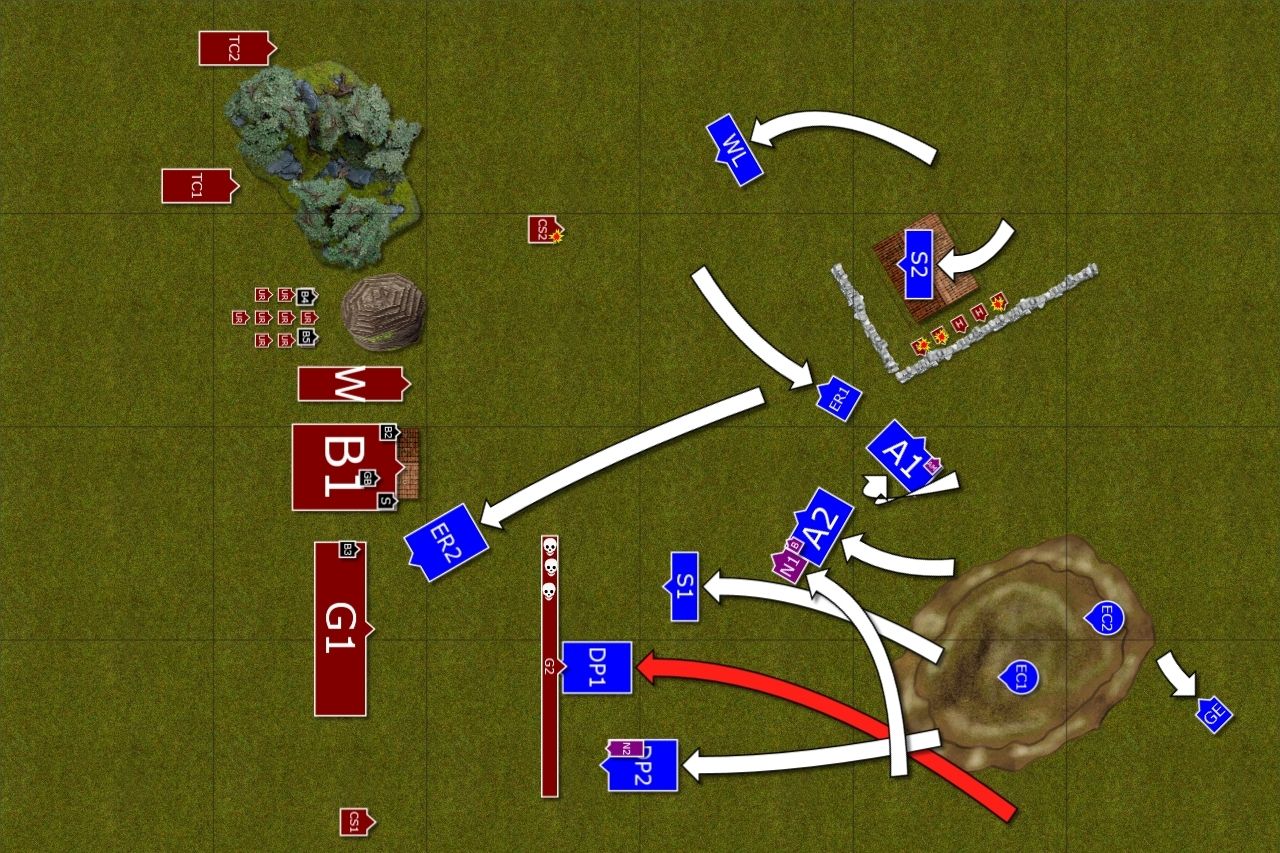
Deployment
Deployment
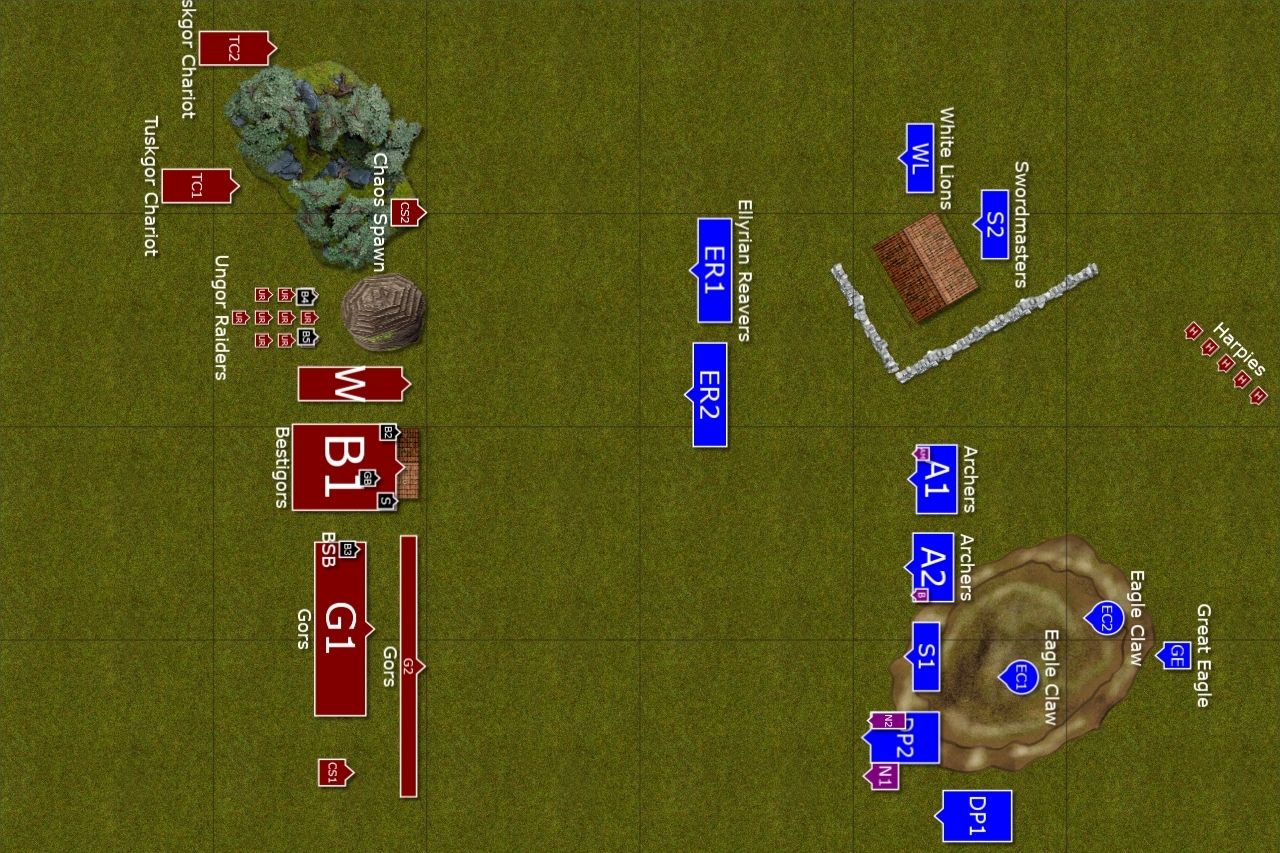 |
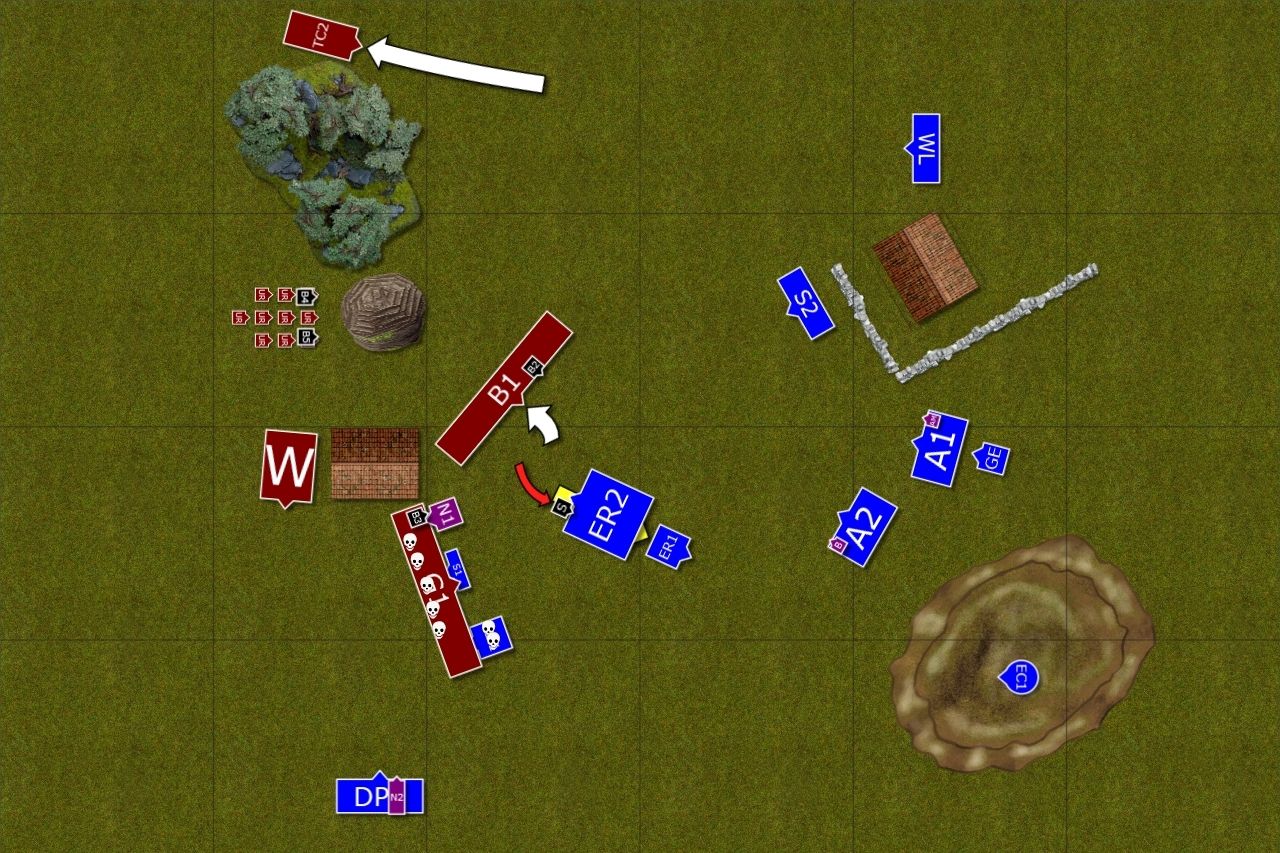
| Deployment after vanguards |
Interestingly, we still deployed in weighted flank formation. I wanted to use the chance to attack with cavalry on the flank and hopefully go through both Gor units since they were deployed wide and they might lose steadfast easier. At the same time chariots would be on the other flank and it would take some time for them to join the combat.
I just made one mistake, forgot about the back yard and didn't put anything to prevent harpies from deploying behind my lines.
Beastmen Shamen got the following spells:
Great Shaman - Wildform, Flock of Doom, Curse, Savage Beasts
Slugtongue - Spirit Leach, Fate of Bjuna
Brayshaman - Wildform
Brayshaman - Miasma
 |
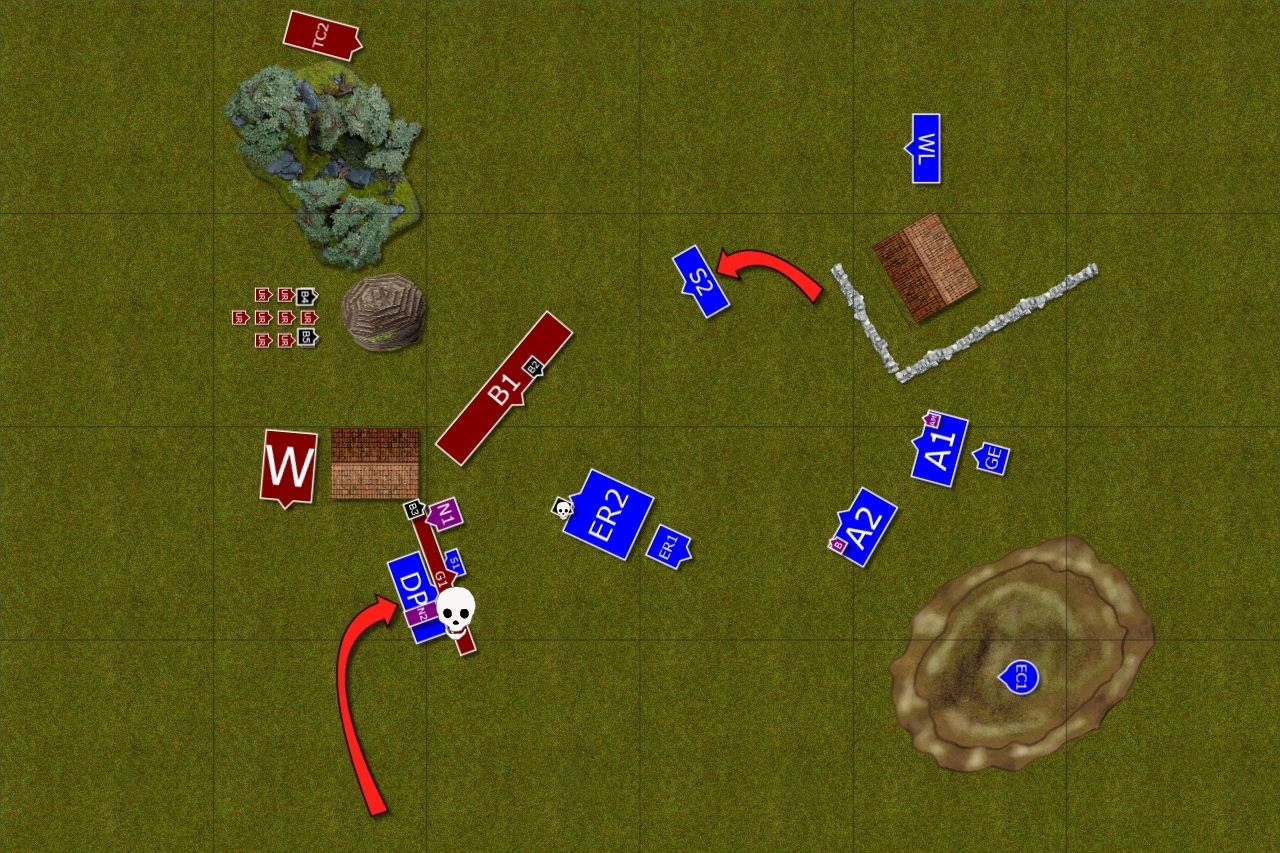
| Units affected by Slugtongue |
James won the roll-off and his was first turn:
Beastmen - Turn 1
Beastmen - Turn 1
 |
| Beastmen set up baits |
 |
| Harpies take cover |
Beastmen didn't move much and sent their expendable units forward instead. Magic was not strong yet and the spells that went through didn't do much damage much to the annoyance of Great Brayshaman. But maybe it was silence before the storm?
Outcasts - Turn 1
 |
| Elves - first to fight |
 |
| Beastmen are steadfast |
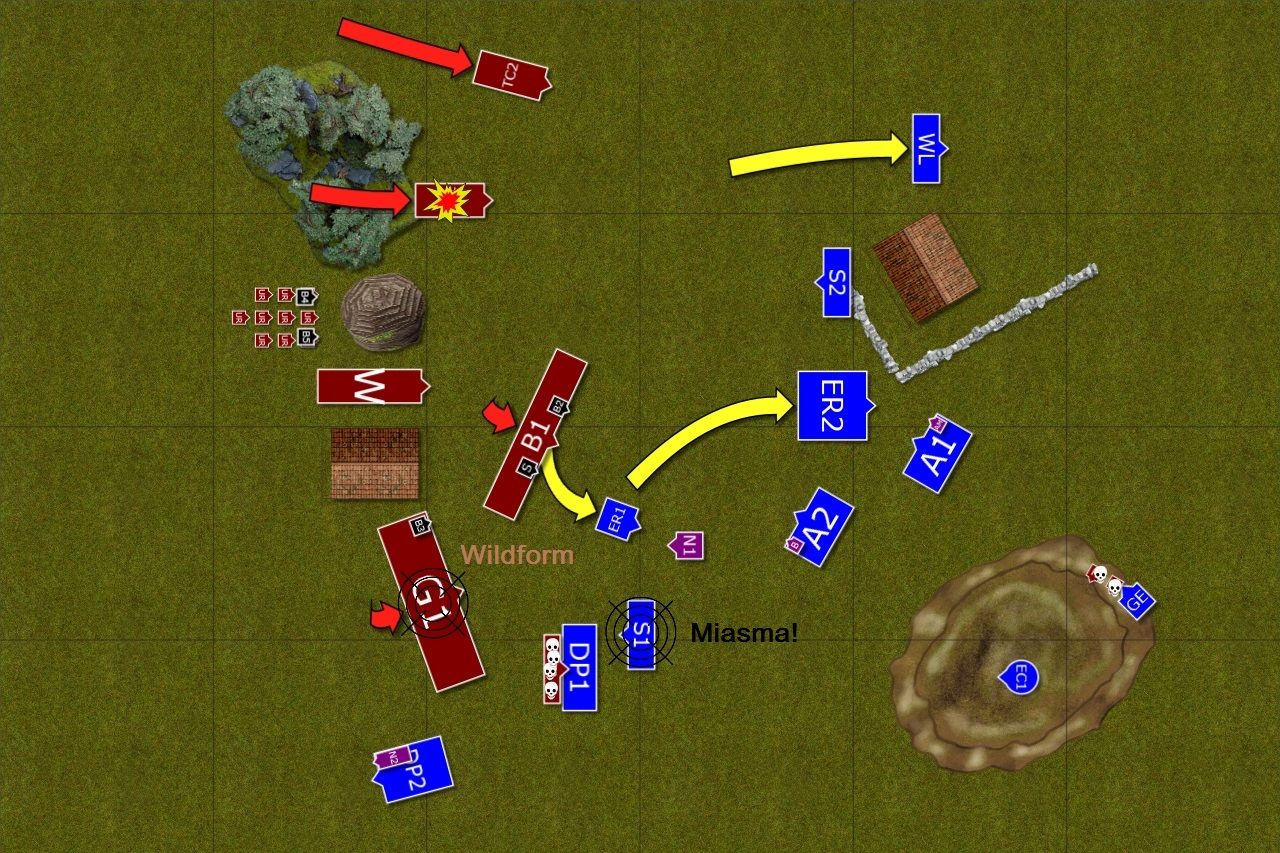
One regiment of the Dragon Princes charged Gors who acted as a living shield. Although they were in the open only one regiment was sent against them to tie them in combat and block the path for the bigger unit behind them. Second unit of the cavalry and Swordmasters closed in to attack as a second wave.
In the meantime, the Loremaster and his archers tried to scare off the harpies but despite enough casualties to do so, flying beasts showed unusual courage and didn't flee.
Beastmen - Turn 2
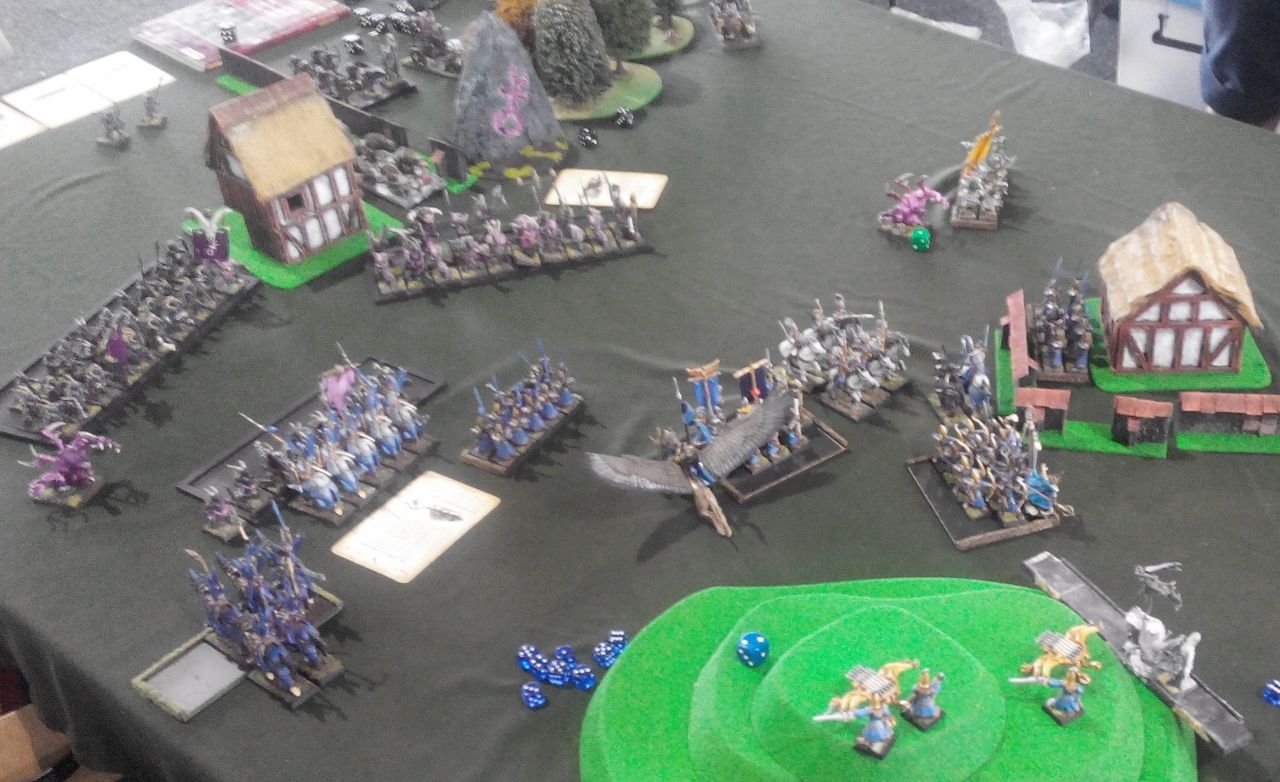 |
| Bestigor leave the building |
 |
| Disaster! |
Beastmen tried to counter attack. Big gor regiment chased off Reavers who then had to avoid warhounds but were swift enough to outrun both. Then Bestigor moved out of the building to dominate the center. Great Brayshaman cursed nearby dragon princes but in his arrogance took way too much energy from the winds of magic and the spell backfired! The result was truly catastrophic as one third of the unit and Shaman himself were dragged to the parallel dimension.
Outcasts - Turn 2
 |
| Elves counter attack |
 |
| But gors still hold on! |
Elven commanders spotted an opportunity to hit the Beastmen from the unexpected direction. It required good coordination. Eagle Rider would attack big units of Gors first. Then, cavalry commander and his unit would attack the spawn in such a way that might lead them into the flank of the same Gor horde in the overrun. Thanks to that Elves wanted to assassinate enemy BSB. However, the air currents were still unstable and the eagle didn't reach the enemy. Seeing that, commander of the cavalry changed the orders in the last moment and they swiftly passed by the enemy regiment after trampling the spawn.
In other areas of the battle field the eagle counter attacked the harpies who managed to kill remaining crewmen of the bolt thrower and even held their ground! White Lions chopped another spawn to pieces.
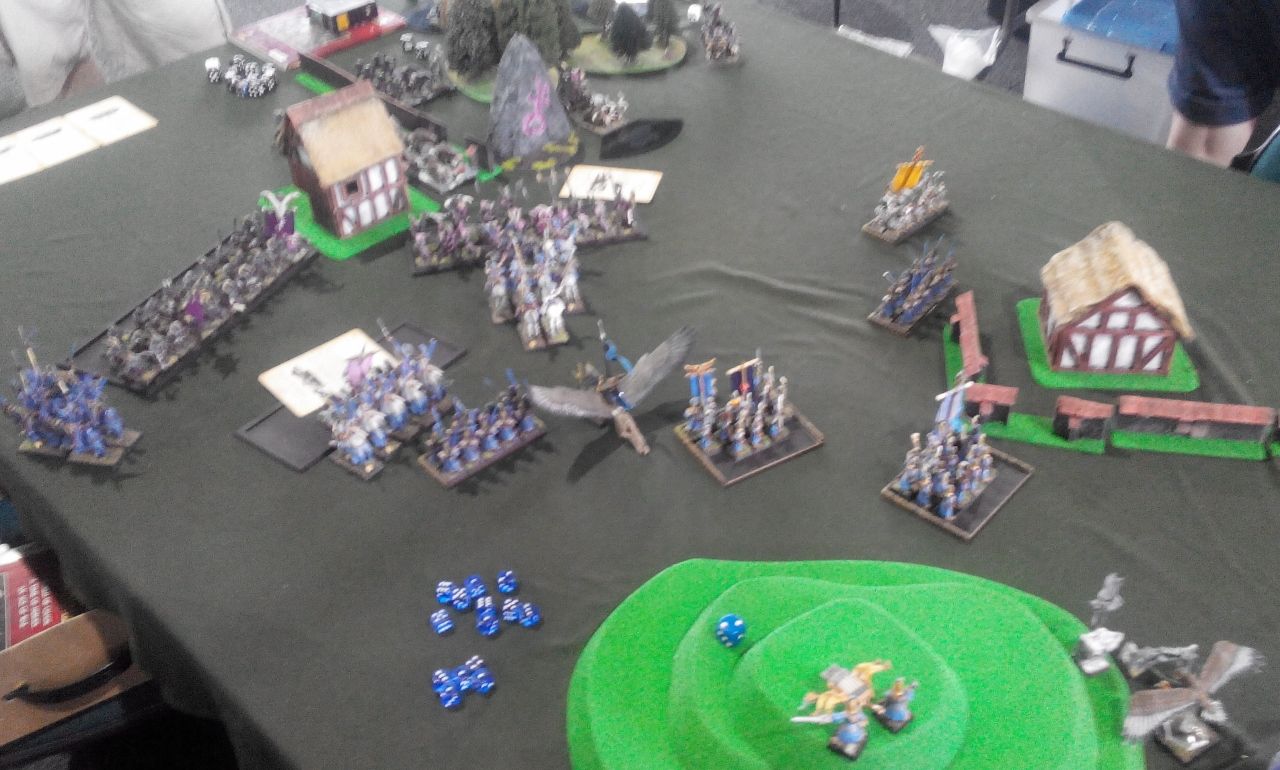
Beastmen - Turn 3
 |
| Exchange of blows continues |
 |
| Tactical retreat |
Both large Beastmen regiments tried to catch reavers but elven fast cavalry performed their feigned flight perfectly. Chariots tried to attack the Lions but they withdrew and one of the chariots got destroyed in the treacherous forest! (Edit: at least I think it did as I can't recall how it disappeared from the pictures!)
Expecting another charge, gors braced for impact and got toughened by the magical efforts of one of the shamen.
Outcasts - Turn 3
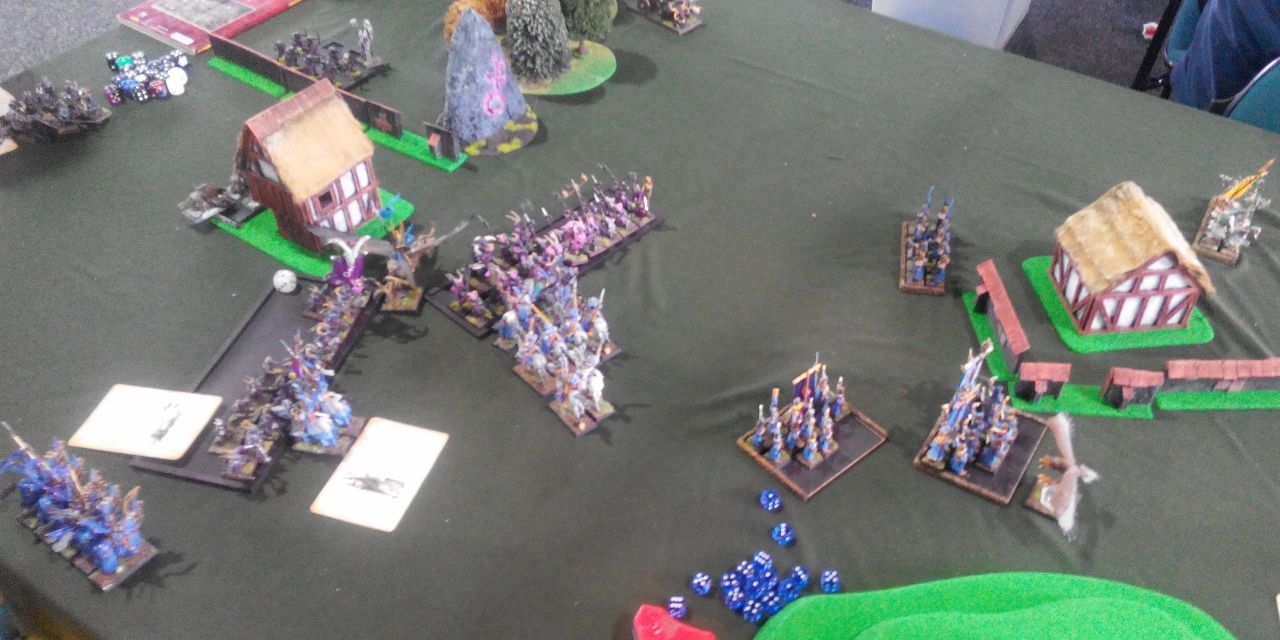 |
| Charge! |
 |
| Horrendous casualties on both sides! |
Eagle rider, Dragon Princes and Swordmasters attacked as one. Swordmasters got boosted by the Loremaster too which helped a lot because Beastmen were incredibly tough. Eagle Rider singled out enemy BSB but inflicted only a single wound and the Banner was not destroyed. (Edit: It was very disappointing to hit 3 times and then roll two 1's to wound with Star Lance. I guess it was some poor copy :D)
The casualties on both sides were enormous but Elves won the combat. However, Beastmen were steadfast and kept fighting!
Beastmen - Turn 4
 |
| The fight continues |
 |
| Slugtongue attacks on its own! |
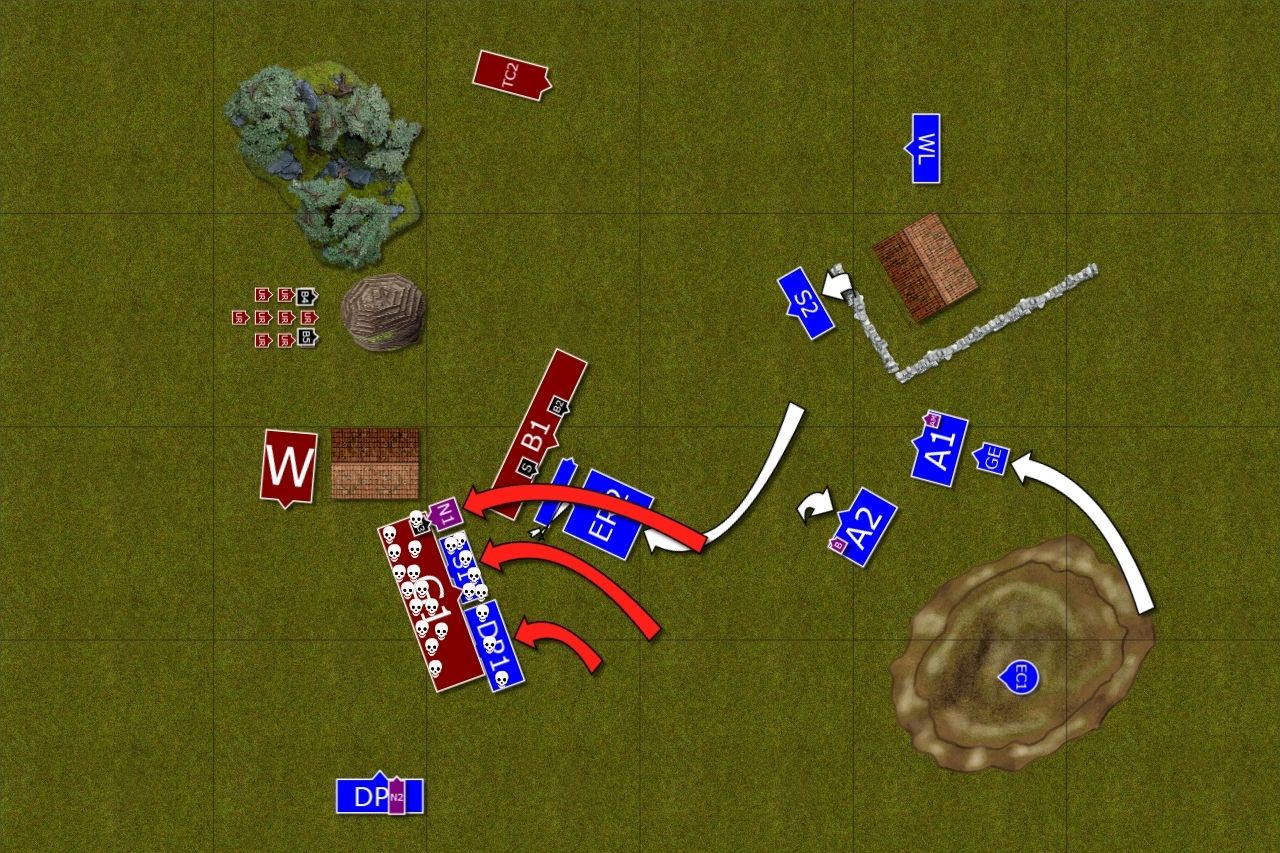
Beastlord, annoyed with elven fast cavalry sent Slugtongue on its own to attack the Elves. They held but fled soon after. However, their companions got their back and held against pursuing Shaman.
Bloody combat continued, Elves fell many Beastmen again but there were only a few left to fight. Fortunately, the cavalry was coming!
Outcasts - Turn 4
 |
| Heavy cavalry charge |
Cavalry commander gave the order and Elven knights stormed into enemy ranks killing them all. It was perfect timing to save remaining Swordmasters and Eagle Rider.
Another group of Swordmasters charged the exposed flank of Bestigors but didn't make it in time. Beastlord, seeing that his forces melted away used the power of nearby Herdstone to withdraw under the cover of magical mist.
Summary
 |
| Turn-by-turn summary animation |
After-battle thoughts
Unfortunately, we run out of time and had to finish the game with only 4 turns played. I was very happy with the victory but of course I was curious if I could do something to get Bestigors too. Please, note, that I didn't move some of the units in my last turn as we wanted to finish crucial combats.
In any case it was very intense battle full of action. I want to thank James for great game and I am sorry his Great Shaman betrayed him! There is no doubt the game would have been very different if he survived that Cascade.
I was very happy with how I played this game for a change. I like the fact I went for aggressive approach and it paid off. Of course getting two 1's for the star lance was a little bit disappointing :)
I liked a lot how I managed to use fast cavalry to set up double flee reactions that kept Bestigors in the middle of the table doing nothing. It is a very good example of what reavers can do that no other unit in the army can.
The maps and diagrams do not show it well but there were a few opportunities where the order of charges was of an extreme importance. For example, James declared the chariots first when he could have waited. If he declared his gors as attacking first then reavers would have to go into chariots charge range and may have been destroyed in the process too!
I made some mistakes too, main one being the issue with harpies. They should not have been allowed to land behind my lines. Fortunately, I managed to deal with them although they took one of the bolt throwers with them as well.
With 16-4 victory from game 7 I was ready for the last game of the tournament! Thanks for reading!
Cheers!
Good game mate!
ReplyDeleteThere's some talk going on about a community steered WHFB 8.5. Many good suggestions go round, but the one thing that I would like to see different is the magic phase. As it is, it's a very high risk, very high reward kind of thing. This ruins the fun. Basically, a player can 6 dice a spell like Dweller's Below and if it goes through irresistibly, it will end up doing so much damage that the game is pretty much over. On the other hand, it can also seriously miscast and cascade your own caster. Either way, the game can pretty much be over and done with in one instant.
I like risk and reward, but it has to be moderate. Anyways, I'm mentioning it because of the cascade of your opponent's shaman. Though I think it didn't even happen from a six diced spell? Still, it shows the principle. You yourself have had this happen far too often. And with a single magic user, you're very vulnerable to it, too. I think that's why you started using the Earthing Rod so much, even if that still doesn't give you a guarantee.
I think that allowing a maximum of five dice per spell would help a lot, it would dissuade heavy spell casting (but still make them a last ditch effort option) and turn the magic phase more towards multiple smaller spells. I think that makes for far more fun games.
Anyways, a bit off topic rambling I guess. But a very good game and highly enjoyable read!
Thanks! I was really happy to have a well earned victory and based on close combat results mainly. That felt good! And I think opponents take the defeat better when they have a chance to fight back.
DeleteYes, I know about fan made efforts, Swedes call it 9th Age :) I do agree there are many things in WHFB that are this high risk, high reward situations. But in terms of magic I would say that is not a case! Many wizards can "risk" 6-dicing some deadly spells and miscasts can be quite acceptable result indeed.
On the other hand Miscasts feel like overkill when you get it on Miasma on 2 dice end detonate half of the unit and lose the wizard in the process :D
I am definitely curious about the outcome of the 8.5 or 9th Age initiatives. I am just worried it will be even more complicated, haha.
I am glad you enjoyed the game, that is always the priority. I was a little sad when my opponent said that it proved Beastmen are no-go in tournaments. I think it is not true. And I am not talking about flying doombulls with 3++ ward save or Blight Kings that can now support Beastie Boyz :)
Cheers!
Yeah. I mostly play Wood Elves and we used to say for years that our army book was outdated and that we were handicapped. But even in the new book, I find myself wishing we still had some stuff from the previous one as options.
DeleteStill, Beastmen are certainly challenging, I hope your opponent scored some better results elsewhere with them.
I thought you were Australian? Maybe like, Polish origin fifth generation Matilda Waltzer or something? So why do you specifically go mentioning Swedes? Why not Argentinans? Polynesians? Don't you wonder how they call the new community supported Warhammer iteration? :-p
Hi there!
DeleteThe thing I like a lot about certain side effect of having an old book such as Beastmen and previous WE is that when you met a player with this force on the tournament there was a great chance he was quite an expert with it and you could learn a lot from him :)
I simply worked in outside of Poland for last decade and it happened I got a job in Australia for the last 4 years. :)
I mentioned Swedes because I know the guys who are responsible for Swedish comp for 8th edition started a topic on The Warhammer Forum about their project called 9th Age. But while they might be the driving force I am sure the group already contributing to it is very much international! :D