
Game 1 - Dawn Attack - Jack - High Elves
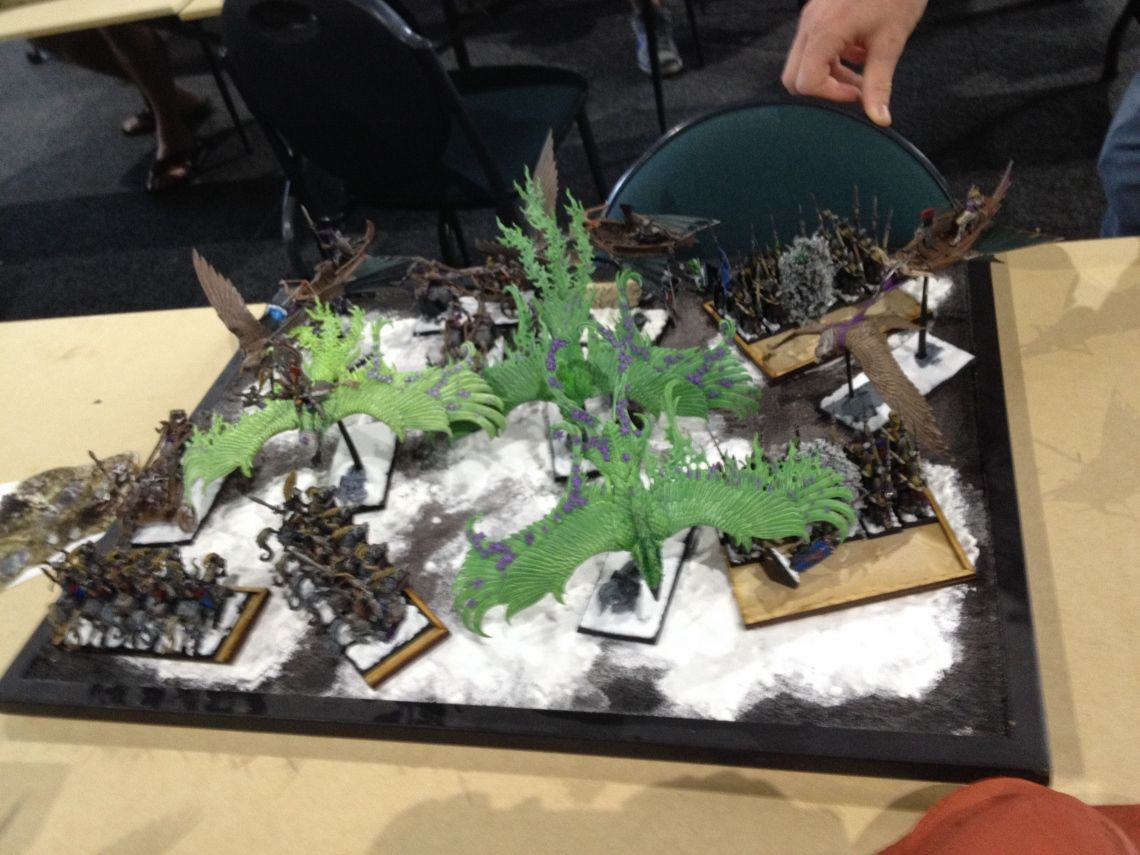
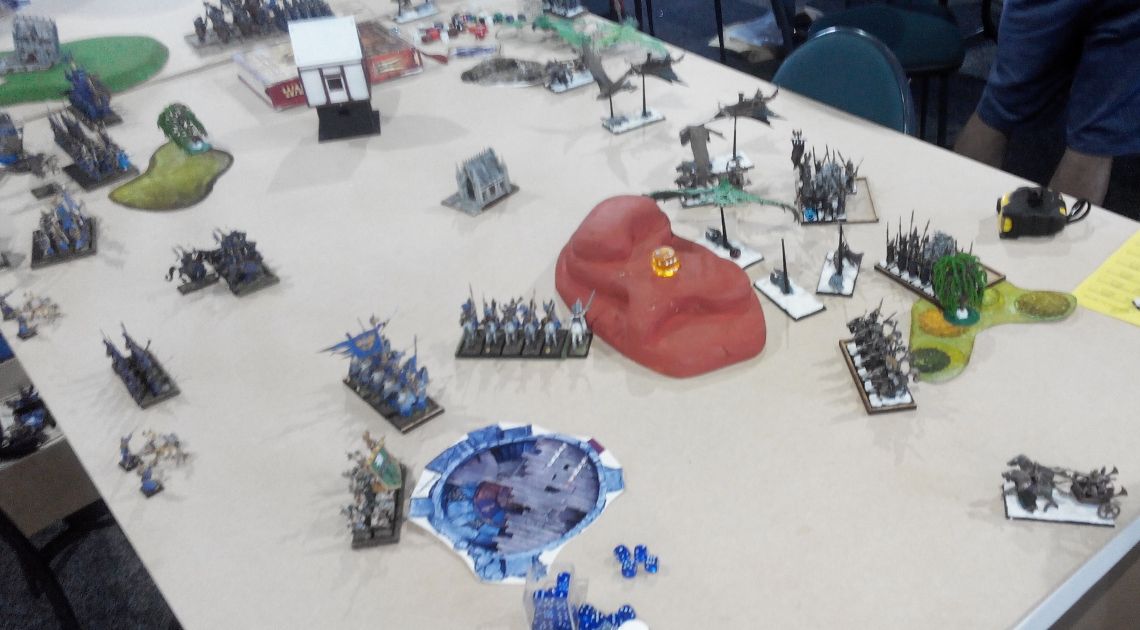
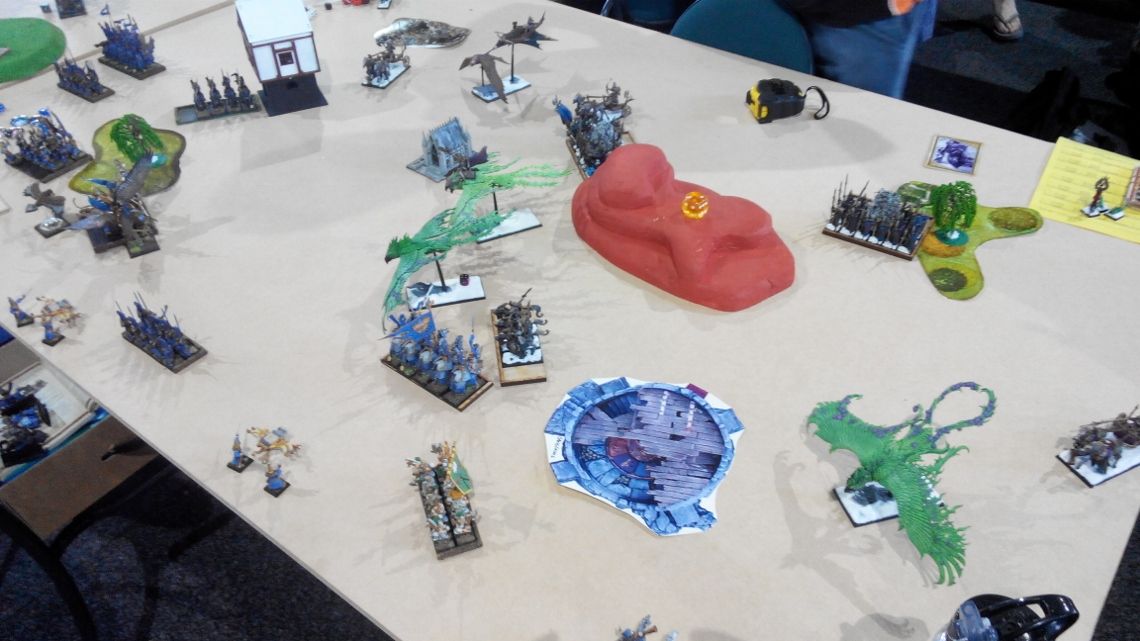
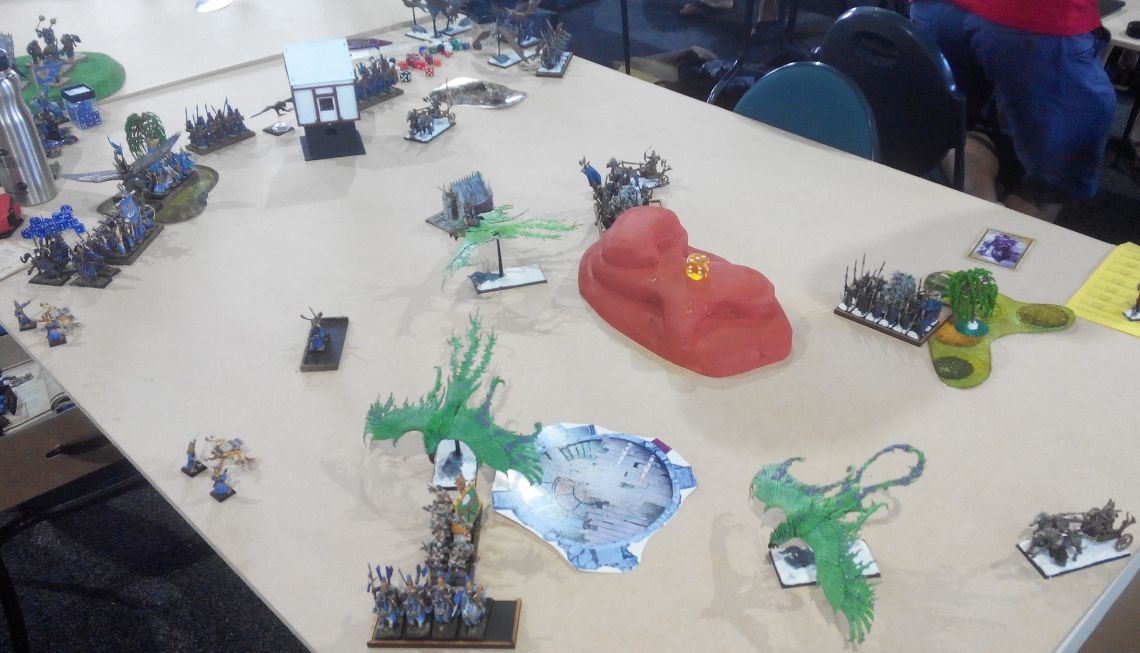
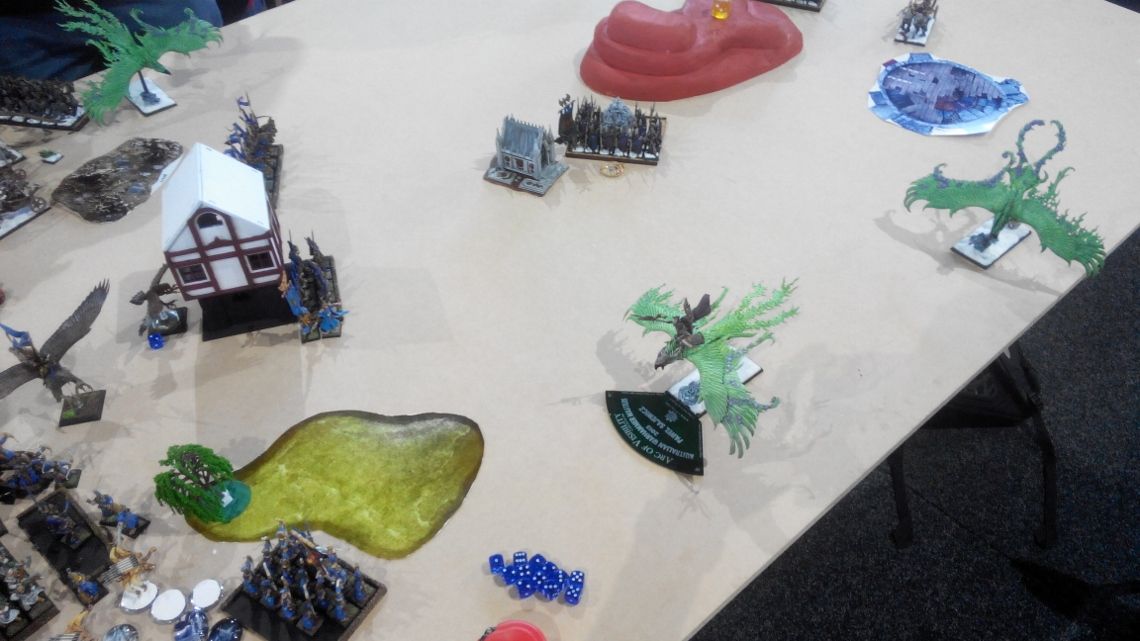
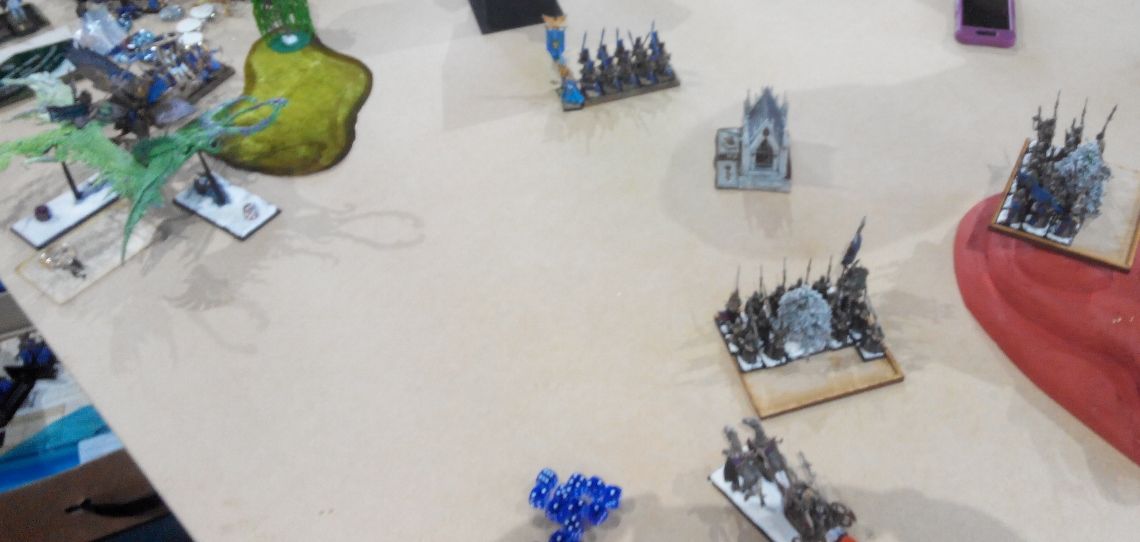
The first game of CanCon usually is a Dawn Attack and I think it is a suitable scenario to begin with. There were no modifications so we played by the book. I had a great pleasure to meet and play against Jack for the very first time. Jack decided to bring a very unique army to the event and I must say it looked absolutely fantastic! Here is a picture of this glorious host when assembled on a display base:
The first game of CanCon usually is a Dawn Attack and I think it is a suitable scenario to begin with. There were no modifications so we played by the book. I had a great pleasure to meet and play against Jack for the very first time. Jack decided to bring a very unique army to the event and I must say it looked absolutely fantastic! Here is a picture of this glorious host when assembled on a display base:
As you can see there are many fliers and many chariots in it! It was a fast force with some shooting support but due to the nature of the Dawn Attack we were not sure what kind of bizarre formation our respective armies are going to adopt. With many units on each side we expected some of them may end up in weird places. Before I proceed to the deployment, here is Jack's army list with more details:
High Elves - Army List
Annointed, General, Flamespyre Phoenix, Dragonbane Gem, Charmed shield, Biting blade, Khaines ring of fury - 480
Mage, Level 2, Dispel scroll - Lore of Death - 145
BSB, heavy armour , Shield of the merwyrm , Ruby ring , Warrior bane - 144
5 Ellyrian Reavers, standard , spears/bows - 105
5 Ellyrian Reavers, standard , spears/bows - 105
18 Archers, musician , standard - 200
18 Archers, musician , standard - 200
Sky cutter, bolt thrower - 120
Sky cutter, bolt thrower - 120
Sky cutter, bolt thrower - 120
Tiranoc chariot - 70
Tiranoc chariot - 70
Tiranoc chariot - 70
Flamespyre Phoenix - 225
Flamespyre Phoenix - 225
I decided to take the following version of my MSU High Elves
Outcasts - CanCon 2015 - Army List
Loremaster, Obsidian Amulet, Armor of Fortune, Earthing Rod - 320 (Earthing Rod -3) = -25
BSB, Dragon Armor, Great Weapon, Talisman of Preservation – 154 (noble -4, bsb -10) = -14
Noble, Great Eagle, Dragon Armor, Star Lance, Potion of Foolhardiness, Enchanted Shield, Golden Crown of Atrazar – 184 (Noble -4, eagle -4) = -8
Noble, Barded Steed, Heavy Armor, Lance, Lion Cloak, Potion of Strength, Dawnstone, Charmed Shield – 149 (Noble -4, Elven Steed -1) = -7
14 Archers, Full Command – 170 (-7)
14 Archers, Full Command – 170 (-7)
6 Ellyrian Reavers, Musician, Herald, Bows, Spears – 136 (-4)
6 Ellyrian Reavers, Musician, Herald, Bows, Spears – 136 (-4, second unit -2)
5 Dragon Princes, Musician, Standard, Banner of Eternal Flame – 175 (-10)
5 Dragon Princes, Musician – 155 (-10)
10 Swordmasters, Musician, Bladelord – 150 (-6)
10 Swordmasters, Musician, Bladelord – 150 (-6)
10 White Lions, Musician, Guardian, Gleaming Pennant – 165(-6)
Eagle Claw – 70 (-7)
Eagle Claw – 70 (-9)
Great Eagle – 50 (-5)
Swedish Total: (300 – 138)/10 = 162/10 = 16.2
Points Total: 2400
As I have already mentioned, Jack had a very mobile army with a lot of impact hits that can ruin my day. I decided to adopt a defensive approach for the opening of the game and wait for Jack to come to me as he had to if he wanted to earn points. Let's have a look at his list with more details:
Annointed - With built in ward saves for himself and his mount they are already quite reasonable protected. With good winds of magic and casting a spell from the ring he and his phoenix can boost their protection to very respectable 3++! That is already hard to pass by and if you add to the equation the fact that he can return if killed then this model alone is quite hard to kill. I would also need to be careful with his fly over attacks (as well as the similar trick with the other two phoenixes). His offensive powers were less intimidating even if I had to remember about thunderstomps against my fragile infantry. Because of the flaming attacks of the phoenix, however, I could try to pin him down with Dragon princes or eagle riding noble.
Mage - just a level 2 but with 2 magical rings there can be an interesting magic phase to stop. He is obviously a character killer. And with a good roll for winds of magic stopping some sniping spells and magic missiles can be a trouble.
BSB - a little fragile character and I know it because I used to equip my own BSB in a similar fashion. Always a useful character but with only two units to join he may be facing some difficulties and keeping him safe can be a challenge.
Reavers - being a fan of light cavalry I always like to see them on the battlefield and I am always curious how my opponents want to use them. Jack decided to give them banners and I think it is due to the fact we were also to play Blood and Glory during the tournament. Usually, such unit is my priority to eliminate but with so many chariots around they might wait.
Archers - good support and can provide ranks to all these impact hits. Will be a great asset against my small units so I guess some returning fire and cavalry attacks should be a method to deal with them. However, as with reavers, I needed to deal with the fliers first.
Skycutters - target priority number one. The reason being I cannot divert them, and they also can potentially threaten the flanks with their bolt throwers. Hence, I decided to shoot and/or magic them down and use my cavalry and nobles to intercept them.
However, I was very curious how they will work in larger numbers and in this particular army.
Tiranoc Chariots - they might be cheap and fragile but there are 3 of them and together with skycutters they can be devastating on the charge. It looks like I will ask my shooters and the loremaster to do a lot of things, in particular early in the game!
Phoenixes - less popular cousins of Mr. Frosty, these guys can still be dangerous. First, flying over will be a problem against small units as even without many ranks these casualties will add up. Second, they are flying monsters and as such are a serious threat already. Third, they can help anointed and other elements of the army to get to the units they wanted to hunt down simply due to their ward save and ability to engage the enemy fast. Last but not least, they can do damage when they die and then return for even more harassment! Fortunately, I had some high strength attacks to use and I planned to employ them whenever possible.
The main challenge in this game would be to try and maintain cohesive formation despite the unpredictable scenario, use magic and shooting to the advantage and if successful I should be able to gain numbers superiority in order to kill more units than I lose. However, the difficulty will lie in the fact there are way too many targets and I would need to select them carefully and make sure they die as the chariots with a single wound can do a lot of damage anyway.
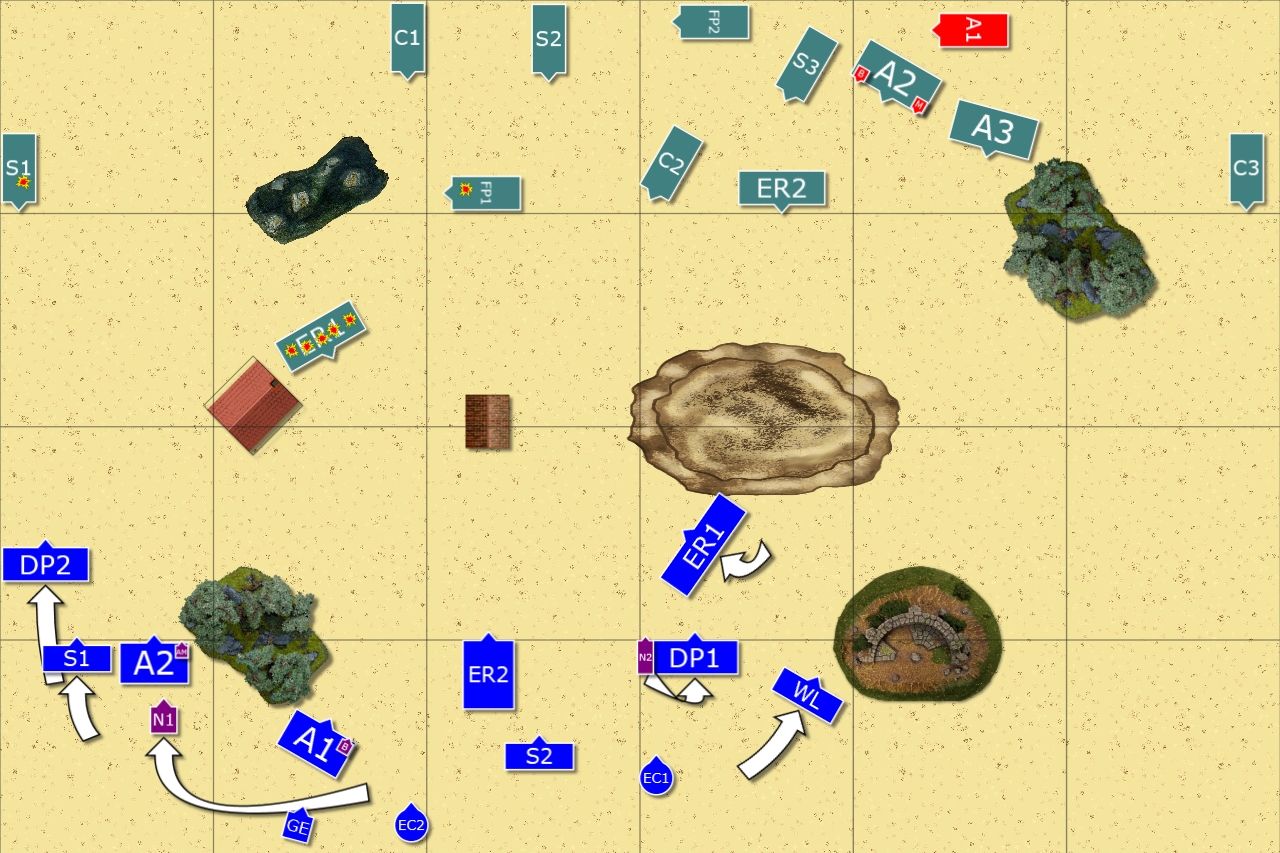
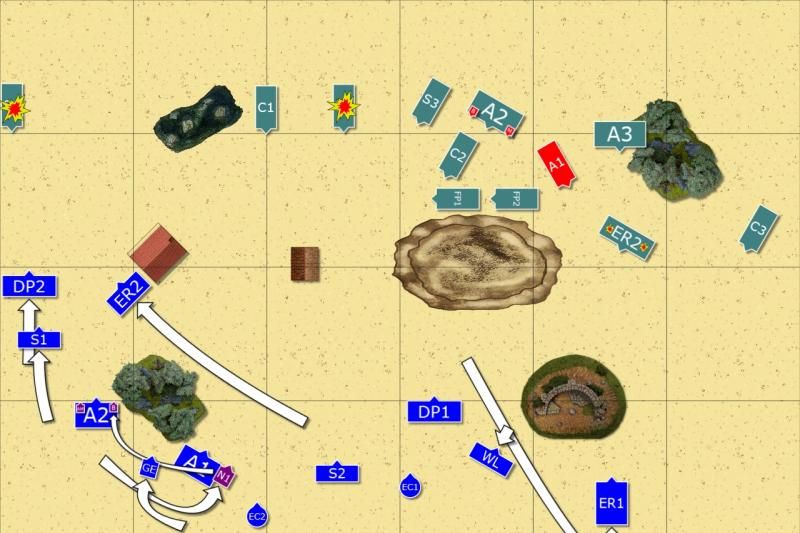
I won the roll off and had to deploy the army first. Please, note that the units on the flanks and in the middle usually were placed there because they had to. In the certain deployment area it was of course possible to arrange the formation to an extend but some improvisation due to the rolls was required.
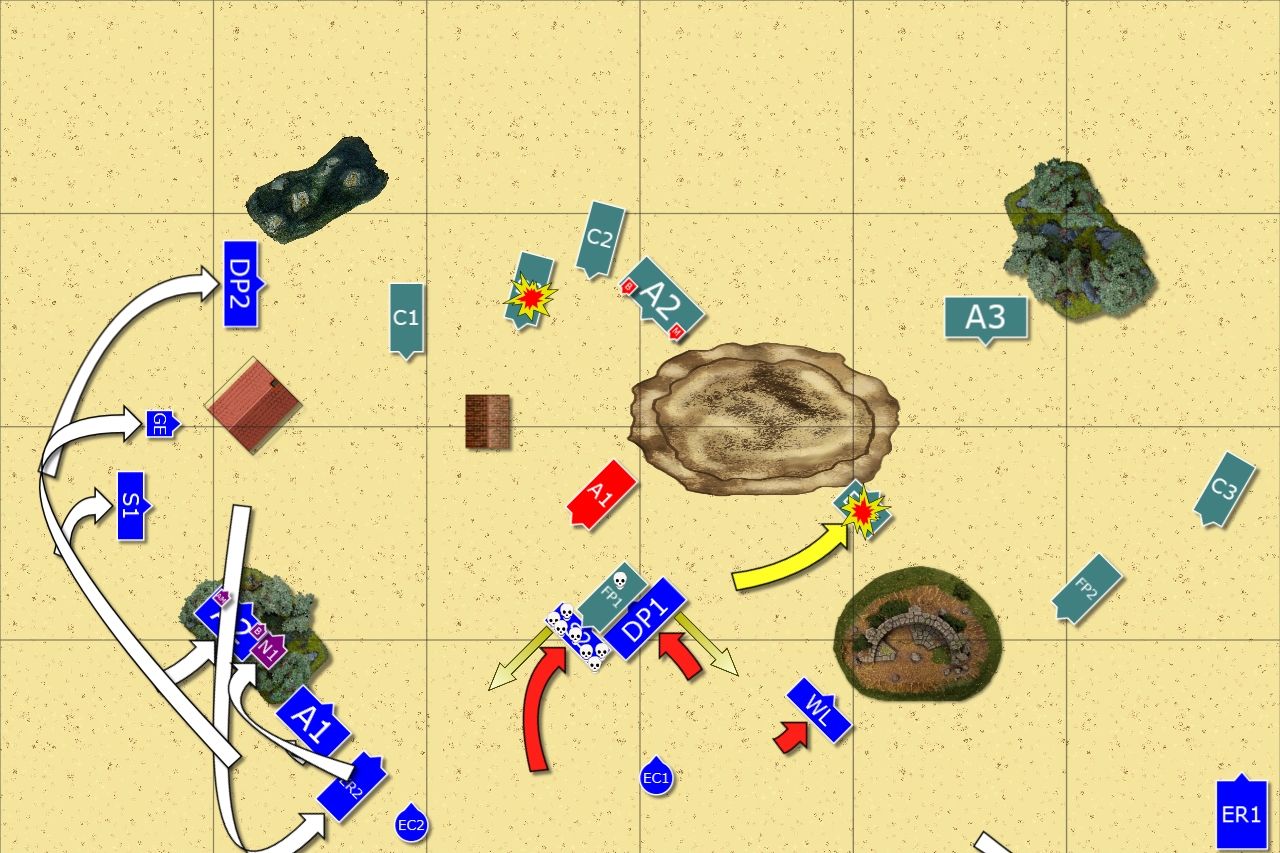
Deployment
 |
| Armies arrayed for battle - duel of two different MSU forces |
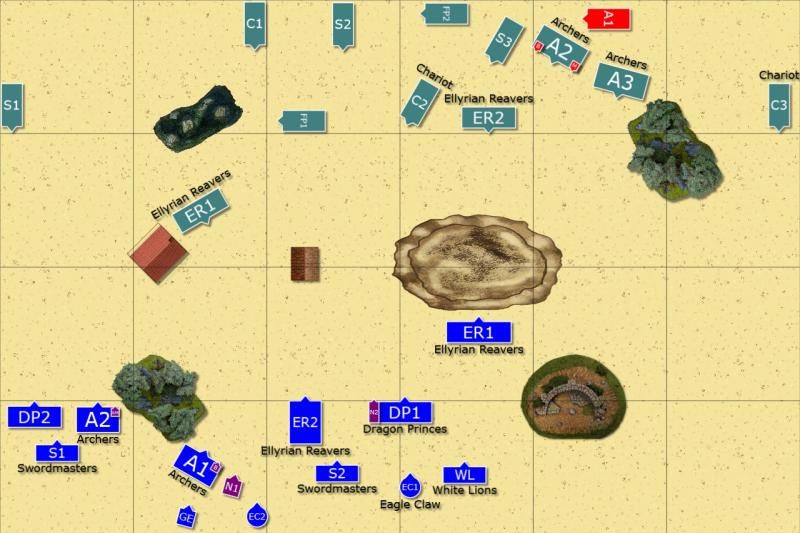 |
| Deployment of the forces after vanguard moves |
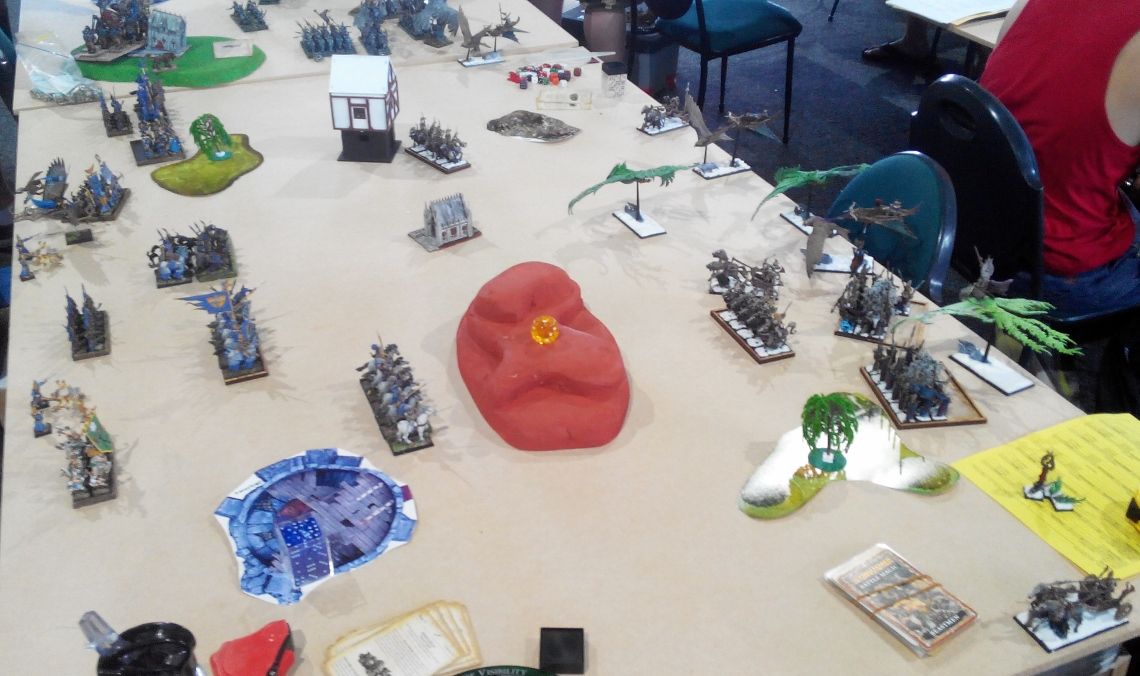
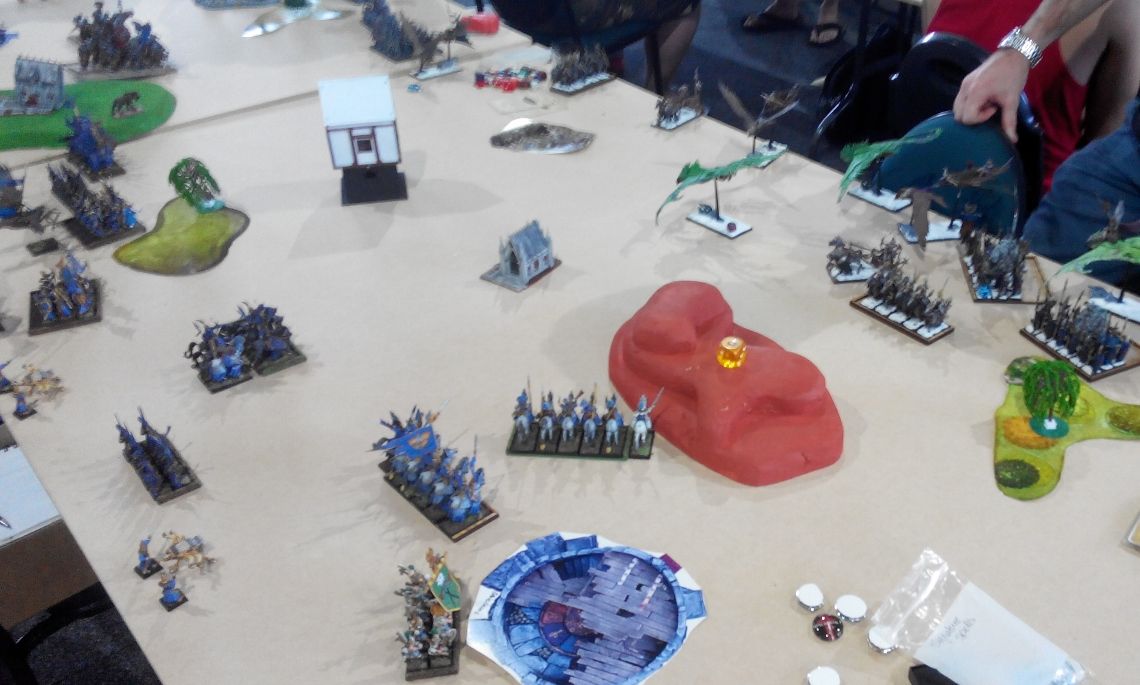
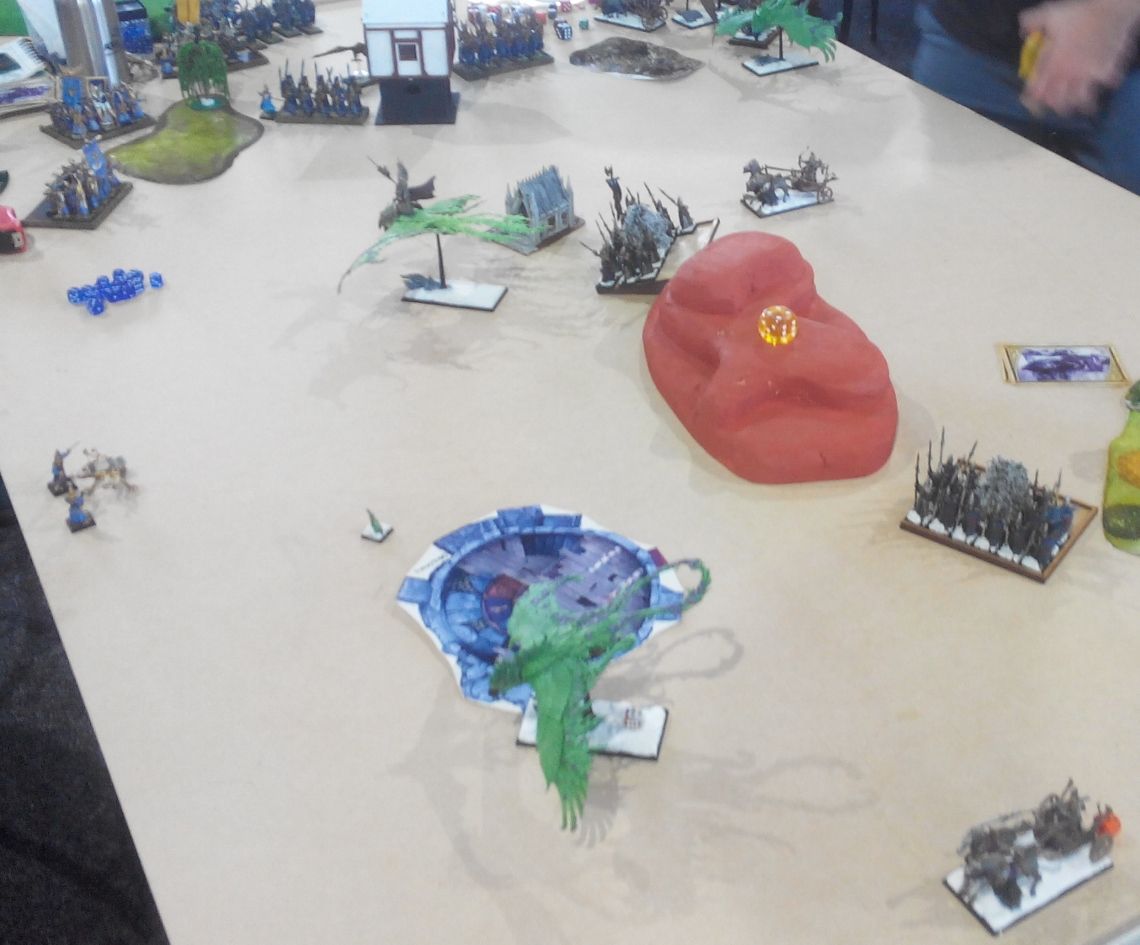
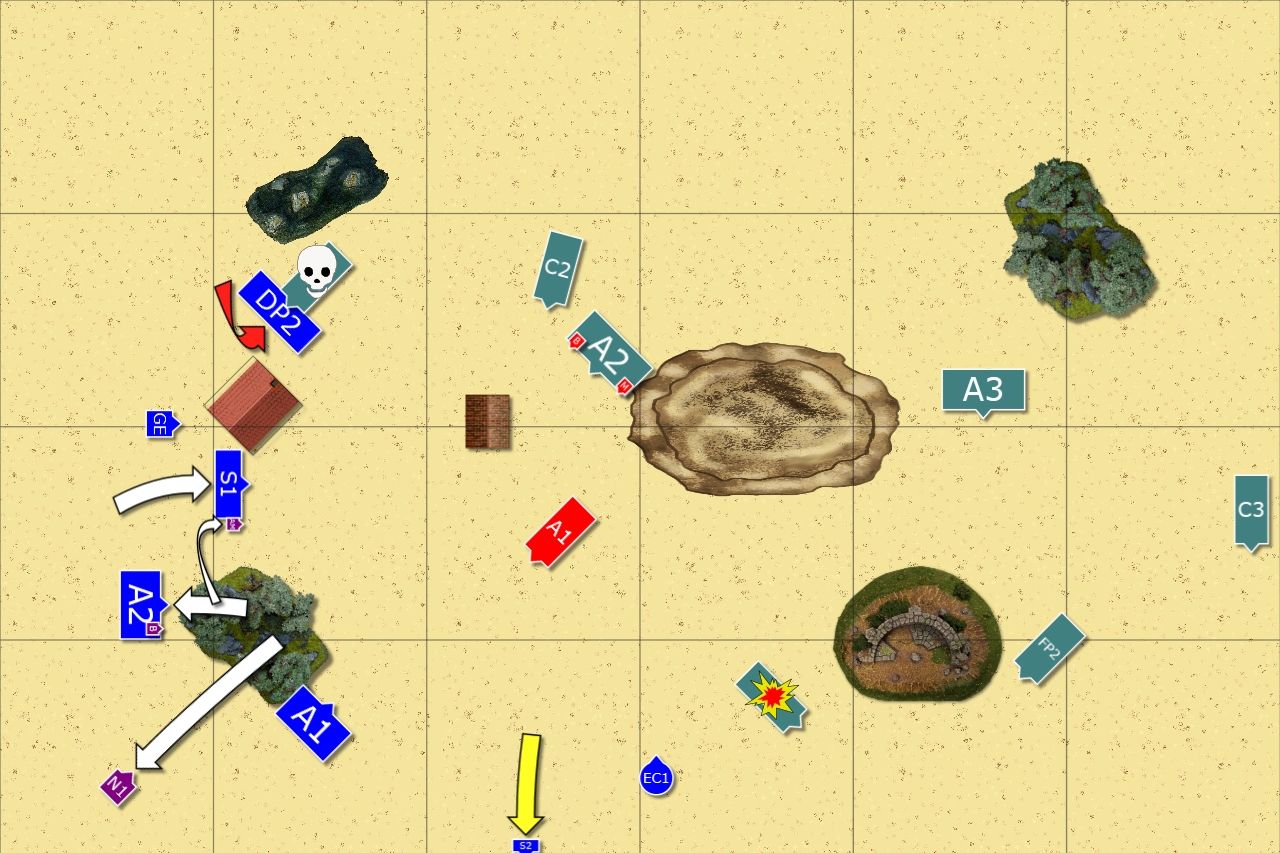
Both armies tried to adapt to the situation when units showed up in particular areas of the battle field. However, we were both relatively happy with what we got. Jack could hide majority of his army behind the hill while I was content with more distance between the forces. It looked more like a meeting engagement now.
Seeing that Jack forces were spread and some of them are at the rear I decided to focus my fire on one target at a time (if possible) and move to another only if the first one was destroyed. This approach can be important against reavers in particular that tend to hide well if in small numbers. Both our armies (with some exceptions) didn't give many points per unit but that is why bot of us looked for the opportunities to do enough damage to collect them.
Despite the fact I knew I have better chances to claim first turn I still deployed further away. First, it would prevent any disasters if lucky 6 was rolled to steal the initiative. Second, it was more important to have enough space in between to use shooting and magic to the great effect.
Jack did his best but the dice gods didn't hear him yet and I proceeded to my first turn!
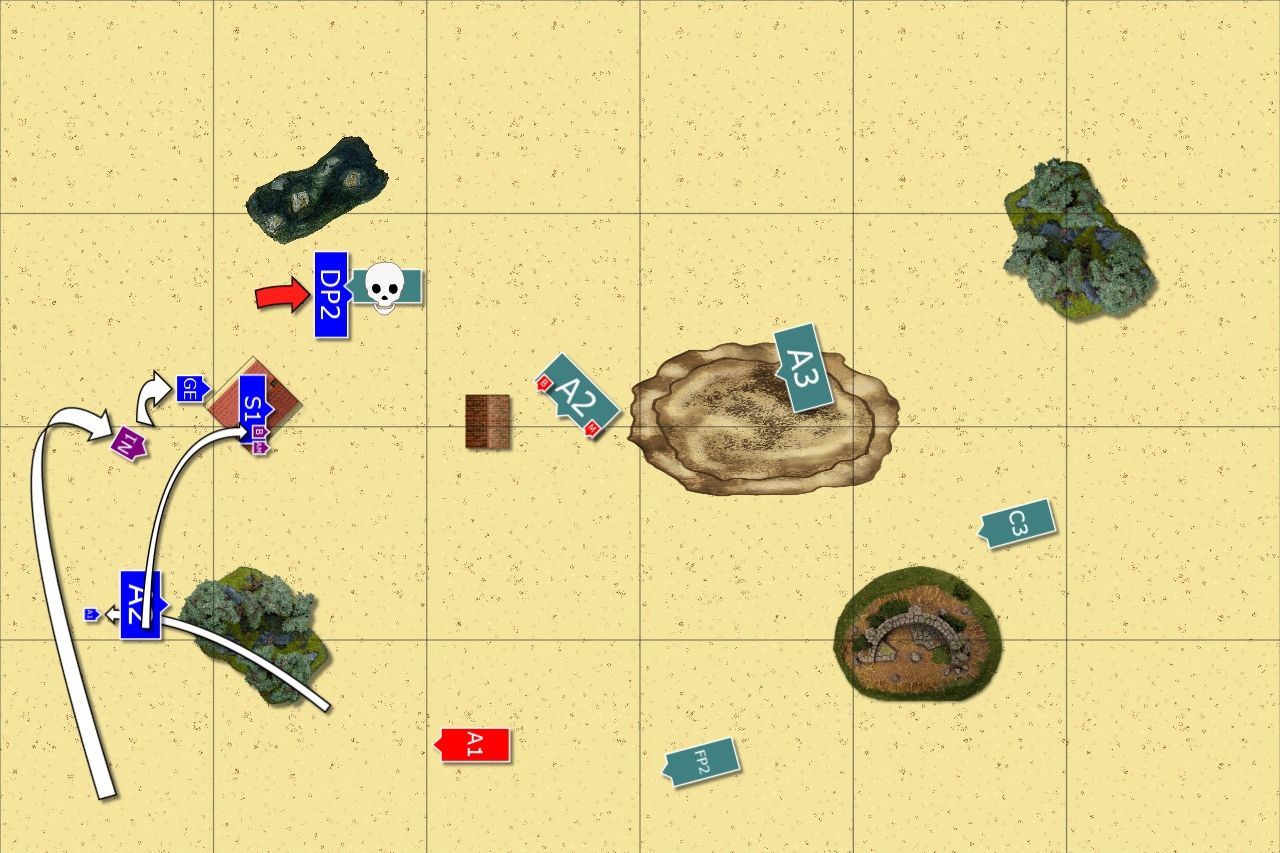
Outcasts - Turn 1
 |
| Shy advance on the flanks |
 |
| First blood for the Outcasts! |
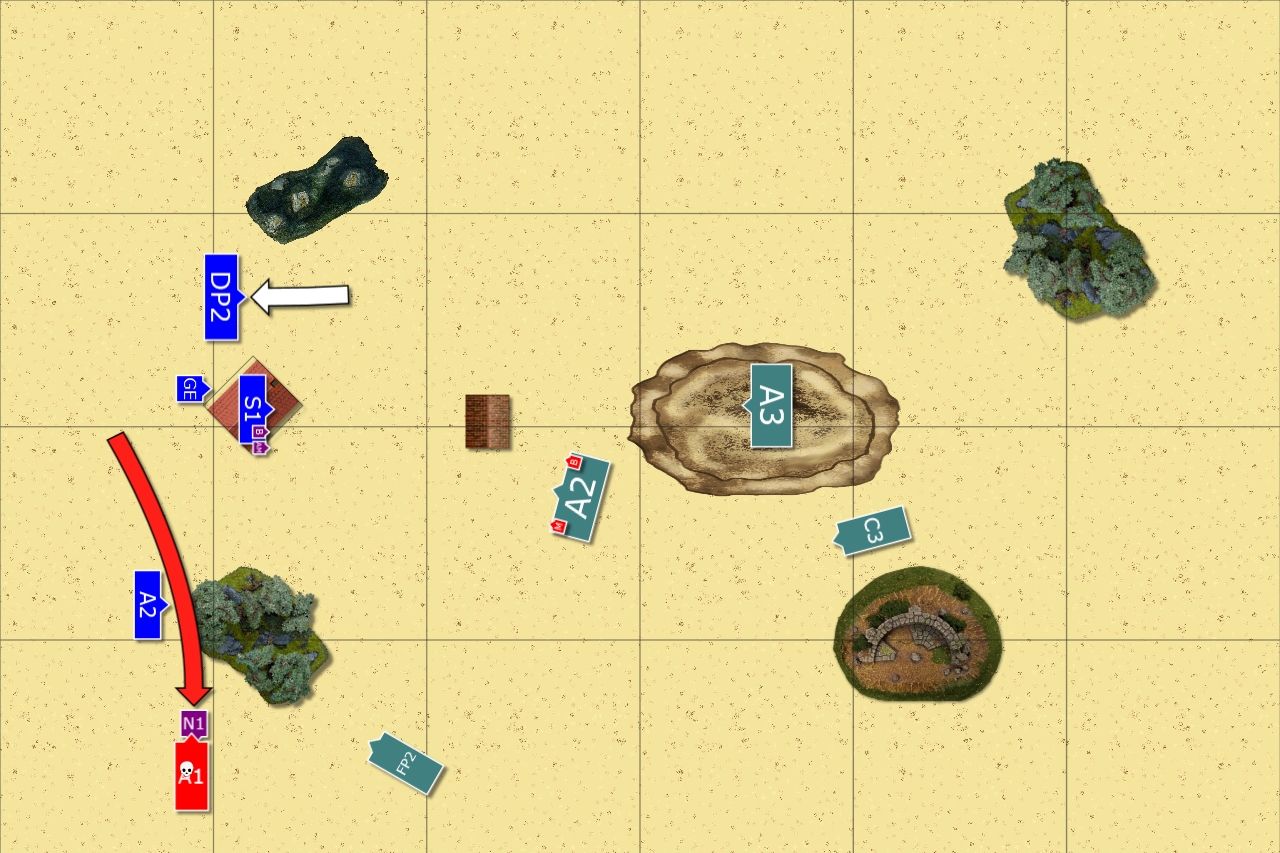
The Outcasts didn't move much knowing time is on their side (at least at the moment) and moved on the flanks slightly. While it was understandable on the right flank, the caution on the left was more surprising. With superior forces they could have put more pressure on a lone skycutter.
With so many targets Larry the Loremaster and the rest of army shooters had plenty of work to do and they started without a delay. Not many targets were in range yet so they focused on what they could. One skycutter and one Phoenix were wounded after a unit of reavers was destroyed. First blood for the Outcasts!
High Elves - Turn 1
 |
| Phoenixes hide behind the hill! |
 |
| Death mage claims his first victim! |
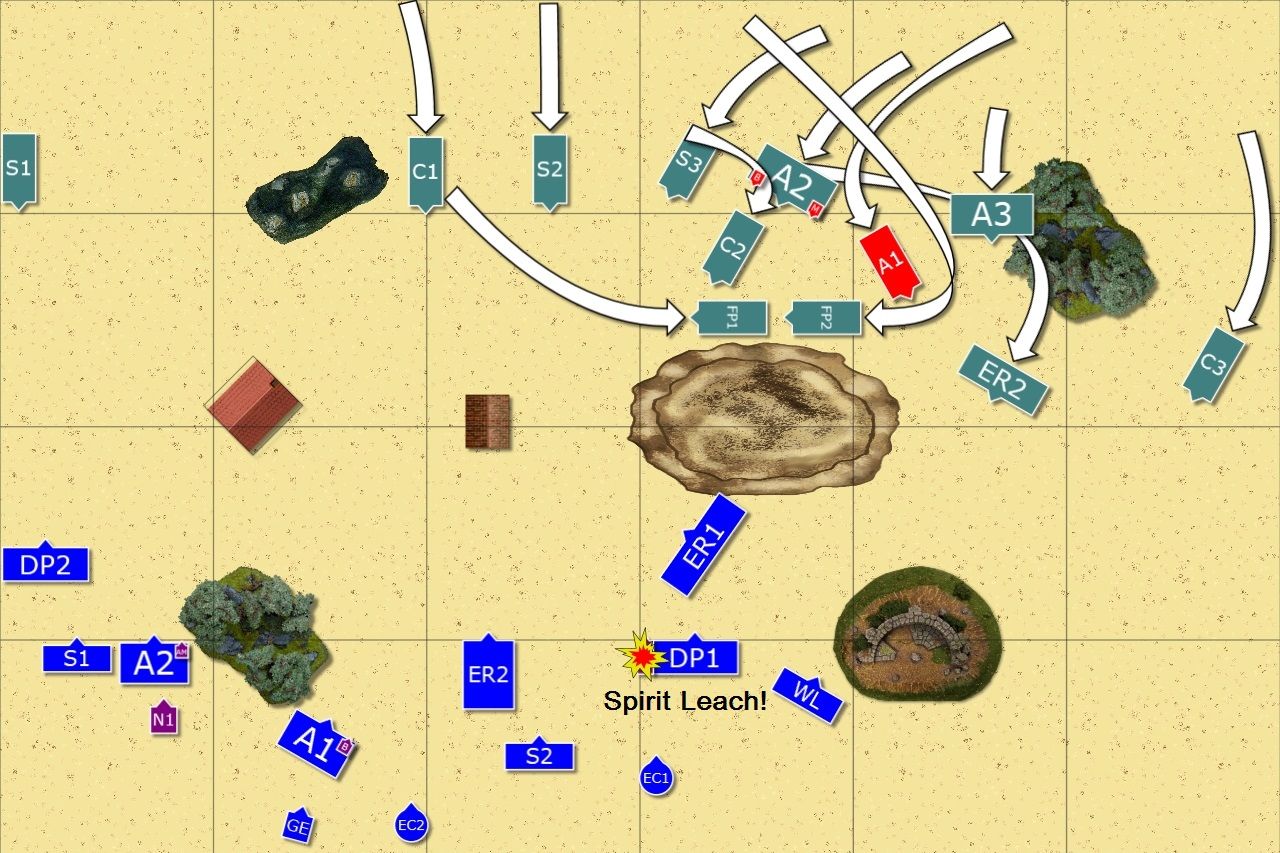
Visibly concerned with the efficiency of the shooting of their enemies, high Elves seek the shelter behind the nearby hill. Skycutters and charioteers tried to return the favor but only two opposing fast cavalry were unhorsed (Edit: forgot to add blast markers to ER2 unit). However, a lonely spellcaster managed to single out enemy noble knight and in the battle of minds he defeated his enemy, who fell dead from his horse.
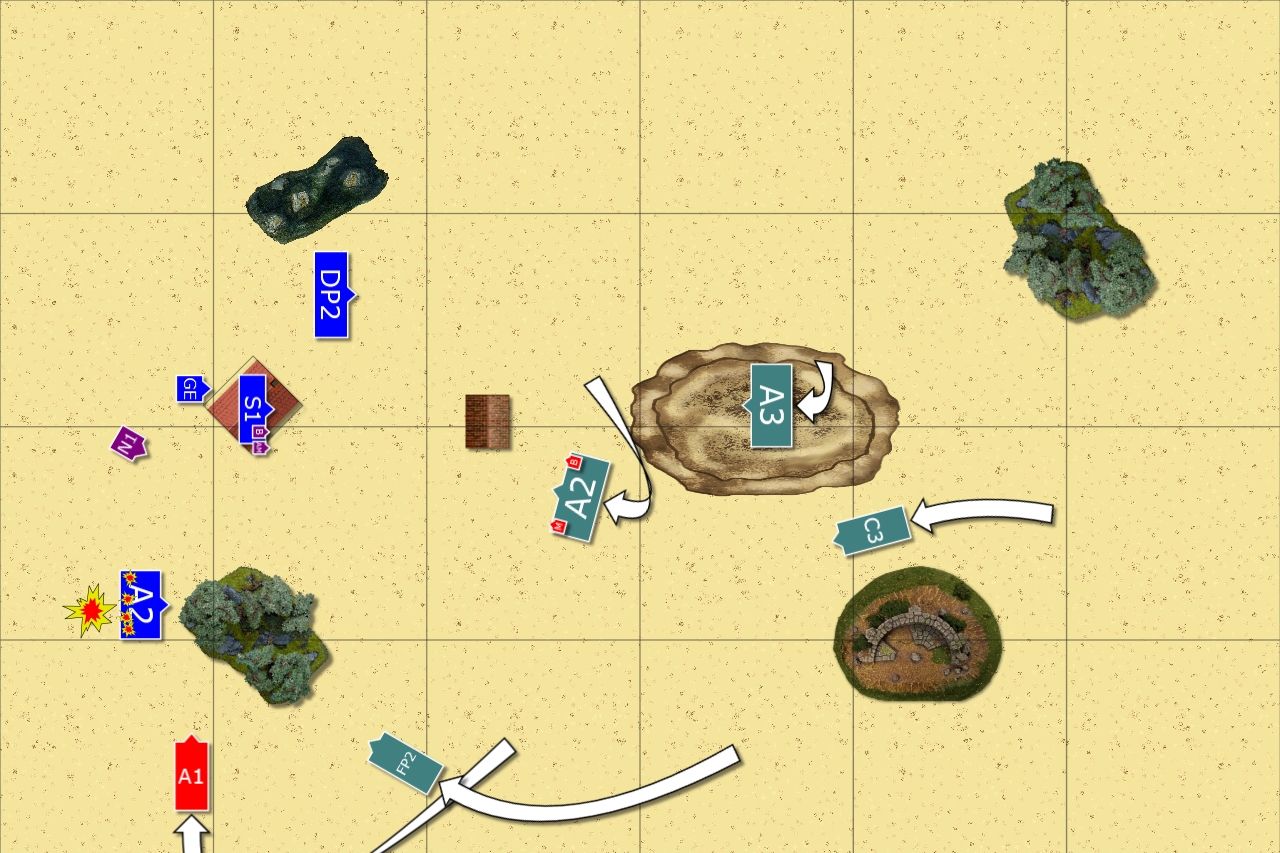
Outcasts - Turn 2
The regiments on the left flank moved in a more aggressive way to force an attack from the skycutter but it didn't matter as it was plucked from the skies with a well placed fireball (I think :)). Another skycutter was destroyed by shooting and second unit of fast cavalry was depleted too.
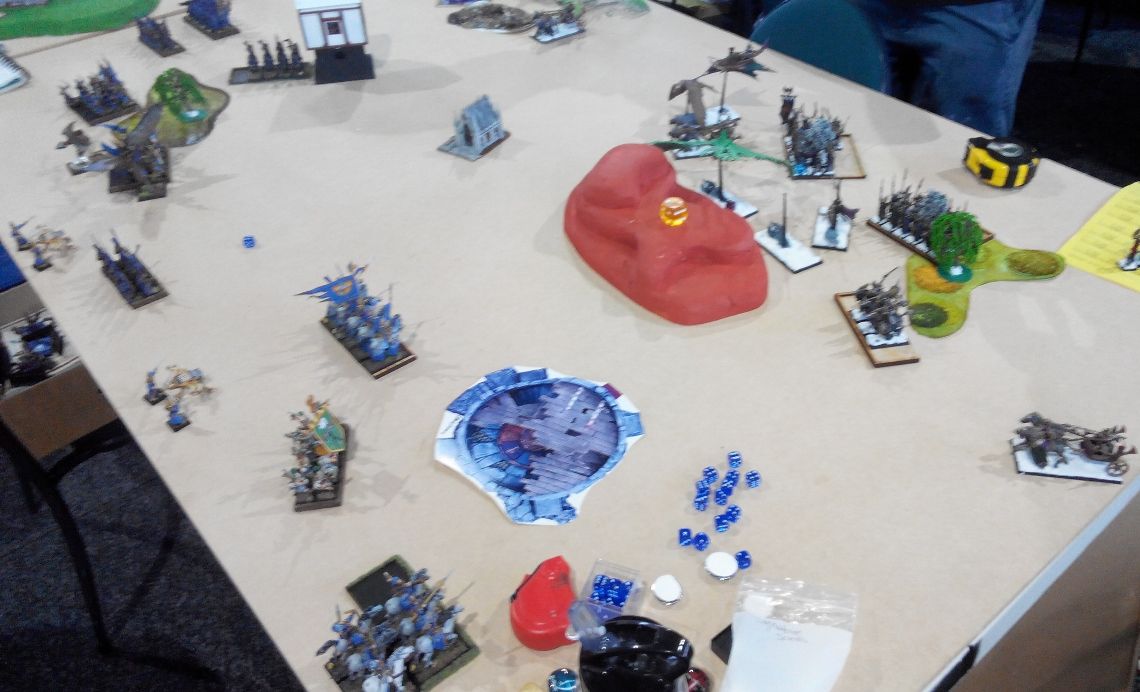
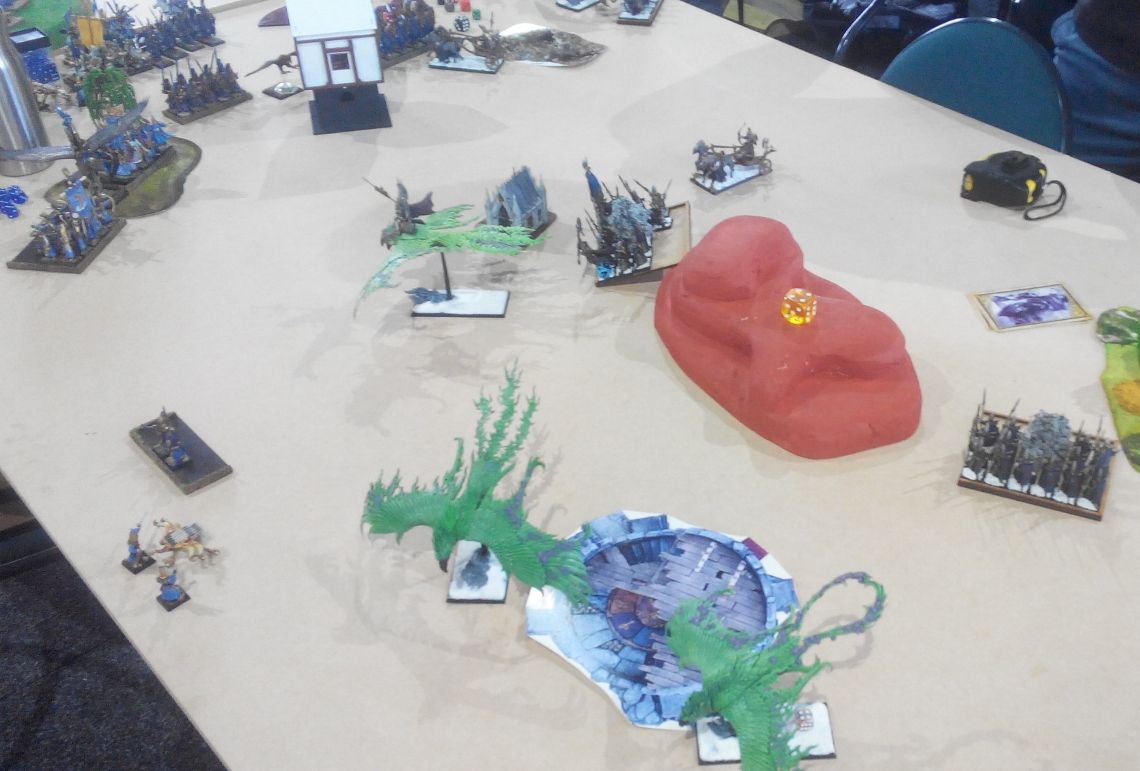
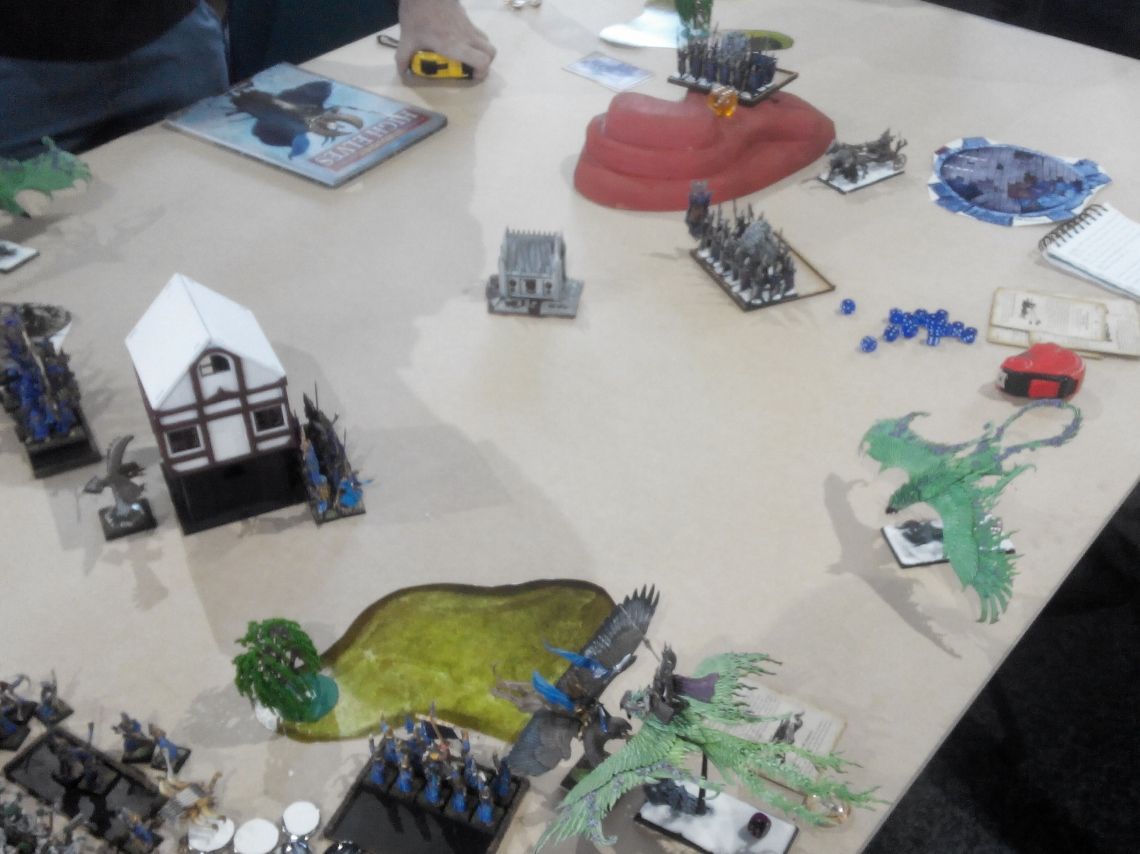
High Elves - Turn 2
 |
| Phoenixes spearhead the attack! |
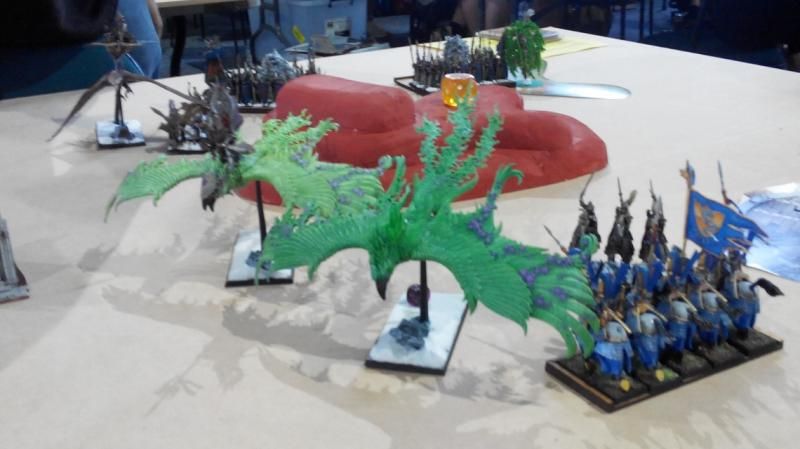 |
| Phoenixes in all their glory |
 |
| Moving in! |
Annointed decided it is time to act more swiftly as enemy fire was inflicting too much damage. Archers got in range too but their shooting was not yet that efficient.
However, in doing so they also put themselves in harms reach as the enemy could intercept them now.
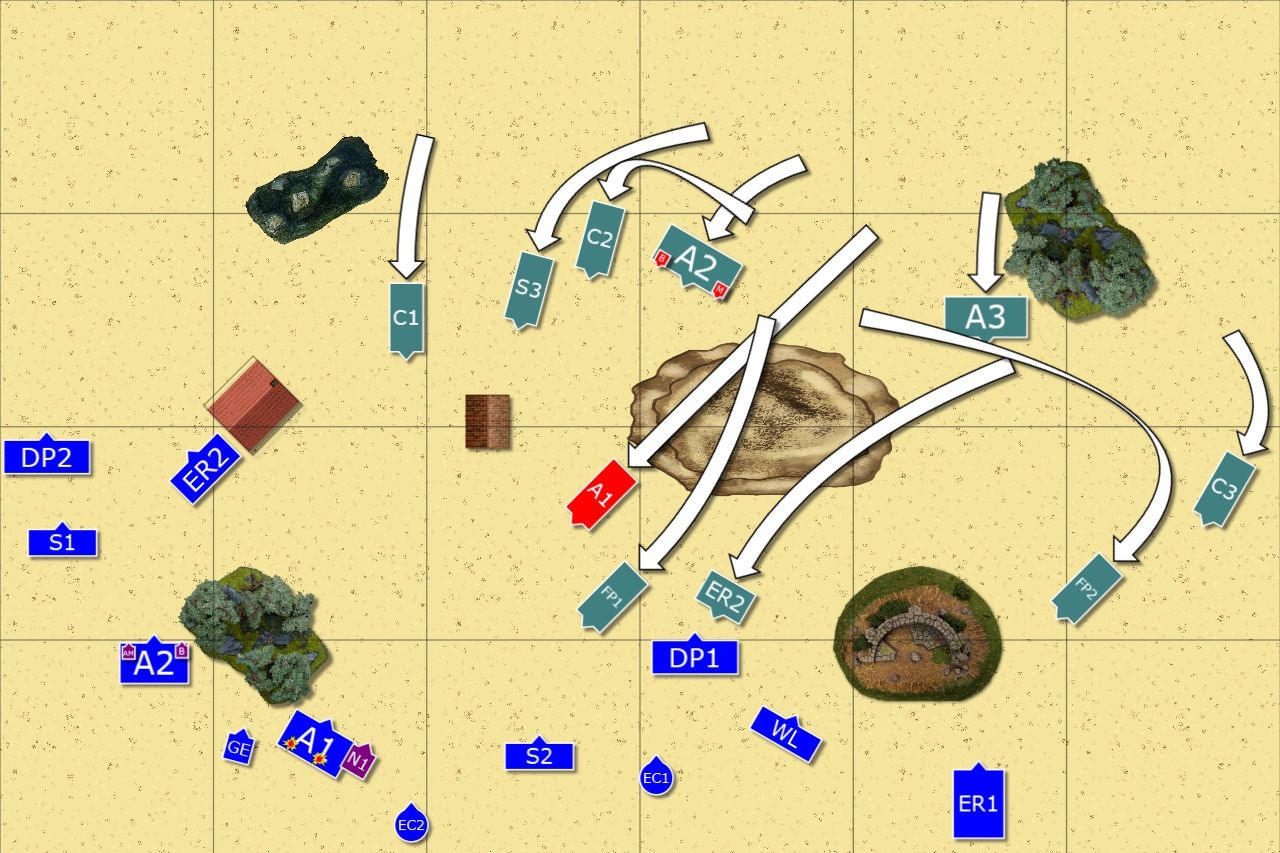
Outcasts - Turn 3
However, in doing so they also put themselves in harms reach as the enemy could intercept them now.
Outcasts - Turn 3
 |
| The charge backfired badly |
 |
| A disaster! |
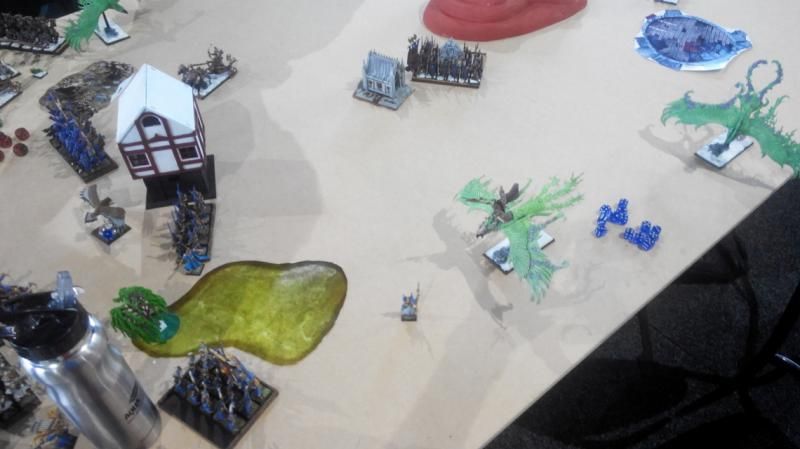
White Lions spotted an exposed flank to the enemy fast cavalry and it also looked like they would be able to overrun into nearby phoenix. Dragon Princes were also eager to fight and reavers decided to withdraw as fighting against such overwhelming odds was a suicide. White Lions decided to try their luck and re-directed to attack the phoenix in front of them but it was too ambitious to work (Edit: I needed 10+ on 2d6). Dragon Princes, however, hit the flank of the phoenix without a trouble.
However, they carried magical banner that granted them flaming attacks, potent weapon but a huge liability against Flamespyre Phoenix. Knowing that, the regiment of Swordmasters decided to help. Unfortunately, these warriors of Hoeth lost their nerve and their attacks did absolutely nothing (Edit: Failed fear test). Dragon Princes managed to wound the Phoenix though but it was for nothing as it stomped the Swordmasters mercilessly (Edit: nothing like being hit on 3+ and a 6 for t-stomps!) and by in the end only two of them survived the fight. No wonder then they fled to safety. Surprisingly, Dragon Princes too decided to withdraw (Edit: Failed steadfast break test on Ld 9 ).
The attack that was supposed to stem the advance of the enemy turned into a complete disaster and pursuing foe was in a great position to carry on with the momentum!
On the other flank the regiments re-arranged their position to face the enemy. The only good moment was when yet another skycutter was shot down from the skies.
High Elves - Turn 3
 |
| Right flank collapsed |
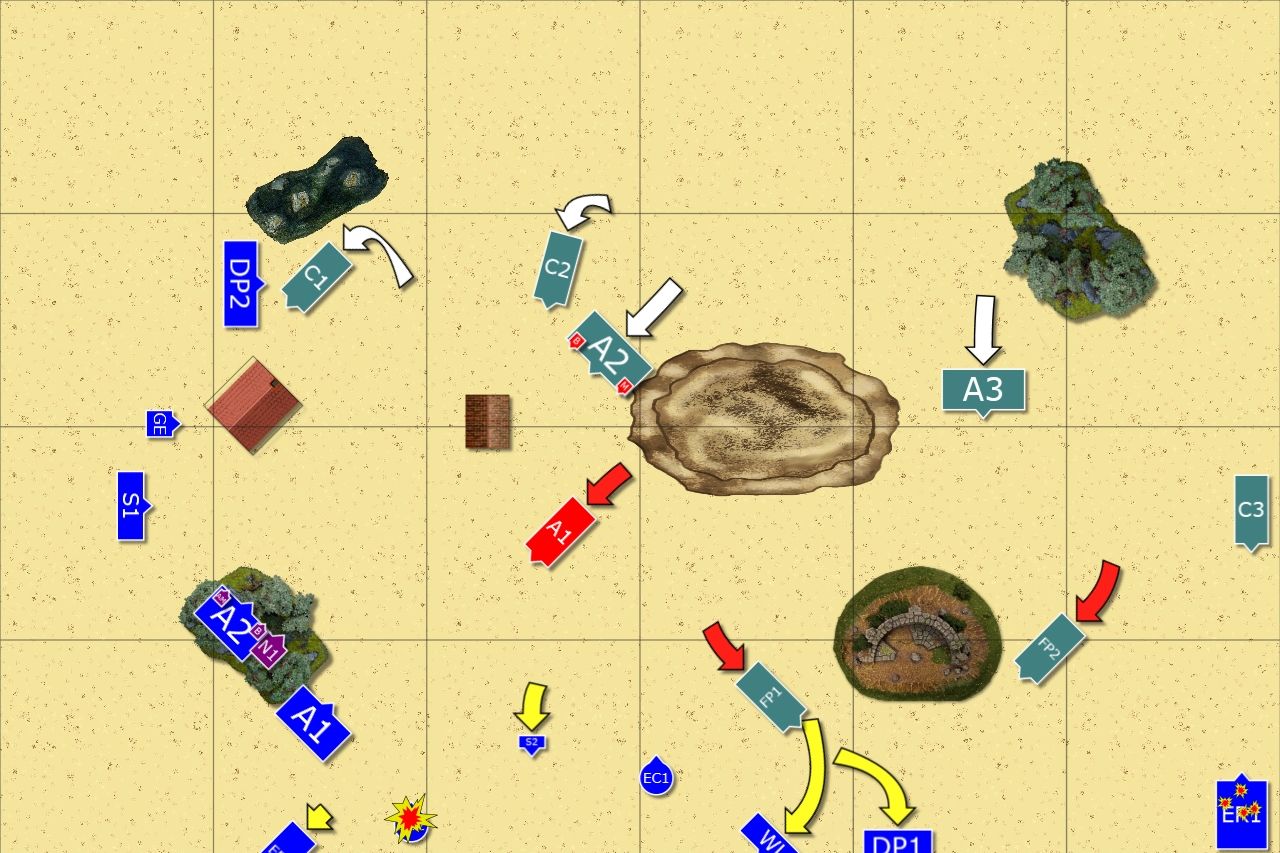 |
| Failed attack had dire consequences |
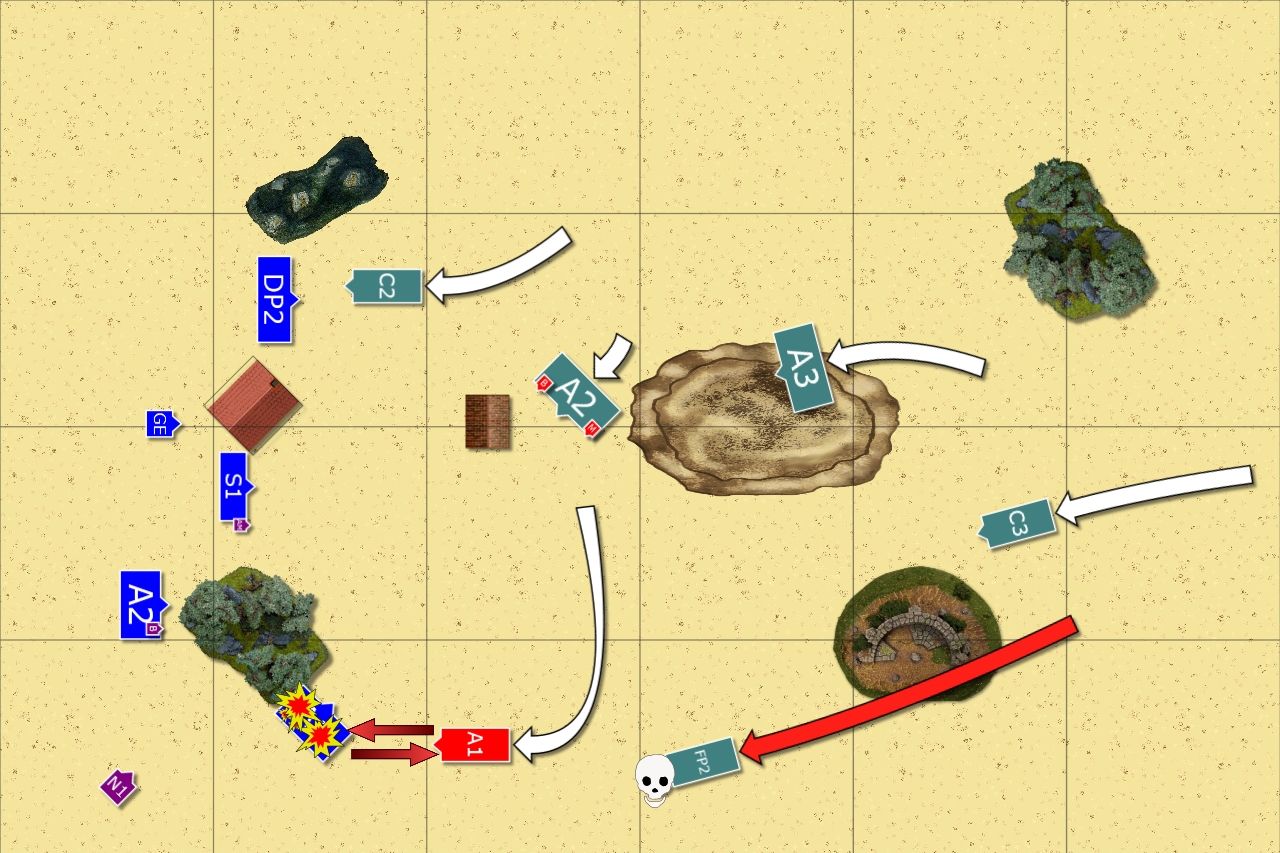
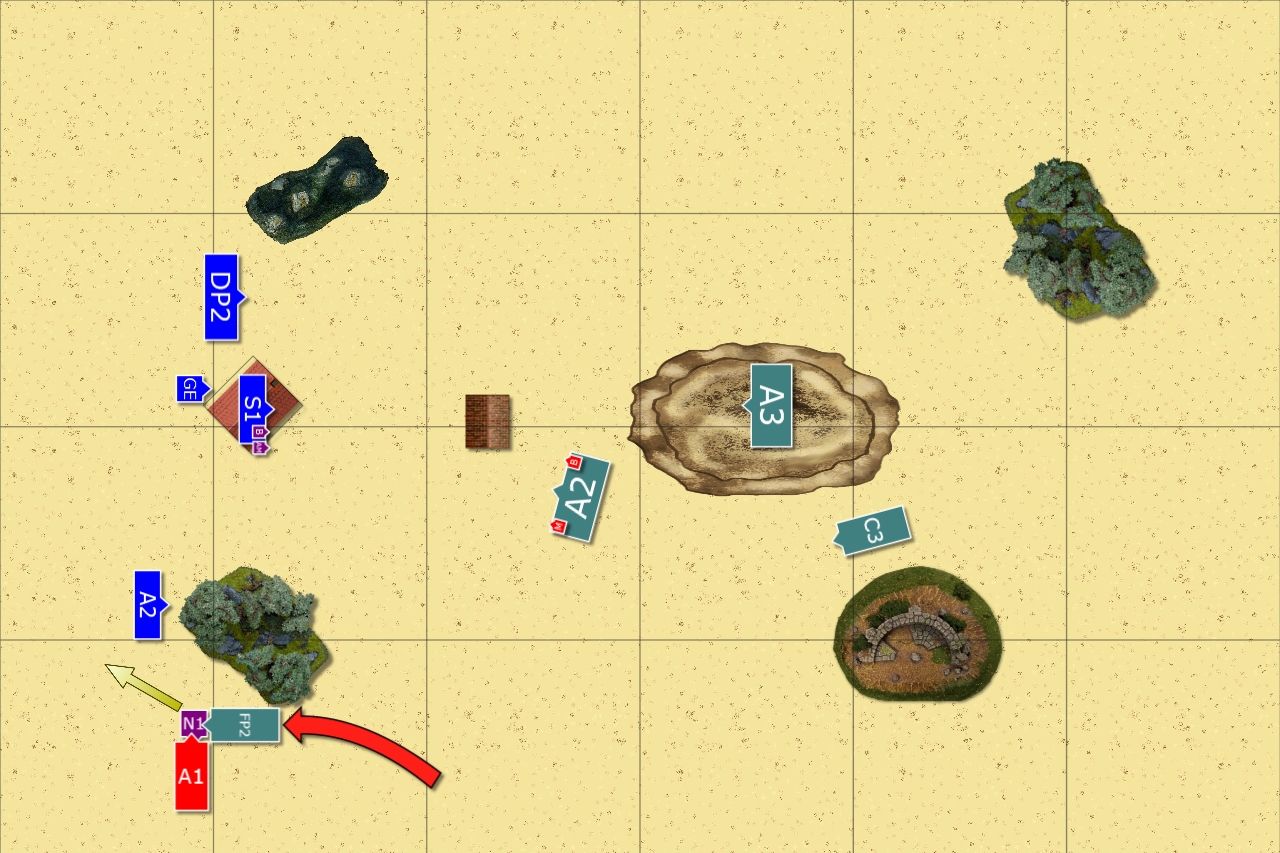
Seeing a new opening in the enemy lines High Elves exploited the opportunity. Phoenixes first chased off already fleeing Dragon Princes from the battle field and then terrorized White Lions who did the same. So much for their legendary bravery! (Edit: Failed re-rollable terror test on Ld8 )
Anointed spotted a weak link in the enemy lines too and charged badly positioned Reavers who had to flee in order to keep enemy general in the middle of the field instead of granting him access to the back yard. Anointed used his magical ring to destroy a bolt thrower and Larry the Loremaster could do nothing about it (Edit: double 6 was rolled!).
The situation changed dramatically as the Outcasts lost 5 units in a quick succession.
Outcasts - Turn 4
 |
| Consolidating positions |
 |
| Ranged attacks still deadly |
After heavy blow Larry the Loremaster had no other option but to form a defensive formation and proceed to fighting withdrawal. Fortunately ranged attacks were still at his disposal and one of the Phoenixes were shot down (at least for now!). The rest of the army moved back and only Dragon Princes destroyed the chariot that blocked their way.
High Elves - Turn 4
 |
| I swear the was a unit of archers there! |
 |
| High Elves keep pressing forward |
Anointed didn't risk solo charge just yet and flew his phoenix over the enemy unit. With the help of his own shooters he reduced the enemy unit of archers to a very concerned champion. Second phoenix quickly finished another bolt thrower and sped forward to aid the general of the army.
Outcasts - Turn 5
 |
| Fighting withdrawal continues |
 |
| High Elves are quite spread |
Larry the Loremaster, Bob the BSB and their bodyguards jump to the nearby house to claim defensive positions. Dragon Princes destroy yet another chariot that was in front of them, clearly slowing their advance so that they could not attack fragile archers.
At this stage it was just saving time and preventing casualties if possible.
High Elves - Turn 5
 |
| Circling around |
High Elven archers showed their marksmanship as despite the multitudes of obstacles, enemy regiments and even a spell disrupting their abilities to shot they still singled out a lone champion and killed him from afar!
Outcasts - Turn 6
 |
| Last gamble! |
 |
| Eagle vs Phoenix! |
Eagle rider felt ashamed he hasn't contributed to the effort of his army. He decided he could redeem himself by attacking the enemy general. The plan was simple, wound the phoenix badly so that it can carry his rider away in an attempt to seek safety. Noble rider drunk his magical potion, leveled his star lance and charged. Unfortunately, he wounded the Phoenix only once and it was not enough to break its resolve. Now he had to wait to receive the counter attack of another phoenix.
High Elves - Turn 6
High Elves - Turn 6
 |
| Counter charge! |
 |
| Escaped but just! |
With both armies exhausted it was up to the leaders to finish the clash. Phoenix charged fighting noble but his dragon armor saved him (Edit: I should have challenged anyway to be safe for sure) but the impact of the attack was high and he had to withdraw. Luckily for him, the phoenixes were not as fast as his eagle and he escaped!
Summary
 |
| Turn-by-turn summary |
After-battle thoughts
First of all I would like to thank Jack for a great game, full of movement and action! It was pleasure meeting you and I greatly enjoyed our game. It was a fantastic start for a fantastic tournament!
When we calculated the points it was still a draw which I was very happy to get after that turn 3 disaster. I thought about my decision to add Swordmasters to the attack and I came to the conclusion it was simply a mistake. With Dragon Princes alone I was winning combat by 3 already (charge, flank, banner) and was not in bad position to keep that phoenix in place. With a bonus from a single wound I had no chance to lose that combat at all. Phoenix would have had to take break test on Ld5 if it didn't wound DP back.
When I added Swordmasters I gave my opponent the opportunity to inflict easy wounds. Even with fear check passed I could not count on killing the phoenix on the charge. When I failed that fear check (no BSB nearby to reroll that) I helped my opponent enormously. Then he proceeded to roll a 6 for t-stomp that sealed the deal. The fact that I also failed Ld9 break test is irrelevant as I could have easily avoided the whole pickle. It was a mistake that cost me the game as the chain reaction of bad consequences followed.
I attacked the phoenix because I thought that winning the combat will get me close to the anointed or even would allow me to hit him with the overrun move. But again, I could have done so with DP's alone. Very bad mistake that should not have happened.
I made a few more unfortunately. First one was to stay with my noble close enough for the spirit leach to be cast. I failed to dispel and rolled low while Jack got a high result. Again, better assessment would have prevented that from happening.
The advance on the left flank was too shy. I should have moved towards the skycutter more aggressively, put DP next to the building (so that the flank shot would have been impossible) and force the enemy to charge. If they did I had 2 units waiting to counter. If not I would attack myself.
There was a little bit of desperation in that last charge too but my reasoning was as follows. I have 4 attacks and ItP so no need to roll fear check. I directed 4 attacks (and eagle's for what it was worth) against the phoenix. I was hitting on 3+ with a re-roll, wounding on 2+ with S7 and then there were 5+ ward saves. But I rolled poorly on to wound as well and got only one wound through (it is also quite possible I didn't get many hits despite the re-roll). I think it was good decision because it gave me the chance to break the enemy general. He could not wound me much due to dragon armor and low strength attacks. But it didn't happen and I was lucky to escape when he broke from combat. Which is funny because I had to pass Ld test on the same value as my opponent :)
I am sure there are many things I could have done better and I will try to post alternative deployment at some stage too.
Thanks for reading!
No comments:
Post a Comment