
Game 4 - Adam - Bretonnia - Blood and Glory
In game 4 I had a pleasure to play against another Master player, Adam. He almost made it this year too but the competition was tough and the final rankings was decided with the most recent tournaments. Interestingly, despite attending many tournaments together, we played against each other only once, during ANUWTF 2014 tournament. Adam had Beastmen army then and I was lucky to win so I was sure he was looking forward to even the score! Another thing you can be sure when playing against Adam is that he will do his best to give you run for your money but at the same time it will be in extremely sporty fashion!
We played modified Blood and Glory scenario. 400VP points were earned extra for breaking the opponent first. 200VP were earned for breaking the opponent second.
For this tournament Adam decided to bring Bretonnian army and this is how his list looked like:
Bretonnia - Army List
Lord, warhorse, Virtue of Heroism, The Heartwood Lance, Charmed Shield, Tress of Isoulde - 231
Prophetess of the Lady, Level 4, warhorse, Earthing Rod - 265 - Lore of Life
Paladin, BSB, warhorse, Biting Blade, Enchanted Shield, Dawnstone - 119
Paladin 2, Lance, Shield, Warhorse, Gromril Great Helm, Gauntlet of the Duel - 120
Paladin 3, Shield, Warhorse, Questing Vow, Sword of Anti-Heroes, Dragonhelm - 124
Paladin 4, Warhorse, Great Weapon, Questing Vow, Insignia of the Quest - 116
Paladin 5, Warhorse, Great Weapon, Questing Vow, Glittering Scales - 111
12 Knights of the Realm, Full Command, Banner of Swiftness - 327
18 Peasant Bowmen, Musician, Standard, Braziers - 128
6 Knights Errant, Full Command, Gleaming Pennant - 146
11 Questing Knights, Full Command - 335
3 Pegasus Knights, Full Command - 195
Trebuchet - 90
Trebuchet - 90
Swedish Comp: 14.6
18 Peasant Bowmen, Musician, Standard, Braziers - 128
6 Knights Errant, Full Command, Gleaming Pennant - 146
11 Questing Knights, Full Command - 335
3 Pegasus Knights, Full Command - 195
Trebuchet - 90
Trebuchet - 90
Swedish Comp: 14.6
Boy but Bretonnian armies can be heroic! So many characters it is really hard to count them and I wish I had a metal mage with Final Transmutation. Let me go through the list and all characters in more details as it would be good to actually see how their rich equipment improves their skills.
Lord - mounted general means that he comes with built in 2+ armor save and 6++/5++ ward save too. Standard for Bretonnian characters, leaves magic item allowance for weapons, talismans and enchanted items. Virtue of Heroism gives him heroic killing blow ability. Very handy indeed! Charmed shield is a good insurance against that failed look Out Sir! roll. Heartwood lance is another useful item as it allows re-rolls to wound on the turn the character charged while Tress ensures he hits on 2+ against single model. The General is made to kill characters and monsters alike. But of course his 4 attacks will be handy against rank and file for sure.
Prophetess - the only spell caster of the army. I assumed she will be protector of the army, as some life spells such as Flesh to Stone or Regrowth can be very helpful for keeping the expensive knights alive but Earthing Rod also ensured some brutal but effective 6-dicing of Dwellers Below.
BSB - first Paladin. 1+ armor save with re-rolls means that his main role is to survive and keep providing Ld re-rolls. Nothing wrong with it at all. He has his companions to fight and die for the Lady!
Paladin 2 - Great Helms improves his armor save to 1+ as well. He also seems to be the one to take tough challenges for the team if there is particularly dangerous enemy character to be contained for a turn at least and to allow the rest of the unit and characters strike at the enemy. All four above characters are going to join Knight of the Realm.
Paladin 3 - There seems to be plenty of magical Helmets and this Paladin benefits from that too. Another character with 1+ armor save. Sword of Anti-Heroes is a great addition in the time where one can expect more characters on the battlefield.
Paladin 4 - Great Weapon means he is less protected than other characters but Insignia of the Quest might make it hard to get him as if he is reduced to a single wound he gains 3++ ward save.
Paladin 5 - Another paladin with great weapon, this one puts some faith in his glittering scales so that the enemy has -1 to hit penalty. In general none of these Paladins is not possible to kill but they are definitely more survivable than regular knights and may protect the unit. Making way to the flank or even rare is a good option to prevent any damage. It will be hard to get them and they can hit back hard too so that any combat against the knights and their paladins is going to be bloody encounter indeed. However, my own eagle riders are well equipped to fight them and have a good chance to kill each characters on the charge. If I can arrange multiple charge then, even if bloody, I may have an opportunity to get a big prize. It will be hard though with infantry units and mounted enemy.
Knights of the Realm - standard Bretonnian unit. Hard hitting, with full ranks. Can go through any of my units and with good armor/ward saves can deflect many hits too. Paladins may overcome their weakness, which is S3 after charge. Banner of Swiftness makes them even more dangerous. Swordmaster and Lions can slowly open that can but as I have mentioned before, at a cost.
Bowmen - always annoying as they can harm lightly armored infantry but at the same time good target for my own shooting and even better for Dragon Princes due to the fact they have flaming attacks.
Knight Errants - a small unit of impetus knights cannot be underestimated. They can hit as hard as regular knights but there are only 6 of them so if attacking alone they can be contained. They can be very useful for supporting duties and can easily prevent combined charges so as in any other case they need to be dealt with quickly.
Questing Knights - they are not seen often among Bretonnian armies. They hit last and have worse armor save in combat but they have respectable S5 and are immune to panic which means they don't need BSB that much. Again, 3 Paladins will make sure that unit is not easily defeated. The key to victory would be to separate both lances and make sure they cannot help each other.
Pegasus Knights - my favorite unit, I am glad there is only one. Very fast and quite tough can be very, very tough unit to catch while constantly presenting a problem. In this case I had high hopes for Thunderbolts and Chainlightnings.
Trebuchets - this time usual suspects. They can hit hard or miss dramatically. They will be a priority to destroy. With expected first turn and the assumption that the knights will move forward, I hope my reavers can get to them quickly.
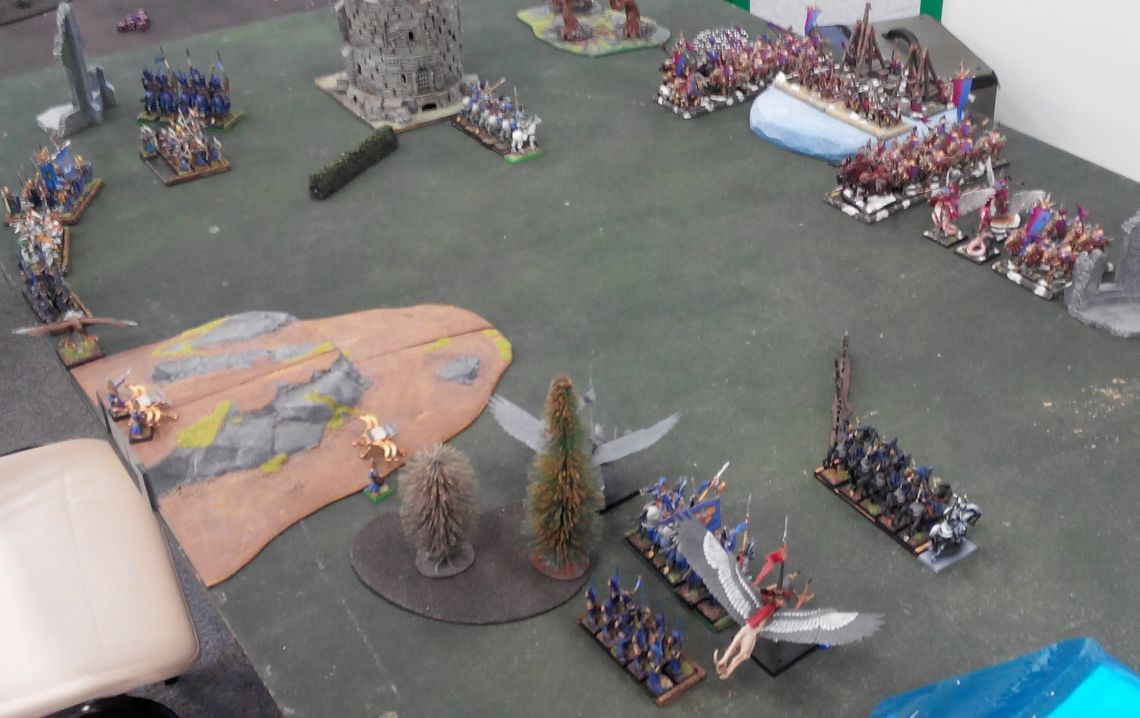
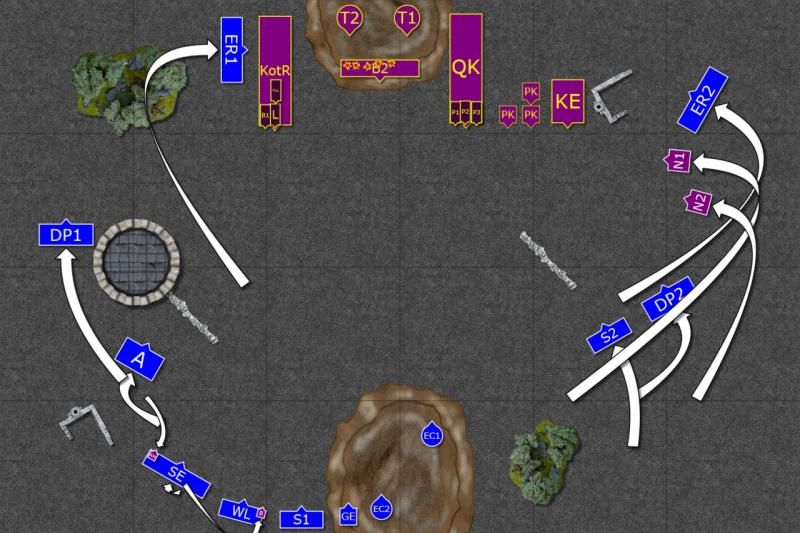
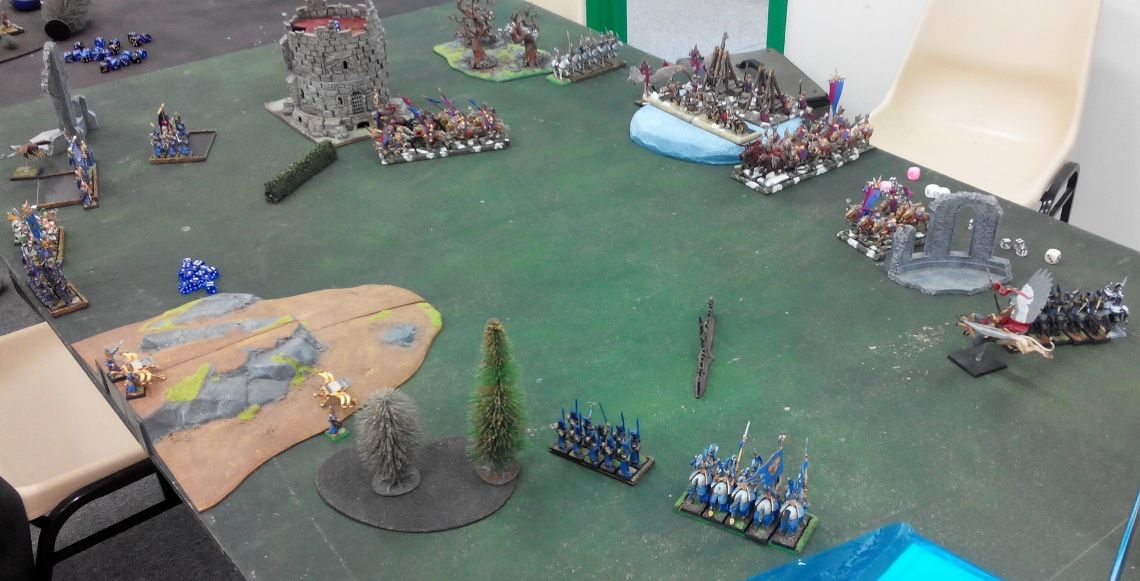
In Blood and Glory scenario armies are closer to each other thanks to deeper deployment zones and that meant I wanted to put more distance between the forces. At the same time I wanted to use the speed of cavalry and heroes to destroy enemy shooters and stay at the rear of enemy formation for the inevitable combat where I could attack with infantry from the front and with fast units from flanks and rear.
Deployment
 |
| Deployment after vanguard |
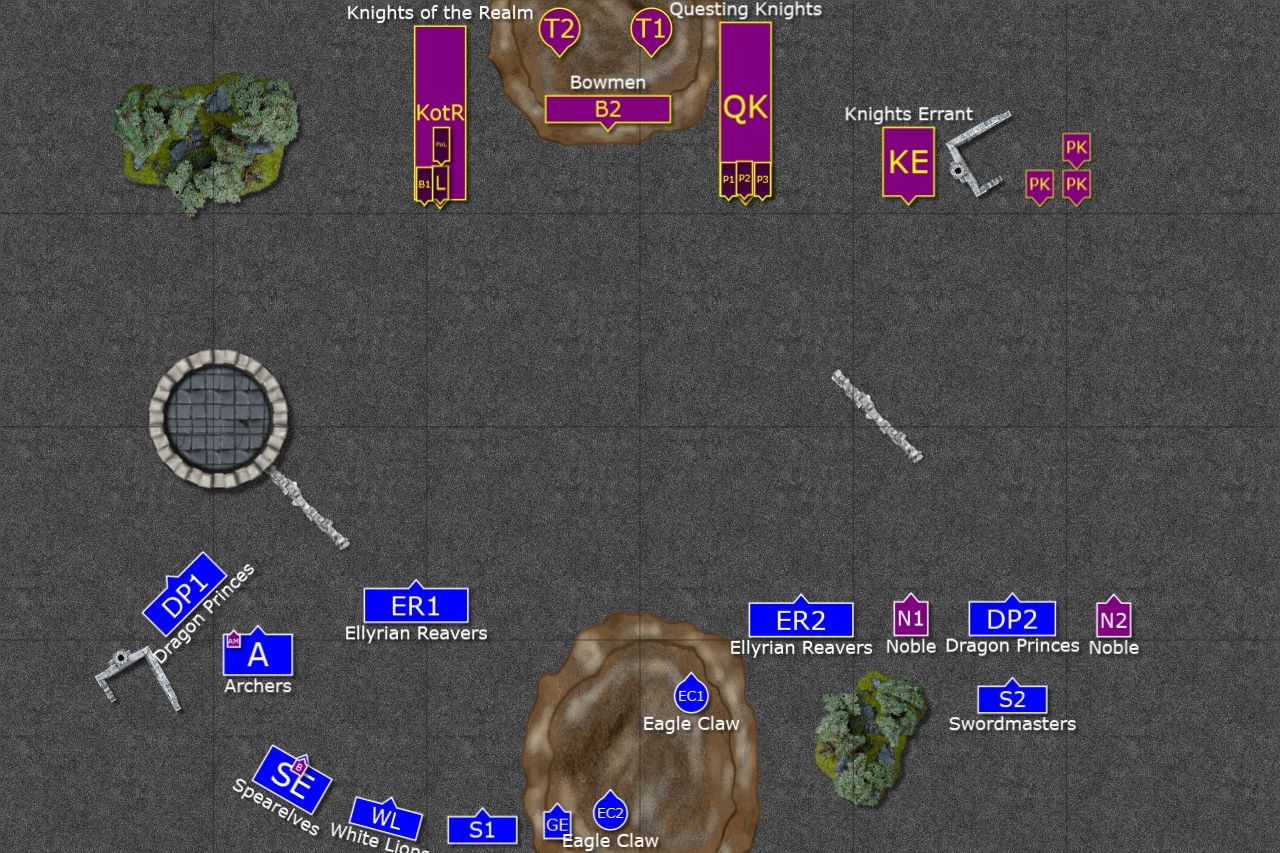 |
| Before Vanguard |
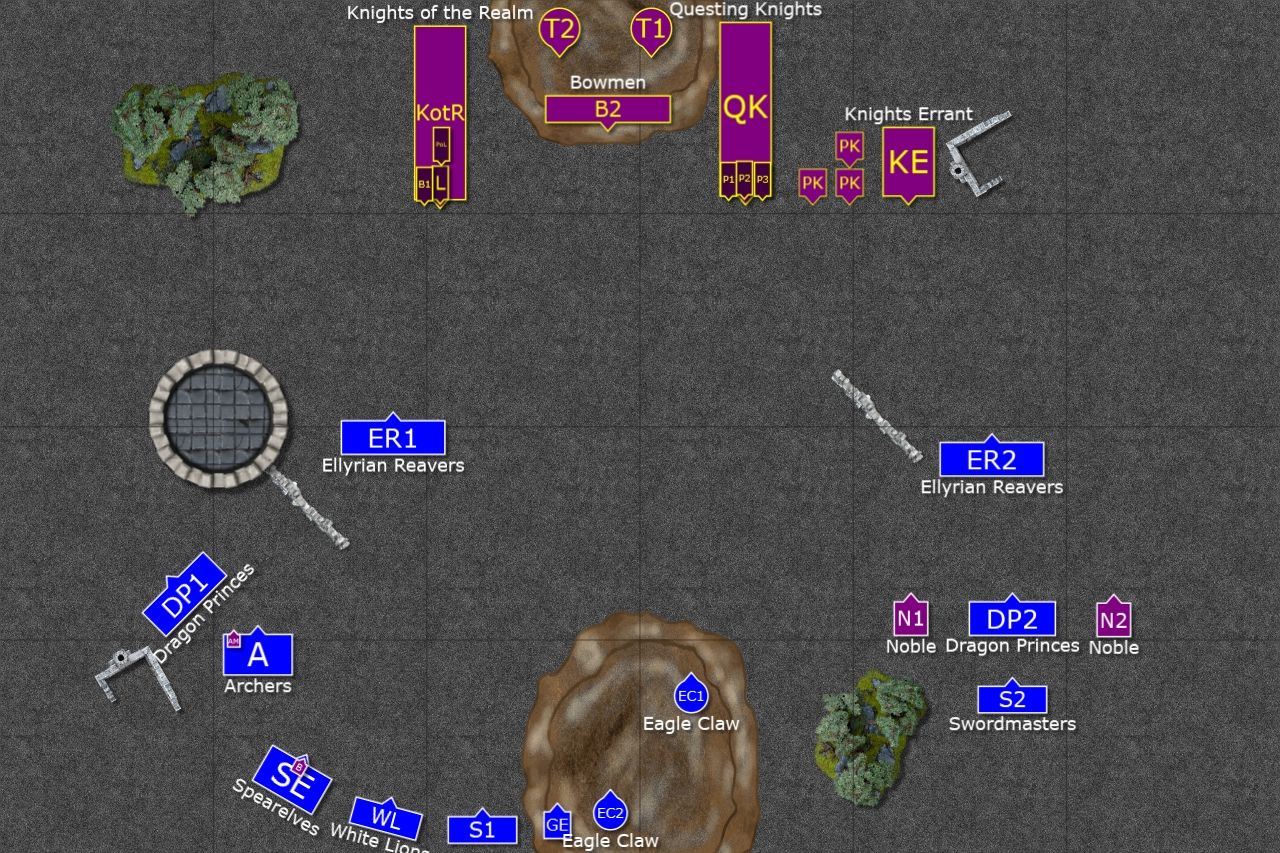 |
| After Vanguard |
Respective wizards had the following spells:
Prophetess - Throne of Vines, Flesh to Stone, Regrowth, Dwellers
Archmage - Iceshard, Curse, Thunderbolt, Chainlightning
As usual Bretonnians prayed before the battle and Elves had the first turn:
Outcasts - Turn 1
Prophetess - Throne of Vines, Flesh to Stone, Regrowth, Dwellers
Archmage - Iceshard, Curse, Thunderbolt, Chainlightning
As usual Bretonnians prayed before the battle and Elves had the first turn:
Outcasts - Turn 1
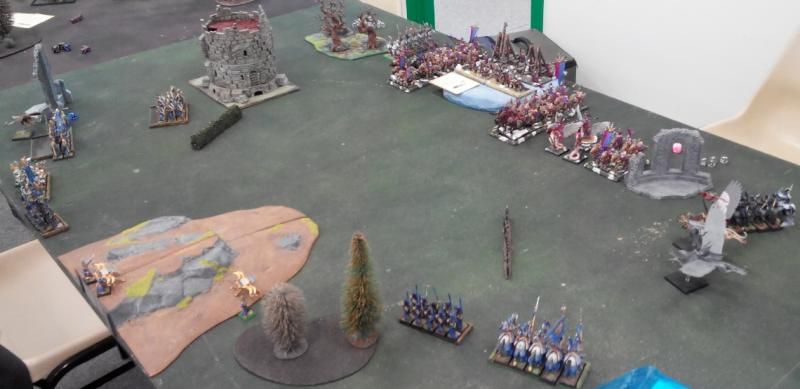 |
| Elves begin outflanking |
 |
| Fast units lead the way |
High Elves seized the initiative and moved fast on both flanks. The main weight of the attack was carried on the right flank but Reavers on the left were ready to attack Bretonnian trebuchers as soon as the knights moved forward. Shooting was aimed at vulnerable bowmen and Iceshard was cast on them too, to make their own shooting even less accurate.
(Edit: Please note I forgot to show Eagle positioning on the map as it moved towards the left flank. Apologies for inaccuracy.)
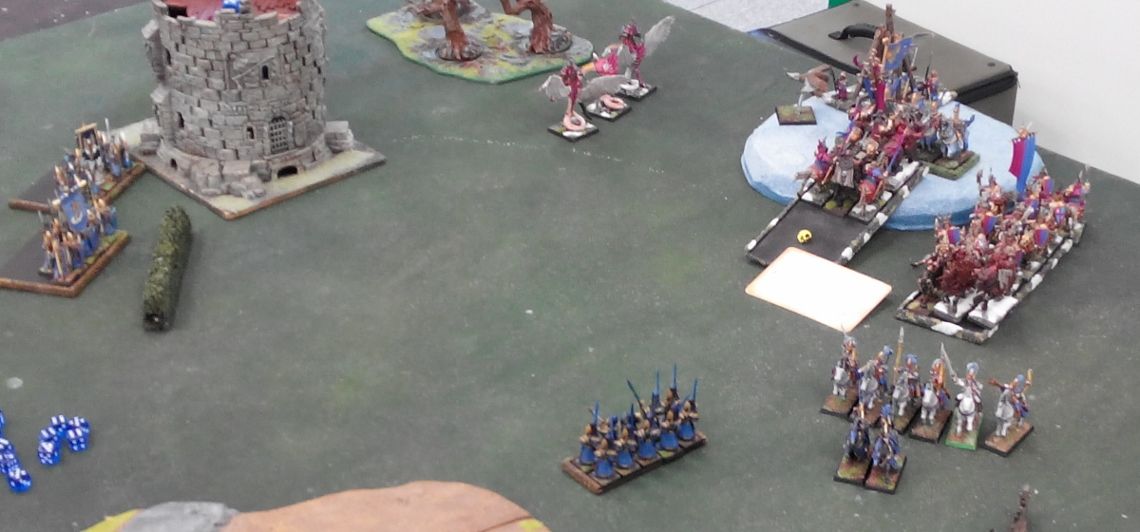
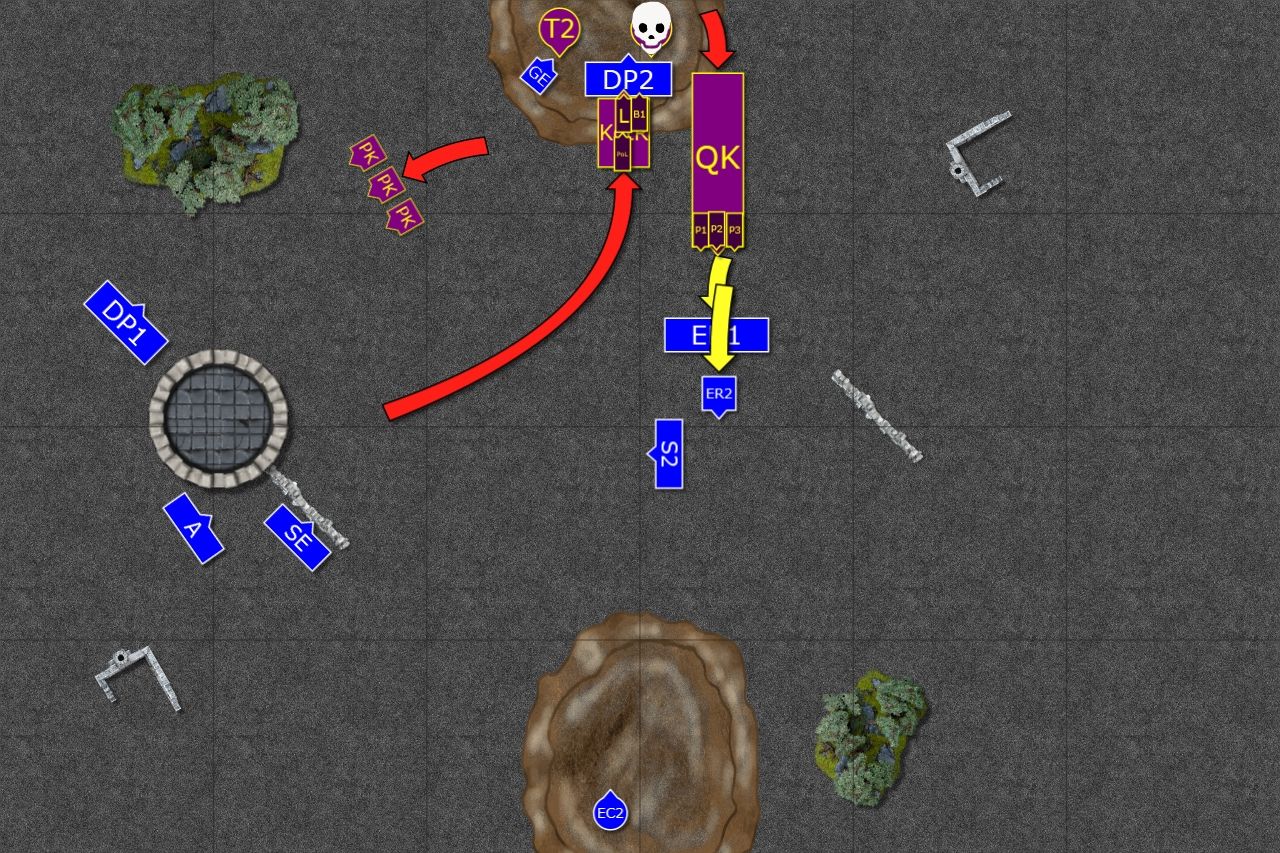
Bretonnia - Turn 1
 |
| Only one Lance moves forward |
 |
| But first Bretonnian attack is brutal |
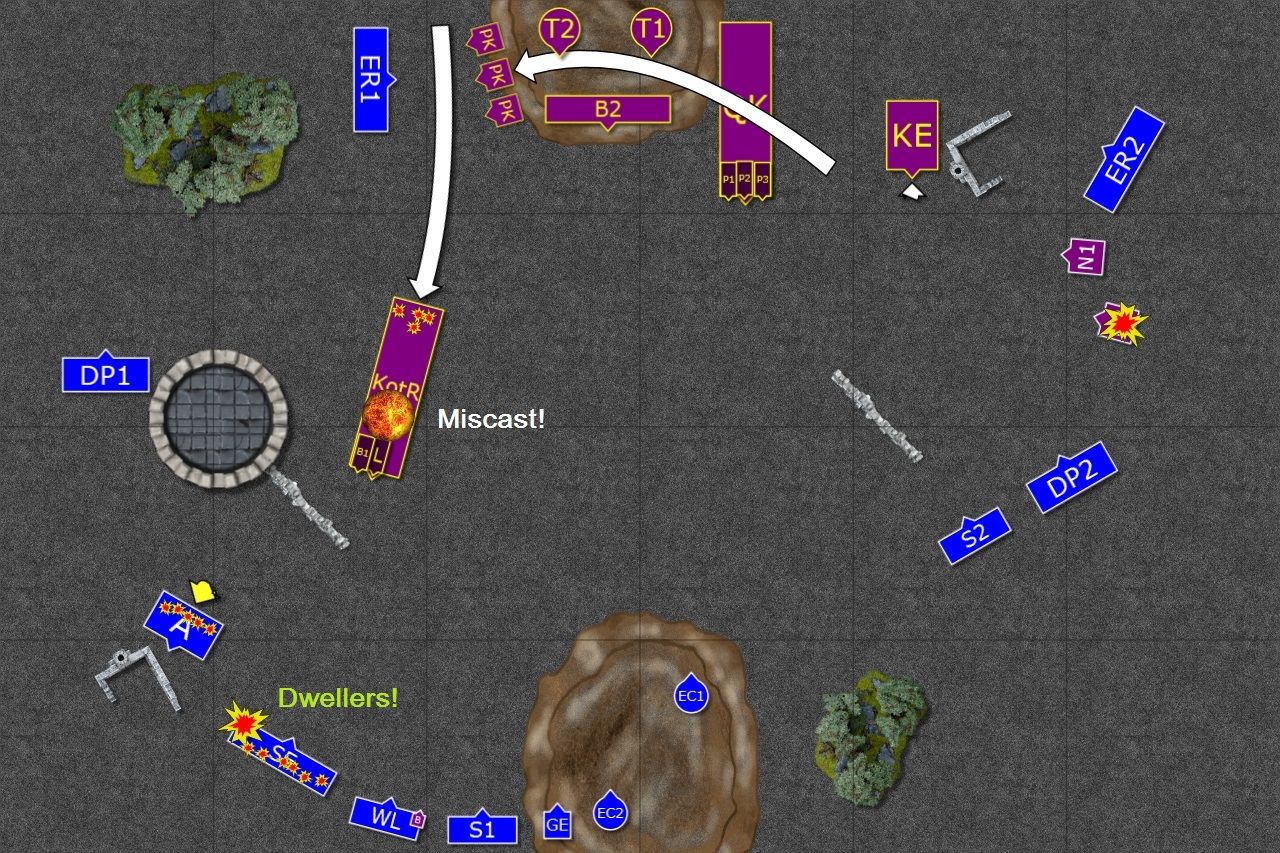
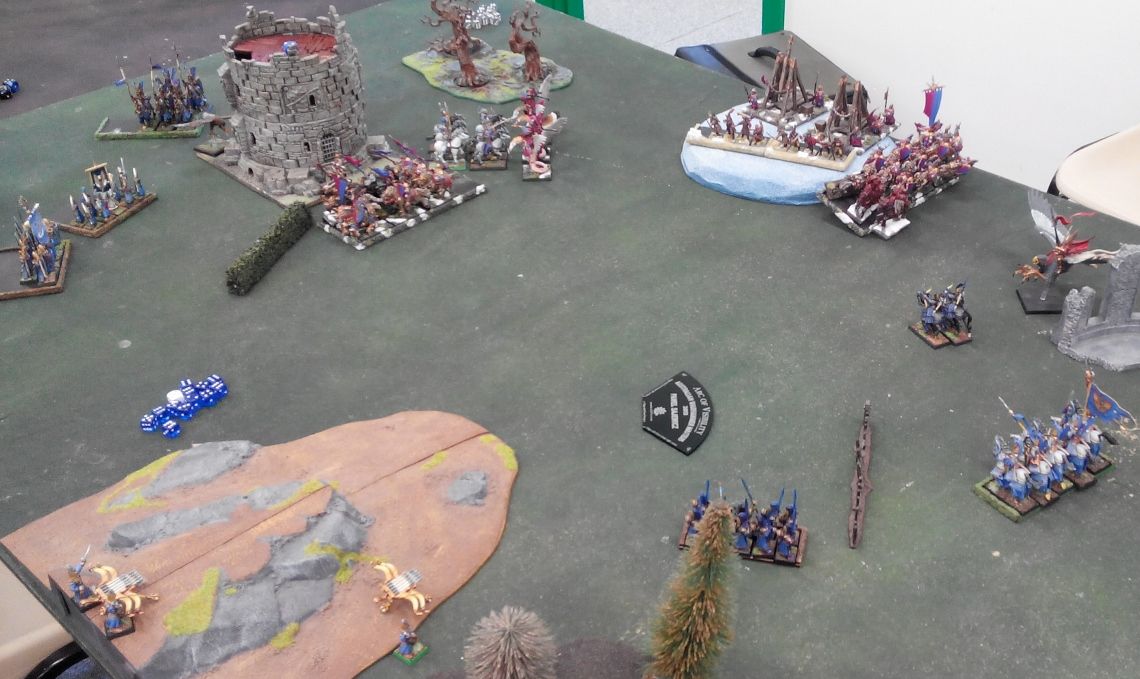
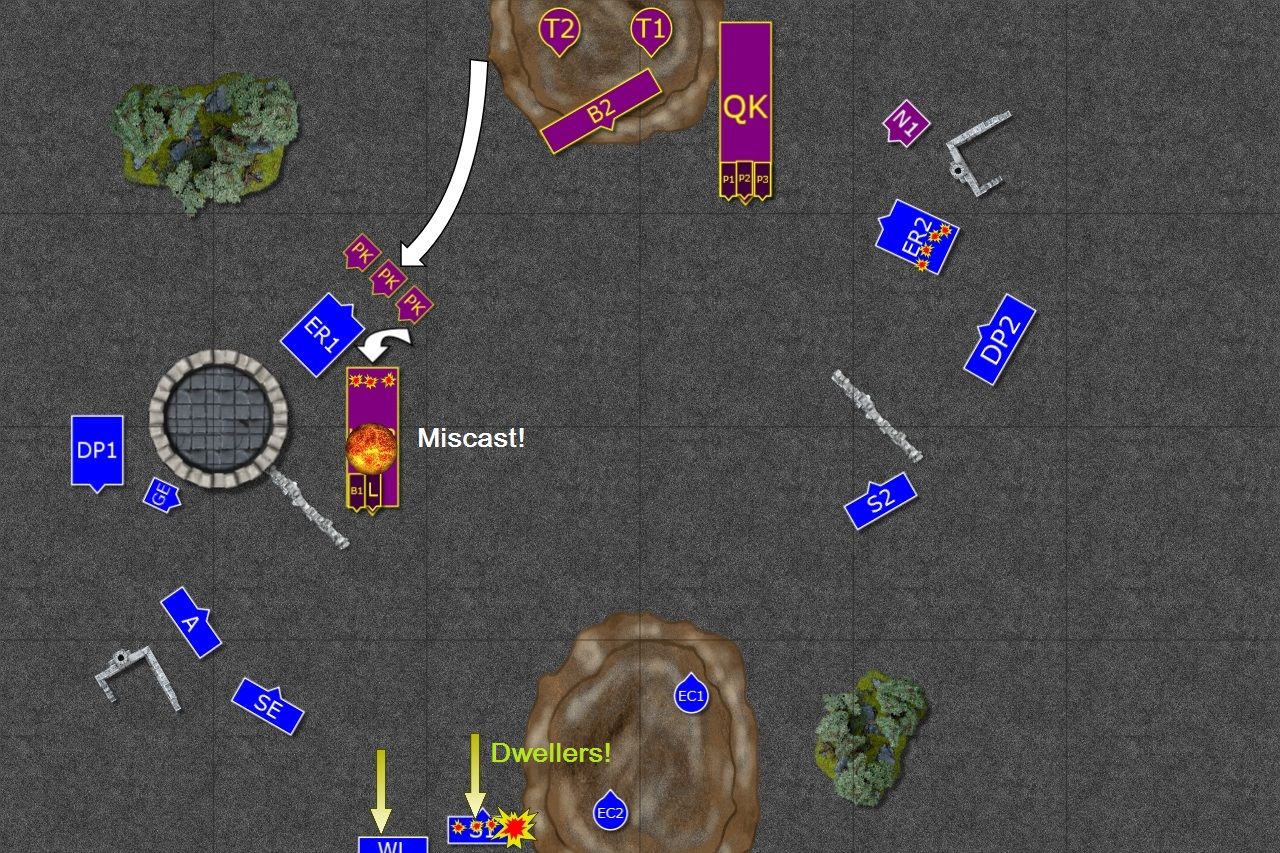
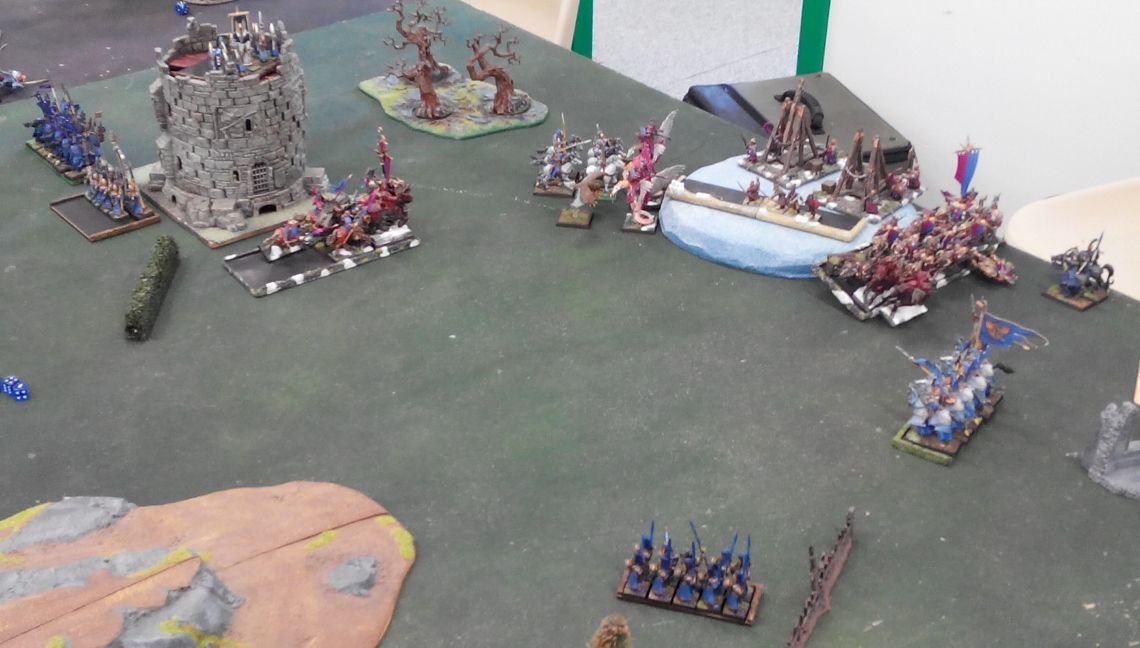
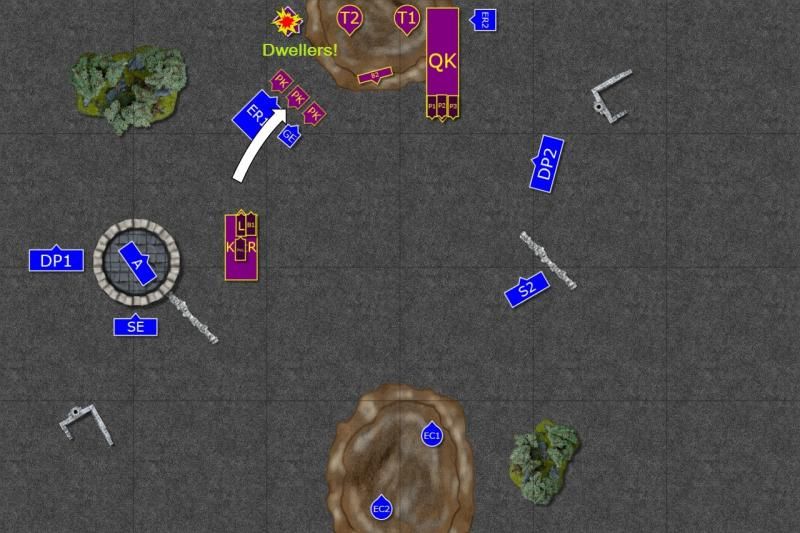
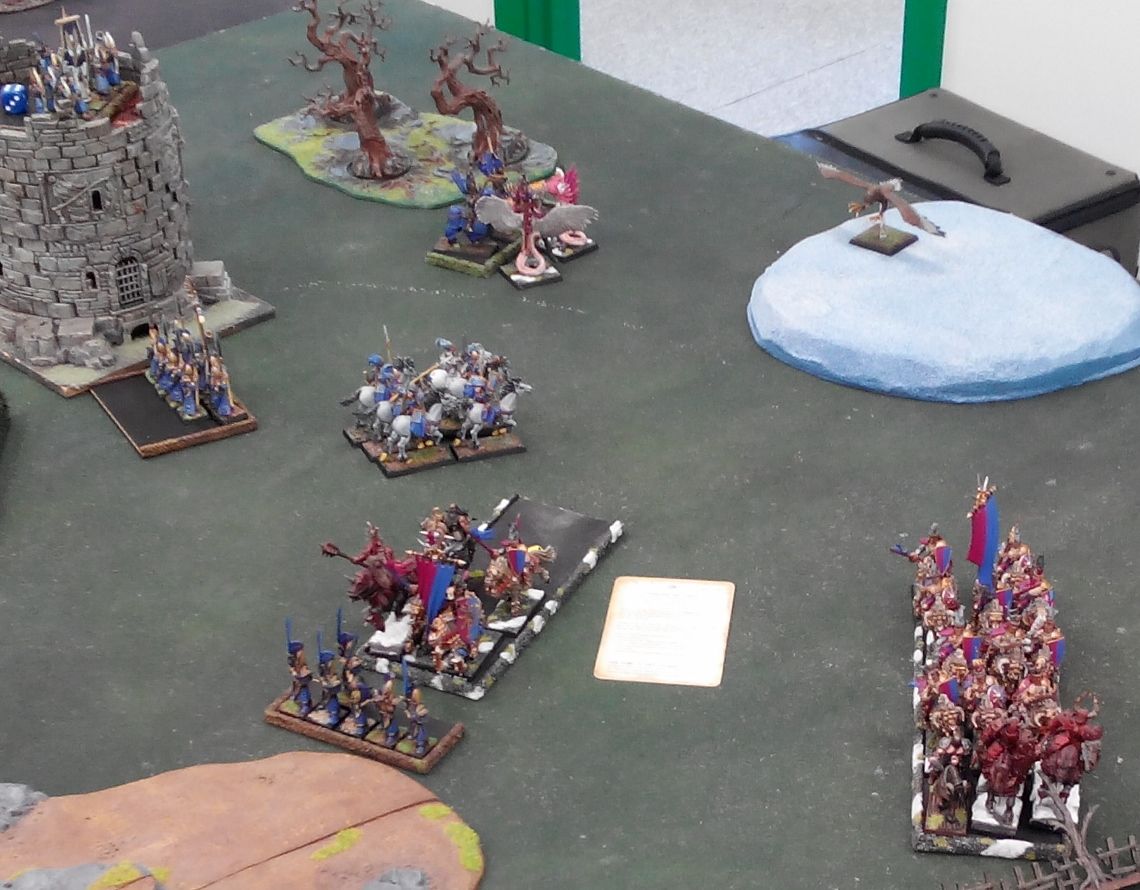
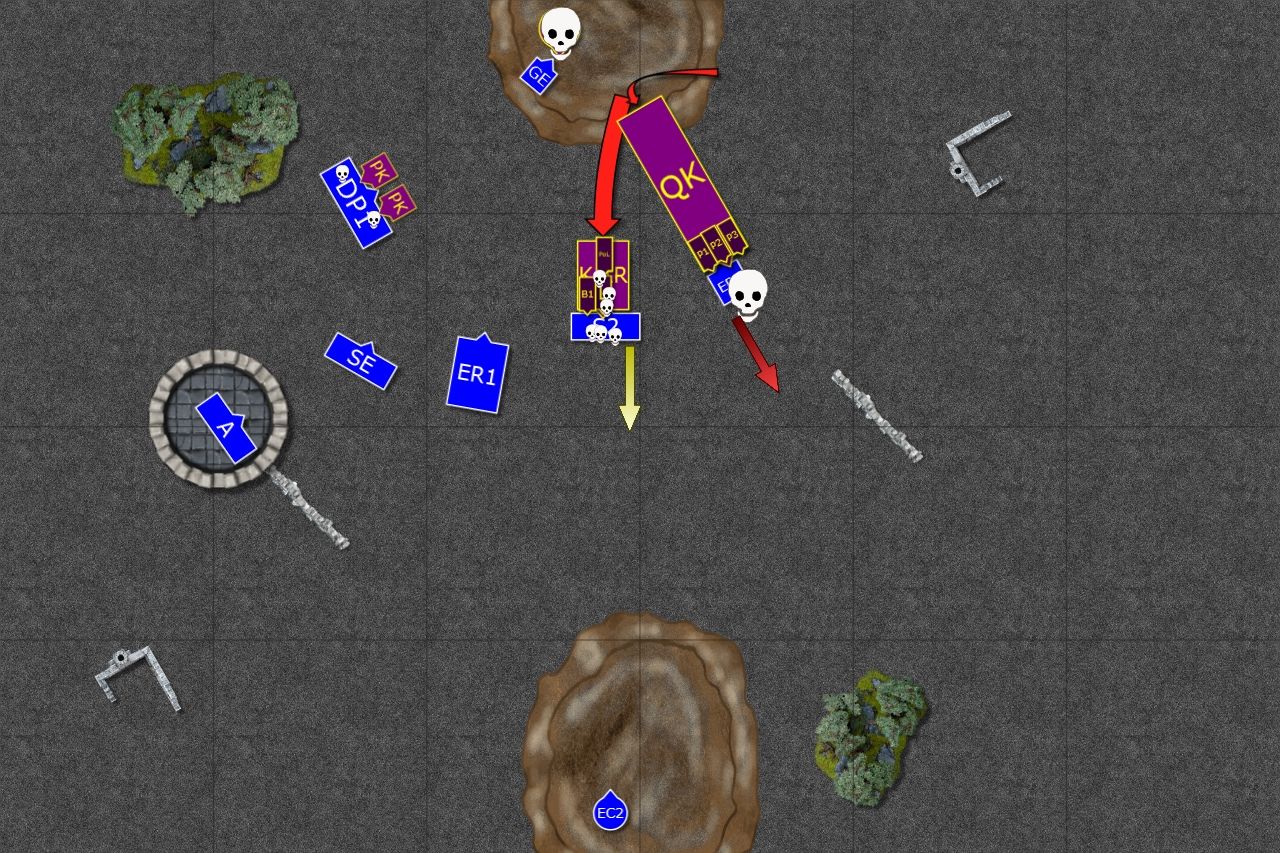
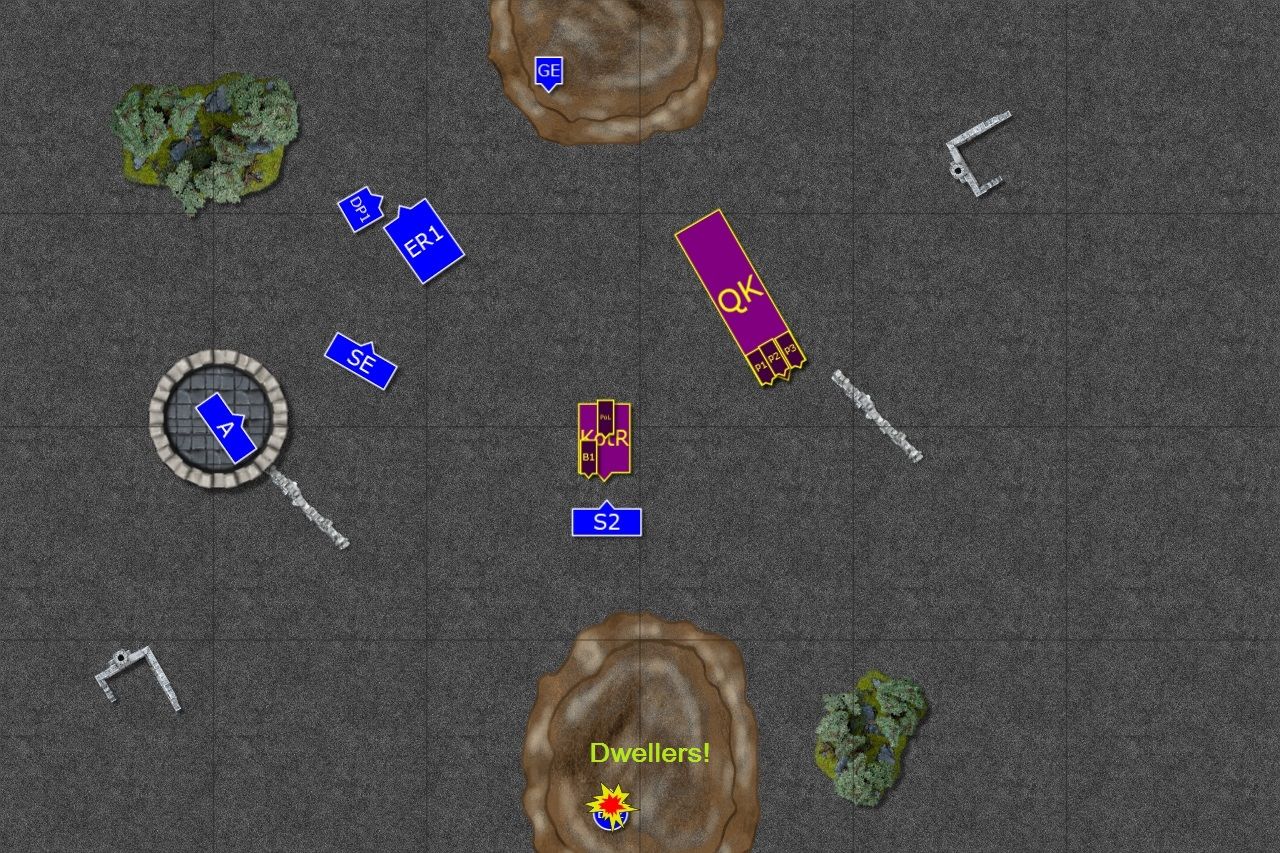
Bretonnian lord gave an order and his trustworthy knights galloped forward. But it was not to charge the enemy but to let Prohpetess to get into the range of her deadly spell. She cast it with irresistible force and elven archmage was defenseless when he and half of his unit was dragged by mysterious creatures from below the surface of the earth. Prophetess suffered from magical feedback and few brave knights paid with life for her gamble but it was worth it. Elven Archmage was no more. (Edit: Adam moved his unit to get into range of a boosted version and promptly 6-diced the spell!)
At the same time Pegasus Knights flew towards the left flank in order to intercept Ellyrian Reavers. In a rare case Bretonnian Knights actually protected their peasants.
As if it was not enough Bretonnian shooting proved to be deadly as well. First, bowmen appeared to be the best marksmen in the entire kingdom and elven archers tasted their own medicine. Survivors decided to withdraw.
Last but not least, trebuchets opened fire and one of the large rocks landed directly on the head of eagle rider, leaving a bloody pulp where a second ago a pride knight was. (Edit: Interestingly, Adam aimed at one noble but the rock scattered and hit second one. As it was exactly on top of him he got hit with S10 and Adam rolled well for number of wounds).
Outcasts - Turn 2
 |
| Elves try to re-organize after heavy blow |
 |
| Small success on the right flank |
Some units were confused after that powerful early attack. Dragon Princes on the left decided to move back to support infantry and expecting Bretonnian Knights to push forward. Reavers danced away and tried to position themselves for an attack from different angle. Eagle Rider attacked Errants all by himself. He was challenged by a young knight and killed him easily while his companions lost heart and fled, only to be caught in pursuit.
Bretonnia - Turn 2
 |
| Bretonnians still don't charge |
 |
| But they manage to land another heavy blow |
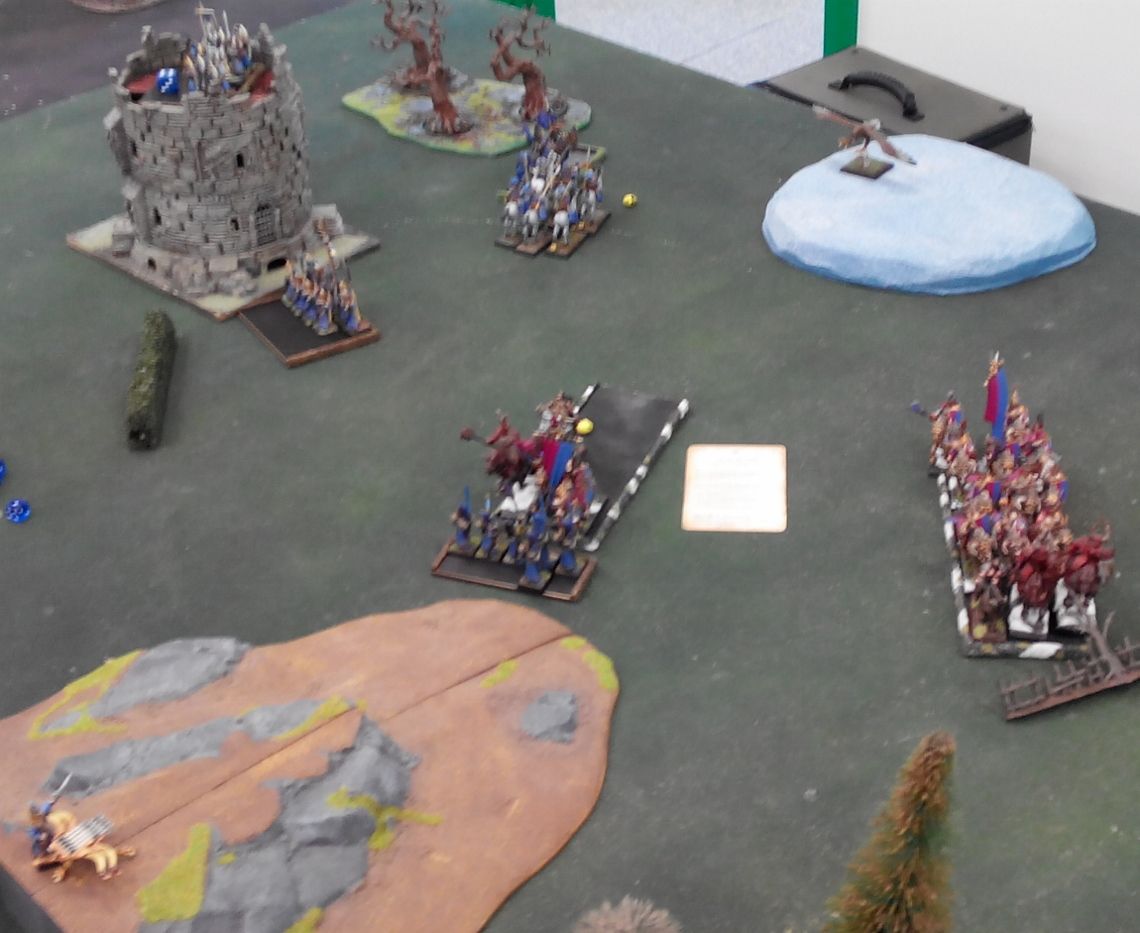
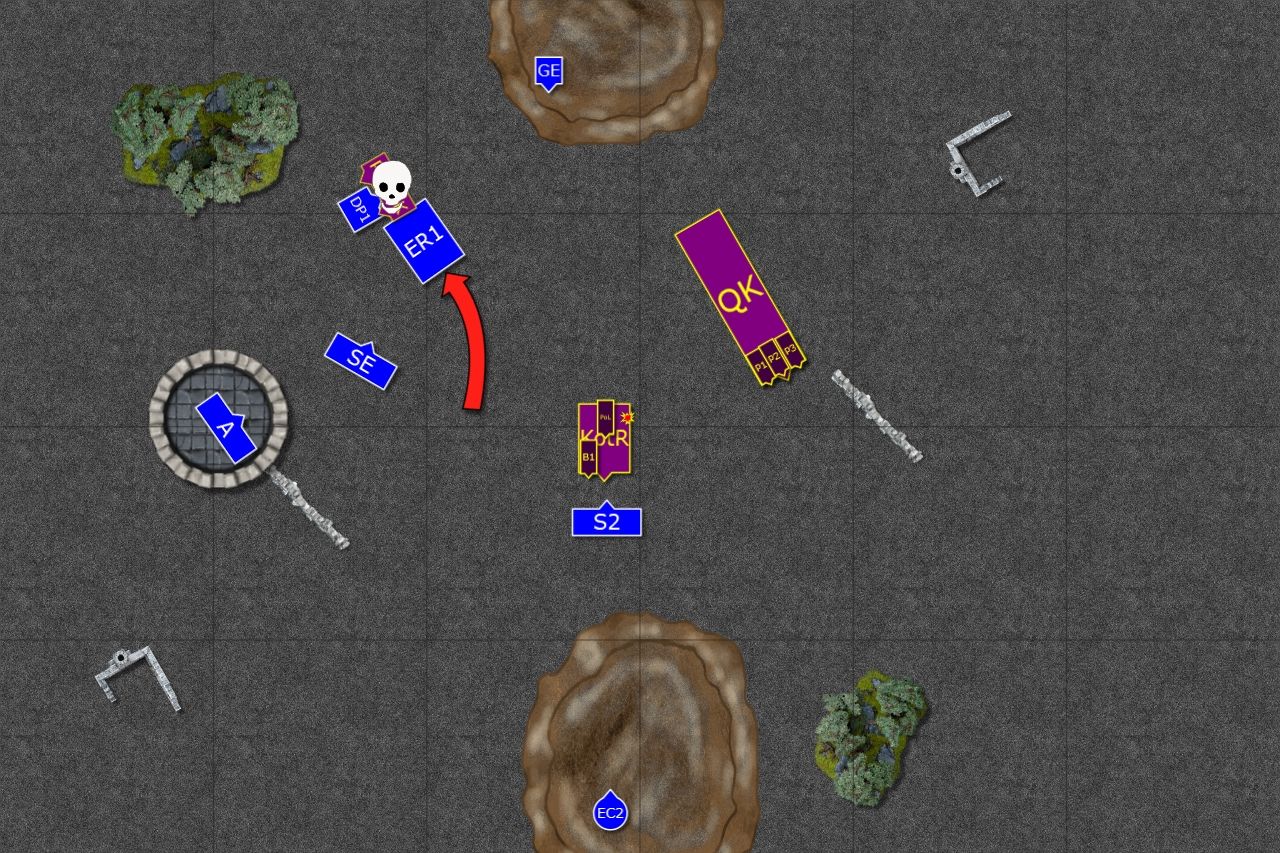
Bretonnian army remains relatively static. Only Pegasus Knights keep blocking elves fast cavalry. Quating Knights protected left flank and even knights of the realm didn't move much. But Prophetess again cast a spell with Irresistible Force, yet again few knights died and this time it was elven BSB and half of the unit of Swordmasters who were destroyed. The rest of the unit could not stand the horror of it and fled. Nearby Lions thinking that all is lost without their leaders also withdrew from the battle field. Remaining regiments of the elven army were in big trouble indeed.
Outcasts - Turn 3
 |
| Elves keep trying to get to Bretonnian firebase |
 |
| Maybe this time? |
Ellyrian Reavers, the eagle and eagle rider all park on the left side of the hill ready to strike at trebuchets. (Edit: Note that ER failed their march test and I was unable to close to trebuchets to avoid being blocked again.)
Units on the left flank moved fast to run away from the knights of the realm. Units on the right flank did the same to avoid Questing Knights. Bolt throwers focused on Bretonnian bowmen but despite heavy losses peasants held their position.
Bretonnia - Turn 3
 |
| Bretonnians keep up the pressure |
 |
| Yet another Dwellers! |
Without any targets to charge and enemy units trying to get to the back yard, knights of the realm are ordered to turn around get back to their own lines. And yet again Prophetess casts her deadly spell and yet again, Elven noble dies.
Pegasus Knights one more time prevent elven cavalry from charging the trebuchets and in return the huge rock destroys one bolt thrower (Edit: Forgot to show that on a map)
Outcasts - Turn 4
 |
| Elves finally made it to the hill |
 |
| They now fight to make the defeat as small as possible |
Bretonnians cannot block Elven troops anymore and Dragon Princes go through Bowmen and hit trebuchet. Another claw of Dragon Princes and remaining Swordmasters try to approach knights of the realm from both sides while bolt thrower kills one knight.
(Edit: I am a little confused what I did with the eagle, I think I might not even charge this time but maybe second trebuchet panicked?)
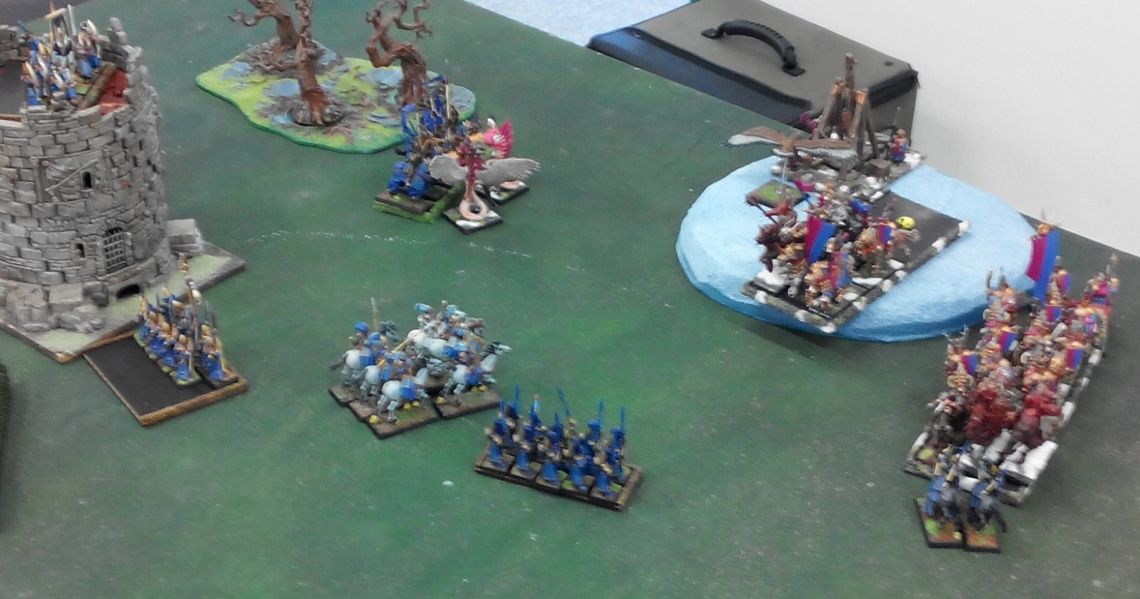
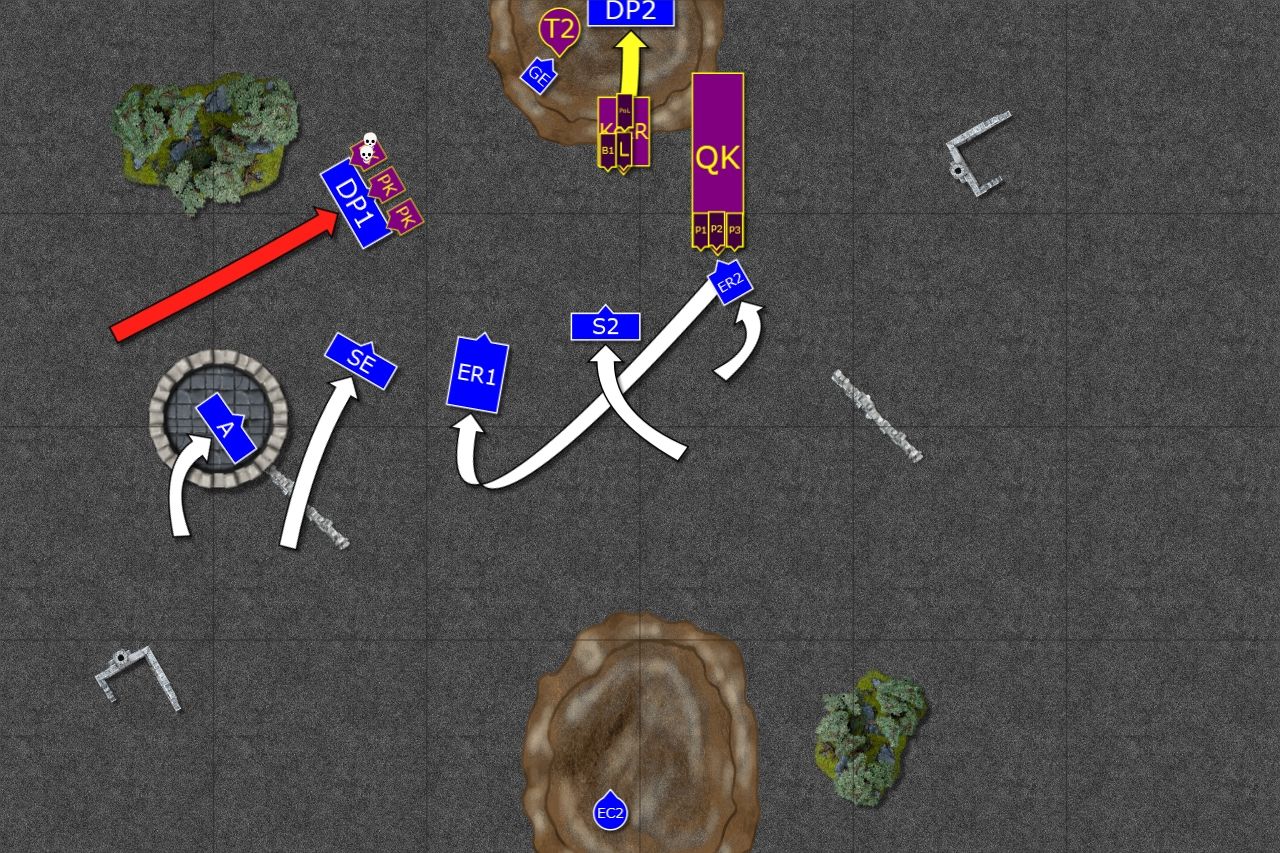
Bretonnia - Turn 4
 |
| Bretonnian Lord spots the opening |
 |
| And charges Dragon Princes |
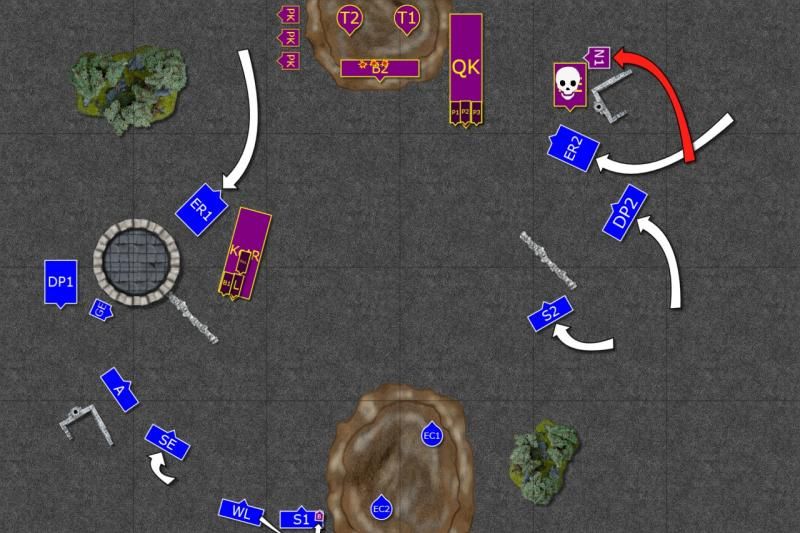
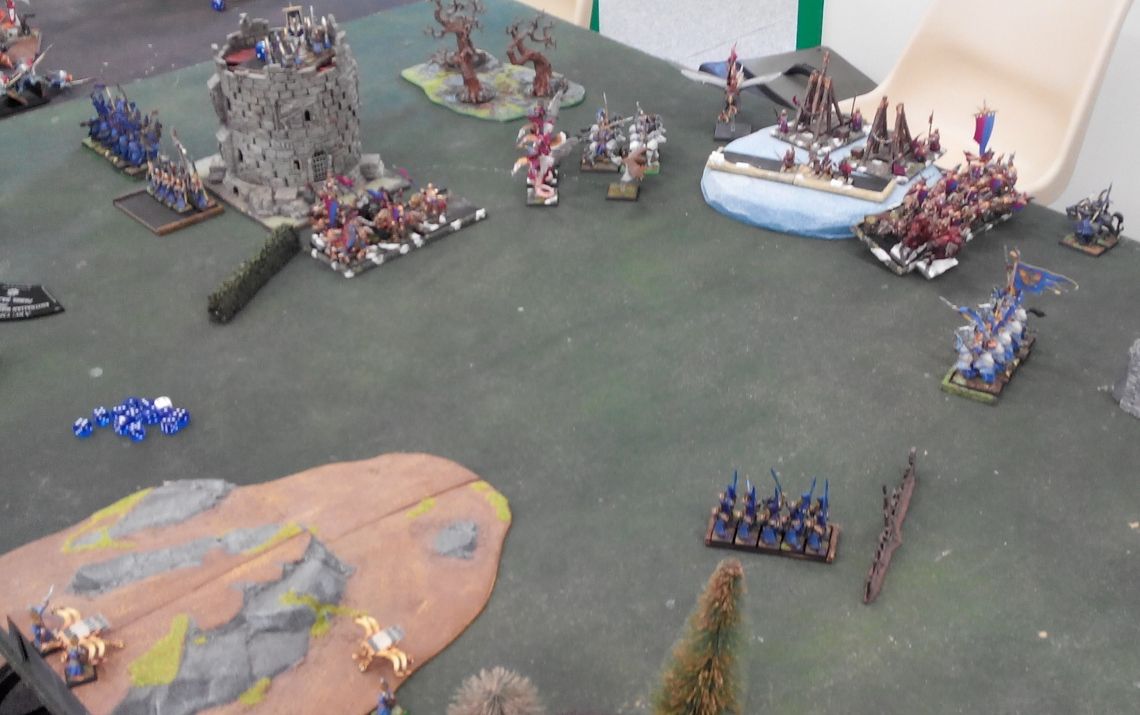
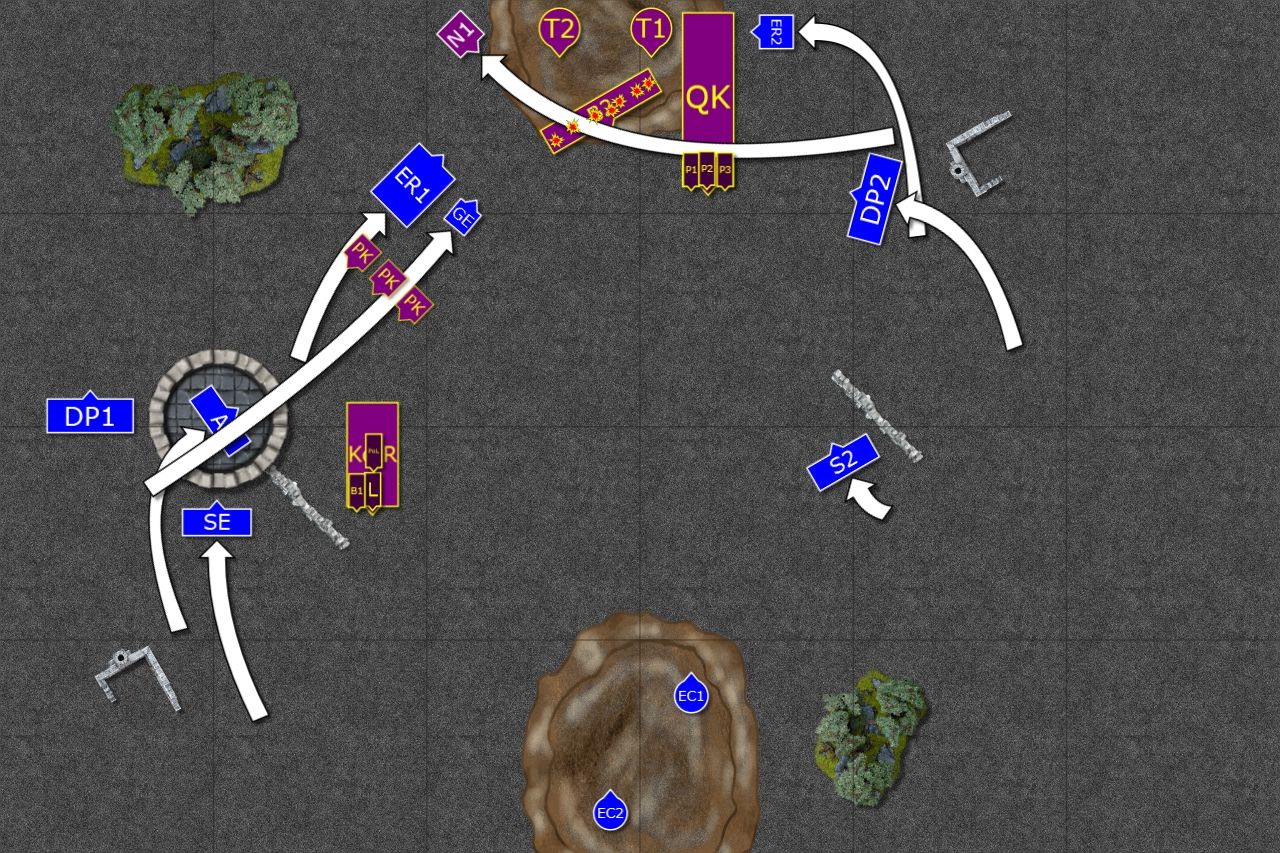
Pegasus Knights try to charge Dragon Princes but the main goal is to move away to make room for galloping Lord and his retinue. Knights of the realm finally charge elven heavy cavalry. However, miraculously they don't inflict any casualties and elven knights hold. (Edit: I rolled some crazy amount of 6's for ward saves)
Questing Knights too charged but swift elven cavalry easily avoided more cumbersome human knights.
Outcasts - Turn 5
 |
| Pegasus Knights got caught |
 |
| Swordmasters challenge Bretonnian Lord |
Reavers block questing knights while the rest of the elven army tries to rush to aid Dragon Princes attacked by Bretonnian Lord. Unfortunately, elven heavy cavalry cannot hold any longer and the rescuing regiments are either too far away or, like in the case of second claw of Dragon Princes, they are held by Pegasus Knights. In these circumstances, Swordmasters positioned themselves to receive a charge of Bretonnian knights.
Bretonnia - Turn 5
 |
| Bretonnain General charges |
 |
| and dies! Although Swordmasters cannot hold the line |
Bretonnian General knows he has to charge so he attacks without hesitation. Swordmasters focus on him and do all they can to get to the enemy general. They succeed and he dies. Despite that, impetus of the charge is strong enough to break Swordmasters but they manage to flee to safety.
The fight between Pegasus Knights and Dragon Princes this time leans into the favor of Bretonnians but elven heavy cavalry holds.
Outcasts - Turn 6
The fight between Pegasus Knights and Dragon Princes this time leans into the favor of Bretonnians but elven heavy cavalry holds.
Outcasts - Turn 6
 |
| Last charge |
 |
| Light cavalry comes to the rescue |
Ellyrian reavers charge for the last time. They attack the flank of Pegasus Knights and finally break them and kill them in pursuit.
Eagle Claw aim well and shoot a single bolt against Bretonnian Knights. It goes through the first rank but Lady Blessing saves the knight in the rear rank.
Bretonnia - Turn 6
 |
| One more Dwellers! |
Bretonnians decided not to charge Swordmasters again as from the proud unit only champion, battle standard bearer, paladin and prophetess remained. Instead, Prophetess cast yet another spell that this time destroyed remaining eagle claw bolt thrower.
After that both armies disengaged and Bretonnians were clearly victorious this day.
Turn-by-turn Summary
Customary animation to summarize the battle turn-by-turn
After that both armies disengaged and Bretonnians were clearly victorious this day.
Turn-by-turn Summary
Customary animation to summarize the battle turn-by-turn

After-battle thoughts
Adam clearly outplayed me and secured well deserved victory. Since he broke my army in the process he got 400VP extra and that gave him solid, 15:5 win. He didn't follow the usual pattern of attacking with knights and leaving peasants to their fate. He used efficient (although not subtle!) way of 6-dicing Dwellers against my characters with his first spell casting attempt almost each turn and that meant I lost all of my leaders. The only eagle rider that was not killed by a spell was squatted by trebuchet.
He used his Questing Knights as a blocker as long as possible. He did even better job with Pegasus Knights. He first lured me to one flank, vanguarded back and moved them to block Reavers on the other flank. Very well played, Adam, easily the best game of the tournament despite painful defeat!
I tried to fight back but didn't avoid mistakes. Let's have a look at what I think I could do better.
1. Deployment - I wanted to limit the impact of Dwellers so that I positioned my units as far away as possible and spread my characters. However, I made a mistake and positioned my Archmage and BSB where they could be reached turn two. Even by positioning on the deployment rear I could not avoid boosted Dwellers due to the speed of Bretonnian army. Because of that I should have deployed my infantry in the center and characters on the right flank.
The chain reaction of failed panic checks was unfortunate but should have been avoided by better positioning. It was a clear example of how risky staying so close to the rear can be.
2. Wrong assumption - I assumed Adam will move forward and abandon his peasants. If he did I would have been in good position to destroy trebuchets and bowmen quickly and be ready to counter attack or surround his lances. I didn't take into account the alternative. Because of that my units on the flanks were not in good position to attack by themselves.
3. Dragon Princes - I am in particular not happy with the way I used Dragon Princes. I should have either moved them through the center towards the firebase and force the following decision: to charge them with knights but in doping so open the path to trebuchets for reavers or not and let them charge bowmen next turn. I could flee from the charge thus opening the path too.
The unit on the left flank was completely wasted and I simply hesitated too much as I didn't want them to be charged by pegasus knights. I think I should have pressed forward instead and force Peg Knights to charge either them or Reavers, in both cases opening the path to the peasants again.
4. Charmed Shield/Golden Crown - I didn't equip my eagle riders with these and I paid the price.
There was a very interesting comment Adam made when we talked after the game. He told me that if he didn't play me before and if he didn't read my reports he would not use the tactics he did. He said he would have attacked as I have expected. I am fully aware that people may know how I play and can use that knowledge to have a good plan in the case we play again. This was clear demonstration how that works. However, I like it because it forces me to try and come up with new ideas. This time I lost but next time I will be better prepared and will know that I cannot assume the enemy will attack me in the same manner as it was before.
Thanks for reading!
No comments:
Post a Comment