

Greetings!
In the round 3 of the Valley of Kings tournament I had a chance to play against the army I have never faced before - the Twilight Kin! I was very excited as it meant I will have a game with a civil war theme. These are always very close and bloody!
Andrew, who commanded a beautifully painted army of the Evil Elves, is also a new opponent for me so I was very happy to play against a new player with a new army at the same time!
I was very intrigued by Andrew's army because it was a combination of units that seemed to be a copy of some of my own and those that are unique to the Twilight Kin army:
Twilight Kin - Army List
40 Crossbowmen, Horde, Heart-seeking Chant
- 10 Shadows, Troop
- 10 Shadows, Troop
- Bolt Thrower, War Engine
- Hydra, Monster
- Dark Lord, Hero, Scarletmaw's Fenulian Amulet
20 Reaper Guard, Regiment, War-bow of Kaba
- 10 Blade Dancers, Troop
- 10 Blade Dancers, Troop
- Bolt Thrower, War Engine
10 Dark Knights, Regiment, Maccwar's Potion of the Caterpillar
- Hydra, Monster
40 Crossbowmen - the only horde formation of the army, very dangerous unit to my small element, especially with Piercing upgrade. Not to forget about Vicious either! It would need to be distracted and disordered as soon as possible as every turn of shooting would mean a loss of a unit for me.
20 Reaper Guard - pretty much a clone unit of my Palace Guard. Very good in melee, with a bit higher nerve, their potential weakness is their average armor and no defensive abilities. If caught in the open they can quickly sustain enough damage to be destroyed.
10 Dark Knights - a bit slower than Storm Wind but having more attacks. In a typical fashion they also were upgraded with a Pathfinder so I would really need that obstacles somewhere to establish a defensive perimeter. They can be potentially outpaced and outmaneuvered by my faster and more nimble units.
2 x 10 Shadows - the scouts of the army, further boost the ranged attacks capabilities. They can vanguard and have pathfinder to allow them to get to good shooting positions faster. Vulnerable too so I can potentially try and outmaneuver them with my fast cavalry to be able to shoot at them first.
2 x Bolt Thrower - very reliable war engines and long range attacks providers. Combination of these units mean that my army is at a disadvantage in the shooting duels. However, I have faster and more maneuverable units to either begin outside effective range of the shooters or be in the position for the attacks quicker. The biggest danger is if all the above units focus their fire on a single target or even split it between two units. The elements of my army are small enough to get killed in a single turn.
2 x 10 Blade Dancers - these units are very fast for infantry, have a lot of attacks, can ignore waver results and further modify the nerve tests with Brutal special rule. They can be deadly against any of my units simply due to the sheer amount of the attacks. But they are also quite vulnerable so can be a good target for my own shooters and can still be outpaced by the cavalry.
2 x Hydra - I think these monsters have really great rules. On one hand they can get more dangerous with more damage sustained as they add the number of attacks equal to the number of damage points. But at the same time their regenerative abilities and 5+ defense mean they are hard to destroy. And need to be killed in a single turn of melee preferably.
Dark Lord - the only source of Inspire in the army. The most powerful and the most flexible element of the force too. He can circle around, picking targets for the Lightning Bolts or engage in melee, when the time is right. Against smaller units he can hunt them individually but can easily pick the targets for combined charges too. It would be very difficult to catch the dragon in melee so I intended to shot at it if given the chance.
In general, I faced the army that has the advantage in the shooting but was a bit slower and I had a few more units too. Not a huge advantage but may be useful. The general plan was to try and limit the efficiency of shooting with terrain, mutual cover and the approach that would allow to disorder the shooters.
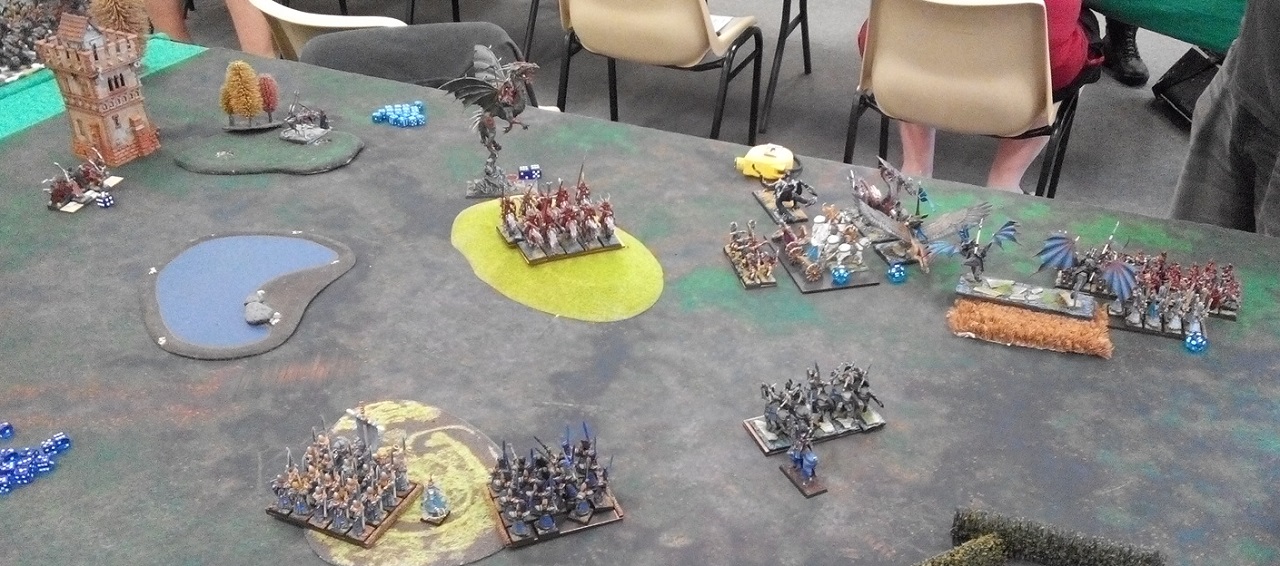
Deployment and Scenario
 |
| Terrain details. |
 |
| Deployment before the vanguard moves. |
 |
| Deployment after vanguard. |
I still remembered a very good plan Clint had against my army at Clash of Kings in the same scenario and I wanted to use a variation of it. I wanted to focus first on preventing the enemy from entering my center and right flank. The intention was to carry the fight to the Twilight Kin zones.
I also noticed that the shooters were guarding the flanks so that they would not be able to focus on the same area of the battle field. It was still difficult to contain them but allowed me to deploy some fast force on the left flank where I could attempt to distract and possibly destroy the bolt throwers and also prevent the units there from entering this area of the battle field.
Lat but not least I wanted to divide enemy army so that I would potentially be able to dominate one of the zones in order to win the scenario conditions.
Once again, I got the first turn!
Outcasts - Turn 1
 |
| Steady advance. |
 |
| Opening fire. |
The Outcasts moved cautiously. The majority of the army on the center left needed to keep the formation, navigate the terrain and be careful of potential attack from the dragon.The beast was also the first target of the ranged attacks. And while only a few arrows pierced the thick skin, the dragon was nonetheless annoyed!
On the left flank the small group begun the harassment too, with the fast cavalry trying to out-shoot the enemy, while drakons found a good landing spot to avoid bolt throwers.
Twilight Kin - Turn 1
 |
| Twilight Kin shows how effective the shooting should be. |
 |
| The Knights are shot down. |
Twilight Kin moved towards the center right to consolidate their positions and present more unified front. In the meantime, the Crossbowmen aimed at the first unit of enemy Knights and simply shot it down!
On the opposite flank the Bolt Throwers and Shades tried to do the same to the light cavalry but were not successful.
Outcasts - Turn 2
 |
| Drakons behind enemy lines! |
 |
| The Outcasts shoot back. |
There were some problems in going over the obstacles and some units could not yet clear them. The dragon was also hiding behind the hydras so the shooters opened fire at the Shades and eliminated them!
Also one of the bolt throwers fell when attacked by the drakon riders. Silver Breeze cavalry shot at the second unit of Shades again but the enemy scouts still refused to yield.
Twilight Kin - Turn 2
 |
| Another unit of the Knights is no more! |
 |
| Twilight Kin backs up. |
Interestingly, the Twilight Kin army backed up. The Dark Knights turned around to threaten the Drakon riders. At the same time majority of the units pulled back too. The Crossbomen still did what they do the best - shot down another unit.
Outcasts - Turn 3
 |
| The Reaper Guard holds! |
 |
| First charge! |
Drakon Riders ignored the enemy Knights completely and charged the Reaper Guard that exposed the flank. Despite a great opportunity to eliminate the unit on the charge, the Reaper Guard held!
Twilight Kin - Turn 3
 |
| Dragon counter attacks. |
 |
| More shooting! |
Twilight Kin counter attacked but this time it was the stubborn Drakons who did not want to get routed when their bigger and meaner cousin attacked. But the Crosswbomen were still very consistent in eliminating the enemy units.
Outcasts - Turn 4
 |
| Attack on the right flank. |
 |
| Drakon riders spear head the attack again! |
Finally, the units on the right flank could attack the dangerous horde of enemy crossbowmen. The charge was so impressive that the enemy warriors wavered in shock and awe!
At the same time the Drakon Lord attacked one of the Hydras to distract the beast and allow the reinforcements to arrive.
Twilight Kin - Turn 4
 |
| Getting closer. |
 |
| Two more units routed. |
After a few rounds of the fire exchange, it was finally the Silver Breeze unit that lost their nerve first and fled the battle. The Drakon Riders could not hold against the second charge of the Dragon either.
Fortunately, the Drakon Lord held against vicious hydra!
Outcasts - Turn 5
 |
| Some quite interesting developments. |
 |
| Another round of melee. |
The battle was becoming more desperate now and the Outcasts attacked with more units to shift the balance into their favor.
Drakon Riders and Palace Guard attacked the Crossbowmen but still could not destroy that unit. At the same time the War Chariots spotted an opportunity and charged the exposed flank of the Hydra. But the beast held and the second one was about the attack too!
Twilight Kin - Turn 5
 |
| Chariots hold! |
 |
| The charge of the Monsters! |
Both Hydras and the Blade Dancers attacked but surprisingly, the War Chariots held the line! (Edit: Lucky double 1's happened here!) The Drakon Lord and nearby Palace Guard troops also held their enemies in place!
Outcasts - Turn 6
 |
| Change of plans! |
 |
| Dragon is down! |
It was clear for the Outcasts that their initial plan to control the North-East corner of the battle field would not work so they had to come up with a new one. The units in that area of the battle field doubled their efforts to hold their enemies in place a bit longer to buy time and prevent them from moving to other directions. That allowed the Drakon Riders t fly away behind the enemy lines.
But to succeed they needed a bit of a help from the shooters. Fortunately, combined efforts of the Sea Guard and Silver Breeze cavalry allowed to inflict enough damage to finally kill the Dragon!
Twilight Kin - Turn 6
 |
| More casualties! |
Twilight Kin finishes off three enemy units in one go! That is quite a heavy blow to the Outcasts but will they have a bit more time to turn the tide?
Outcasts - Turn 7
 |
| Change of the attack direction. |
The Drakon Riders managed to reach the lone bolt thrower in their rapid redeployment and destroyed the war engine!
At the same time, the Sea Guard aimed at the damaged Shades and managed to rout them too! Suddenly, North-West fell under the Outcasts control!
Twilight Kin - Turn 7
 |
| The last attempt to reclaim the control. |
Twilight Kin was caught by surprise and tried to claim the control over the battle field again. The foolish Palace Guard did not hold against the charge of the Knights and perished. However, fortunately for the Outcasts, the rest of the units were too far to change the course of battle!
Summary
 |
| Turn-by-turn animation summary. |
After-battle thoughts
I would like to thank Andrew for a fantastic game and the opportunity to play against his great looking Twilight Kin army! I am also sorry that due to turn 7 his solid victory turned out to be a loss :(
I admit it was very lucky for me that I had extra round to redeploy Drakon Riders and to shoot at the Shades for the ability to control one more zone than Andrew.
While it was good to snatch the victory from the jaws of the defeat, such situation certainly calls for a better plan next time. I think the main problem I had this game was a very slow advance on the right flank which cost me 3 units before I even attempted the charge!
The deployment would have to be refined so that I could move my units over the obstacles in a single turn and to have other elements in the position to attack and disorder the shooting horde turn 2. It means that I should have probably moved the cavalry more aggressively, with the support of the Drakon Riders and Drakon Lord. Even placing them in the charge range of the enemy Dragon.
I am glad I had second Drakon Riders unit on the left flank to destroy one bolt thrower and then distract the enemy for some time.
I am also happy with the performance of the Sea Guard because it was thanks to their combination of phalanx and shooting that they kept the Knights from charging and risking being flanked by the Palace Guard. As well as having the ability to add constant shots to the ranged attacks of the army. Thanks to that the Dragon went down and the Shades were routed in the last turn.
It looks to me that I should refine my deployment on the right and be more aggressive in the approach next time to make sure that no matter if the turn 7 happens or not - I can still prevail!
Thanks for reading!
Great game Swordmaster!
ReplyDeleteYou always had close games against dark elves in WFB and it seems KoW is no different. I think he played a great game as well. Both sides had a bit of luck on some key nerve tests ( I was shocked when I saw the hydra still there after a flank from chariots and the Lord in the front!), but that is part of the game and must be taken into account.
I lost a game recently that was due to not advancing aggressively enough into a shooting list, so I'm beginning to see how important it is to really "get after" a list like that and do your best to disorder shooting early. You did a great job on the left flank with the drakons and got to his warmachines very quickly. As you pointed out, I think you would have had better luck by a more aggressive approach on the right flank, but that's why making your reports and seeing how to play differently in the future is so beneficial.
You raised an interesting point about advancing aggressively even if you left yourself in charge range of the dragon. One of the most difficult aspects of playing against flyers is not knowing exactly where they'll end up because of their range and nimble. I've been thinking that maybe giving them (dragons, flying hordes, etc.) one quality charge target. That way, you can still advance aggressively, know where the flyer will end up, and can set a counter charge up. For this to work, it would have to be a valuable enough unit to merit a charge, but in certain situations the trade might be worth it. And if they don't take the bait, the aggressive move puts you in a better position to move against the rest of his force.
Last note, as a TK player, I really thought his list looked fun. It had some usual suspects (crossbow horde, dragon) and rare picks (double hydra!). I couldn't make a TK list without at least 2 units of gargoyles and a high priestess (bane chant), but it was great to see a different take!
Thanks for the report!
Hi Dan!
DeleteFinally, your patience has been rewarded with the report featuring Twilight Kin! I hope it was worthy waiting for :)
It is true that civil wars were very close and bloody encounters and it seems to be a thing across the different gaming systems. Makes them special!
Dice rolls are always a funny factor and I keep telling myself I should use these to generate some nice short stories to spice up the reports. :) But yes, one should definitely try to take into account these lucky double 1's or 6's.
I am not sure yet about the best approach against the shooters but I found patience is important. As is balance between patience and aggressive advance. On one hand you want to stay calm under the incoming fire and do not panic when inevitable casualties happen. On the other, you should not keep hiding forever and deploy and move in a way that minimizes damage but allows you to get into position quickly. However, it can be turned into mindless rush towards the enemy and that is not what you want either.
I didn't utilize the speed of some of my units to engage the horde turn 2 or 3. I would like to aim at the approach where if I want to attack on turn 3 then I should avoid being shot at in the first round at all. I failed to do so because I moved one of the units into range already. At least I should have made sure the horde needs to move to be able to shoot at something.
Big monsters, dragons in particular, are great psychological weapons. They can attack many units but need to choose one if they do. As you said, one way to mitigate their presence is to give them a juicy bait. Another is to position units in a way that allows immediate counter attack no matter what is the target.
I should have moved units further forward so that the first line would threaten the enemy already but the dragon would be the only element able to charge. Then, no matter if the target is killed or not I should have something to pin the dragon down.
That is still risky business if the rest of the army follows the initial charge of the dragon. Any attack on the beast would put my units in danger as it would have been difficult to bring enough units to charge the dragon from many sides and kill it.
It is still worthy considering because sooner or later the units get into respective charge ranges.
It is definitely great to see variety among the lists! I wonder if Andrew is going to make any changes to his for the next event but even if he does the army may still be different. I just wish TK had their proper, official list by now. But I guess we have to wait and see. :)
Cheers!
Awesome battle report!!!
ReplyDeleteI hope you could put the diagrams again in the missing ones!
;)
Hi Phobos!
DeleteThanks! No, not yet unfortunately but I will try to fix it for sure!
As Phobos said, I think you are missing diagrams for the reports before this event. I can't see the ones from the AU Masters but I can see all of the valley of kings diagrams.
ReplyDeleteHi Dan,
DeleteI haven't had time to fix the previous reports yet. It will take some time and I still don't know what happened. However, this time I am uploading pictures directly from my hard drive instead of uploading them to Photobucket. Maybe that will help to avoid the problem in the future?
I hope so, your BR are some of the most interesting out there :D
DeleteThanks a lot, Phobos! I glad you like them so much and I will do my best to fix the problem soon as well as provide a new report. :)
DeleteFinally caught up on your battle reps and this was a great one. I like that you had the presence of mind to adapt your plans and snatch victory at the end. Too many times I've gotten so caught up in the fight that I've forgotten the objectives (probably a throwback to warhammer).
ReplyDeleteThanks! It does not happen often so I am even more happy that I managed to see the way out of the trouble. I was a bit lucky too as in turn 6 I was still losing. :)
Delete