
Greetings!
I decided to take some WIP photos and write down how I painted Ellyrian Reaver in step-by-step fashion (in a way, I didn't take a photo for each of them :)). I wanted to do so because of 2 reasons:
1. I would like to share what I have learned in terms of painting so far. Almost all I learned comes from observing better painters works and reading their advices and then practicing it on my own miniatures. Some of them I got by asking them directly.
2. I want to improve my skills further. So if you have any suggestions as to the way of painting, colors used, anything, please share your thoughts. I promise I will consider all of them no matter if they come from a beginner or Golden Daemon winner :)
Let's start then!
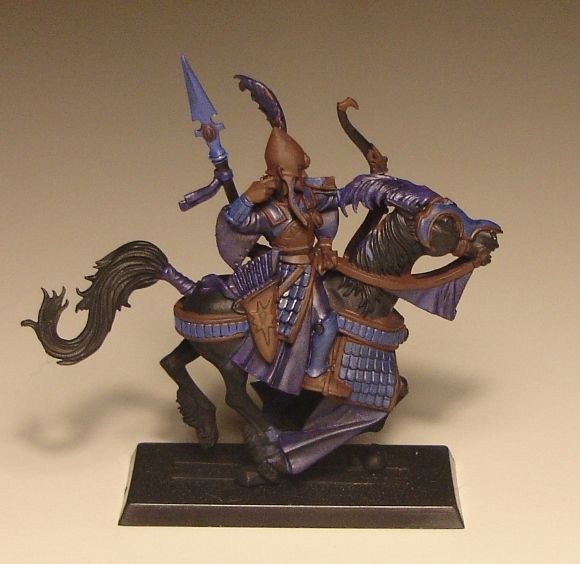
I start of course with cleaning the model from mold lines and other "additional" features. Since it is a model which requires assembly there are some gaps between parts. I tried to fill them with liquid green stuff and only then I primed the model with black undercoat. My first step in terms of painting was to paint the model with "base" colors. However, I always paint from the darkest color, not from middle tone. I just prefer highlighting. The model after this stage looks like this:
I decided to take some WIP photos and write down how I painted Ellyrian Reaver in step-by-step fashion (in a way, I didn't take a photo for each of them :)). I wanted to do so because of 2 reasons:
1. I would like to share what I have learned in terms of painting so far. Almost all I learned comes from observing better painters works and reading their advices and then practicing it on my own miniatures. Some of them I got by asking them directly.
2. I want to improve my skills further. So if you have any suggestions as to the way of painting, colors used, anything, please share your thoughts. I promise I will consider all of them no matter if they come from a beginner or Golden Daemon winner :)
Let's start then!
I start of course with cleaning the model from mold lines and other "additional" features. Since it is a model which requires assembly there are some gaps between parts. I tried to fill them with liquid green stuff and only then I primed the model with black undercoat. My first step in terms of painting was to paint the model with "base" colors. However, I always paint from the darkest color, not from middle tone. I just prefer highlighting. The model after this stage looks like this:
 |
| Base colors |
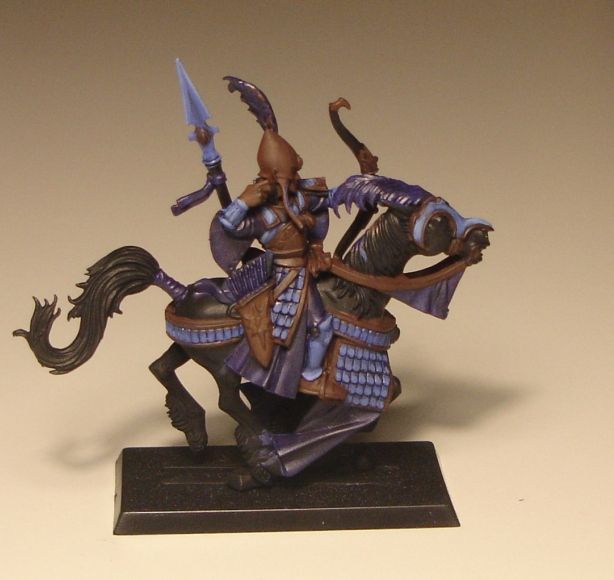
The colors used:
GW Scorched Brown - Armor, Flesh
GW Ultramarines Blue then washed with Asurmen Blue- Scale Armor
GW Ultramarines Blue mixed with Leviatan Purple Wash washed with Leviatan Purple - Clothes, Feathers
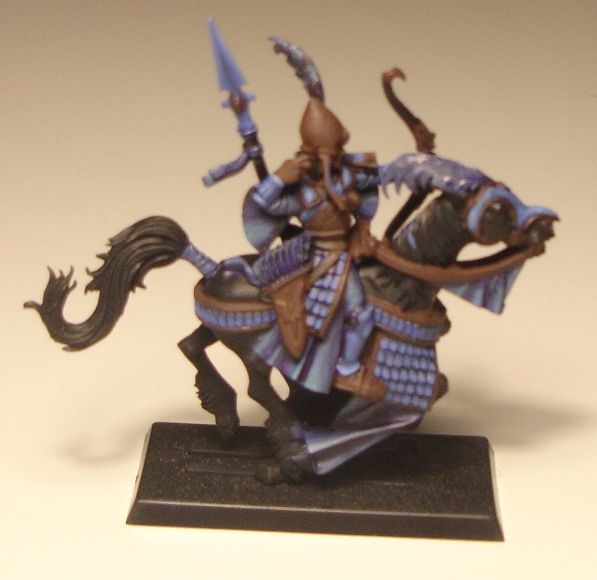
Now I start painting particular areas of one type. Usually I paint scale armor first.
 |
| Scale armor |
I paint with Ultramarines first. I used diluted paints on wet palette. The idea is to paint each scale or each area in a semi-transparent way. Hence I use fine brush and each time I dip it in paint I wipe it out on a tissue. I also paint from top to bottom and start at 2/3 height of scale. In this way I apply more paint at the bottom. After that I add a little Vallejo White to Ultramarine Blue to get lighter tone and add another layer starting from the middle. I add even more white and then paint some kind of bigger dots in the bottom half or 1/3 area of a scale. In terms of other areas the principle is the same although not everywhere up-bottom direction is good. You have to use your imagination as to where light color should be applied or look for references on many blogs of master painters :)
Next I paint clothes.
 |
| Apologies for blurry picture |
I wanted to keep limited colors scheme but it was suggested to me before that I should use warm colors here so that they stand out from cold blue I used for armor. I also tried to use an excellent advice from master painters at Chest of Colors (I highly recommend that site for anybody) and add some more purple/reddish colors to the mix. I hope I am getting in the right direction. :)
First I apply my Ultramarines + Leviatan Purple mix. Next I add Vallejo White and highlight exposed areas. Then I add old Hawk Turquoise to the mix. And last but not least I add a little Vallejo Bad Moon Yellow to the mix to make it lighter but warmer color (this particular model didn't have much of it, I added a little more for next models). The advice was to highlight with appropriate colors and not with white as it makes the mix cold again. It is also a principle of using colors from color wheel. As I said, I hope I am going in the right direction although the effect might not be visible well also due to poor picture. :oops:
Now I paint gold(ish) armor. I divided that part into 3 steps. First:
 |
| Gold armor - stage 1 |
I use Vallejo Ochre Brown, as always diluted and applied in semi-transparent way. It also helps to blend colors better for smoother look at the end. I don't apply it on whole area of particular element, I leave some parts unpainted (not counting Scorched Brown of curse). Then I apply Gryphon Sepia on all gold areas, also on the Scorched Brown parts. I wait until it dries out and proceed to step 2:
 |
| Gold armor - stage 2 |
I apply Ochre Brown again, on a little smaller area, then Vallejo Yellow Ochre and yet again Gryphon Sepia. I wait for it to dry and proceed to step 3:
 |
| Gold armor - stage 3 |
I apply Yellow Ochre one more time and then use Vallejo Golden Yellow but very carefully and almost only on some edges, corners etc. as it is quite significantly lighter color and stands out too much if applied in too thick layer or on too large area.
Next I start painting details like gems, flesh or quiver and bow.
 |
| Apologies for another blurry picture |
Gems - Vallejo Blood Red, Gryphonne Sepia, Scorched Brown, Black, Bad Moon Yellow, White
Flesh - Tanned Flesh, Elf Flesh
Bow, Spear - Golden Yellow followed by Golden Yellow+White
Quiver, Boots - Cobra Leather followed by Cobra Leather+White
Horse - Vallejo Darkblue Grey, Devlan Mud, Darkblue Gray
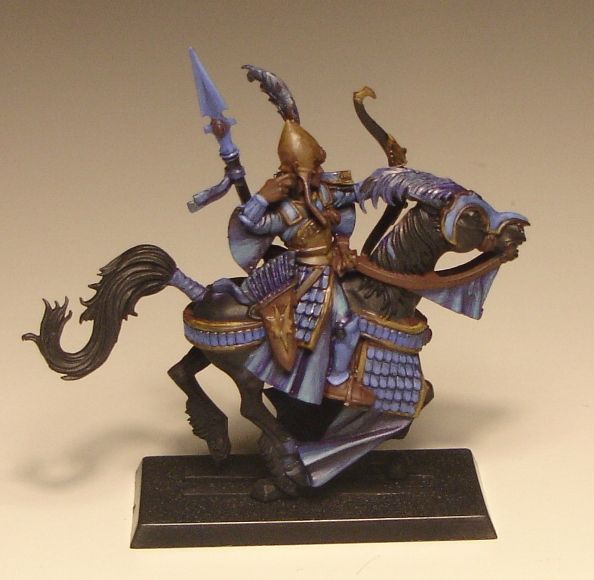
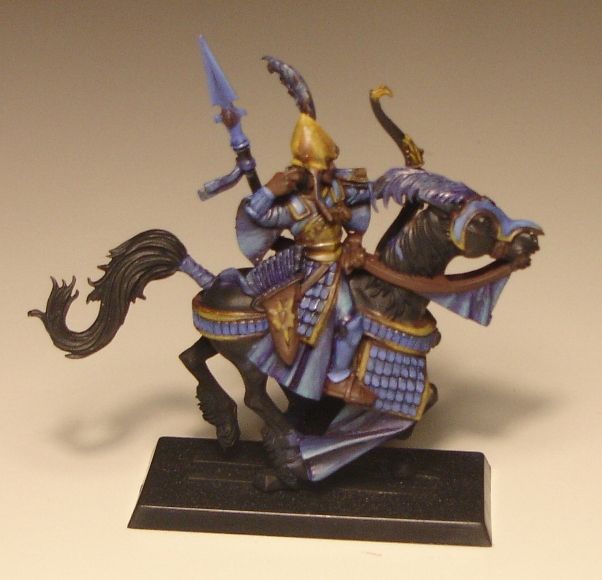
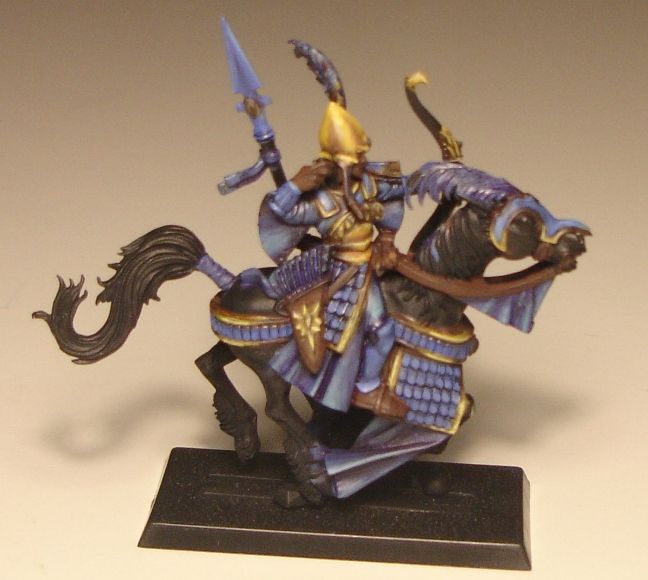
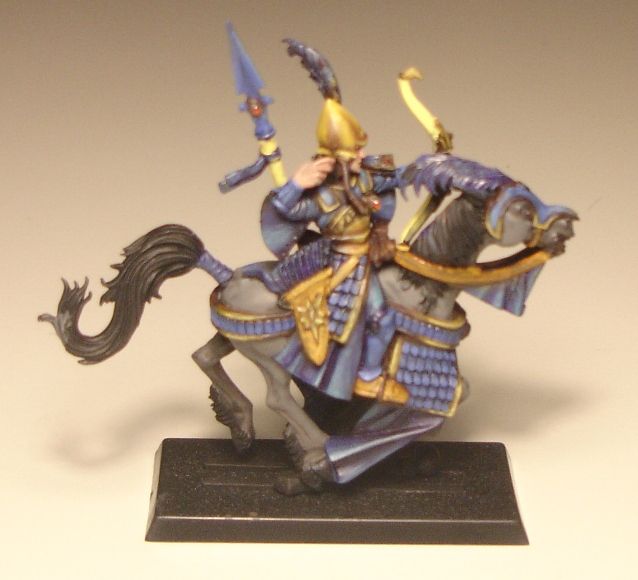
Then it is time for basing. And a better picture of Furious Five :)
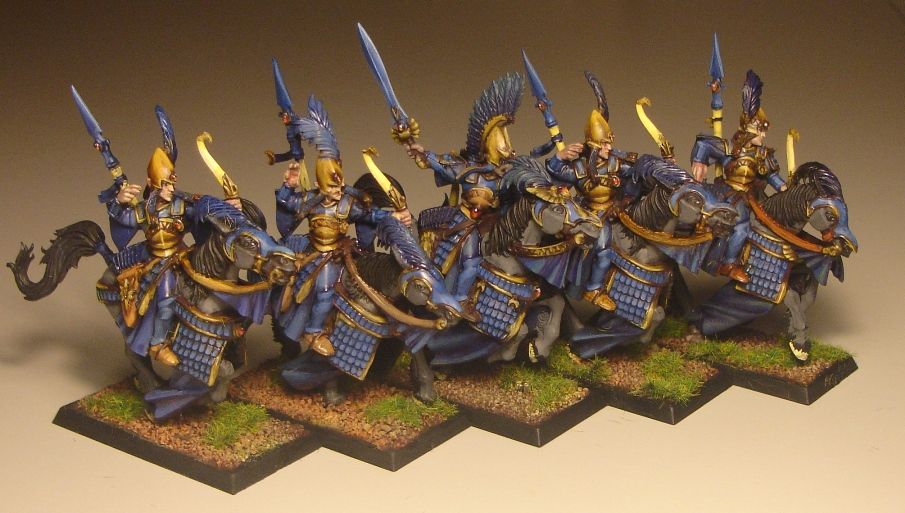
I hope you find my way useful. Please, leave a comment or two if you liked it :)
Cheers!
Nice work Swordie! I'm just about to paint some Reavers myself. Will take some tips from this. Rojo.
ReplyDeleteCheers Rojo! I am very happy to know this article is going to be useful for you. Send me some photos as soon as you them painted!
Delete