Hello!
In my next Mortem at Gloriam game I played against Leigh who is known for bringing a new army to play with almost every time we meet!
It was not different this time either but Leigh brought the force I did not expect at all. The army of Angkor Empire with multitudes of Elephants!
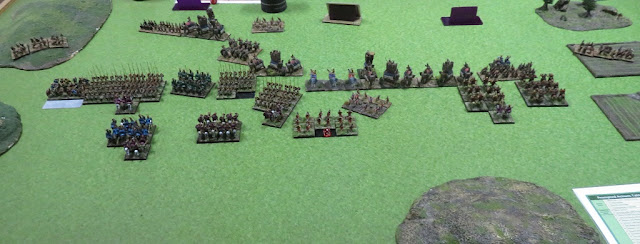
Now I can tell you, that was a sight to inspire and intimidate at the same time! Truly impressive army as you are going to see on the pictures, even though they do not give proper justice to the magnificent looking army Leigh had. Before we go there, however, here are the details as I remember them. I cannot recall at this stage what level of generals Leigh had but he had 3 commanders total.
Angkor Empire - Army List
The rest of the army also had some sort of shooting attacks so they potentially could significantly slow down the advance, inflict a few points of damage here and there and then send the elephants to finish the job.
My initial plan was to avoid elephants with cavalry at all cost and to try to inflict some damage with my own shooters. While dangerous, elephants seem to suffer from the low base count and that may allow Cretan Archers in particular to do some damage against them.
It was also an option to send Phalangites directly into the fight with the elephants but I was concerned the infantry can still be outflanked, especially that cavalry cannot protect them.
Pre-battle
We ended up with the secure flank of mountains and a few pieces of the terrain scattered on the edges of the battle field. It meant that the centre of the battle field was still open and we had plenty of room to manoeuvre.
I think I was able to out-scout Leigh but since he had so many elephants it was really difficult to avoid them!
Deployment
 |
| Early Seleucids vs Angkor Empire |
I started deploying with Phalangites and positioned them closer to the secure flank so that Elephants would not be able to outflank me from this side. But it also meant that the centre and right were open. That is why I positioned my shooters there to slow down the Elephants there and if lucky, maybe even stop one TuG completely.
The central Phalangites needed to get stuck with some Elephants but at the same time be careful not to get outflanked. That is why I also needed the left group to get into fight quickly. The cavalry was waiting in a gap in order to try and catch some loose formations of infantry off-guard. Although they seemed to stay close to the Elephants at the moment.
I was the defender in this game.
 |
| Deployment of the Armies |
Angkor Empire - Turn 1
 |
| Turn 1 - Sequence of Actions |
 |
| Elephants - inspiring and intimidating at the same time! |
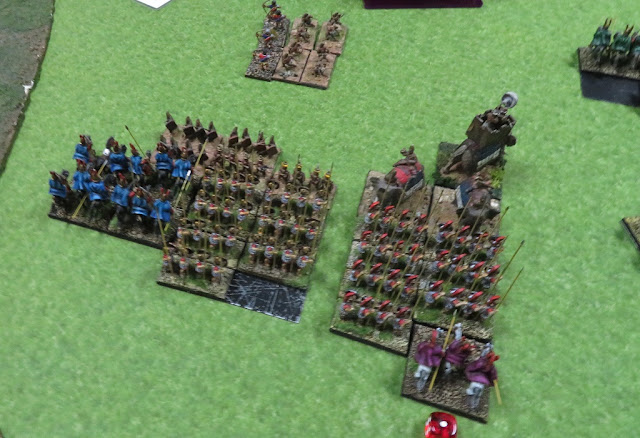
The Elephants advanced at the double through the middle of the battle field as an unstoppable juggernaut. No wonder that light cavalry of Seleucids army quickly moved to the flank to avoid them.
At the same time the Phalangites advanced steadily, not getting too close to rampaging beasts just yet.
 |
| Elephants lead the way. |
Seleucids - Turn 2
 |
| Turn 2 - Sequence of Actions |
 |
| Slowing down the elephants on the right flank |
Seleucids attempted to slow down the advance of the Elephants on the right flank with the use of their own skirmishers. It was to give time to Phalangites on the left to engage the weaker enemy there. Would that work?
 |
| Getting closer! |
Angkor Empire - Turn 3
 |
| Turn 3 - Sequence of Actions |
 |
| First units collide! |
Phalangites and Elephants collided in the centre. Seleucid infantry suffered casualties due to shooting but did not stop their charge.
Light cavalry and Cretan Archers managed to split the formation of the Elephants who started wheeling to attack exposed flank of the Phalanx.
On the left flank Seleucid units were now in position to attack their enemies as well.
 |
| The heat of battle! |
Seleucids - Turn 4
 |
| Turn 4 - Sequence of Actions |
 |
| Break through! |
The vicious fight continued but this time Seleucid Line Cavalry defeated Khmer mounted warriors and chased them in hot pursuit. One of the Phalanx also routed the Elephants, although they paid a heavy price for that success.
The breach was created in Angkor empire battle line, however, and Seleucids attempted to exploit it by sending more cavalry through the gap.
 |
| The gap is created in the enemy battle line. |
Angkor Empire - Turn 5
 |
| Turn 5 - Sequence of Actions |
 |
| The flank holds - for now. |
Seleucids poured more units into the gap and Phalanx as well as Companions prepared to deliver flank charges to two more groups of Elephants pinned from the front by the Phalangites.
At the same time, remaining Elephants moved quickly to help their companions with their own flank attacks.
 |
| Will the decisive blow land soon? |
Seleucids - Turn 6
 |
| Turn 6 - Sequence of Actions |
Although one group of Elephants arrived to help and attacked Phalangites from the vulnerable side, the Phalanx held long enough for the Companions to deliver killing blow. As the Phalangites and Line Cavalry on the right flank routed two more units, it was enough for the army of Angkor Empire to sound the full retreat. Even of the brave camp dwellers managed to defend themselves from the attack of Seleucid cavalry.
 |
| Just before the final melee fights. |
Summary
 |
| Turn-by-turn animation summary |
After-battle
Many thanks to Leigh for a great game! I did not expect to defeat this army so I am really happy to be able to achieve that.
The plan seemed to work as the fast light cavalry managed to slow down and split the formation of Elephants so that the Phalanx had enough time to defeat their enemies before being outflanked.
I was also quite happy with the fact I noticed the opportunity to move more units through the gap and be in the position of decisive flank charges. Even Companions, although fighting against the Elephants, thanks to the flank charge managed to deliver the killing blow to the damaged unit.
I think what was important for me in this game was to engage fast as the army did not suffer casualties due to shooting. I have no doubt that next time against similar army, I would be in trouble!
Thanks for reading!


No comments:
Post a Comment