

Greetings!
In the last game of the tournament I played against Ken "Chaaarge" who happened to be on a guest performance in Canberra. Ken is a very experienced player from Queensland and it was fantastic to have him attending our local event. However, Ken was not commanding his usual all mounted Varangur army this time but thanks to Tasman he played with superbly painted Trident Realms.
It was thus a very interesting situation from my point of view because I had an honor to play against Ken for the very first time but against the army I met before. Another difference was though that the army composition differed a little from these Tasman used earlier.
Trident Realms - Army List
40 Placoderms, Hammer of Measured Force, Horde
- Trident King, Hero
- Leviathan's Bane, War Engine
6 Naiad Wyrm Riders, Brew of Courage, Horde
- Naiad Centurion, Banner of the Griffin, Hero
- Leviathan's Bane, War Engine
6 Depth Horrors, Mace of Crushing, Horde
- Kraken, Monster
6 Water Elementals, Brew of Haste, Horde
- Coral Giant, Monster
This army had almost all familiar units, probably with an exception of Elementals. But as always, even with similar elements the army may work differently, so let's have a closer look at them:
40 Placoderms - very good defensive unit, where combination of Defense 6+ and Ensnare means it will be taking very few points of damage. Or it will take a lot of effort to take it down. As it is also a horde unit that is slow in comparison to my units, my approach is to avoid it until I have enough room to attack it from all directions at once.
6 Naiad Wyrm Riders - heavy cavalry of the army. They are very good in attack as with Pathfinder only obstacles can hinder their charge and while they are not as well armored as the knights in other armies, their regeneration 4+ takes care of that. Brew of Courage helps in passing these nerve checks.
While fast they are a bit slower than my heavy cavalry so I had a chance to attack them first. But I would need to do it in a way that allows me to deal a lot of damage as otherwise Wyrm Riders would simply heal themselves quickly.
6 Depth Horrors - Depth Horrors are tricky to use. They are not slow but not super fast either. They hit well enough but with Defense 3+ they may not like being hit back and getting them to melee in the first place is not easy.
If possible, I would very much like to shoot at them. They can be defeated in melee of course but it may be more costly to do so.
6 Water Elementals - the unit with Surge without a wizard to use it. However, with Brew of Haste it moves 8" and charges 16" so I would need to be very careful how to approach them. Nice defense, not wavering and regeneration make this unit very good in defense. But with Crushing Strength they can also be reliable in the attack and they seem to me as a very good, flexible unit.
Avoiding them may not be that easy, even if in the initial turns they would just Shamble forward. What I cannot allow is war of attrition in one-on-one fights as Elementals will keep regenerating the damage and may simply take any of my units one by one.
2 x Leviathan's Bane - long range shooting. The army may not have much of support in that department but if left unattended these war engines have a potential to delete a unit per turn. Hence, I decided to dedicate my own shooting and/or some fast troops to take them down fast.
Trident King - it is a very versatile and flexible character and I am not surprised he was present again. As before I would probably try to avoid him, block him and only if I could isolate him with enough units I would attack.
Naiad Centurion - is another good addition. It was clear that he will team up with Wyrm Riders and while he can do some damage on his own his another important role would be to inspire the Riders. Which makes them even more difficult to route due to combination of artifacts and inspiring presence of their leader.
Kraken - I think Kraken is a must have for this army, if only for the great looking centerpiece of the force. it can hit hard though and regenerates damage well. I know I mentioned it before but the key to success against Kraken is isolating it and attacking from few directions at the same time.
Coral Giant - as every other giant it is very tough nut to crack and can comfortably hold the line all by itself. Fortunately it cannot regenerate the damage but it is always difficult to mount a successful attack against a model on a relatively small base.
In general, this army would want to go into war of attrition against mine but due to significant difference in the number of units, it cannot do it recklessly. Regardless of the scenario the plan was not to let that happen and divide the units that are otherwise too tough to handle.
Terrain
Deployment and Scenario
In this game the scenario was Control. What was interesting from my perspective was that Ken did not deploy his toughest units in the center to defend my advance into his territory. It seemed that he rather wanted to stall the advance along the whole width of the battle field. And by doing so created a trap for any of my units that would potentially venture into his half through the middle.
Seeing his army deploying like that I positioned majority of the units in the center and on the right flank with the aim to get rid of the Banes as fast as possible and to tackle the Wyrm Raiders too. If that plan succeeded I would be in a good position to control two zones on the right, have enough units in the center to keep Trident Realms army to move to my half and to outflank other forces for the possession of the most valuable zone for me.
At the same time, units on the left were to threaten the advance of at least some elements of the enemy. Their presence also meant Ken had to consider keeping something in reserve and not allow me to get into top left zone. Also, at least the Drakons and Drakon Lord could easily threaten the advance towards the center too.
Well, that was my plan but let's see how well it survived the contact with the enemy!
Outcasts - Turn 1
Elves moved as one across entire width of the battle field. The units on the left flank moved a bit more aggressively, setting up an obvious trap for Wyrm Riders. All the shooters released their arrows while on the move and damaged one of the Leviathan's Banes.
Trident Realms - Turn 1
Neriticans advanced too but did so in mutually supportive manner. Trident King and the Horrors moved close to each other so that Elven units would have limited areas to attack. And while Placoderms moved to support as well, Trident King used his ranged attack abilities to damage Elven Drakons.
Outcasts - Turn 2
The units on the left moved in a more aggressive way. Palace Guard attack the Tirdent King to distract him while Drakons moved around the enemy to threaten flanks and rears.
On the right flank the cavalry tempted Wyrm Riders to charge a bit more juicy target. The trap was still obvious.
Trident Realms - Turn 2
The Trident King and Depth Horrors had no problems in getting rid of the annoying Palace Guard. In the middle, Water Elementals charged the Regiment of Palace Guard to spearhead the attack and followed by Kraken and Coral Giant. But the damage was really low and disappointing.
Outcasts - Turn 3
The army of Trident Realms seemed to be divided in between different areas and Elves tried to use that to their advantage. First, the Chariots attacked the Kraken to shield the fight between Palace Guard, Sea Guard and Water Elementals. Elven infantry managed to route the enemy and redressed the ranks.
Drakon Lord and Drakon Riders ignored powerful enemies on the flank and swooped over to the center of the field where they threatened the Kraken and the Giant.
At the same time heavy cavalry destroyed second war engine and awaited the attack of the Wyrm Riders.
Trident Realms - Turn 3
Temporarily outmaneuvered, Neriticans started re-positioning. Trident King moved towards the center to help the Kraken and the Giant and his ranged attacks successfully grounded Elven Drakon Riders.
Also Wyrm Riders attacked finally and routed their enemy. It was important as it allowed them to reform and assume defensive positions against Elven second wave.
Outcasts - Turn 4
The initial plan didn't work so Elves had to adapt. Instead of attacking the Sea Monsters, Elven Lord teamed up with heavy cavalry and Drakons to charge Wyrm Riders. Unfortunately for Elves, despite the advantage they could not rout their enemy!
Palace Guard in the center attacked the Sea Monsters to pin them down but since the cavalry failed to destroy their foe it became a difficult situation for the Elven infantry.
Trident Realms - Turn 4
Badly damaged Wyrm Riders withdraw while their Centurion charges in to shield them from another coordinated attack and pins down the Drakon Riders.
Second unit is destroyed by Placoderms while the Kraken eats Palace Guard. Elves started losing units - fast.
Outcasts - Turn 5
The cause was not lost yet but Elves really needed to get rid of that Wyrm Rider unit. Unfortunately for them, nearby Cneturion inspired Naiad cavalry to heroic stand and they held against all odds!
Now not only the cavalry was in danger but also the remnants of the infantry in the middle had to deal with the Monsters without any support.
Trident Realms - Turn 5
Neriticans started pushing the Elves back. More units were routed and situation was grim for the Elves. Remaining heavy cavalry was wavered, Sea Guard was its own, only Silver Breeze cavalry could still attack the enemy and were hunting down Depth Horrors that invaded Elven territory.
Outcasts - Turn 6
With very few units left Elves could not hold onto the territory so used the speed to control different part. Drakon Lord flew towards the left flank while in the opposite corner of the battle field Silver Breeze cavalry finally managed to rout Depth Horrors and free this zone from the presence of Neriticans.
It was now up to Sea Guard to hold against the Kraken and the Giant alone.
Trident Realms - Turn 6
In the final heroic stand of the battle, the Elven Sea Guard holds against all odds and despite horrendous damage. Thanks to that Elves still controlled more territory and Neriticans withdrew. The cost of that victory was very high though.
Summary
After-battle thoughts
I would like to thank Ken for a fantastic game! He was the first one to congratulate me despite the fact that unlucky roll of double 1's cost him well deserved victory. In fact, he added that he is very happy that I won and that I should have simply because I had some bad luck against his Wyrm Riders.
I greatly appreciate such kind words and for me it is a sportsmanship standard I will aspire to reach. Thank you very much, Ken, it was a great pleasure to meet you and play against you and I will do my best to follow your example as a player.
While I am happy I won the game it still feels a bit of like "cheating". These double 1's rolls definitely add a lot of dramatic situations to the games. It was clear that if we had turn 7 (again, bad luck for Ken who didn't roll 4+) then Sea Guard would have been gone and I would have lost badly.
Where did it all go wrong for me then? I think that in the similar way as in the game 1 the coordination was not there. Maybe not to the same extend but now and again I found my units are not in the right position to either support each other or at a bit of a wrong angle to get to the nice position.
For example, Drakons on the right were too far to help in the middle while those on the left parked in a wrong spot and were shot at. First, early in the game and second, when I didn't check that possibility when the King simply moved in range.
But in general I think it was just a sum of small mistakes that put me in such a bad spot and cost me many units.
First, as I mentioned before, a bit of lack of coordination and mutual support. Second, bad timing. On one hand I had ranged attacks superiority so there was no need for me to hurry into melee. Yes, it was important to hold the enemy in their half but I still could use the shooting more. Fortunately, I kept Silver Breeze alive and they managed to get rid of the Horrors just in time.
Bad timing was also visible on the right flank when somehow I was reluctant to advance when I had comfortably force the exchange and move heavy cavalry into position where they could still attack Wyrm Riders and allow the second wave to get into good positions earlier.
Another thing I noticed was that I didn't use my Army Standards as I should have. They were often too far behind to either interfere with the movement of the enemy or be close enough to support my own units. Good example of that was when I attacked second Leviathan's Bane. Storm Wind cavalry got only a single point of damage when attacked by Wyrm Riders but Ken rolled high on the nerve check and they were routed. If only I had Army Standard nearby I would have had a chance to hold the enemy in place and allow Drakons and second unit to flank charge the Naiads.
Due to all the mistakes in positioning and timing I lost my advantage in number of units and speed. Ken used all the opportunities I gave him, didn't rush into melee when he didn't have to and destroyed large part of the army so that the end result was 13-7 for me. Which should have been solid 17-3 for him!
Thanks for reading!
This army had almost all familiar units, probably with an exception of Elementals. But as always, even with similar elements the army may work differently, so let's have a closer look at them:
40 Placoderms - very good defensive unit, where combination of Defense 6+ and Ensnare means it will be taking very few points of damage. Or it will take a lot of effort to take it down. As it is also a horde unit that is slow in comparison to my units, my approach is to avoid it until I have enough room to attack it from all directions at once.
6 Naiad Wyrm Riders - heavy cavalry of the army. They are very good in attack as with Pathfinder only obstacles can hinder their charge and while they are not as well armored as the knights in other armies, their regeneration 4+ takes care of that. Brew of Courage helps in passing these nerve checks.
While fast they are a bit slower than my heavy cavalry so I had a chance to attack them first. But I would need to do it in a way that allows me to deal a lot of damage as otherwise Wyrm Riders would simply heal themselves quickly.
6 Depth Horrors - Depth Horrors are tricky to use. They are not slow but not super fast either. They hit well enough but with Defense 3+ they may not like being hit back and getting them to melee in the first place is not easy.
If possible, I would very much like to shoot at them. They can be defeated in melee of course but it may be more costly to do so.
6 Water Elementals - the unit with Surge without a wizard to use it. However, with Brew of Haste it moves 8" and charges 16" so I would need to be very careful how to approach them. Nice defense, not wavering and regeneration make this unit very good in defense. But with Crushing Strength they can also be reliable in the attack and they seem to me as a very good, flexible unit.
Avoiding them may not be that easy, even if in the initial turns they would just Shamble forward. What I cannot allow is war of attrition in one-on-one fights as Elementals will keep regenerating the damage and may simply take any of my units one by one.
2 x Leviathan's Bane - long range shooting. The army may not have much of support in that department but if left unattended these war engines have a potential to delete a unit per turn. Hence, I decided to dedicate my own shooting and/or some fast troops to take them down fast.
Trident King - it is a very versatile and flexible character and I am not surprised he was present again. As before I would probably try to avoid him, block him and only if I could isolate him with enough units I would attack.
Naiad Centurion - is another good addition. It was clear that he will team up with Wyrm Riders and while he can do some damage on his own his another important role would be to inspire the Riders. Which makes them even more difficult to route due to combination of artifacts and inspiring presence of their leader.
Kraken - I think Kraken is a must have for this army, if only for the great looking centerpiece of the force. it can hit hard though and regenerates damage well. I know I mentioned it before but the key to success against Kraken is isolating it and attacking from few directions at the same time.
Coral Giant - as every other giant it is very tough nut to crack and can comfortably hold the line all by itself. Fortunately it cannot regenerate the damage but it is always difficult to mount a successful attack against a model on a relatively small base.
In general, this army would want to go into war of attrition against mine but due to significant difference in the number of units, it cannot do it recklessly. Regardless of the scenario the plan was not to let that happen and divide the units that are otherwise too tough to handle.
Terrain
 |
| Terrain Details |
Deployment and Scenario
 |
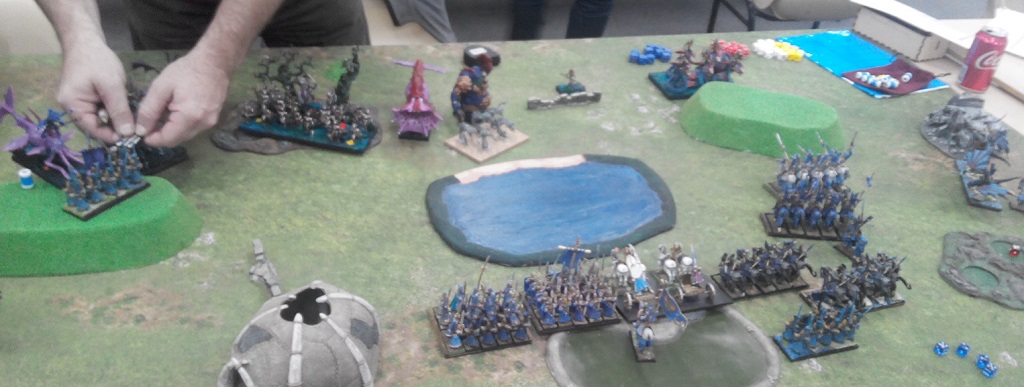
| Armies ready for battle. |
 |
| Deployment details. |
In this game the scenario was Control. What was interesting from my perspective was that Ken did not deploy his toughest units in the center to defend my advance into his territory. It seemed that he rather wanted to stall the advance along the whole width of the battle field. And by doing so created a trap for any of my units that would potentially venture into his half through the middle.
Seeing his army deploying like that I positioned majority of the units in the center and on the right flank with the aim to get rid of the Banes as fast as possible and to tackle the Wyrm Raiders too. If that plan succeeded I would be in a good position to control two zones on the right, have enough units in the center to keep Trident Realms army to move to my half and to outflank other forces for the possession of the most valuable zone for me.
At the same time, units on the left were to threaten the advance of at least some elements of the enemy. Their presence also meant Ken had to consider keeping something in reserve and not allow me to get into top left zone. Also, at least the Drakons and Drakon Lord could easily threaten the advance towards the center too.
Well, that was my plan but let's see how well it survived the contact with the enemy!
Outcasts - Turn 1
 |
| Elves close the distance. |
 |
| Shooting contest begins. |
Elves moved as one across entire width of the battle field. The units on the left flank moved a bit more aggressively, setting up an obvious trap for Wyrm Riders. All the shooters released their arrows while on the move and damaged one of the Leviathan's Banes.
Trident Realms - Turn 1
 |
| Neriticans prepare to receive early Elven charges. |
 |
| Trident King returns the favor and "shoots". |
Neriticans advanced too but did so in mutually supportive manner. Trident King and the Horrors moved close to each other so that Elven units would have limited areas to attack. And while Placoderms moved to support as well, Trident King used his ranged attack abilities to damage Elven Drakons.
Outcasts - Turn 2
 |
| Outflanking attempts. |
 |
| One war engine down, one to go. |
The units on the left moved in a more aggressive way. Palace Guard attack the Tirdent King to distract him while Drakons moved around the enemy to threaten flanks and rears.
On the right flank the cavalry tempted Wyrm Riders to charge a bit more juicy target. The trap was still obvious.
Trident Realms - Turn 2
 |
| Monsters in the pond! |
 |
| Pre-emptive strike by Water Elementals. |
The Trident King and Depth Horrors had no problems in getting rid of the annoying Palace Guard. In the middle, Water Elementals charged the Regiment of Palace Guard to spearhead the attack and followed by Kraken and Coral Giant. But the damage was really low and disappointing.
Outcasts - Turn 3
 |
| Big scrum in the middle. |
 |
| Attack into enemy territory. |
The army of Trident Realms seemed to be divided in between different areas and Elves tried to use that to their advantage. First, the Chariots attacked the Kraken to shield the fight between Palace Guard, Sea Guard and Water Elementals. Elven infantry managed to route the enemy and redressed the ranks.
Drakon Lord and Drakon Riders ignored powerful enemies on the flank and swooped over to the center of the field where they threatened the Kraken and the Giant.
At the same time heavy cavalry destroyed second war engine and awaited the attack of the Wyrm Riders.
Trident Realms - Turn 3
 |
| Neriticans counter attack. |
 |
| Breaking the encirclement. |
Temporarily outmaneuvered, Neriticans started re-positioning. Trident King moved towards the center to help the Kraken and the Giant and his ranged attacks successfully grounded Elven Drakon Riders.
Also Wyrm Riders attacked finally and routed their enemy. It was important as it allowed them to reform and assume defensive positions against Elven second wave.
Outcasts - Turn 4
 |
| Elven attack is stalled. |
 |
| New plan didn't quite work. |
The initial plan didn't work so Elves had to adapt. Instead of attacking the Sea Monsters, Elven Lord teamed up with heavy cavalry and Drakons to charge Wyrm Riders. Unfortunately for Elves, despite the advantage they could not rout their enemy!
Palace Guard in the center attacked the Sea Monsters to pin them down but since the cavalry failed to destroy their foe it became a difficult situation for the Elven infantry.
Trident Realms - Turn 4
 |
| More losses for Elves. |
 |
| Elven army starts melting down. |
Badly damaged Wyrm Riders withdraw while their Centurion charges in to shield them from another coordinated attack and pins down the Drakon Riders.
Second unit is destroyed by Placoderms while the Kraken eats Palace Guard. Elves started losing units - fast.
Outcasts - Turn 5
 |
| Wyrm Riders hold again! |
 |
| So does the Centurion! |
The cause was not lost yet but Elves really needed to get rid of that Wyrm Rider unit. Unfortunately for them, nearby Cneturion inspired Naiad cavalry to heroic stand and they held against all odds!
Now not only the cavalry was in danger but also the remnants of the infantry in the middle had to deal with the Monsters without any support.
Trident Realms - Turn 5
 |
| Trident Realms seize the initiative. |
 |
| Elves are in big trouble. |
Neriticans started pushing the Elves back. More units were routed and situation was grim for the Elves. Remaining heavy cavalry was wavered, Sea Guard was its own, only Silver Breeze cavalry could still attack the enemy and were hunting down Depth Horrors that invaded Elven territory.
Outcasts - Turn 6
 |
| Drakon Lord escapes. |
 |
| Depth Horrors perish. |
With very few units left Elves could not hold onto the territory so used the speed to control different part. Drakon Lord flew towards the left flank while in the opposite corner of the battle field Silver Breeze cavalry finally managed to rout Depth Horrors and free this zone from the presence of Neriticans.
It was now up to Sea Guard to hold against the Kraken and the Giant alone.
Trident Realms - Turn 6
 |
| The Monsters are stopped! |
 |
| Heroic stand by Sea Guard. |
 |
| The Monster's March is stopped! |
In the final heroic stand of the battle, the Elven Sea Guard holds against all odds and despite horrendous damage. Thanks to that Elves still controlled more territory and Neriticans withdrew. The cost of that victory was very high though.
Summary
 |
| Turn-by-turn animation summary |
After-battle thoughts
I would like to thank Ken for a fantastic game! He was the first one to congratulate me despite the fact that unlucky roll of double 1's cost him well deserved victory. In fact, he added that he is very happy that I won and that I should have simply because I had some bad luck against his Wyrm Riders.
I greatly appreciate such kind words and for me it is a sportsmanship standard I will aspire to reach. Thank you very much, Ken, it was a great pleasure to meet you and play against you and I will do my best to follow your example as a player.
While I am happy I won the game it still feels a bit of like "cheating". These double 1's rolls definitely add a lot of dramatic situations to the games. It was clear that if we had turn 7 (again, bad luck for Ken who didn't roll 4+) then Sea Guard would have been gone and I would have lost badly.
Where did it all go wrong for me then? I think that in the similar way as in the game 1 the coordination was not there. Maybe not to the same extend but now and again I found my units are not in the right position to either support each other or at a bit of a wrong angle to get to the nice position.
For example, Drakons on the right were too far to help in the middle while those on the left parked in a wrong spot and were shot at. First, early in the game and second, when I didn't check that possibility when the King simply moved in range.
But in general I think it was just a sum of small mistakes that put me in such a bad spot and cost me many units.
First, as I mentioned before, a bit of lack of coordination and mutual support. Second, bad timing. On one hand I had ranged attacks superiority so there was no need for me to hurry into melee. Yes, it was important to hold the enemy in their half but I still could use the shooting more. Fortunately, I kept Silver Breeze alive and they managed to get rid of the Horrors just in time.
Bad timing was also visible on the right flank when somehow I was reluctant to advance when I had comfortably force the exchange and move heavy cavalry into position where they could still attack Wyrm Riders and allow the second wave to get into good positions earlier.
Another thing I noticed was that I didn't use my Army Standards as I should have. They were often too far behind to either interfere with the movement of the enemy or be close enough to support my own units. Good example of that was when I attacked second Leviathan's Bane. Storm Wind cavalry got only a single point of damage when attacked by Wyrm Riders but Ken rolled high on the nerve check and they were routed. If only I had Army Standard nearby I would have had a chance to hold the enemy in place and allow Drakons and second unit to flank charge the Naiads.
Due to all the mistakes in positioning and timing I lost my advantage in number of units and speed. Ken used all the opportunities I gave him, didn't rush into melee when he didn't have to and destroyed large part of the army so that the end result was 13-7 for me. Which should have been solid 17-3 for him!
Thanks for reading!
Sorry to comment on a month's old post, but I was getting over being hurricaned when you posted this.
ReplyDeleteI'm finally getting back to my KoW stuff and am refreshing the rules and such in my mind so as not to make too big a fool of myself on the table. This could also be because the graphics are not always a perfect model of miniatures on the table.
At the end of Trident T4 the wyrm riders back up make it so that is seems clear that they are in the drakon lord's front arc (and he is in theirs). On Outcast T5, the drakon lord charges into the flank of the wyrm riders. How could he do that? I thought you had to charge the facing that you could see and, if for some reason, you couldn't then you couldn't charge. See https://www.mantic.club/forum/kings-of-war/general-discussion-aa/256619-anti-flyer-tactics point 1.4. What am I missing?
Thanks!
Hi Dan!
DeleteThanks for your comment! No problem at all, always good to get back to previous games :)
The answer to your question and an explanation is that I simply made a mistake and didn't check the photos properly. Interestingly, I did not remember that important detail properly but when I zoomed in I noticed I presented the situation in a wrong way.
What really happened is as follows:
1. Wyrm Riders pulled back and Centurion charged the Drakons.
2. In my turn 5 I could not charge the Wyrm Riders with both, Drakon Lord and cavalry so I decided to attack the centurion. The description and the map I created is wrong.
3. Because it was a bit crowded, I positioned only the base touching the flank of the Centurion instead of entire model. That was misleading and I interpreted the picture in a wrong way.
4. I failed to rout the Centurion but he charged the Drakons back (I think) and that allowed me to fly away with my Lord.
Thanks a lot for spotting that mistake and I am really sorry I created the confusion. You didn't miss anything and you are absolutely correct that such charge would have not been possible at all!
Cheers!