

Greetings!
The fifth scenario of the Edge of the Abyss campaign is played on the Ardovikian Plain where forces of good try to build a Great Wall in order to stop the green tide of Orcs pouring further into the lands of Men.
This time I had a great pleasure to play against Christo and his Empire of Dust army! I have never had a chance to play against him so it was great to finally do so. Empire of Dust, on the other hand, is not completely new foe for me but then I have not fought against this army for quite a long while.
Christo brought the following army to our game:
Empire of Dust - Army List
40 Revenants, Horde, Brew of Strength
- Bone Giant, Monster
- Ahmunite Pharaoh, Hero, Wings of Honeymaze
20 Mummies, Regiment
- Reanimated Behemoth, Monster
- Cursed High Priest, Hero, Heal (4), Shroud of the Saint
20 Mummies, Regiment
- Cursed High Priest, Hero, Heal (4)
6 Enslaved Guardian Archers, Horde, Chant of Hate
6 Enslaved Guardian Archers, Horde, Blessings of the Gods
Let's start from the beginning then:
40 Revenants - very solid infantry horde with 5+ defense, not wavering and good nerve. They may have average to hit characteristics but they definitely make up for it with Brew of Strength and number of attacks. Hence, it is a very flexible element of the army, able to take the charge and counter properly. They are slower with Shambling but we all already know that it is just different way of moving and comes with some advantages too. Such hordes can be possibly taken down in a few subsequent rounds of melee and provided they are isolated.
2 x 20 Mummies - They are even tougher than the Revenants thanks to Regeneration 5+. They also hit harder with Crushing Strength 2 and I had a chance to see what these units can do already. They may not do a lot of damage alone in a single round of melee but they are definitely good at war of attrition and soaking up damage. As with Revenants, if I could isolate them and bring enough units to keep attacking them, there is a chance to rout the Mummies.
2 x 6 Enslaved Guardian Archers - the long range support. However, against my small units each volley of the heavy crossbow fire may mean dead unit. I need to accept that but it does not mean I should provide easy targets either. They share the characteristic of being slow but with Shambling they can potentially do things regular units cannot. What is more, they are not as fragile as other shooters, even if they have a bit less armor than other infantry units.
I think they are actually very flexible elements of this force, capable of aiding their support at range and in melee, whenever it is needed.
Bone Giant - Quite similar to a regular giant with the main and important difference of the Shambling rule. Hence, cannot be wavered and potentially can get anything in certain radius, provided Priests are nearby to cast Surge. As long as it attacks the front there is a chance to slow it down for some time. Yet another tough unit that requires a lot of effort to be destroyed.
Reanimated Behemoth - this Monster, on the other hand, is something I have never faced before. Defense 6+ is definitely impressive. Crushing Strength 3 is powerful too but may be somewhat limited by the 4+ to hit. However, comparing to Giant, Behemoth should be more consistent in inflicting the damage. It is a bit slower and with lower nerve but I am not sure if the combination with Defense 6+ is not making it tougher over all.
Ahmunite Pharaoh - the general of the army and a very versatile hero, also thanks to flying upgrade. Very difficult to destroy thanks to combination of 5+ defense, 5+ regeneration and lifeleech. Can Surge nearby units too! And his attacks can also be very helpful, if only in disrupting some enemy shooters for example. I think the key to winning against such heroes is to ground them and not let them move away.
2 x Cursed Priests - Very important heroes because they provide inspire for unlucky nerve checks but also because they can either Surge the units or Heal them. Both options are fantastic and make these two very flexible in animating the army as well as repairing the damage real quick. Especially if the targets are sporting regeneration in addition to army wide lifeleech.
In general, I faced a very tough army, able to deflect a lot of hits and then heal and regenerate the damage done anyway. It may be slow but thanks to Surge and Shambling combination it is very hard to find a safe spot to land behind the enemy lines. While the army is good at moving towards the enemy with unified front and drawing it into a trap of war of attrition.
I would need to avoid it at all cost and hopefully create a breach in the battle line that would allow me to engage the units on my terms.
Terrain
 |
| Terrain details |
Deployment and Scenario
 |
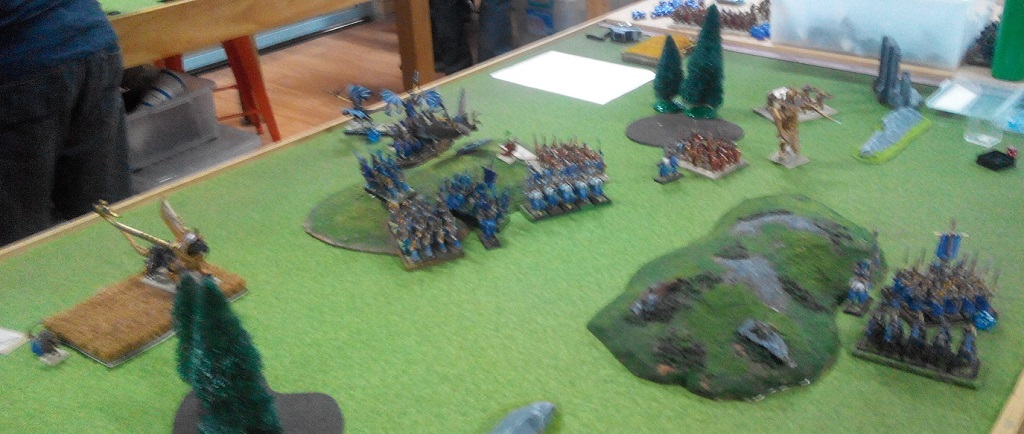
| Deployment of the armies. |
 |
| Deployment - top view. |
In this game we played scenario Invade. Neither of our armies were affected by further special rules. I considered this scenario against this army a challenge because it can potentially move forward, park in my half and defend that position successfully. As long as Empire of Dust force does not offer any flank charges it can comfortably heal back the damage anyway.
The speed advantage was nicely balanced by the Surge and Shambling meaning I could not comfortably land on the flank or rear and even getting close enough could possibly invite some attacks.
I decided to try to following. I waited to see where the Guardians are going to be positioned and moved majority of my melee orientated units to the opposite flank. This way I would not worry about them being shot to pieces or being wavered while maneuvering. I also grouped together the shooters in a way that would allow me to shoot at one unit of Guardians first and hopefully score enough hits to eliminate them.
In addition, I formed the units on the left in two lines. First were the fast cavalry units and their role was to intercept any advancing enemy and to screen more fragile infantry. But I also hoped to execute two wave attack where cavalry would go in first, possibly with some flank attacks from the drakons and then the infantry would be able to hit the enemy that is weakened in order to create a breach in the formation. Let's see if that worked :)
According to the scenario rules Elves had the first turn as the good army.
Outcasts - Turn 1
 |
| Elves advance slowly. |
 |
| Opening fire. |
Elves moved forward slowly, the units on the left crossing an obstacle, while those on the right getting into range for the shooting. The effect was not what Elves hoped for and while the damage was done it was not enough to break the magical bond between the Guardians and the Priests.
Only the Drakons moved fast, either going for a bold outflanking maneuver or flying away from the danger of the enemy ranged attacks.
Empire of Dust - Turn 1
 |
| Shambling forward to meet the enemy. |
 |
| Heavy crossbow fire. |
Hasty Silver Breeze cavalry was quickly punished for the mistakes it made when Guardians lifted their heavy crossbows and destroyed the unit. The rest of the army patiently shambled forward with Priests being busy with repairing damage to the animated constructs.
Outcasts - Turn 2
 |
| Advancing further! |
 |
| First melee. |
Elves focused on their left flank and first unit of Drakons attacked the Paharoh to prevent him from flying over the battle line and disrupt units from superior positions. The rest of the army closed towards the Revenants awaiting the signal to the attack.
The shooters made another attempt to win the duel with the Guardians but yet again the constructs proved to be too tough to crumble.
Empire of Dust - Turn 2
 |
| Slow movement forward continues. |
 |
| Guardians Shooting is devastating. |
The Pharaoh and the Behemoth both attack the Drakons but their charge is highly inefficient and results only in the grounding of the Elven flying cavalry.
On the other hand the Guardians are healed again and again they show their shooting is to be feared. This time the target is Sea Guard regiment who wavers under the heavy fire.
Outcasts - Turn 3
 |
| First wave - so fast I could not take a focused photo :D |
 |
| Charge of the heavy cavalry. |
First wave of the Elven army attacked their chosen targets. The Drakons kept their enemies occupied while the Lord, both Storm Wind units and War Chariots attack the Revenants. The damage is substantial but the main goal is to distract the enemy and keep it busy so that the Palace Guard can maneuver into positions.
Empire of Dust - Turn 3
 | |||
| Revenants countercharge. |
 |
| Empire of Dust strikes back. |
With many units either too far away to help or being engaged in their own combats, it was up to Revenants to take care of the situation. Together with Mummies they counter attacked and destroyed Elven chariots. The Priests started healing the unit back and the nearby Guardians moved to the second line, ready to help.
Outcasts - Turn 4
 |
| Breach in the line. |
 |
| Second wave hits home. |
There was an opportunity to press further with the second wave of the attacks and Elves took it. Drakon Lord and Storm Wind Cavalry maneuvered around the Revenants and attacked damaged Guardians. This time the dark magic could not help them and they finally turned into dust.
That opened paths for the Palace Guard units to charge the Revenants and with the aid of the Storm Wind cavalry they also succeeded in eliminating their enemy. That, in turn, created an opening for the Drakon Riders to fly away and land in safety from the Pharaoh and indestructible Behemoth.
Empire of Dust - Turn 4
 |
| Mummies join the fight. |
 |
| Behemoth and Pharaoh press against Elven flank. |
Although Elves managed to create the big gap in the battle line of their enemies, Empire of Dust units were still dangerous. The Mummies joined the fight but as they attacked alone they could not yet deal significant damage.
Also Pharaoh and Behemoth attacked Palace Guard units but the valiant Elves knew a lot depended on them holding the flank and did not yield.
Outcasts - Turn 5
 |
| One units of Mummies down, one to go. |
 |
| Elves surround another unit. |
Having seized the initiative, Elves continued surrounding another unit. This time even tough Mummies were not able to hold against the attack from three sides. While Palace Guard units fought bravely to hold the flank, the rest of the units maneuvered to get read to attack another foe.
Empire of Dust - Turn 5
 |
| Behemoth and Pharaoh cannot break through! |
 |
| Undead units are hold in place. |
The undead forces once again attacked Elven units but brave warriors, including lone army standards, refuse to flee. That was really unfortunate for the Empire of Dust army as Elves could now mount another set of charges.
Outcasts - Turn 6
 |
| Second regiment of Mummies perishes. |
 |
| But the Guardians hold! |
Elven units coordinate one more attack and this time second regiment of mummies is destroyed. Palace Guard is heavily damaged by now but they attack again. Drakon Riders attack the Guardians who exposed the flank in order to be able to shoot at the Elves but somehow the constructs survived that charge!
Empire of Dust - Turn 6
 |
| So close! |
 |
| Stubborn Elves! |
The melee continues and Palace Guard once again refuses to give ground! It means that Elves are still winning the bloody battle as they invaded the enemy territory with greater force. However, they are also determined to seal the deal and the fight continues a bit longer.
Outcasts - Turn 7
 |
| With Guardians gone Elves invade the enemy territory in force. |
 |
| Last Elven charge. |
Drakon Riders withdrew making room for Storm Wind cavalry to flank charge the enemy and destroy them for good. Although a few powerful elements of the enemy were still fighting, it was clear Elves prevailed.
Empire of Dust - Turn 7
 |
| Palace Guard regiment holds! |
Pharaoh and Behemoth push one more time and while the general of the army finally destroyed the annoying enemy, the regiment of the Palace Guard still held!
Disappointed that he could not surround and destroy nimble Elves, Pharaoh called the remnants of his army and withdrew from the battle field.
Summary
 |
| Turn-by-turn animation summary. |
After-battle thoughts
Many thanks to Christo for a great game! I am glad we finally had a chance to play and hopefully we will become regular opponents.
His army is really though and I am very happy my plan worked this time. I just want to stress out that in turn 6 Christo had a very good chance to get a draw but unfortunately the dice didn't let him do it. If both Pharaoh and Behemoth destroyed their respective enemies, then I would have had combined unit strength of 4 in his half of the field (3 troops and 1 monster). At the same time he had the same in my half (1 horde and 1 monster). If that plan succeeded and if the game ended in turn 6 that would have been a draw!
While very happy with the end result I must admit I made some mistakes I should have avoided. First, knowing I am going to have turn 1 I should have deployed my shooters a bit better. I still had to move them to get into range but in doing so I exposed Silver Breeze to be fired in the open. I could not avoid it but perhaps shooting from behind of the Sea Guard would have saved them.
I also moved away my Army Standard so that the Giant could attack and destroy damaged Sea Guard. It didn't change the course of the battle but I should not have let that happen and lose another unit.
As expected, Guardians were powerful shooters and I was lucky that the second unit did not had good line of sight as otherwise I would have suffered some more casualties and maybe the attack on the left flank would not have happened.
Thanks for reading!
No comments:
Post a Comment