Greetings!
Once again, there was an unplanned break in battle reporting for which I sincerely apologise. I hope I will be able to make up for it because I played six more games after this one, four of which were at the local tournament, WinterCon 2019.
It is good I took a lot of photos from this battle, as we played a rematch with Paul who brought slightly altered army of his Bosporan Kingdom with trusted (hopefully!) Sarmatian allies. I managed to recreated the turns but there may be a few inaccuracies here and there, for which I apologise in advance. I do hope, however, that this report will be equally entertaining as the game was definitely very interesting for both of us.
One of the reasons is that both our armies seem to represent different approach to warfare. Paul's force was mostly mounted, with some infantry to add to the flexibility. It had a significant numerical superiority as well. But it was also led by instinctive commanders and the troops were mostly formed. It could potentially provide some challenges in getting the units where they are the most needed at the right time.
On the other hand, at least from my point of view, my smaller force should be easier to manoeuvre at the cost of smaller frontage and constant danger of being outflanked.
Here are the details of the army Paul used as well as I could recall after some time we played. There may have been differences in the skills of each TuG, for instance, I initially thought that Paul had Greek Mercenaries but that would not fit into the army. Unless he downgraded some superior cavalry to average. However, from the point of view of the type the army list is accurate nonetheless.
Bosporan Kingdom - Army List
If I recreated the army list correctly, Paul's force had the breaking point of 8. Double of what I got! And almost twice as many units. I needed something to mitigate the disadvantage in these areas. Hence I was not against more terrain to interfere with the movement of the cavalry in particular.
Here is my army list for the reference:
Early Seleucids - Army List
Deployment
 |
| Early Seleucids vs Bosporan with Sarmatian Allies |
I cannot recall at this moment which terrain we ended up in but there was no secure flank available. We got a few patches of rocky ground here and there which was ok. I had a few of the terrain pieces on the flanks of my smaller army which I wanted to utilise to the fullest. Because of that I deployed the army in a bit of staggered formation. The stronger left would advance as fast as possible. The cavalry would protect the left flank from enemy horsemen.
The phalangites and Thracians on the right were to advance as well. Phalangites to block the path towards the vulnerable mobile camp (not yet properly represented). Thracians to get into the rough terrain in front of them to further interfere with the movement of the enemy forces.
After the deployment I also decided to alter one element. As my single TuG of Charging Lancers would have been vulnerable to the attacks of enemy horse archers facing them, I was about to divert my own mounted skirmishers to the left to block that passage.
 |
| Deployment of the Armies |
Seleucids - Turn 1
 |
| Turn 1 - Sequence of Actions |
 |
| Light cavalry moves to protect the left flank. |
Seleucids started advancing towards the enemy and at the same time performed some more elaborate manoeuvres in order to match the enemy deployment better. Hence Phalangites and Argyraspides moved from the left towards the centre while light cavalry protected them from the left flank.
Interestingly, the enemy cavalry responded from the flanks only, with majority of the army static and not moving at all.
 |
| Elaborate manoeuvres. |
Bosporans - Turn 2
 |
| Turn 2 - Sequence of Actions |
 |
| First skirmishes on the left flank. |
Bosporans continued the advance on the flanks and yet again the bulk of the army remained motionless. First skirmishes broke on the left flank.
Seleucids continued their advance as well but kept re-shuffling the units at the same time. One of the Phalangite unit turned sharply right to block the passage towards the camp as soon as the first enemy horse archers were sighted. One of the units of Charging Lancers also was ordered to reinforce that flank, especially with Thracians already in the rough terrain and another Phalangite unit advancing forward.
 |
| Seleucids keep unfolding their formation to intercept the enemies. |
Seleucids - Turn 3
 |
| Turn 3 - Sequence of Actions |
 |
| Phalangites widen their formation to block the path. |
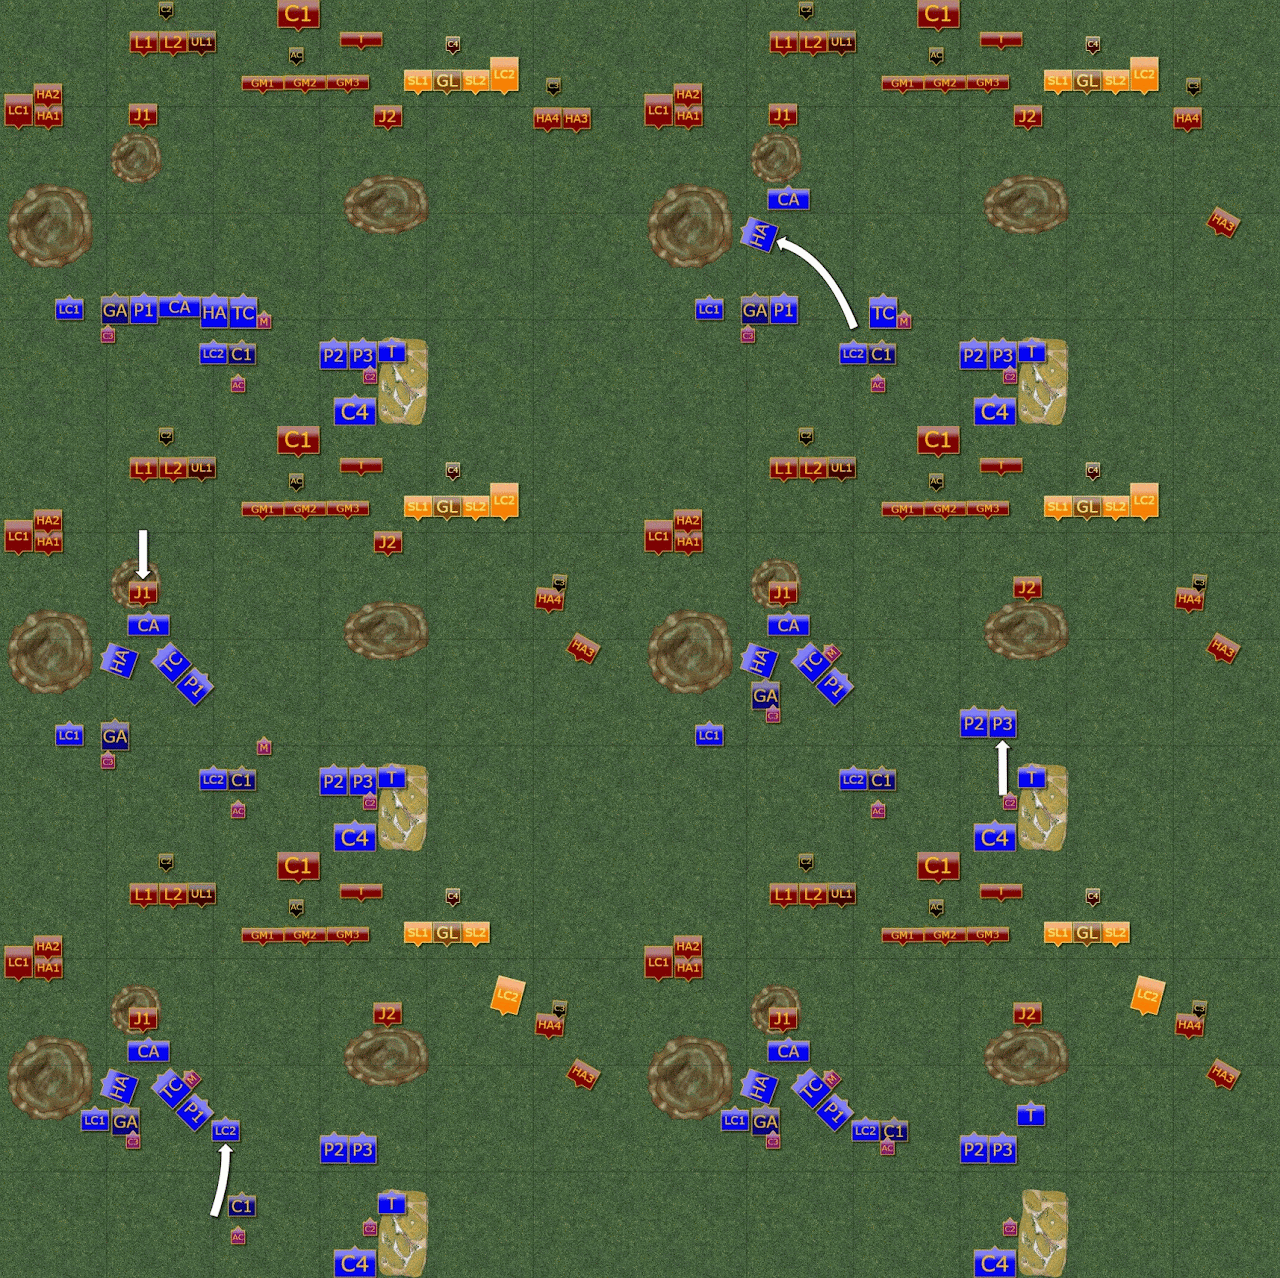
More and more units were now active and manoeuvred to catch their respective enemies off guard. On the left flak Seleucids seized the initiative and pushed back Bosporan bow armed cavalry.
In the centre, the phalangites were coming into a charge distance with Bosporan Militia Hoplites. While on the right flank the Seleucid pikemen widened their formation to block the passage for enemy horsemen.
 |
| Diagram instead of photo - it seems I forgot to take one here :( |
Bosporan - Turn 4
 |
| Turn 4 - Sequence of Actions |
 |
| Phalangites vs Hoplites |
Seleucids attacked on the left and managed to engage Horse Archers in melee. Tarentine Cavalry also chased away enemy mounted skirmishers and continued outflanking the unit in combat. Nearby Cretan Archers finally won the shooting duel with the Javelinmen.
In the centre, Phalangites engaged two enemy units at once and already started inflicting some casualties. Argyraspides, Companions and one more unit of Phalangites also advanced and were in charge distance of their respective enemies.
 |
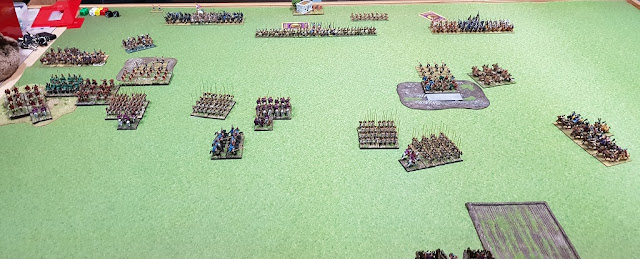
| Units of both armies are now engaged across the entire front line. |
Seleucids - Turn 5
 |
| Turn 5 - Sequence of Actions |
 |
| Argyraspides break through but Companions lose their fight. |
Both army commanders send in more units to the fight. Bosporans succeed in cavalry engagements, managing to rout Charging Lancers on the left flank and Companions in the centre. It is not good for the Seleucids but they still have some units that can be used as reserves.
At the same time Argyraspides break through the enemy infantry although now they expose their flank to the enemy cavalry.
 |
| The fights continue on the enemy territory now. |
Boporans - Turn 6
 |
| Turn 6 - Sequence of Actions |
 |
| Argyraspides get hit but Cretan Archers slow down the second Bosporan cavalry. |
Armies were exchanging blows now and more units were being routed from the battle field. On the left flank Tarentine Cavalry destroyed badly damaged Horse Archers. Argyraspides got hit in the flank but held, turned and badly damaged their mounted enemies. Another unit of Bosporan cavalry attempted flank attack but the timely fire from Cretan Archers slowed them down significantly and they didn't reach their target.
Second unit of the Bosporan infantry then broke and Seleucid Phalangites pursued survivors towards their camp. While units on the left flank moved onto offensive to push back outflanking enemy forces.
 |
| Casualties mount up on both sides. |
Seleucids - Turn 7
 |
| Turn 7 - Sequence of Actions |
 |
| Charging Lancers destroyed enemy cavalry only to have another unit threatening their flank! |
Seleucids reformed their light troops on the left flank and although they lost Tarentine cavalry, the enemy units were not necessarily in shape to chase them away without sustaining more damage.
Two unlucky units of Bosporan cavalry were also destroyed, one by Argyraspides and the other by Charging Lancers who caught their enemies off guard. Although now they were in danger themselves!
The Phalangites in the centre marched towards enemy camp or were still fighting against hoplites. The unit on the right flank finally engaged with enemy Horse Archers while Thracians were surprisingly winning the fight against the cavalry!
At this stage the commander of Bosporan army decided to disengage and withdraw. The army sustained significant damage and was at the brink of being completely routed. Hence he chose to save what he could and fight another day.
 |
| Final stage of the bloody battle. |
Summary
 |
| Turn by turn animation summary |
After-battle
Many thanks to Paul for yet another great and bloody battle! It seemed to me, especially when writing the report, that the balance swung from one side to another. And while in the end I managed to rout more units of his army than he did for mine, we both sustained quite significant casualties, in particular if compared to respective break points.
I noticed that Paul did not move much for the first two turns and I think it was partially due to poor cards he got. This in turn compromised his plan and he was not able to coordinate the manoeuvres of his larger army. I think that also contributed to the fact I was able to get my units to combats I wanted them to fight. Although I was disappointed Companions lost their fight and Charging Lancers on the left were not able to defeat the Horse Archers alone, I was still very happy with the progress elsewhere.
It was interesting to see that Phalangites, especially Argyraspides, can get hit in the flank and successfully fight back. Of course it was only because they were not engaged from the front but perhaps that is what enemy commander needs to achieve.
I also noticed (again!) the importance of having a reserve. That small unit of Charging Lancers int he centre was in the right place to wheel and intercept the enemy cavalry, especially when they moved too far in pursuit to receive the orders from their commander.
In the end, I was very close to breaking Paul's army and perhaps one more turn would result in that. However, I managed to rout six of his TuGs and one SuG while losing two TuGs and one SuG of my own. The end result was then 15:7.
Thanks for reading!


No comments:
Post a Comment