

Greetings!
In the last game of the tournament I had a great pleasure to play against another new opponent, Tony. He brought a great looking historical army with a bit of a mythical twist. Exactly what you would expect from a person with a great creativity and ability to accomplish very interesting modelling projects. Tony decided to try his Samurai army and I was really lucky to had a chance to play against this superb looking army. But he also spiced it up with some cool looking units he based on mythical creatures entry of the KoW Historical supplement.
Samurai - Army List
40 Archers, Horde
- General, Hero, Individual, Very Inspiring, Crushing Strength (1), Mounted
40 Samurai, Horde, Crushing Strength (1), Fury, Stealthy
- Musician, Hero, Individual, Rallying! (2)
40 Samurai, Horde, Crushing Strength (1), Fury, Stealthy
40 Samurai, Horde, Crushing Strength (1), Fury, Stealthy
10 Samurai Cavalry, Regiment, Fury, Stealthy, Thunderous Charge (2)
10 Samurai Cavalry, Regiment, Fury, Stealthy, Thunderous Charge (2)
6 Winged Warriors, Horde, Large Infantry, Crushing Strength (1), Fly, Inspiring, Iron Resolve, Thunderous Charge (1)
- Winged Hero, Hero, Large Infantry, Crushing Strength (2), Fly, Heal (3), Inspiring, Thunderous Charge (1)
Multiple Horde Units Army! Seeing them all on the other side of the table was quite intimidating because even infantry can cross the distance separating both armies really fast and then my small units are in real trouble. In addition, all Samurai units sported Stealth, meaning my shooting effect would be significantly mitigated. Also, Samurai units have Fury so no lucky Wavers to slow down the advance either.
Two cavalry regiments, Winged Warriors and Winged Hero ensured that my advantage in speed was minimal. The Winged ones also provided much needed Inspiring presence that would cover whole army if needed. General and his trusty musician would also ensure that all these hordes were not that easy to rout either.
If the army of Samurai could keep the formation and get into melee fast, my force would need to fight war of attrition against the enemy that was far better prepared to do it. In order to have a fighting chance I needed to create some gaps and exploit them with timely attacks. It is because there were only two ways I could win against horde units like that. One is to weaken them by fire and finish them off with a combined attack. Second is to get into positions for coordinated flank and even rear attacks.
However, with cavalry, shooter of their own as well as fliers, that was far more easier said than done. But I needed a plan and this is how I wanted to proceed. Since I had a bit of advantage in number of units I wanted to use that to place fast elements to be able to distract Archers Horde. Second, I wanted to focus on one unit with my shooters so that I had a chance to rout it when it comes to attacking. I counted on being able to do it against one horde unit. In itself it would not necessarily mean winning the game but perhaps it would be enough to allow fast troops on the flanks to start threatening the envelopment.
And keep my eyes open for any opportunity to have any flank attacks ready. As always, I needed to review that plan and adapt it to the scenario.
Terrain
 |
| Terrain details |
Deployment and Scenario
 |
| Deployment of the armies. |
 |
| Elves vs Samurai - Dominate! |
Dominate is always an interesting scenario. On one hand, big blocks want to move in and park in the middle. Samurai definitely had a few fat units that could dominate the center. But at the same time it means they would expose the flanks and kind of surrender initiative to more maneuverable units. Getting the balance right between controlling the middle and preventing outflanking would be the key here.
The plan stayed the same in the principle but I wanted to use the small advantage faster and more maneuverable units can offer. Hence three groups of the units. The center was based around the shooters but with some considerable hitting power to keep threatening advancing enemy. Especially when weakened by a bit of shooting.
On the right I had 3 fast elements to outflank and harass the foe, forcing it to make tough decisions. To face the flanking units or to keep going forward and always feeling like flanks are exposed. Similarly on the left, but the difference was I had to deal with the Archers here. Hence the presence of the mounted Prince and heavy cavalry regiment for more staying power.
If it worked I should be able to create a few gaps in the battle line of the Samurai and use fast flanking forces to pick the units for combined charges. Now was the time to put that plan to the test :)
Outcasts - Turn 1
 |
| Elven advance. |
 |
| Samurai General is hardly impressed. |
 |
| Opening fire. |
Whole Elven army advanced, with the units on the flanks maneuvering a bit faster than those in the middle. All Elven shooters focused their fire on the right unit of Samurai and pushed them back a bit too.
Samurai - Turn 1
 |
| Samurai move forward too. |
 |
| Nothing to be seen here, definitely no flying ninjas hiding among bamboo trees! |
 |
| Going after that center. |
Samurai were absolutely not impressed by Elven Archery and simply moved forward, adjusting the battle line here and there. Then their own Archers aimed at Elven knights and wavered them!
Outcasts - Turn 2
 |
| Maneuvers continue! |
 |
| Samurai point of view. |
 |
| Center stops, flanks move around. |
Elven Prince was the first to attack the enemy. He spurred his steed and threw himself among the disorientated enemies. While Drakon Riders and Palace Guard moved forward to exploit that confusion.
Units in the center either stopped or shifted a bit and continued shooting. It was not enough to do significant damage to the enemy but every single wound brought the foe closer to breaking.
Samurai - Turn 2
 |
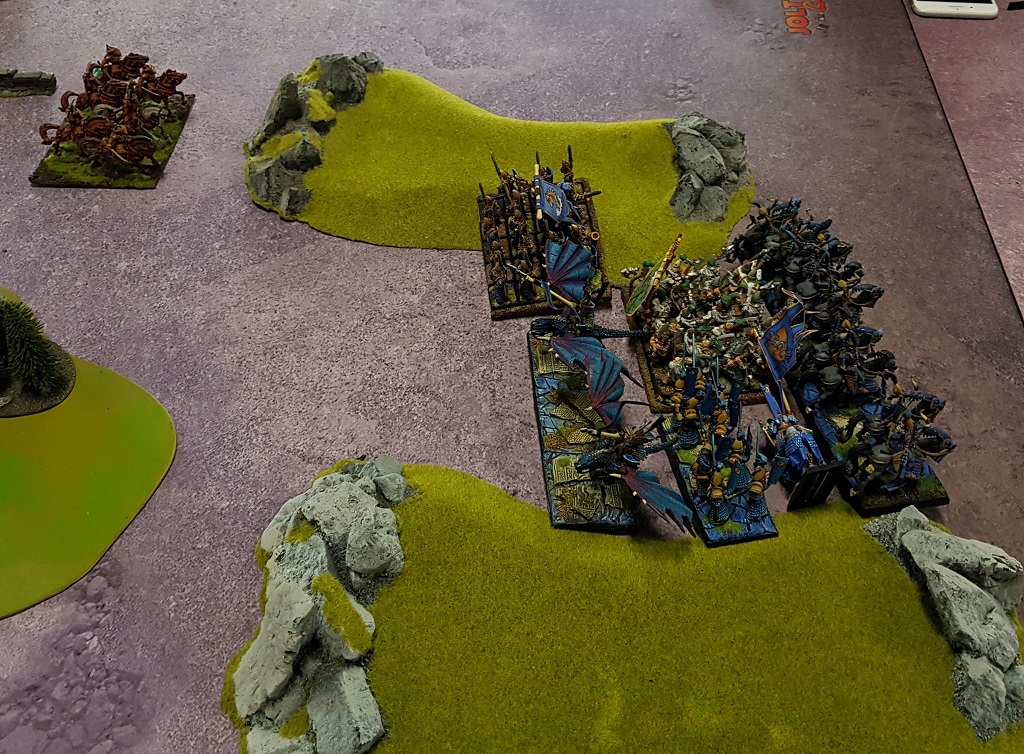
| Flying Warriors attack! |
 |
| The attacks did not bring expected results. |
Samurai continued their advance but some units attacked already. The Archers, aided by the mythical Hero, charged foolhardy Elven Prince. However, he seemed to be far more skillful than Samurai expected and avoided majority of blows, to the annoyance of the Hero.
On the opposite flank, Flying Warriors also attacked their enemy. Silver Breeze cavalry was their chosen target but yet again, Samurai warriors failed to rout their foes and Elven fast cavalry only wavered.
Outcasts - Turn 3
 |
| All out attack by the Outcasts. |
 |
| That does not look good, even for stealthy Ninjas. |
 |
| Elves charge on all fronts. |
Spotting several opportunities, Elves charged on all fronts. On the left, in the cavalry battle, Samurai held their ground against Storm Wind. However, nearby Drakons captured elusive flying Hero, while Palace Guard, using distraction as cover, flank attacked unsuspecting Archers and routed them.
In the meantime, Sea Guard and War Chariots attacked as one against another group of angry Samurai to pin them down for a while.
Fast cavalry swiftly moved back and Flying Warriors soon found themselves surrounded by the Elven version of katana wielding Swordmasters. The Warriors had to flee the battle to save their lives!
Last but not least, Drakon Riders and Storm Wind cavalry on the right charged frontally at the weakened Samurai and managed to rout them.
Samurai - Turn 3
 |
| Samurai fight back! |
 |
| Bloody revenge. |
Although Samurai suffered substantial losses it was not in their spirit to give up and they promptly counter attacked.
As a result Elves lost three units and the battle became quite a blood bath.
Outcasts - Turn 4
 |
| Elves converge around the center. |
 |
| The fight for the hill! |
 |
| No turning back! |
Once committed, Elves did not look back and kept pushing forward. Two Guards regiments attacked damaged Samurai and claimed the control over the hill.
In the center, Palace Guard troop and Drakon Lord combined their efforts to distract another group of Samurai Warriors. Nearby, Storm Wind cavalry attempted to aid the Drakon Riders in their fight against Samurai Cavalry but were stopped by the Musician! Their companions on the opposite flank also could not rout stubborn Samurai horsemen!
Samurai - Turn 4
 |
| Drakon Lord is captured! |
 |
| Samurai claim another victory. |
Samurai valiantly pushed forward and captured Elven Drakon Lord. Unfortunately, both Samurai Cavlary regiments were not able to rout Drakon Rider units.
Outcasts - Turn 5
 |
| Elves control the center. |
 |
| Samurai center and right is broken. |
Despite heroic efforts, Samurai units met their honorable deaths and perished fighting to the last breath. Another set of combined charges were too much even for such stubborn warriors and only the General and a single cavalry regiment were left alive.
Samurai - Turn 5
 |
| Fighting until the end. |
 |
| One more victory for the Samurai! |
Samurai General, infuriated by the losses, charged enemy cavalry alone and scattered the Elven knights to the four winds! The Samurai Cavalry on the opposite flank got rid of the annoying Elven Prince too!
Outcasts - Turn 6
 |
| Occupying the center! |
 |
| Elves hurry to the middle of the battle field! |
With the enemy reduced to a single unit and a general, Elves could relax and all units were recalled to the center of the battle field.
Samurai - Turn 6
 |
| The end of the battle. |
 |
| Last charge of the Samurai |
Although the battle was lost, the Samurai Cavalry charged Drakon Riders and claimed one small victory to end the struggle.
Summary
 |
| Turn-by-turn animation summary. |
After-battle
I would like to thank Tony for a great game and for being a fantastic opponent! It was absolute pleasure playing against him and his great looking army! As you probably noticed, I had some extra pictures for this report and it was thanks to Tony as well!
I was very happy that my plan worked and that I could finish the event with victory too. I just hope that despite the result, Tony enjoyed the game too. It is always a bit sad to lose last game and I certainly was in that situation too.
Although I managed to gain a decisive victory in this game, it was not an easy one and I did lose significant part of the army too. When I looked at the battle I think there were a few crucial moments that contributed to the end result.
First, I think that the charge of Flying Warriors was premature. Even if they routed Silver Breeze (which they should have!), it would have put them in tough spot anyway. There were Drakons nearby that could attack their flank or rear, depending on the way they reformed. Or if they faced the Drakons, Palace Guard would have a good chance for flank/rear charge too. In committing such a powerful unit early, Tony gave up the opportunity to keep my own fliers in check and allowed easier maneuvering on my right flank.
Second, offering the flank attack on Archers. It is not obvious, sometimes, that the enemy unit is in the flank and that there is enough room to get there. However, thanks to that opportunity I was able to do two things. Get rid of the Archers that would otherwise cause a lot of damage to my small units. And have Palace Guard in a very good position to threaten the Samurai on the hill.
These two elements allowed me to gain an advantage and from now on, even if I went for exchange, I had enough elements to continue fighting while it was much harder for Tony to keep the flanks protected.
Thanks for reading!
No comments:
Post a Comment