
Game 2 - Battle for the Pass - Lizardmen - Ethan
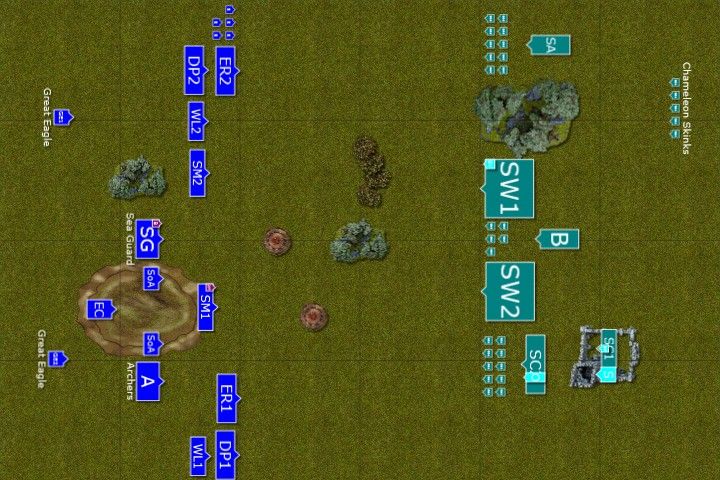
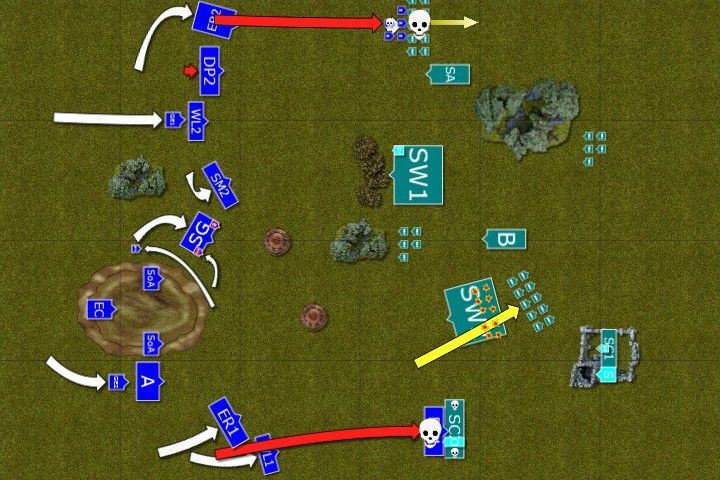
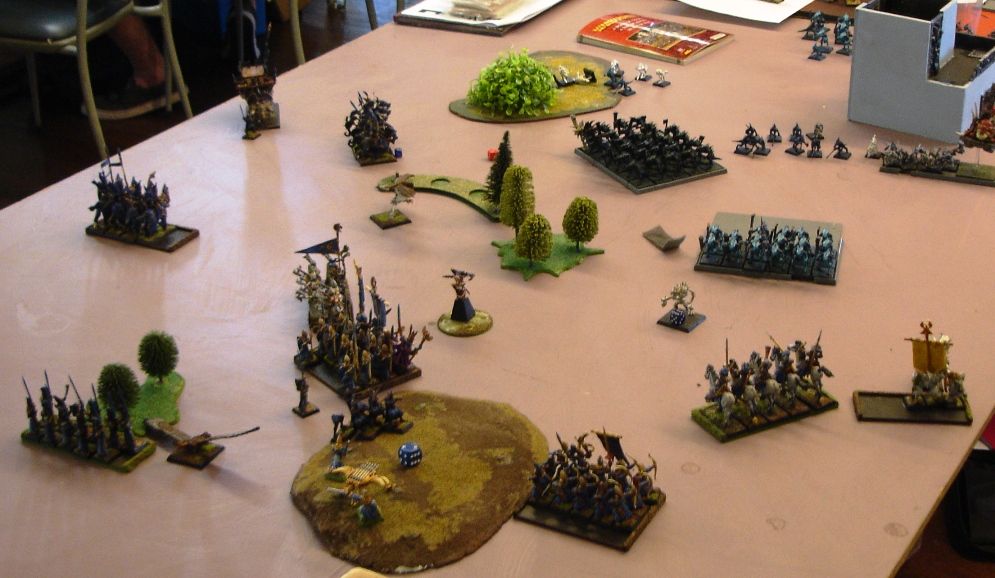
Game 2 of Castle Assault was Battle for the Pass. The usual rulebook scenario but again, in line with the whole tournament player's pack, with modifications. First of all each player had to bring appropriate objective marker. Something that fits army theme and is either on 40x40mm or 50x50mm base. I decided to use the miniature I have been given by my Secret Santa (thanks a lot again, grntmepower! :)) and she was looking attractive enough to stir even coldblooded Lizardmen so that they wanted to capture her :) We had to place our respective markers in the middle of no man's land and then scatter them. Then we rolled a dice and as I won the roll-off I was to pick what was the primary and what was the secondary objective. I naturally chose my own marker as primary objective! But as you can see on the diagram, both scattered towards my own deployment zone.
To claim an objective a player needed to position a unit (or part of it) in 6" away from the objective. If both players had units close to the marker, then the one with higher static combat result (ranks, banners, bsb, etc.) would claim the objective. 3 battle points were granted for taking Primary objective, 2 for Secondary and points were shared if no one could claim the objective.
Ethan was my opponent this time. We haven't had an opportunity to play before but I can tell you right now that he is a very nice person to play against and it was yet another very pleasant game for me. Thanks a lot, Ethan!
Ethan brought his stalwart Lizardmen. I was very curious about the outcome as I haven't played against new Lizards yet. They were always a tough opponent for me and I had no doubts it would be the case here as well. But then would it be because of their new toys or due to old tricks?
Below is the army list Ethan brought to the game, obviously, with some details lacking as I don't remember all the items
Lizardmen - Army List
Slann, level 4, BSB, Knows all signature spells
Oldblood on Coldone, Piranha Blade, 1+ armor save (I think)
Scar Veteran on foot
Skink Priest - Lore of Heavens
30 Saurus Warriors, Full Command
30 Saurus Warriors, Full Command
10 Skink Skirmishers
10 Skink Skirmishers
10 Skink Cohort
6 Saurus Cavalry
5 Chameleon Skinks
5 Chameleon Skinks
Bastiladon (bound spell shooty thing)
Stegadon Ancient (lots of blowpipes)
Lizardmen are really tough and even more so in battle for the pass. Their phalanx nicely blocked the passage to the rear. Skinks are very good at hunting eagles and fast troops. Two dinosaurs also are very dangerous to my small units thanks to impact hits and t-stomps. The combination of high toughness and good armor meant it would be hard to beat them too.
Two big infantry blocks were a problem. I thought I have a chance to beat one if I managed to thin it down properly but would have divert the second one away from markers. I simply don't think I would be able to engage both with enough units to win combats. Not to mention that war of attrition is way better for Lizardmen.
Saurus cavalry with Oldblood was very potent and I had to deal with it too. I hoped I could contain them with my own cavalry or at least try to inflict enough casualties to make a difference for later combats. Then last but not least was Slann and his new ability to know all signature spells. I know how powerful it is thanks to running Loremaster but with level 4 it can be even more dangerous!
So, the general plan was:
- focus shooting (if possible) on one saurus block and kill it in close combat
- divert the second one
- use magic to wound dinosaurs and if possible, attack them with high strength unit. Combination should see them killed before they start stomping.
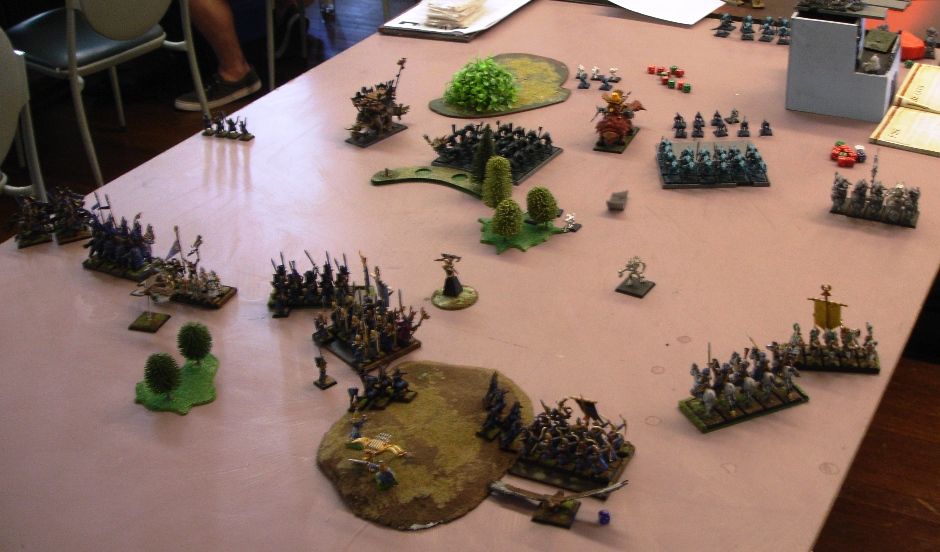
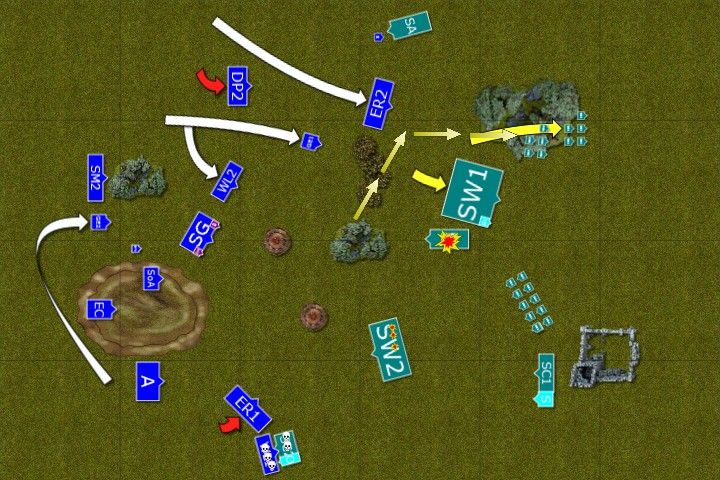
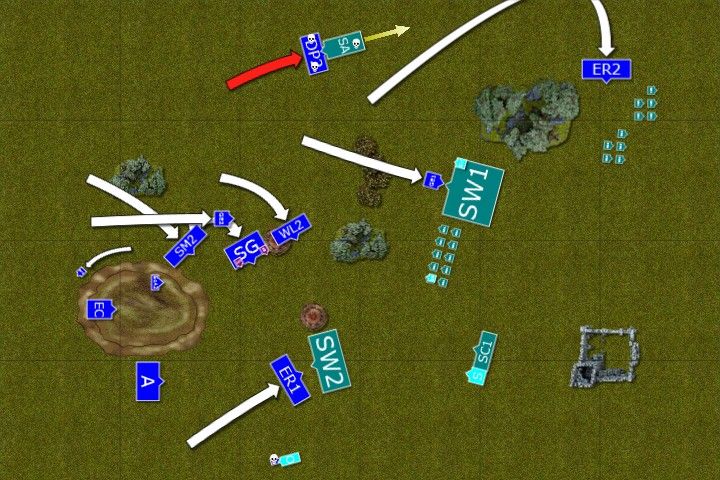
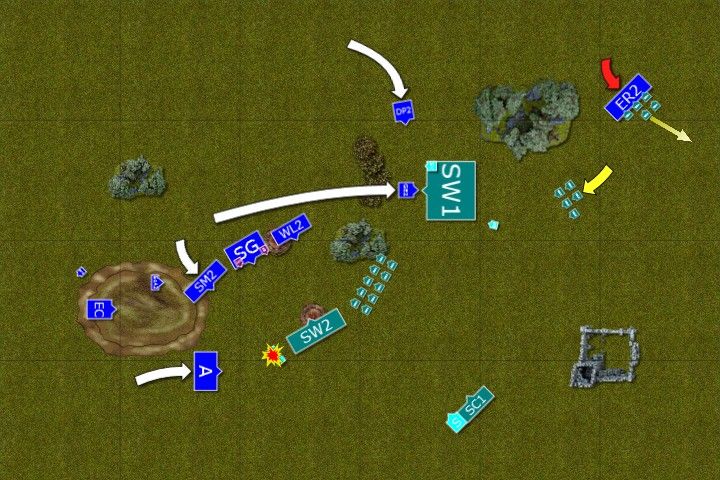
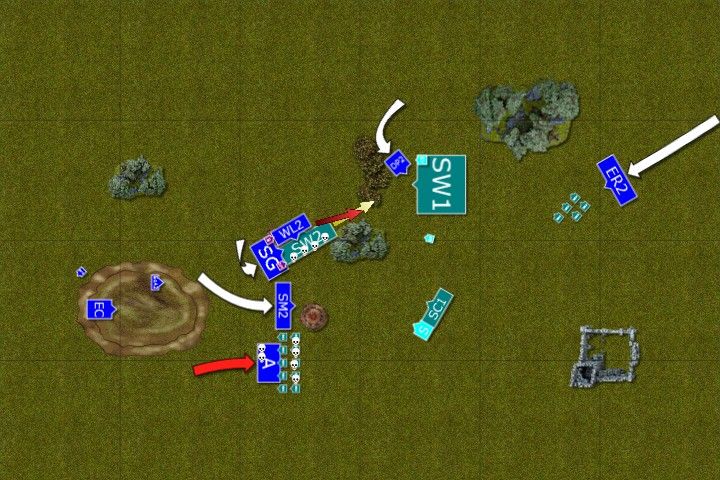
Deployment
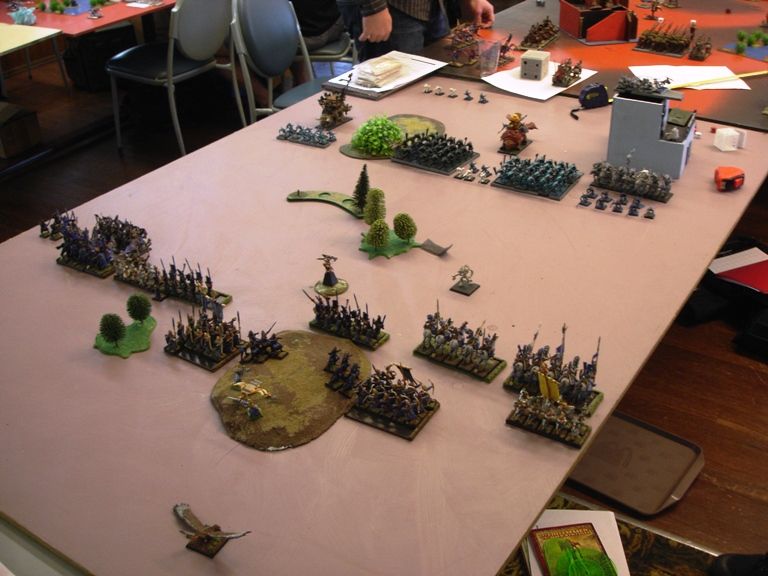 |
| The pass is full of troops - no space to maneuver on flanks |
 |
| Deployment before vanguard |
Slann decided to stay with his trustworthy Skinks in the building. Oldblood joined his elite cavalry, while Scar Veteran led one of the Saurus blocks to battle. Skink Priest (who had Iceshard Blizzard spell) was also attending his master Slann.
Loremaster joined his Swordmasters in the front line. BSB led Sae Guard to battle.
Ethan won the roll-off and his army was to move first.
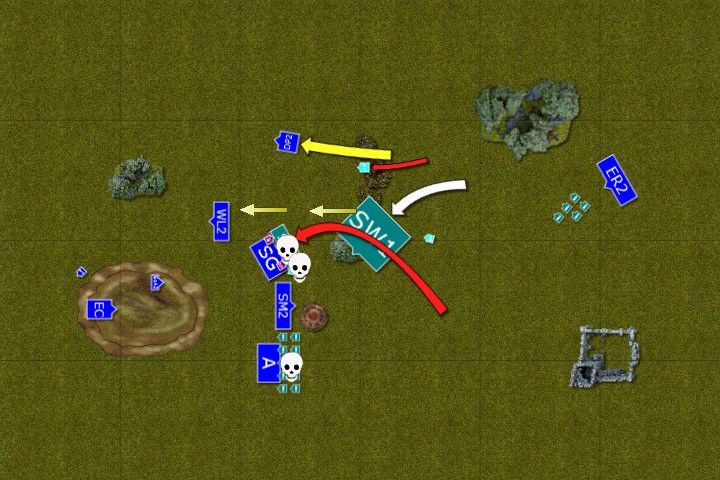
Lizardmen - Turn 1
 |
| Coldblooded phalanx rolls forward |
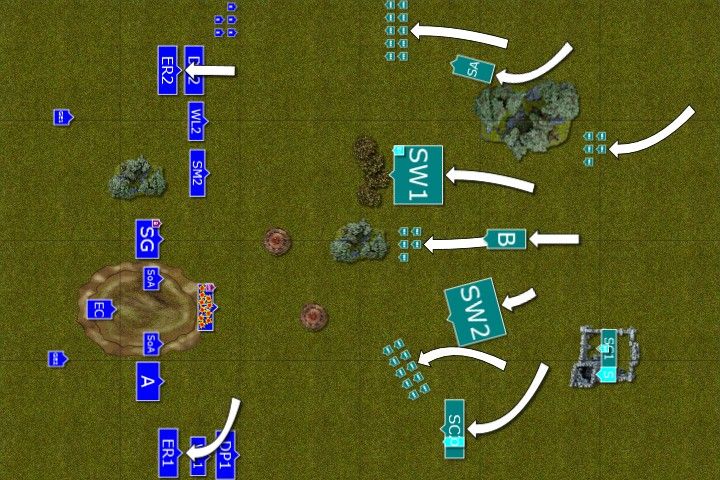 |
| Ellyrian Reavers movement indicates vanguard moves |
The telepathic order was given by the meditating Slann and his coldblooded minions marched forward across the narrow mountain pass. Sensing the mental presence of his very young counterpart Slann moved one of his crooked fingers and skinks operating the solar engine at the back of Bastiladon directed its deadly beams against Swordmasters protecting their general. In a flash of sun bright light all but one Swordmaster perished.
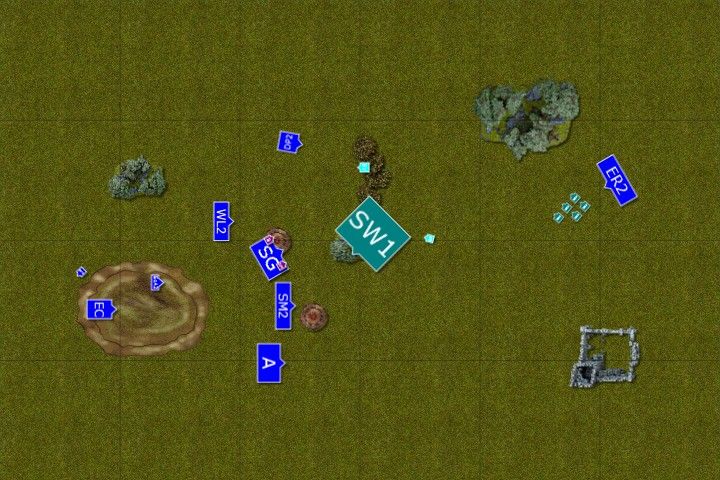
Outcasts - Turn 1
 |
| Attack is the best form of defense - or is it? |
 |
| HE execute early charges on both flanks |
High Elves try to seize the initiative by early charges. On one flank Dragon Princes charge Saurus cavalry but after killing one or two enemies they all die at the blade of the Oldblood. Was Caledorian pride their undoing?
On another flank heavy cavalry didn't reach skinks as they were magically slowed down. However, Shadow Warriors charged enemy skirmishers too and in a short combat they forced skinks to retreat and caught them in hot pursuit.
In the center, elven fire base aimed at one of the Saurus cohorts and quite a few hulking warriors died to accurate arrows.
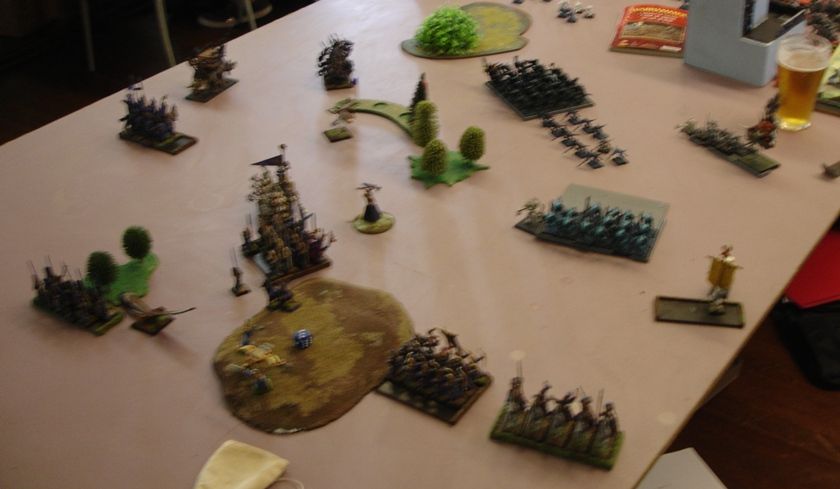
Lizardmen - Turn 2
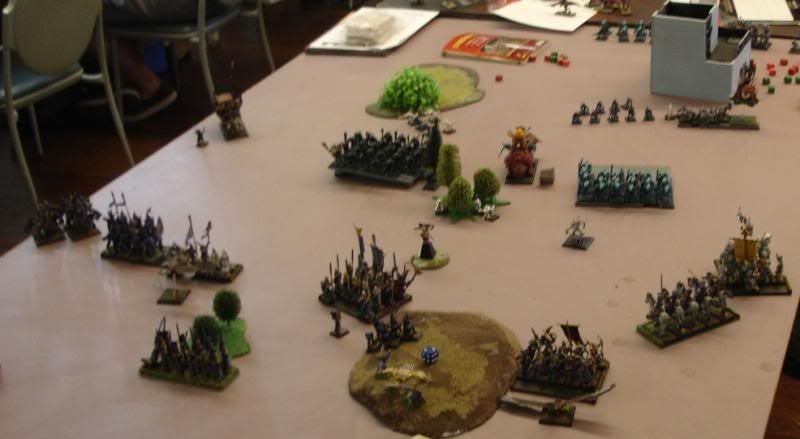 |
| White Lions hold the flank |
 |
| Lizardmen counter attack |
Oldblood leads the charge of his mounted warriors against another enemy unit. But this time they face stubborn White Lions and exchange of blows is painful for both sides. Saurus press forward but Lions refuse to give ground.
In the center Sar-Vetern wanted to repeat action of his superior but Swordmasters, who were the target of the attack, withdrew to the safety of the nearby forest.
On the other flank victorious Shadow Warriors are punished by deadly fire from the skink crew from the howdah on top of an ancient stegadon and only a single warrior remains.
Outcasts - Turn 2
 |
| Exchange of punches continues |
 |
| Unexpected turn of events! |
The battle starts entering its most decisive stage as combatants furiously exchange punches. White Lions destroy all Saurus cavalry but can't scratch the thick hide of Oldblood who carves a bloody path through Chracians.
Reavers charge Chameleons who flee to safety of their bigger cousins. Dragon Princes spot them and charge them too. Nimble Chameleons avoid them too but panic their own units! Somehow hulking brutes misunderstood the orders and decided to withdraw together with two small units of Chameleons, away from Elves and objectives. Slann was furious. He opened one eye in disbelieve!
As if it was not enough this unexpected turn of events distracted big toad and elven Loremaster managed to get through one of his own deadly spell. Magic projectiles of molten metal hit powerful form of Bastiladon as if it was covered with paper and killed the beast outright! Elves cheered up. One monster down, one to go!
Lizardmen - Turn 3
 |
| Last brave Lion keeps fighting till the end! |
 |
| Lizardmen try another counter attack |
Saurus infantry comes to senses but Chameleons, being outside of the influence of Slann keep running away.
Oldblood methodically eliminates Lions but the last warriors still standing holds the standard high and true to he stubborn nature of warriors of Chrace, he fights till the very last breath.
Another Saurus infantry, now depleted, attempts to charge Reavers but fast elven cavalry is not easy to catch.
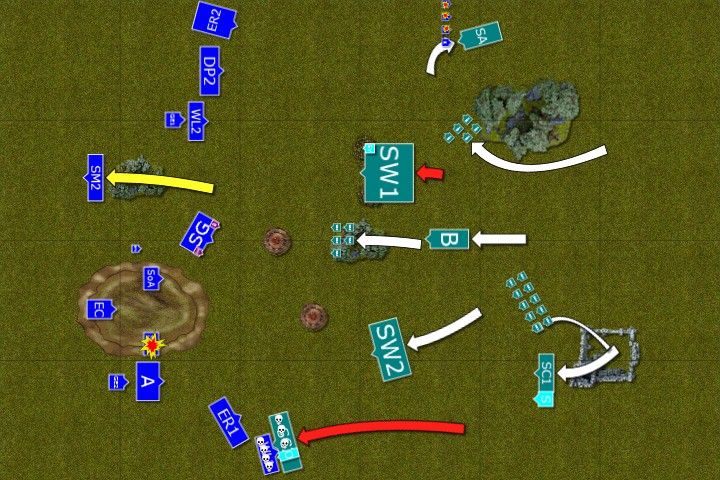
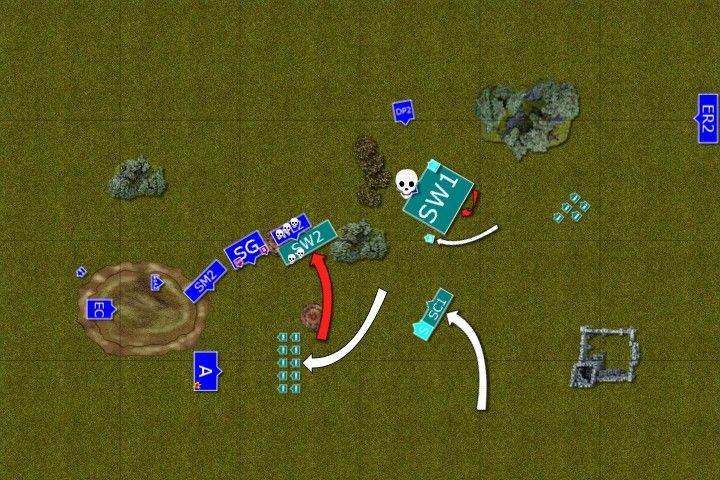
Outcasts - Turn 3
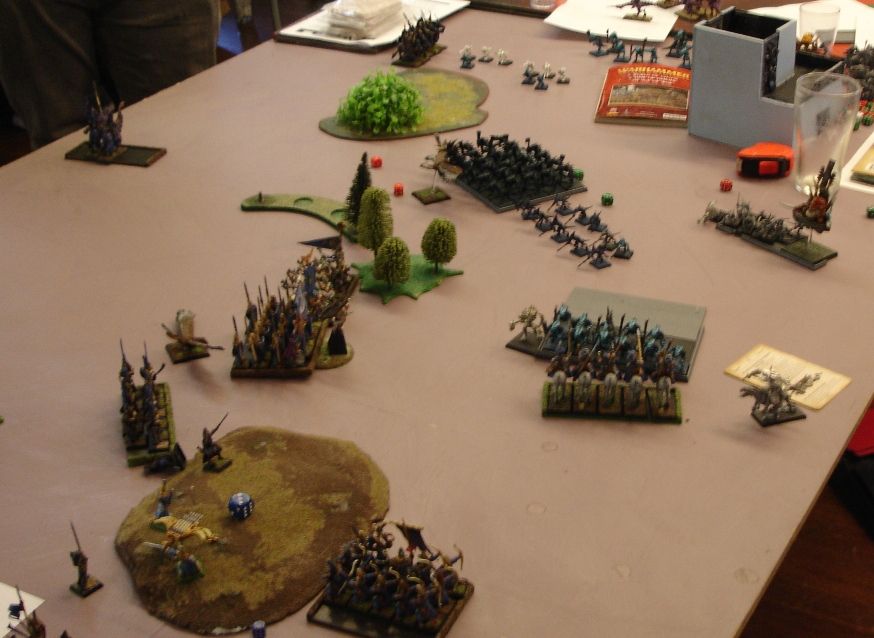 |
| Both armies start claiming objectives |
 |
| Glorious cavalry charge! |
Elven units in the center pivot to claim the objective and to threaten isolated Saurus Warriors. One of the eagles blocks another infantry unit while Dragon Princes charge Stegadon. They managed to wound the beast and despite some losses it was enough to break it and run it down!
Lizardmen - Turn 4
 |
| Lizardmen surround few Elven units |
 |
| The battle hangs in the balance |
Oldblood charges Reavers who hold this time and are all killed for their trouble. The rest of the Lizardmen close in and try to surround elven regiments defending their primary objective.
Outcasts - Turn 4
 |
| Elves don't charge yet |
 |
| Power of the elven archery |
Elves decide not to attack yet and bring their firepower to shift the odds into their favor. All bows are aimed at Oldblood. Elven BSB uses his magical potion and his supernatural strength allows him to put two wounds on the warrior-leader of the enemy. Finally, one of the arrows or bolts finds its mark and Saurus Oldblood goes down.
In the meantime, Ellyrian Reavers hunt down one of the Chameleon swarms.
Lizardmen - Turn 5
 |
| The battle at its decisive stage |
 |
| Saurus Warriors charge! |
Saurus Warriors charge White Lions in order to break through and to re-unite with their other unit. But again White Lions are there to hold the line for the Elves.
Skink skirmishers move forward too, to block elven archers. However, there are other, more dangerous elven units ready to counter attack.
Outcasts - Turn 5
 |
| Deadly elven counter attack |
 |
| Saurus perish but skinks hold! |
Elven leaders lead the attack and together with White Lions they destroy Saurus Warriors. Archers charge skinks and win easily but skins are surprisingly stubborn and don't flee!
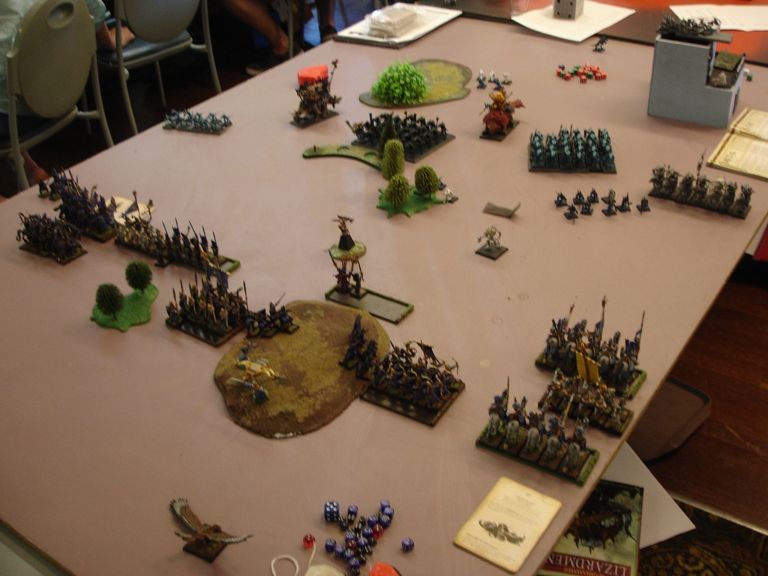
Lizardmen - Turn 6
Lizardmen - Turn 6
 |
| Who knows the mind of the Slann? |
Surprisingly Slann himself enters the close combat. His fragile skink bodyguard is depleted by stand and shoot and then destroyed in the hand to hand fight. Slann meets his unexpected end pierced by elven spears.
Scar-Veteran charges on his own from the unit of Saurus and chases off two regiments of Elves. That allows Saurus to close towards the objectives.
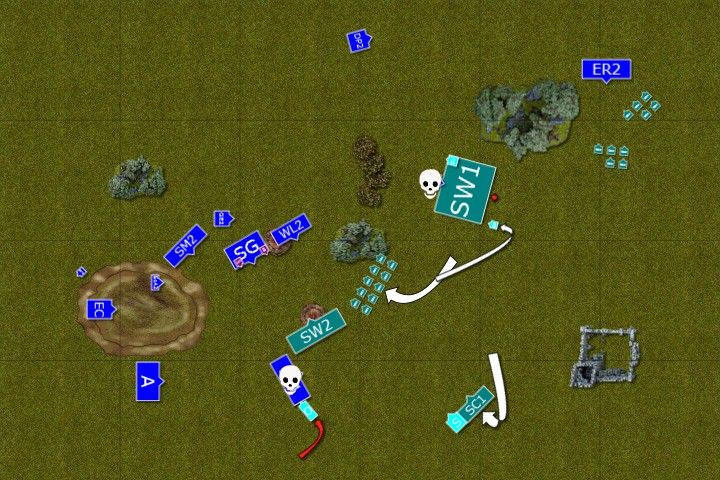
Outcasts - Turn 6
 |
| Despite bloody battle no one can claim the objectives! |
Both armies were bloodied by the vicious combats and now units on both sides stared at each other. It was clear that no further melee will erupt now and both armies disengaged in good order. No one claimed the objectives in the end but it was clear the Elves inflicted far more damage to the enemy.
Summary
 |
| Turn-by-turn summary animation |
After-battle thoughts
It was awesome game and once again I would like to thank Ethan for great spirit and a challenging battle. I was not aware until I made the diagrams that it was such a close one! Sure, we exchanged punches and the balance seemed to shift to one side and then to another but now I see how it could have gone either way.
First a very rare situation when Saurus block flees despite the presence of a nearby Slann-BSB. It released the pressure on the center. I still had units to divert that regiment but obviously it made my life easier.
I had some luck with hunting down big monsters. Ethan had a tough decision to make at some stage where I could target his Bastiladon with Searing Doom and Spirit Leech. He decided to let Searing Doom in and I was lucky to get 5 hits which all wounded. The same with Stegadon, where I won combat due to charge only and then managed to run it down. While Ld6 is not great, it is not that bad on 3d6.
I was very pleased with the plan where I decided to shoot one Saurus block so that I could destroy it in combat. It worked well enough! Also, shooting proved very helpful in hunting down Oldblood, otherwise capable of destroying my units all by himself, as was clearly demonstrated.
I am still surprised Ethan decided to charge with Slann. It seems like he handed over lots of victory points. I was so surprised I even forgot to ask what was his plan with that move! :oops:
My mistake was to flee with Dragon Princes and then Lions from scar veteran. I should have fled with cavalry but hold with lions. Sacar veteran had too few attacks to kill them all and I could have prevented Saurus Warriors from getting to the objectives close enough to deny them to me. In the end we had the same amount of CR and no one could claim the extra Battle Points.
Despite that, due to huge point difference and additional comp difference I managed to claim 18-2 victory from the game.
Thanks for reading!
This one was a fun read!
ReplyDeleteKey point of the battle for me was your use of redirects (and his inability to remove them) to keep his big saurus blocks separated. I think you redirected that unit three times as well as the unlucky flee kept them out of the game.
The other key point being the slann charge which is maybe the first time I've seen a slann charge except when housed in a large unit of temple guard. Even then, that's rarely the optimal play. However, mistakes are how we learn and learning is how we get better!
Great win and on to the next report!
Hi Dan,
DeleteI was very happy with the outcome of the game because Lizardmen are usually are tough opponent and I lost more than I won against them. It is very important to crack that phalanx in order to get points. I was also happy to hunt down the characters! Although I must add that charge of the Slann was totally unexpected and it would probably survive the game significantly affecting the end result.
Cheers!